Dal Tadka is a popular Indian lentil dish made with arhar dal (husked & split pigeon pea lentils) or masoor dal (husked & split red lentils). This Dal Tadka recipe gives you a delicious creamy dal with smoked flavors.
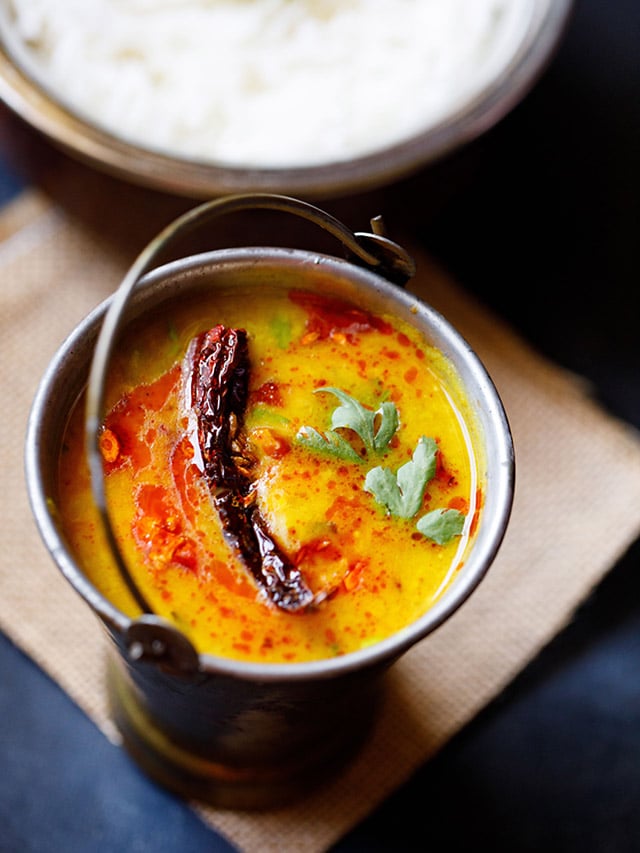
In this post I am sharing 2 versions of the recipe.
- Restaurant Style Dal Tadka – Made on Stovetop with an optional smoking method.
- Home Style Dal Tadka – Made in the Instant Pot.
Both the recipes are easy and taste good. You can make either of them as per your preference. For making homestyle dal tadka on stovetop, check the notes section in the recipe card of instant pot dal tadka recipe.
Table of Contents
About this Recipe
Dal Tadka is one of the most popular lentil dish served in Indian restaurants. Basically, dal tadka is cooked lentils which are tempered with oil or ghee fried spices & herbs.
I have to admit that I simply love the dal tadka that is served at the restaurants even though we hardly eat out.
So I try to recreate the restaurant magic in most of the food that I make at home. Here the restaurant style flavors come from smoking the dal using a red-hot charcoal.
Trust me, this simple method of smoking makes the dal so much flavorful and tasty. In Hindi language we also call this smoking technique as dhungar.
This Dal Tadka recipe is more of a North Indian style recipe.
What does Dal Tadka mean?
- Dal is the Hindi term for lentils.
- Tadka or Chaunk is the Hindi term for tempering and is a commonly employed cooking technique in the Indian cuisine.
- Tempering method has the spices & herbs fried in oil. The frying of the spices and herbs release their essential oils, aroma and flavor in the hot oil. This fried spices, herbs, oil mixture is added to prepared lentils or cooked rice or steamed vegetables and it greatly changes the flavor, aroma and taste of the dish. Tempering is very much a part of cooking Indian food and we use this method while making dal, vegetable dishes or chutneys.
Lentils added
- Tuvar dal – Generally dal tadka is made with tuvar dal or arhar dal also known as split pigeon pea lentils. In this post, I have shared the dal recipe made with tuvar dal.
- Moong dal – Even moong lentils can be used to make the recipe. At times I make this recipe both with tuvar dal and moong dal. The recipe can also be made with a mix of masoor dal (red lentils) and pigeon pea lentils. If you want to use moong dal then you can refer this post – Moong Dal Tadka.
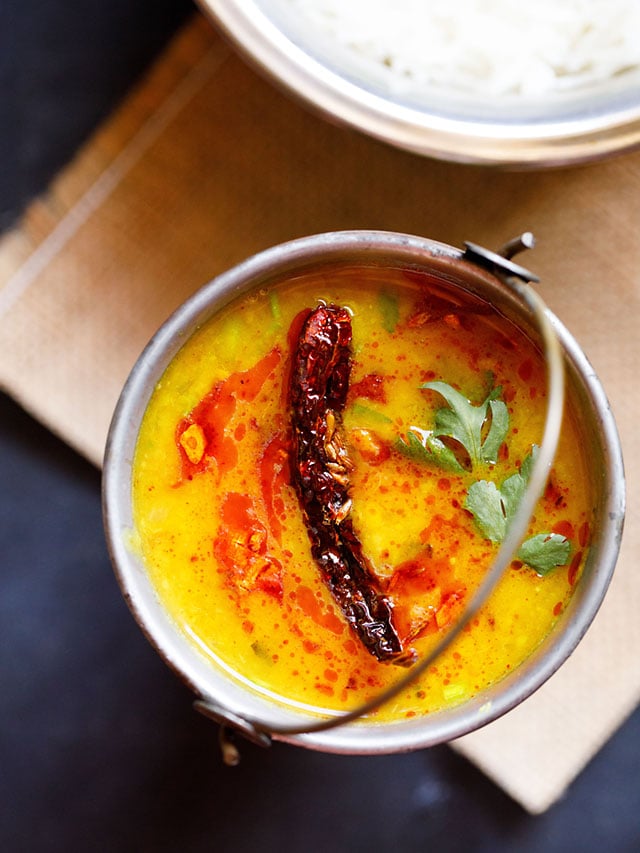
How to make Dal Tadka
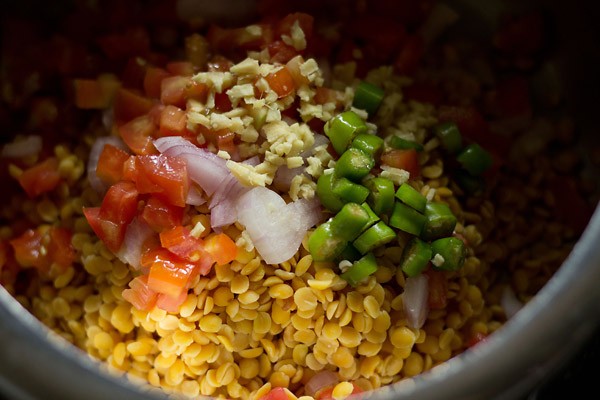
1. Rinse 1 cup tuvar dal or arhar dal (split & husked pigeon pea lentils) for a couple of times in water. Add them to a 3 litre pressure cooker.
You can also cook the lentils in a pot. Soak the lentils for an hour or two before you cook them in a pot. The method on cooking lentils in a pot is mentioned in the notes section of the recipe card below.
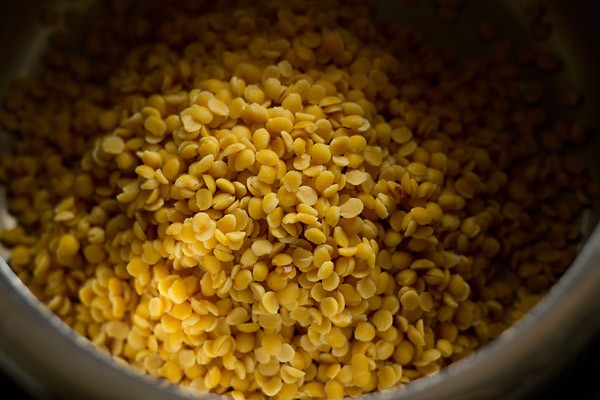
2. Add ½ cup chopped onions, 1 cup finely chopped tomatoes, 1 or 2 green chilies (1 teaspoon of chopped Anaheim pepper or Serrano pepper can be subbed for green chillies) and 1 teaspoon finely chopped ginger.
3. Pour 2.5 cups of water. If cooking in a pot, then about 4 to 4.5 cups of water can be added.
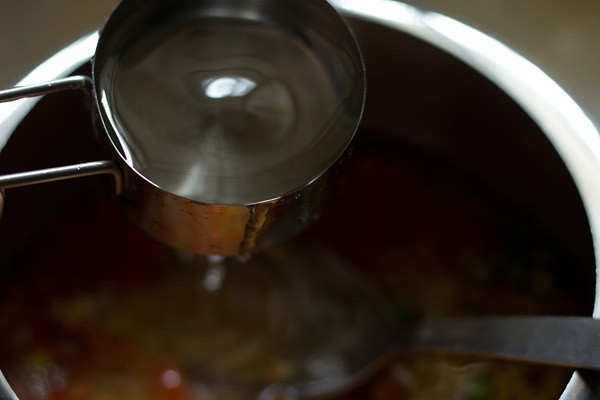
4. Add ½ turmeric powder and 1 pinch of asafoetida (hing). If you do not have asafoetida, then skip it.
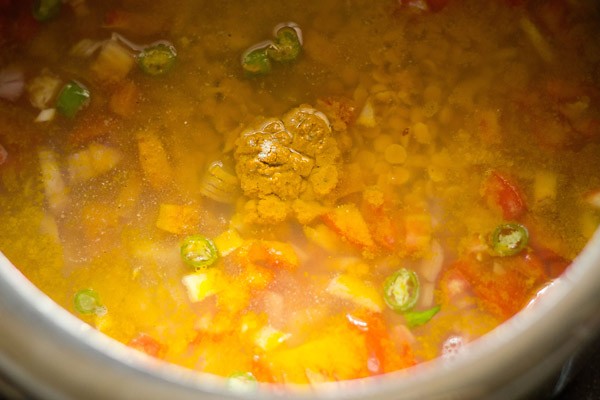
5. Mix well.
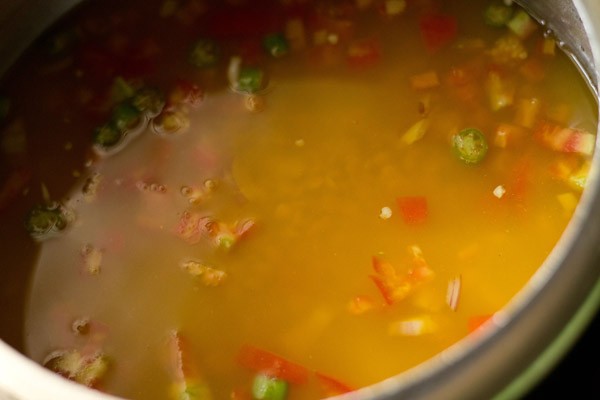
6. Pressure cook the lentils for about 7 to 8 whistles or more till they become soft and creamy. Mash the cooked lentils with a wired whisk or with a spoon and keep aside.
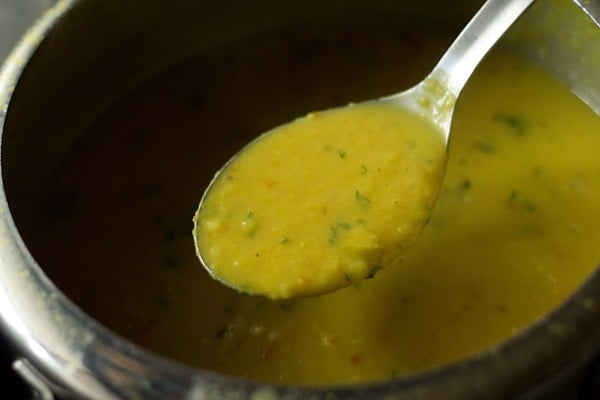
If the consistency looks thick, then add some water. About ½ cup to 1 cup water (depending on the thickness) to get a medium consistency. Simmer dal for 3 to 4 minutes. Consistency of the lentils in the below photo.
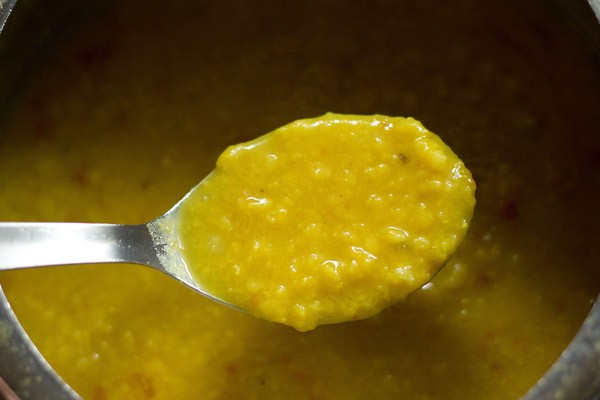
7. Once the desired consistency is reached, add 1 to 2 tablespoons low-fat cream (optional), ½ teaspoon garam masala powder, 2 tablespoons chopped coriander leaves (cilantro) and salt as per paste. Switch off the the heat.
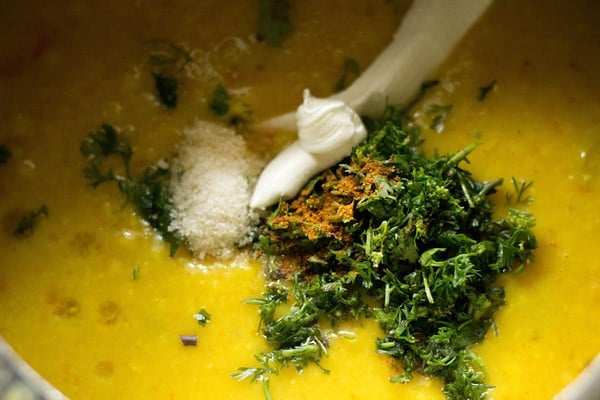
8. Mix well so that everything combines uniformly. Check the salt before you add the tempering. If the salt is less than add more salt to the dal.
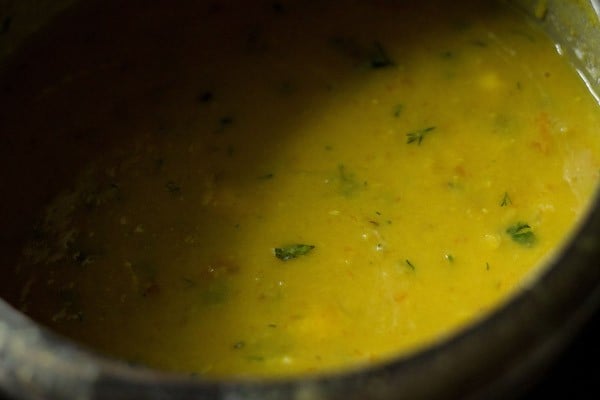
9. The final consistency of the cooked dal.
Optional – smoking or dhungar method
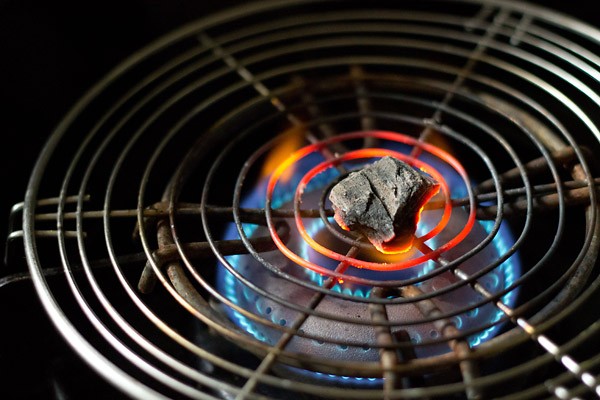
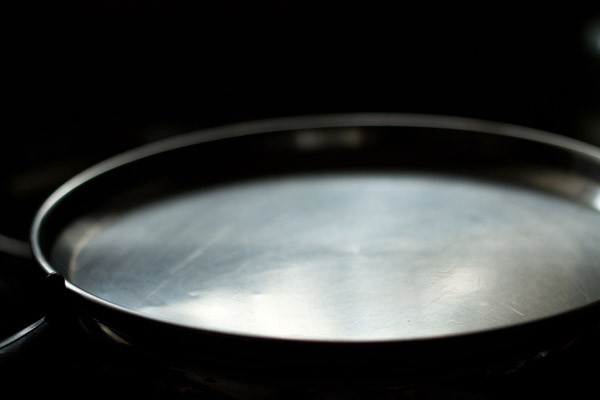
10. Next is the dhungar method of flavoring dal tadka with the smoky fumes of burnt charcoal. For this with the help of tongs or on a grill pan like shown in the photo below, place a small piece of charcoal.
Burn the charcoal till it becomes red hot. Please use natural charcoal for this method. Note that this is an optional step and you can proceed directly to the tempering method.
11. Place the red hot charcoal in a small steel bowl. You can also use onion layers or a halved hollow onion for the same.
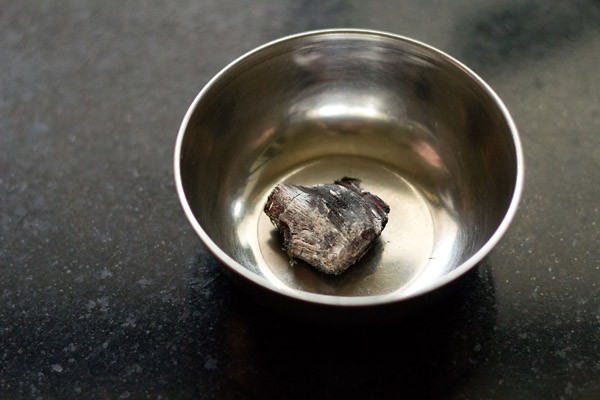
12. Pour about ¼ tsp of oil or ghee on the charcoal. You will see fumes emanating as soon as you pour oil or ghee on the hot charcoal.
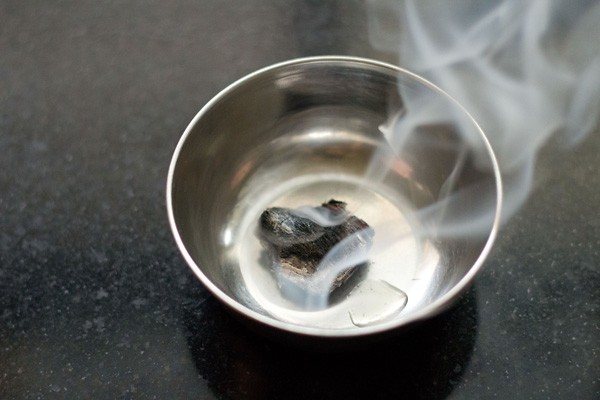
13. Place this bowl on the dal.
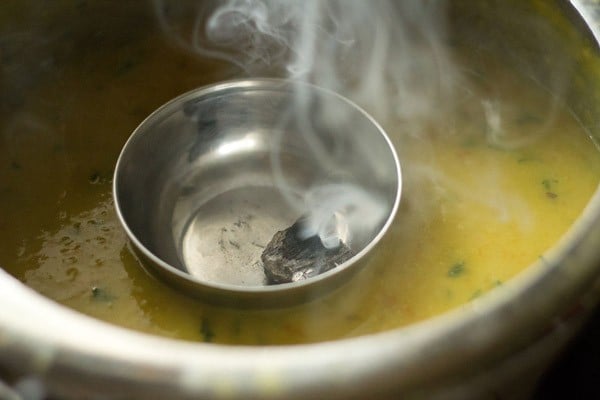
14. Cover the cooker or the pot with a lid and let the dal get infused with the charcoal smoke. Just keep for 1 to 2 minutes.
Do not keep for a long time as then the dal can taste bitter. Remove the bowl carefully with the help of tongs and cover the cooker with a lid. Set aside.
Making tempering or tadka
15. Next heat 3 tablespoons oil or ghee (clarified butter) in a small pan. First, add 1 teaspoon cumin seeds and crackle them. The cumin should get fried and not be raw, but don’t burn them.
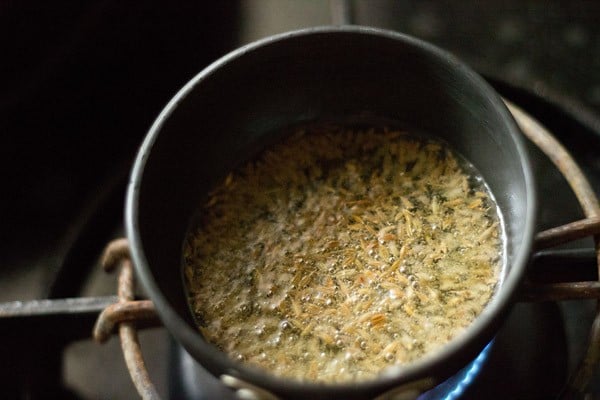
16. Now add 2 to 3 dry red chilies, a generous pinch of asafoetida and 5 to 6 medium sized garlic cloves which have been finely chopped. Let the garlic brown and the red chilies change color. Do not burn the garlic.
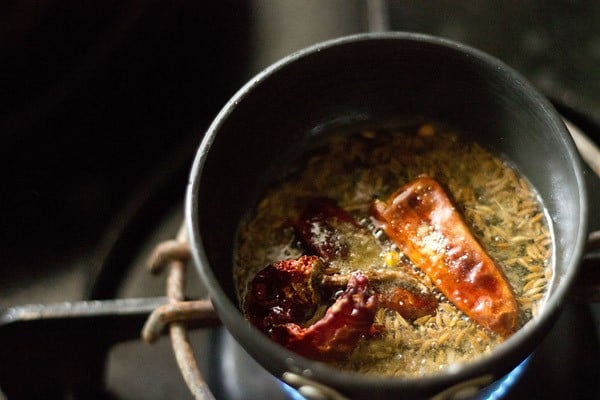
17. Lastly add 1 teaspoon crushed kasuri methi and ½ teaspoon red chili powder or cayenne pepper. Mix and switch off the stove. Make sure to fry the tempering ingredients at a low flame, so that you don’t burn them.
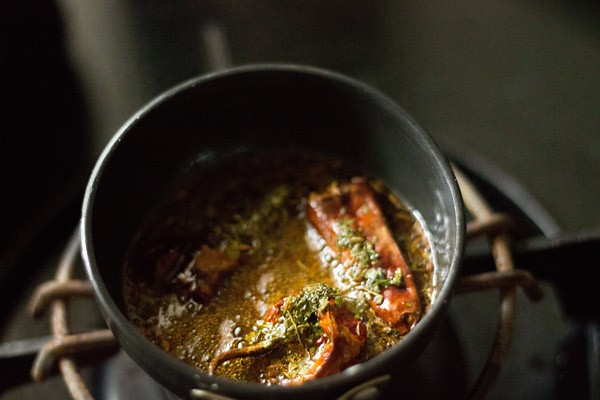
18. Pour entire tempering along with the oil or ghee into the dal.
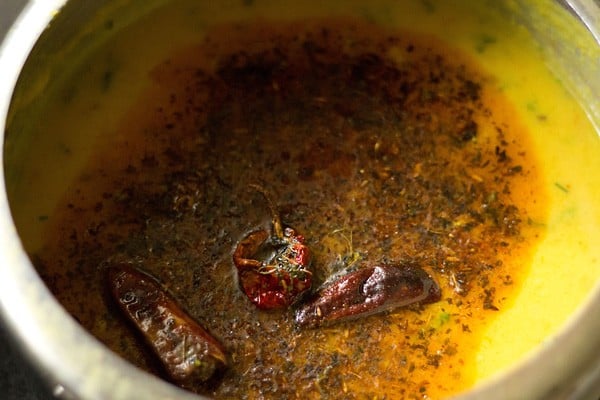
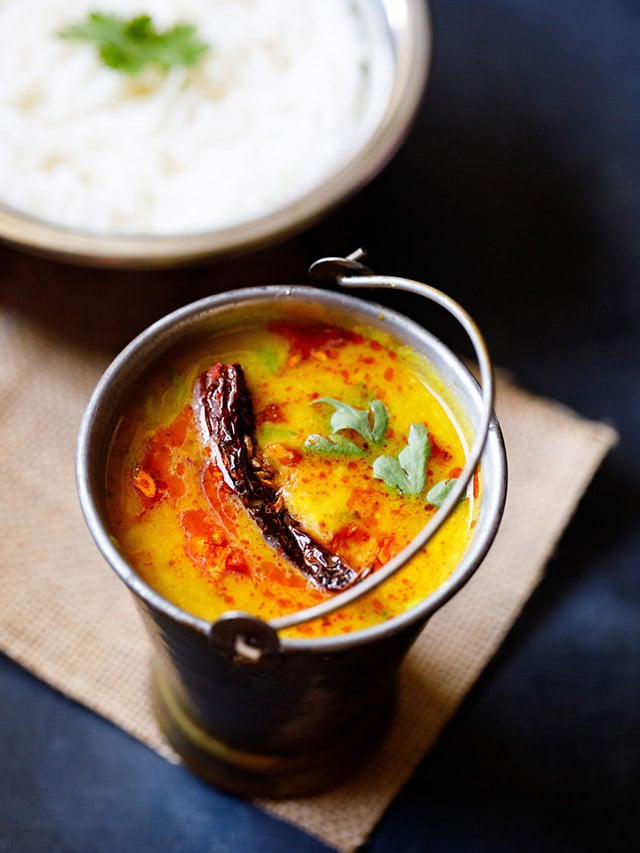
19. You can mix the dal with tempering or serve the dal tadka with the tempering on top it. Garnish with coriander leaves. Serve it hot with steamed basmati rice, cumin rice or with Indian flatbread like roti or paratha or chapati or naan.
Serving Suggestions
The tempering adds a lot of flavor, aroma and thus the dal tadka gets paired beautifully with steamed rice or jeera rice (cumin flavored pilaf).
Dal tadka can be also be served with roti or naan or dinner rolls or paratha.
Expert Tips
- Preparation: First, cook the lentils and then lastly temper it just before serving. You can also cook the lentils first and keep in the fridge. Before serving reheat the lentils and then temper it. Serve immediately. However for best taste always prepare the lentils fresh. It not only tastes good but also a healthier choice.
- Type of Lentils: You can make it with any yellow dal (split lentils). I make it sometimes with Tuvar dal (split pigeon pea lentils) and Masoor dal (split pink lentils) and sometimes only with Tuvar dal.
- Tomatoes: I have added tomatoes and it gives a nice tang. If you do not have tomatoes, then add ½ to 1 teaspoon of lemon juice when the lentils are cooked.
- Tempering: You can temper or fry the spices and herbs in either ghee or oil. In the recipe I have used sunflower oil but ghee (clarified butter) also gives a good flavor. You can even use peanut oil or any neutral flavored oil.
- Dhungar Method: In the step by stepwise photos below, I have illustrated the charcoal smoking method as it gives a really good smoky flavor to the lentils. You can easily skip this method if you don’t have charcoal. Another alternative to get that smoky flavor is to add smoked paprika instead of red chilli powder or cayenne pepper.
- Consistency: The consistency of the cooked dal is neither thick nor thin but medium. But if you prefer you can opt for a slightly thick or thin dal consistency.
- Soaking Lentils: You can also soak the lentils for 30 to 40 minutes before cooking them. This helps in cooking the lentils faster and a recommended step.
Dal is a staple in Indian food. India has so many varieties of dal recipes. Each region, each state having their own delicious recipes.
More Popular Dal Recipes
Dal (Lentils) & Legumes
Dal (Lentils) & Legumes
Dal (Lentils) & Legumes
Dal (Lentils) & Legumes
Please be sure to rate the recipe in the recipe card or leave a comment below if you have made it. For more vegetarian inspirations, Sign Up for my emails or follow me on Instagram, Youtube, Facebook, Pinterest or Twitter.
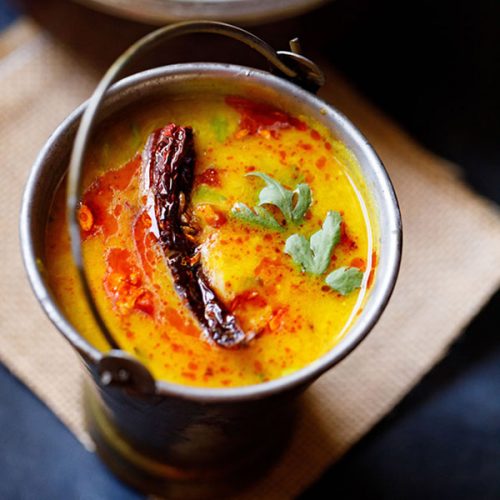
Restaurant Style Dal Tadka Recipe
Ingredients
for cooking lentils
- 1 cup tuvar dal (arhar dal or split pigeon pea lentils) or 200 grams or ½ cup tuvar dal + ½ cup masoor dal (split pink lentils)
- 1 to 2 green chilies or serrano peppers – chopped or slit lengthwise
- ½ cup chopped onions or 1 medium sized onion
- 1 cup finely chopped tomatoes or 2 medium sized tomatoes
- 1 teaspoon finely chopped ginger or 1 inch ginger, peeled and finely chopped
- ½ teaspoon turmeric powder (ground turmeric)
- ½ teaspoon Garam Masala
- 1 pinch asafoetida (hing) – optional
- 2.5 cups water – for pressure cooking
- 1 or 2 tablespoon low-fat cream – optional
- 2 tablespoon chopped coriander leaves (cilantro)
- salt as required
for tempering or tadka
- 3 tablespoon oil or 3 tablespoon ghee (clarified butter)
- 1 teaspoon cumin seeds
- 5 to 6 medium garlic cloves – finely chopped
- 2 to 3 dry red chilies – broken and seeds removed
- a generous pinch of asafoetida (hing) – optional
- 1 teaspoon crushed kasuri methi (dry fenugreek leaves) – optional
- ½ teaspoon red chili powder or cayenne pepper or paprika
for garnish
- 1 tablespoon chopped coriander leaves (cilantro)
for dhungar method
- a small piece of charcoal
- ¼ teaspoon oil or ghee (clarified butter)
Instructions
1. cook lentils
- 1. Thoroughly rinse 1 cup tuvar dal (arhar dal, or split & husked pigeon pea lentils) in water. Add them to a 3-litre pressure cooker.No pressure cooker? You can also cook the lentils in a pot. Soak the lentils for an hour or two before you cook them in a pot.
- 2. Add ½ cup chopped onions, 1 cup finely chopped tomatoes, 1 or 2 green chilies (1 teaspoon of chopped Anaheim pepper or Serrano pepper can be subbed for green chillies) and 1 teaspoon finely chopped ginger.
- 3. Pour 2.5 cups of water into the pressure cooker. If cooking in a pot, then about 4 to 4.5 cups of water can be added.
- 4. Add ½ turmeric powder and 1 pinch of asafoetida (hing). If you do not have asafoetida, then skip it. 5. Mix well.
- 6. Pressure cook the lentils for about 7-8 whistles, or until they become soft and creamy. Mash the cooked lentils with a wired whisk or with a spoon and keep aside. If the consistency looks thick, then add about ½ – 1 cup water (depending on the thickness) to get a medium consistency. Simmer dal for 3 to 4 minutes.
- 7. Once the desired consistency is reached, add 1-2 tablespoons low-fat cream (optional), ½ teaspoon garam masala powder, 2 tablespoons chopped coriander leaves (cilantro) and salt to taste. Switch off the the heat.
- 8. Mix well so that everything combines uniformly. Taste and adjust salt before adding tadka.
2. Smoke lentils using dhungar method (optional)
- 10. To get the smoky fumes of burnt charcoal like you would in a restaurant, you'll want to follow the dhungar method. Using tongs, place a small piece of charcoal on a grill pan like shown in the photo below. Burn the charcoal till it becomes red hot. Please be sure to use natural charcoal for this method, avoiding anything that has a flame accelerant added. Note that this is an optional step – you can proceed directly to the tempering method.
- 11. Place the red hot charcoal in a small steel bowl. You can also use a halved hollow onion instead of the bowl.
- 12. Pour about ¼ tsp of oil or ghee on the charcoal. You will see fumes emanating as soon as you pour oil or ghee on the hot charcoal.
- 13. Place this bowl on the dal.
- 14. Cover the cooker or pot with a lid and let the dal get infused. Only smoke for 1-2 minutes. Do not keep for a long time, or you'll risk making the dal taste bitter. Remove the bowl carefully with the help of tongs and cover the cooker with a lid. Set aside.
make the tempering (tadka or chaunk)
- 15. Next, heat 3 tablespoons oil or ghee (clarified butter) in a small pan over low-medium heat. First, add 1 teaspoon cumin seeds and crackle them. The cumin should get fried and not be raw, but be careful not burn them.
- 16. Now add 2 to 3 dry red chilies, a generous pinch of asafoetida, and 5-6 medium sized garlic cloves which have been finely chopped. Let the garlic brown lightly and the red chilies change color. Do not burn the garlic.
- 17. Lastly, add 1 teaspoon crushed kasuri methi (fenugreek seeds) and ½ teaspoon red chili powder or cayenne pepper. Mix well and turn off the stove.
- 18. Pour entire tempering along with the oil or ghee into the dal.
- 19. You can either mix the dal with tempering, or serve the dal tadka with the tempering on top it. I personally like the aesthetic of having the tadka floating on top. Garnish with coriander leaves. Enjoy!
- Serving Suggestion: Serve dal tadka hot with steamed basmati rice or jeera rice (cumin rice), or with roti, naan or paratha.
Video
Notes
- Type of Lentils: You can make the recipe with any yellow dal (split lentils). I make it sometimes with Tuvar dal (split pigeon pea lentils) and Masoor dal (split & husked red lentils) and sometimes only with Tuvar dal. You can even add an equal mix of tuvar dal and moong dal.
- Soaking Lentils: You can also soak the lentils for 30 to 40 minutes before cooking them.
- Tomatoes: I have added tomatoes and it gives a nice tang. If you do not have tomatoes, then add ½ to 1 teaspoon of lemon juice when the lentils are cooked.
- Tempering: You can temper or fry the spices and herbs in either ghee or oil. In the recipe I have used sunflower oil but ghee (clarified butter) also gives a good flavor. You can even use peanut oil or any neutral flavored oil.
- Dhungar Method: You can easily skip the charcoal smoking method if you don’t have charcoal. Another alternative to get that smoky flavor is to add smoked paprika instead of red chilli powder or cayenne pepper.
- Consistency: The consistency of the cooked dal is neither thick nor thin but medium. But if you prefer you can opt for a slightly thick or thin dal consistency.
- Soaking Lentils: You can also soak the lentils for 30 to 40 minutes before cooking them. This helps in cooking the lentils faster and a recommended step.
- Soak the lentils for about 1 to 2 hours. Drain and rinse then well in water.
- In a deep pot, add 4 to 5 cups water added to the lentils. Add the rest of the ingredients mentioned in the recipe.
- Cover and cook the lentils. If the water begins to froth and bubble, then remove the lid or cover it partly and continue to cook the lentils till they become soft and creamy.
- If the water becomes less, then add some hot water.
- Once the lentils are cooked (takes from 45 minutes to an hour or sometimes more (depends on the quality and age of the lentils). Then follow the recipe further.
Nutrition Info (Approximate Values)
About Instant Pot Dal Tadka
Dal is a staple at home and I make them in different varieties. What I am sharing in this post, is a version that has been made for decades and is still being made.
A family recipe and one which I make often. A comforting and nourishing dal recipe which I hope you enjoy as much as we do. This is a vegan recipe and can be made gluten-free by skipping asafoetida.
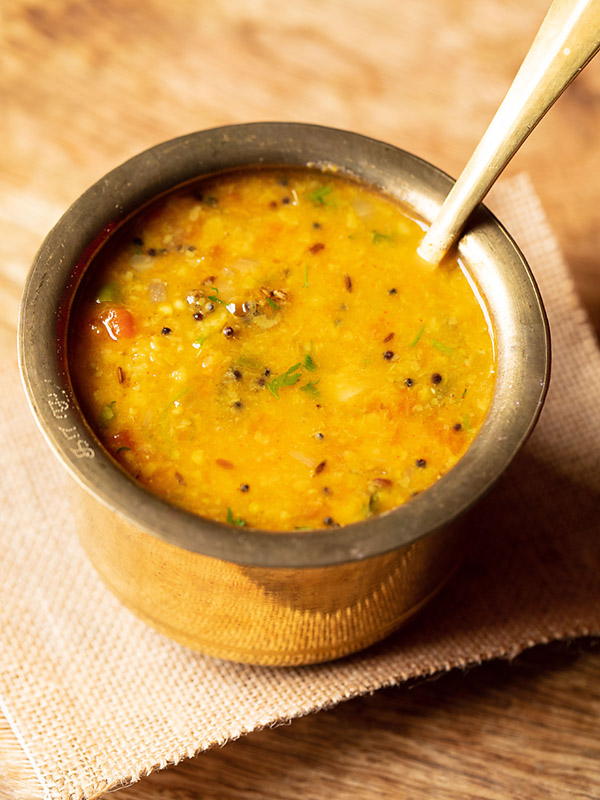
There are many variations of making dal tadka. This instant pot recipe is a home-style version and tastes good like an everyday home cooked food.
After getting the instant pot, I have been making dal in it. I have stopped using the stove-top pressure cooker completely. Thus I have updated this post with the instant pot method also. I have included the stovetop method of this homestyle dal tadka in the recipe card.
At times I even cook the rice along with the dal. I usually serve this dal tadka with roti (Indian flatbread) or steamed rice. So when making rice, I cook the rice and dal together in the IP.
It is best served with some steamed basmati rice. You can also serve with chapati or roti or dinner rolls.
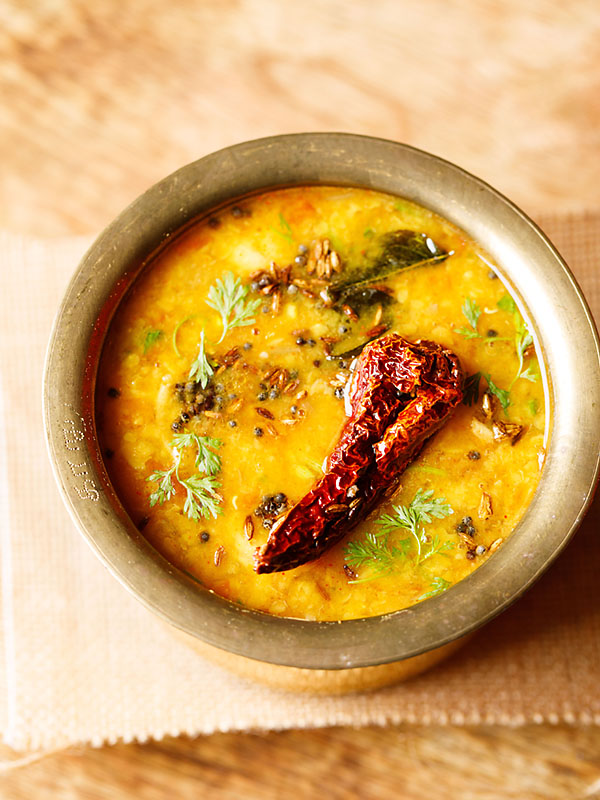
Step by Step Instant Pot Dal
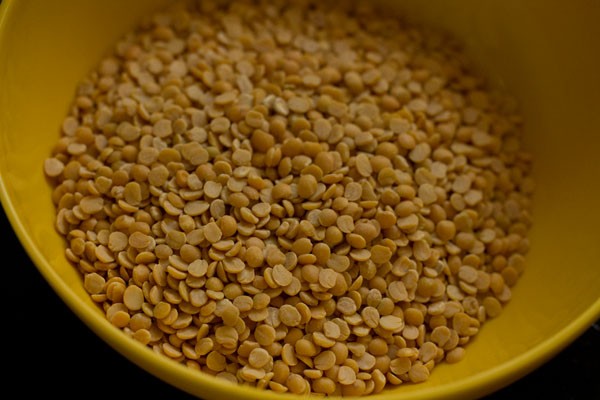
1. Take ½ cup arhar dal (tuvar dal or pigeon pea lentils) in a bowl or colander.
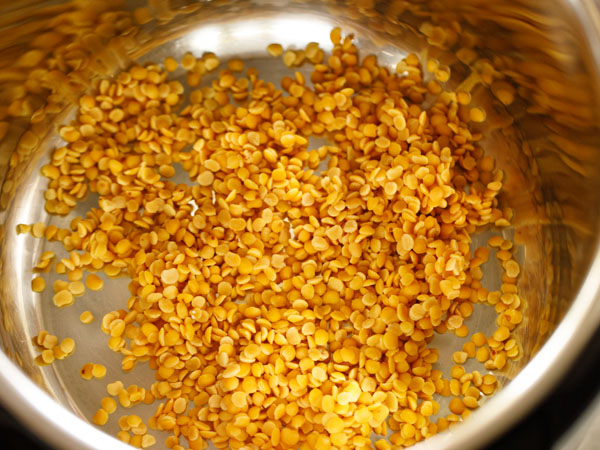
2. Rinse a couple of times and add the rinsed dal in the instant pot steel insert.
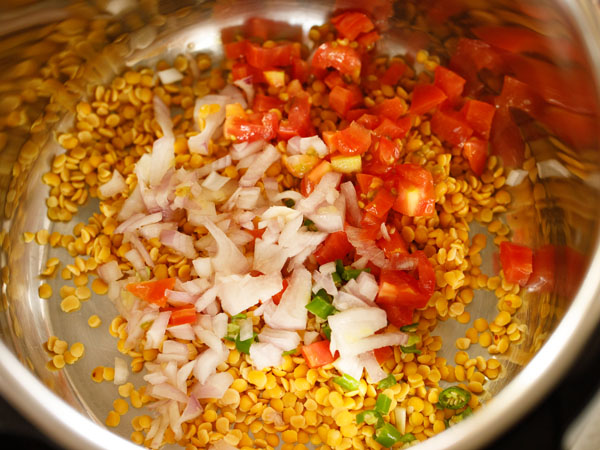
3. Add ⅓ heaped cup sliced onions, ⅓ cup chopped tomatoes, 2 green chillies or serrano peppers (sliced, slit or chopped).
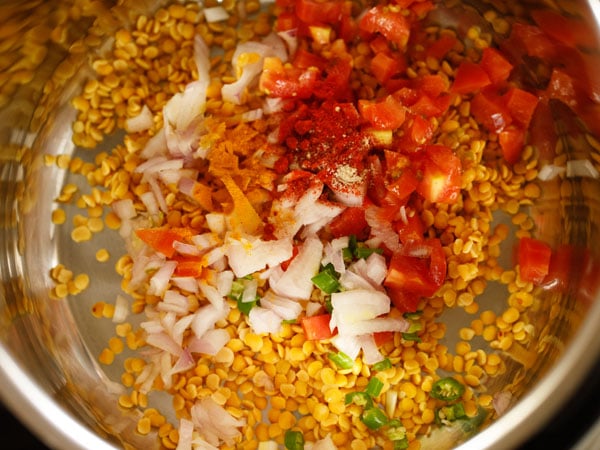
4. Add ½ tsp turmeric powder, ½ tsp Kashmiri red chilli powder and a pinch of asafoetida (hing).
5. Pour 1.5 cup water. Mix well.
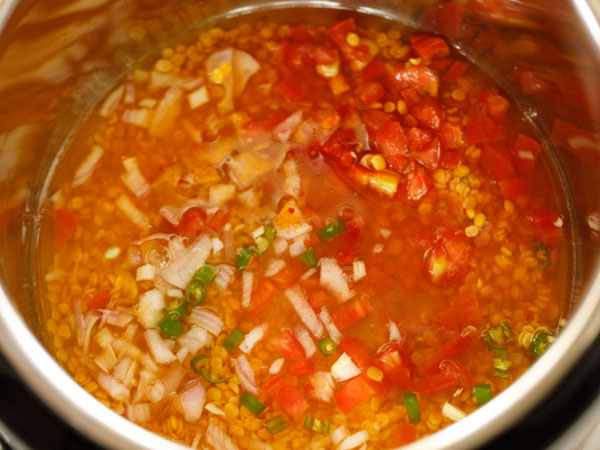
6. Mix very well. At this step if you plan to cook rice, then place a tall trivet and add rice+water in a steaming pan. Place the pan on the trivet.
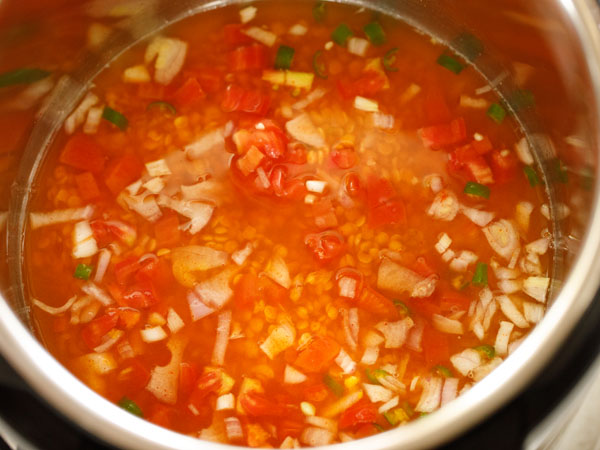
7. Switch on the IP. Secure the lid and position the steam release handle to sealing. Press the pressure cook button and set the timer for 15 minutes on high pressure.
Depending on the quality and age of lentils, it can take 10 to 15 minutes. I prefer the dal to be cooked really well and mushy without any separate grains visible, so I cook the lentils for 15 minutes.
At times I have even cooked the lentils for 20 minutes. So depending on the quality of dal, you can decide upon the timing. Anyways, even if the lentils are undercooked, you can always pressure cook for some more minutes later.
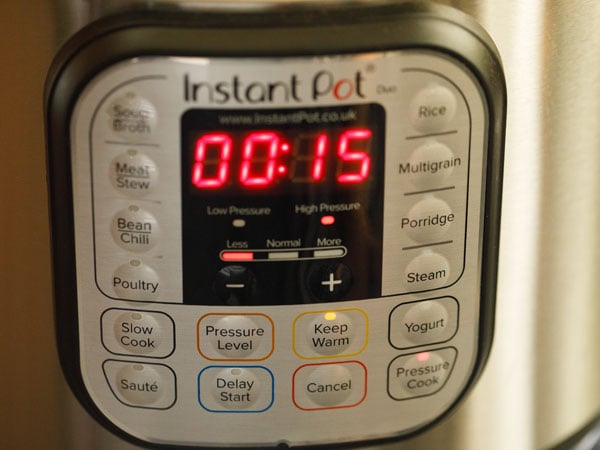
8. Give NPR (natural pressure release) after 10 minutes. Release the pressure after 10 minutes and open the IP lid. The lentils have to be cooked very well and become soft and mushy.
If the consistency of dal looks thick, then add some hot water to thin it. If dal looks thin, then use the sauté option and simmer dal for a few minutes.
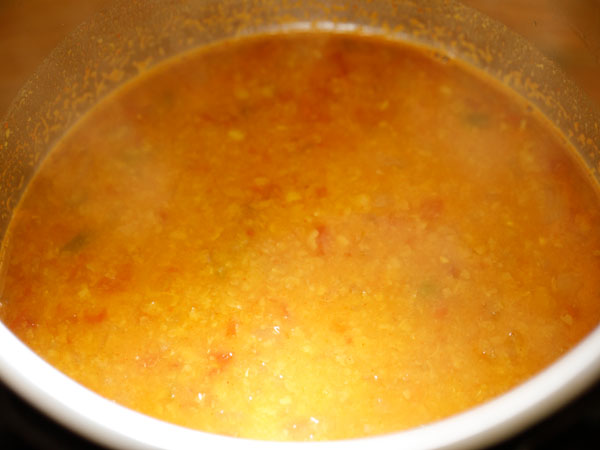
9. With a spoon lightly mash the dal. If the dal looks thick, you can add some hot water.
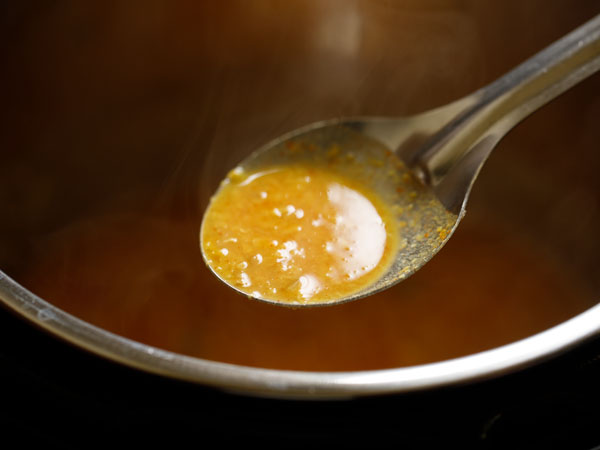
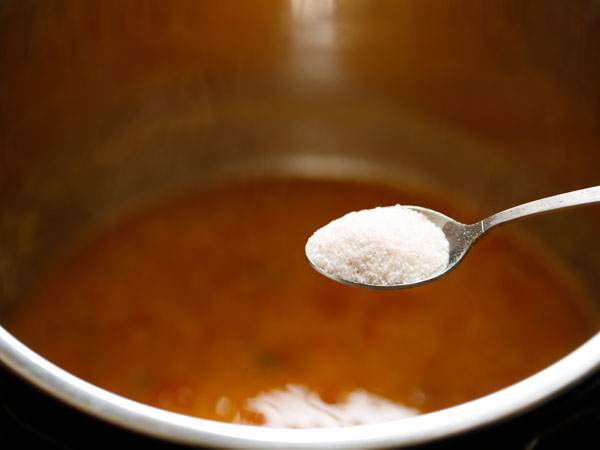
10. Season with salt as per taste and stir very well. Cover the cooked dal with the IP lid and begin with the tempering
Preparing tempering (tadka)
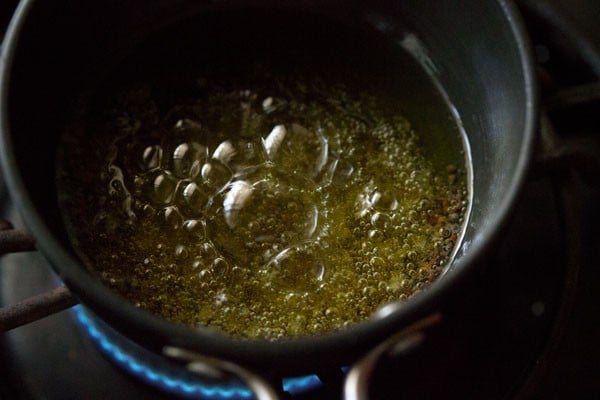
11. In a small pan or tadka pan, heat 2 tablespoon oil. Keep the flame to low or medium-low. Add ½ teaspoon small mustard seeds.

12. Let the mustard seeds crackle.
13. Then add 1 teaspoon cumin seeds.
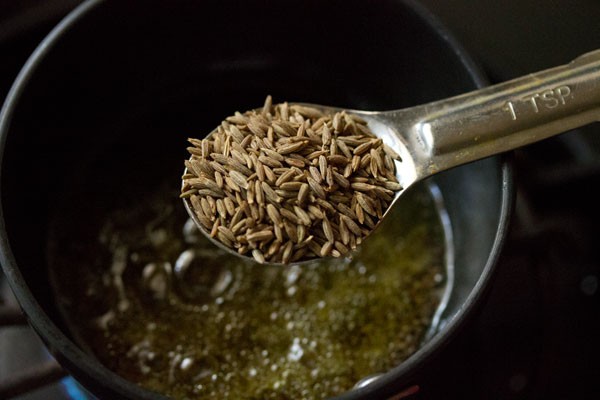
14. The cumin seeds will crackle as soon as you add them in oil. Let them change their color.
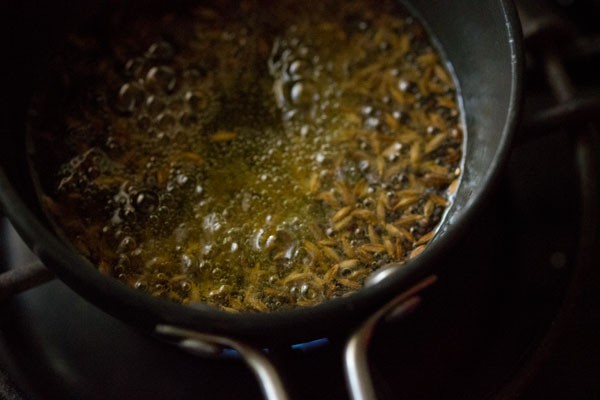
15. Then add 4 to 5 medium garlic cloves, crushed lightly with their peels on. You can also slice or chop the garlic. Fry for some seconds stirring often. The garlic can be a light golden but do not brown them or burn them.
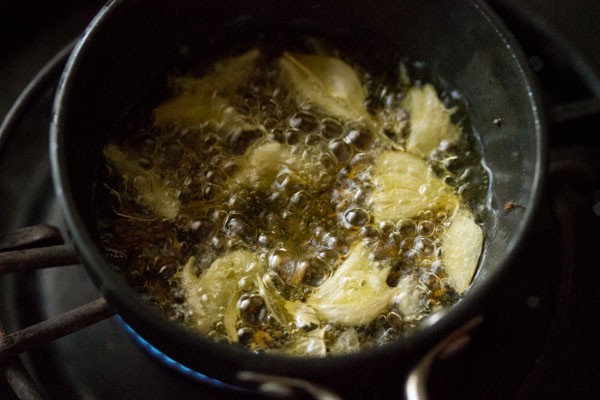
16. Add 1 to 2 dry red chilies (broken and deseeded).
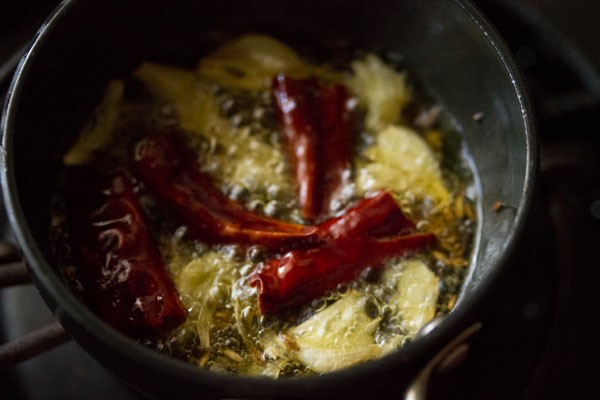
17. Add 9 to 10 curry leaves. fry for a few seconds till the red chilies change color and the curry leaves become crisp.
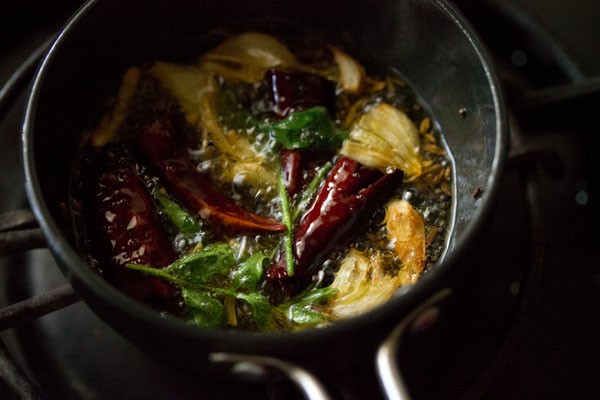
18. Pour the entire tempering mixture in the dal.
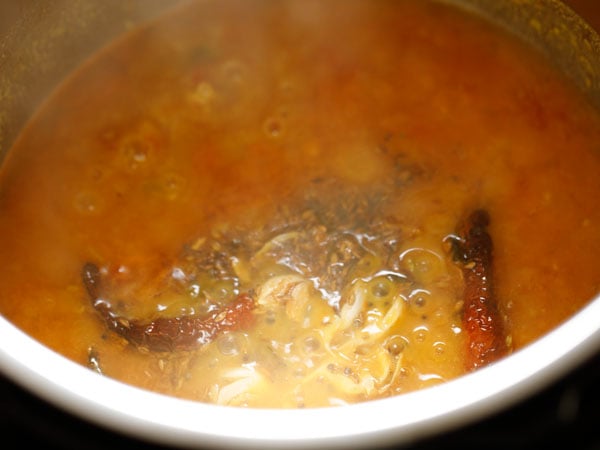
19. Mix very well.
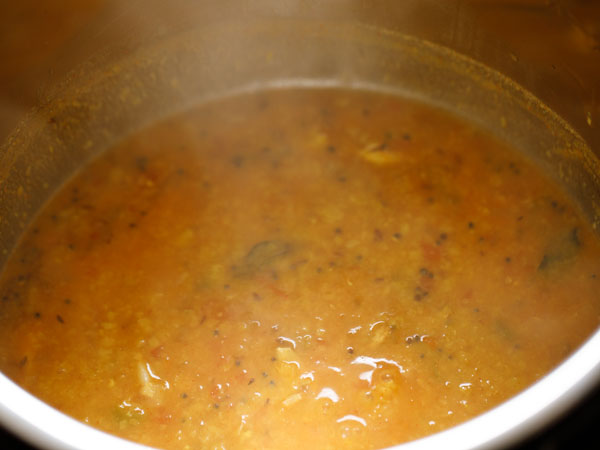
20. Lastly, add 2 tablespoons chopped coriander leaves (cilantro)
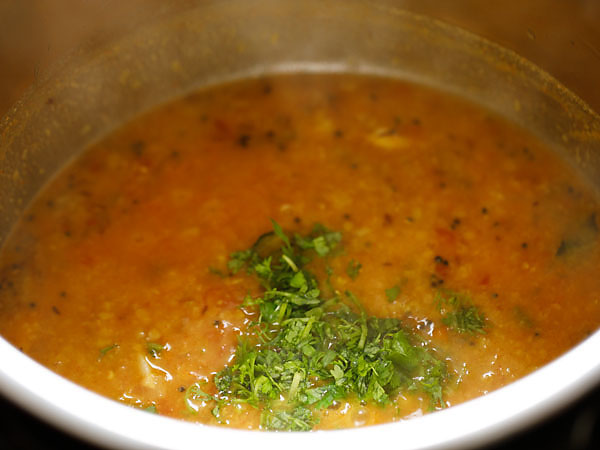
21. Stir and instant pot dal tadka with steamed rice or roti. You can garnish with some coriander leaves while serving.
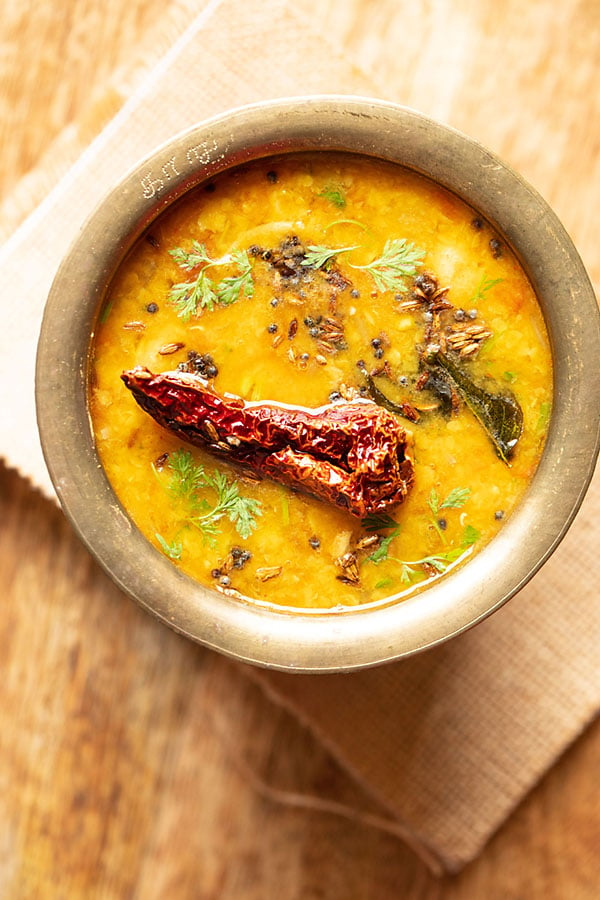
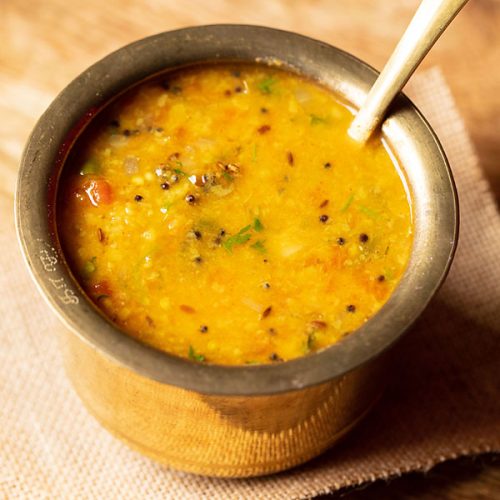
Instant Pot Dal Tadka
Ingredients
main ingredients
- ½ cup arhar dal or 100 grams arhar dal (tuvar dal or split pigeon pea lentils)
- ⅓ cup chopped onions or 1 small medium-sized onion or 50 grams onion – chopped or sliced
- ⅓ cup chopped tomatoes or 1 medium-sized tomato or 65 grams tomatoes – chopped
- 1 to 2 green chillis or serrano peppers – sliced, slit or chopped
- ¼ teaspoon turmeric powder (ground turmeric)
- ½ teaspoon kashmiri red chilli powder or ¼ teaspoon cayenne pepper or paprika
- 1 pinch asafoetida (hing) – optional
- 1.5 cups water
- salt as required
- 2 tablespoons chopped coriander leaves (cilantro) – for garnish
for tempering
- 2 tablespoon oil – ghee can be substituted in place of oil. use either sunflower or any neutral tasting oil
- ½ teaspoon small mustard seeds
- 1 teaspoon cumin seeds
- 4 to 5 medium-sized garlic cloves – sliced or chopped or crushed lightly with their peels on
- 1 sprig curry leaf or 9 to 10 curry leaves
- 1 to 2 dry red chilies – broken and deseeded
Instructions
pressure cooking dal
- Take the lentils in a bowl or colander.
- Rinse a couple of times and add the rinsed dal in the ip steel insert.
- Add sliced onions, chopped tomatoes, green chilies (sliced, slit or chopped), turmeric powder, red chilli powder and a pinch of asafoetida.
- Pour water. Mix well. Secure the lid and position the steam release handle to sealing.
- Press the pressure cook button and set the timer for 15 minutes on high pressure.
- Give npr (natural pressure release) of 10 minutes.
- Release the pressure after 10 minutes and open the ip lid. The lentils have to be cooked very well and become soft and mushy. With a spoon lightly mash the dal mixture.
- If the dal looks thick, you can add some hot water.
- Then season with salt as per taste and mix.
- Cover the cooked dal with the ip lid and begin with the tempering.
tempering (tadka)
- In a small pan or tadka pan, heat oil. Add the mustard seeds.
- Let the mustard seeds crackle. Then add the cumin seeds. The cumin seeds will also crackle and brown when you add them.
- Add 4 to 5 medium garlic cloves, crushed lightly with peels. You can also slice or chop the garlic. Fry for some seconds. Do not brown or burn the garlic.
- Add the dry red chilies (broken and deseeded), curry leaves. Fry till the red chillies change color and the curry leaves become crisp.
- Pour the entire tempering mixture in the dal. Mix very well.
- Lastly add chopped coriander leaves.
- Mix again and serve the dal tadka with steamed rice or roti. You can garnish with some coriander leaves while serving.
Notes
- Depending on the quality and age of lentils, the cooking time can vary from 10 to 15 minutes. I prefer the dal to be cooked really well and mushy without any separate grains visible, so I cook the lentils for 15 minutes. Thus depending on the quality of dal, you can decide upon the timing. Even if the lentils are undercooked, you can always pressure cook for some more minutes later.
- Asaofoetida can be skipped.
- To make a spicy dal, add more green chillies.
- If the dal has a thick consistency, add some hot water to thin it.
- If the dal consistency looks thin, press the sauté button and simmer for a few minutes.
- Add the rinsed lentils, chopped onions, tomatoes, green chillies, asafoetida, turmeric powder, red chilli powder in a 2-litre pressure cooker.
- Add 2 cups water.
- Pressure cook the dal for 8 to 9 whistles or 14 to 15 minutes. When the pressure comes down on its own, in the cooker, check the dal. The lentils have to be cooked very well and become soft and mushy.
- With a spoon lightly mash the dal mixture.
- Then add ½ to 1 cup water to the dal. You can add water as required depending on the consistency you want. For a thicker dal, add less water and for a thin dal, add slightly more water.
- Stir very well. Season with salt as per taste.
- Keep the dal on stove top and simmer for some minutes till you get the desired consistency. Do stir the dal at intervals so that the dal does not get browned or burnt from the base. Cover and keep aside.
- Later fry the spices and herbs in the oil and add to the dal.
- Add coriander leaves. Mix and serve.
- Soak the lentils for about 1 to 2 hours. Drain and rinse them well in water.
- In a deep pot, add 4 to 5 cups water added to the lentils. Add the rest of the ingredients mentioned in the recipe. Cover and cook the lentils.
- If the water begins to froth and bubble, then remove the lid or cover it partly and continue to cook the lentils till they become soft and creamy.
- If the water becomes less, then add some hot water. Once the lentils are cooked (takes from 45 mins to an hour or sometimes more. Depends on the quality of the lentils). Then follow the recipe further as mentioned above.
Nutrition Info (Approximate Values)
This recipe post is from the archives (July 2012) and has been republished and updated on 4 June 2020.
This post contains amazon affiliate links.


I loved this Dal Tadka recipe.
I love your recipes, they are so delicious even my young daughter loves it and her schools friends as well as she takes leftovers to school 😂😍
Nice to know and thank you for sharing.
super yummy.
This was the best dal I’ve had at home for a loooooong time. Thank you. I doubled all the ingredients in the Tadka and came out so yummy!! Thanks for sharing.
Great and thanks a lot for the awesome feedback.
Amazing and very detailed, my family loved it
Made this last night, the 4 servings were wolfed down by my partner and I, it tasted better than my favorite restaurant. So glad I found your recipe online.
Wonderful and thanks for sharing this awesome feedback.
delicious and easy!
Very delicious 😋
My favorite Dal recipe. I really like the addition of tomatoes. Have never tried it with charcoal. Thanks for posting it.
nice dal
A fantastic recipe, authentic, tasty and easy to make – even for novices! This recipe will turn even the most committed meat eater into a vegetarian food lover 🙂
Hi Dassana, this is one of my favourite recipes, I make it a couple of times a month and it’s always popular with friends. Thank you for all your recipes, I love your website very much!
hi laura, thanks for the lovely feedback. so nice to read it. most welcome and happy cooking.
Dear Dassana,
I love this recipe and have made this so many times that now I know it almost by-heart!
A few questions though:
1. I don’t stock cream and never used it in this recipe. Does omitting cream make a lot of difference?
2. Can we add sour cream, Creme fraiche or yogurt instead?
3. Some recipes you mention coriander leaves and in some you don’t. Any particular reason why we shouldn’t use corrainder leaves in this recipe?
4. Not a question.. but a big thanks to you. You are awesome ????
Waiting for your answers
Love,
Priya.
thank you priya ????
your queries answered:
1. not much difference. you can skip cream.
2. avoid adding sour cream or creme fraiche or yogurt if you do not like a sour taste. if you like sour taste, then you can experiment. it will give sour taste in the dal. my mother makes dal tadka with yogurt and it is something which i never approve of, though she makes this at times.
3. i have mentioned adding coriander leaves in the recipe. the garnish is done with coriander leaves. in most indian recipes, coriander leaves are added, so you can safely add them in any indian curry or dal recipe.
4. thanks again and hugs ????
regards
dassana
Enjoyed making the dal tadka dish. Instructions were crystal clear and easy to follow.
My wife and my neighbours have finally conferred upon me with the pro chef title.
Thanks a lot Dassana!
Welcome Priyanko. Glad to read your positive comment.
it literally made my mouth salivate…..the images are also great and the recipe good job
thank you.
I’ve made this recipe twice and I finally got everything the way I wanted the second time. I followed it exactly as written and served with paranthas because that’s our favorite. Really delicious and healthy.
It turn out to be wonderful always a big fan of Amit ji????
Super easy and came out brilliant. Thank you
Welcome Sanjay
Could you substitute the jeera with nigella in the tadka step?
you can. but nigella seeds will give a different flavor.
Hi there,
First of all, thank you very much for sharing this great recipe. Definitely this is my to go recipe whenever I make dhal curry. However, I’m quite clueless on what meat curry (wet or dry) that goes well with this dal tadka dish. I would really appreciate it if you could suggest few meat dishes to pair with this great dish. Thanks again.
thanks and welcome jeanne. even i am clueless and i do not have any idea which meat curry will go with dal tadka. so i am fraid i really cannot help you.
Hi there, I tried this recipe and it was great! I am cooking for some friends who don’t eat ghee, would mustard oil be ok to use or should I use sunflower oil? Thanks,
thanks jarrad. use sunflower oil or any neutral tasting oil.
The Dal tasted fantastic, and I m certainly going to learn recipes from your website.
thanks nagaraju
My wife is away and I tried this recipe. Thank you so much, the dal came out to be really good. Better than some of the good restaurants and Dhaba’s. Will surely surprise my wife with this once she’s back. thank you.
Welcome Ravi. Glad to know that you liked this dal tadka recipe so much. I am sure your wife will enjoy the dal cooked by you.
Hi dassana,
Some day, please post a recipe for gatte ki curry. It’s a Rajasthani curry prepared using besan rolls. I tried some recipes available online but it wasn’t successful. Making gatte seems to be a little tricky. Sometimes they turn out really dense & hard. Other way round,they might get dissolved while boiling itself.
Looking forward to a tried & tested recipe of yours with the specific tips/inputs that you share in the write up. Thanks.
yes ruchi, will add. we make a punjabi version of gatte ki kadhi. so i will share this recipe in some time and then later share the rajasthani version. i know cooking the besan gatte can be tricky.
You are a life saver! With your blog, it’s become so easy to put delicious food on table. Be it everyday recipes or occasional bakery goodies….you rock!! Thanks for putting up the blog. Keep writing!
Welcome Tina. Thanks for this awesome feedback on recipes and for the blog.
Amazing recipe! I followed everything as the recipe said except I used coconut cream instead of regular cream and I used ghee instead of oil. It turned out so good. I have been looking for a good recipe for a long time and I finally found one!
I have a couple questions. My pressure cooker doesn’t whistle. How long should I cook the dal, and should it be on high heat the whole time (steam coming out) or should I reduce heat so no steam is coming out?
Also, what kind of coal do you use? I went around my city today to find some but couldn’t. Is it the same as a barbecue charcoal?
Thanks so much for all your amazing recipes!
thank you emm for this lovely feedback. you can cook dal for about 8 to 10 minutes. cooking time varies with the quality of dal. cook on medium heat. the steam will come out. no need to reduce the flame.
i have used wood charcoal. you can use barbecue charcoal also. hope this helps and welcome.
Oh no I am disappointed to hear about the removal of App from iOS. I always refer to this app for cooking. I have tried almost every varieties of recipe and it has come out to be perfect like restaurant style cooking.
Falguni, You can check the recipes in the website. We could not manage the app, so we had to delete it. I am sure you will equally like the website as well.
I am glad that I followed your recipe ! Turned out to an awesome dal tadka ????????
Thanks Deepika for your positive feedback.
Hi…..m Vaishali…I hv always follow ur recipes …and it was awessm. .yesterday I hv made ur dal tadka recipe…nd it was same like restaurant type…we all liked it very much….Thank you for the wonderful recipe
Welcome Vaishali. Glad to know this. Thanks for sharing your positive feedback on dal tadka recipe.
As always,this recipe also turned out very good.. i have made this quite a few times as it is simple,time saving and tasty.
thanks again winnie. glad to read your comment. happy cooking.
Awesome, had it with chapattis’. infact nice with anything.
Thanks a ton
Welcome Suma
Hi dear i tried dal today it very easy, time saving, and super tasty. All liked it really thanks for sharing it.???? so happy to find your blog.
Welcome Anamika. Glad to know that you like the dal tadka recipe and the blog.
Dal is heartsome recipe …light sambar..But charcoal is an additional part quite different.
yes charcoal method gives a smoky flavor to the dal. thanks.
10 years of cooking and finally the best dal I’ve ever made. In love with his recipe! Hubby and friends loved it. Thank you and God bless!
Welcome Deeps. Glad to know that everyone liked the dal tadka. Thanks for your best wishes.
Thank you for this wonderful recipe. My dal turned out beautiful and tasted divine with white rice , fried fish and kachumber. Thank youuuu
thanks arafa for this feedback. glad to know that you liked the dal tadka recipe.
A culinary awakening!!
Skipped the hing (couldn’t find it) regardless it was amazing!
thank you Dr. D. glad to know. hing can be skipped.
Truly delicious…Just loved it Thank you so much for the recipe.. could you please suggest if I can add veggies to this dal??
Nishad, generally veggies are not added in this dal. you can try checking sambar recipes in the blog.
Indian dal is all time favorite recipe for all the indian as well as any outsiders. This simple restaurant style indian dal can be amazingly served with plain rice or jeera rice. the jeera tadka adds a delicious flavour to it.
Thanks Smita for your feedback.
Very nice recipe
Thanks Herold
By cream, do you mean yogurt?
Nini, i mean fresh cream and not yogurt.
Absolutely fabulous recipe! Thank you.
I followed it to the letter and the end result was epic. I only omitted the smoking charcoal part… (I cheated with a touch of smoked paprika). I very much doubt any restaurant goes that far so I’m good 🙂
Welcome Ian Bell. Even without dhungar, the tadka taste very good. Sometimes we also don’t give dhungar. so its fine.
Awesome recipe.. perfect description of recipe..
thanks abhishek.
Awesome recipe…?
thanks akanksha.
super se upar. .. awesome dal..Thank you
thanks noopur -)
Tried this recipe yesterday and came out awesome. Everyone liked it. Thank you!
thats great. thanks kavitha for sharing the feedback.
Can I make the masala mixture on the side and pressure cook just the lentils and then add the 2 together?
I don’t like little chunks of vegetables so I usually blend the mixture and then add the lentils for the dal makhni. Wondering if i can do the same with this recipe. Thank you!!!!
you can do this way anna.
I couldn’t find yellow split lentils in the store, but I found yellow split peas (https://upload.wikimedia.org/wikipedia/commons/b/bc/Split_pea.jpg). Are they the same thing? Can I make the dish from it?
yellow split peas are different than tuvar dal. you can make this recipe with yellow split peas. but the taste and flavor that comes from tuvar dal won’t come with yellow split peas. though still you can make the recipe.
I have Futura pressure Cooker. So how many minutes Should I pressure cook as it doesn’t give whistles.
Thnx
munish, pressure cook for 10 to 12 minutes.
I have tried this recipe many times…. Its simply awesome.
Pls note that point number 6 & 7 are repeated twice in your recipe section above. Thanks 🙂
thanks princy for the feedback on the recipe. also thanks for mentioning about point nos 6 and 7. will check it.
I used your dal tadka restaurant style recipe and my husband loved it. He couldn’t stop praising it. Thank you so much!
welcome poonam and thank you for positive views 🙂
Delicious recipe!
thank you nuha for positive feedback 🙂
Awesome dal ever made ? yummy yummy
thank you carol for your positive feedback 🙂
Best ever dal…
It tested such a yummy
Thank you…
Welcome Priyanka
Best dal ever had… tasted just like we eat in restaurant. Please keep posting such good and hearty recipes.
surely we would thankyou ramya 🙂
Best dal I have ever made. Thank you and God bless!
welcome padmini and thankyou for your positive feedback 🙂
This is a fantastic recipe.You explained it well and the pics helped. I am south Indian so this is not something I learnt at home. It came out perfect. Restaurant quality. Thank you for sharing. I am going to try your veg biryani next.
surely try vidya thankyou for your positive words 🙂 and you are always welcome.
awsome recepi I love it
I have been referring to your recipes and asking my wife to follow them. I am glad I could eat some tasty food because of you. Thank you.
welcome and thankyou 🙂
Thanks a ton. Sixth and 7th point are repeated.
I tried making Dal Tadka at home many times, only your recipe has turned out as good as a restaurants dal tadka!
Thanks so much
Anita
very pleased to know this thankyou so much anita 🙂
Very very good recipe…. My guest like it very much.. . They were appreciating me.. Thanks for the great recipe..
welcome yasmeen. nice to know and thanks for sharing your experience 🙂
Thanks for the recipe?
welcome ankur
Hii
I just loved your blog, the recipes you most here I just got through them and try to make it which really turns out Very nice.
Do you have any page on Facebook or so we can follow you
thanks a lot sonam. you can follow us on our fb page. link here – https://www.facebook.com/vegrecipesofindia
I love dal and have been looking for a recipe to make the restaurant-style dal. This recipe was exactly what I was looking for. Simple and delicious. Thank you!
great 🙂 nice to know sarah and thanks for sharing.
Simple, easy to prepare and temptingly delicious!! Thank you so much for sharing with us this recipe!! 🙂
welcome and thankyou for your positive and encouraging words :
I tried this recipe today. It turned out to be super yummy. Thanks fir all the lovely recipes.
welcome shazia and thankyou for your positive words 🙂
Hello dasana
I am Pakistani.l love ur blog
My kids hv started eating vegetables thanks
May ur all wishes come true
thats nice to know afsheen and thanks for sharing. wish you and your family too all the best.
Your all recipes are wonderful. …I just love it 🙂
I am your true fan….
thanks a lot madhavi.
Good one !!!
Hello
I tried the recipe and i turned out really good. i cooked for my family once and once for my friends and i’ve got a lot of adoration, i follow your blog all the time i also tried the pizza and veg hakka noodles.
Thank you for all your recipes
thank you harsha. good to know and happy cooking.
Hi
I have tried this recipe today and it turned out really yummy.
Thank you so much for taking so much time and posting such amazing recipes.
welcome hanisha 🙂 and thankyou so much for your kind words.
Hi your blog is fabulous…. I love the way of presentation for every recipe….thanks a lot for sharing us such a wonderful recipes…. I tried different recipes from your blog and it always turns out tasty….keep posting……
pleased to know this samyuktha 🙂 would keep posting recipes and glad to know you found the recipes tasty 🙂
Wow..Awesome..Tried out d dal thadka recipe and it was very yummy..Thanku for such a fantastic recipe..:) <3 Avoided d dhungar method…
I have a food group and a cooking expt album in FB.Can i share d link of dis recipe?
thanks souyma. yes you can share the link.
Thank you Dassana for the recipe. The dal came out delicious! Everyone in my family loved it!
I just wanted to advise you against using the dhungar method. The smoke that is formed by pouring oil on coal is polycyclic aromatic hydrocarbons (PAH) and it is a known carcinogen.
thanks sam. i was not aware of this. thanks for the info too. will keep in mind.
Where to get this charcoal piece from
Dr. Namrata, you have to get it from a charcoal dealer.
Incredible. I didn’t (but will next time) do the charcoal part, but it was still amazing. I always add or subtract a bit here and there, but most of it was your entire recipe. I had many compliments and even a “this is restaurant food” remark!
Thank you! I’ll definitely make it again.
welcome renée. glad to know this. thanks for sharing positive review.
I just finished making this and tasted it…delicious! I substituted 3 whole garlic cloves for asafoetida, used powdered fenugreek, used a small handful of chiles de arbol in the tadka, and added 2 tbsp of coconut cream. I used red oily lentils in 5 cups of water, and it took me 2 hours of cooking, after which point I got tired and decided to call it quits. I didn’t wind up with the perfectly creamy consistency shown in your photos, but it is still quite good and I’m happy with my first attempt. Next time I will make sure to have charcoal on hand for the dunghar method, which sounds awesome. Thanks for the great recipe!
welcome chris. nice to know this. yes do try the dhungar method next time.
Hi Dassana..
Tried this recipe and it turned out soon yummy…love ur way of presentation… I tried many of your recipes and all turned out soon good…just one question.. I usually use amul freshcream.Do u have any recipe for homemade fresh cream..
thanks anjali for sharing positive feedback on recipes. no, i have not posted the homemade cream recipe.
Came out exactly restaurant style! 🙂 🙂 Thank you so much, ur recipes never go wrong, except rava dosa 🙁
welcome manjiri
This was really great. I’m Norwegian and just started an internship in Bangalore. Being in India again is making me want to try cooking all things Indian and this came out great, even with my lack of experience! My Indian roommate even approved and said it seemed very authentic. Thank you very much for a great recipe and blog. I’ve really enjoyed all the things I’ve made so far.
welcome linn. glad to know this. thanks for sharing positive feedback.
Best daal made by me….Sasuraal ppl were impressed…third recipe I tried from here…lovely.
thanks surbhi for sharing positive feedback. glad to know this.
Hello. will try this definitely for Iftar(end if fasting day in Ramzan) Thanx for sharing.
welcome ayesha.
Hi Dassana, I tried this recipe and it came out very well. Everyone in my family liked it. Next time I will try dhungar method. I like many of your recipes and I will try them. I especially like your step by step method and awesome pictures. They are very tempting. Thanks, Aparna
welcome aparna. glad to know this.
I think coriander leaves should be added at last. I tried Thais recipe but it gives a little bitter taste. don’t know why.I think due to adding coriander leaves before tempering.. Or due together kasoori methi
chitra, coriander leaves will not make bitter. it gives a good taste. kasuri methi if its added even a bit more then the dish becomes bitter. so could be due to kasuri methi. you can balance the bitterness by adding some cream or a bit of sugar.
Hi,
Your recipe looks amazing. I want to make it for my friends for lunch. Do you think I can make it the previous night itself? Would it taste good or it needs to be Served immediately?
Thanks,
Jyoti
welcome jyoti. you can make the dal previous night but add the tadka at the time of serving. for best taste make everything fresh. the dal which i make for lunch and reheat for dinner does not have a same taste.
I tried this recipe really very good taste & thank u very much
welcome rashmi
Hi,
I tried this recipe, It was Awesome……. Every one in our family really appreciated it.
Thank you very much.
Aarti
welcome aarti. glad to know this.
I made this dal at home, everyone liked so much that they took almost 2-3 times and was finish off quickly. Thanks for sharing the recipe it was great one. Cheers to author!!! Would try some more from your website its good one.
welcome arvind. good to know this. yes do try some more recipes.
I hv done this reciepe thrice . everytime v all loved eat.
thanks shefali
hi dassana, i hv made this dal many times without the dhungar method and it has tasted nice, but the last time i made it with the dhungar method and it was excellent .. what a difference in taste .. very nice … thanks a lot ….
marina
thanks marina. dhungar gives a nice smoky flavor and taste to the dal. you can also try this method with other dishes like paneer gravies or paneer tikka or dal makhani. but just don’t keep for a long time as then the dish gets a slight bitter taste.
Thanks dassana, will definitely try on other recipes , no doubt your site is better then the other site but the best part is that you revert so quickly on any queries asked by the readers. Thanks
Marina
welcome marina. thanks for your kind words.
Hi, Dassana
Have always wanted to try the smoked version. But never know where to buy charcoal from. Which shops keep them?
Your recipe looks yummy! Would definitely want to try it after buying the charcoal.
thanks chandrakala. you will have to ask locally or ask the people who iron clothes. shop which sells only pooja material can also help you.
Finally tried the “smoked” version, and it was delicious! (It’s great without as well)!
thanks jennifer for sharing your positive review. i agree both versions are good.
Very yummy. Thanks a ton for this recipe. Me and my husband loved it . I am yet to try to the smoked version but without it also the dal came out great .
Also loved the picturization and the presentation of your recipes.
Thank you . 🙂
welcome richa. glad to know that both of you liked the dal tadka. thanks for sharing positive feedback.
I have no words for your recipes….
For me…ur blog is like my mom who is far but (near) in my kitchen….
You make me good cook.
thanks priti for this touching feedback. i am humbled.
I HAVE TRIED YOUR DAL FRY,PANEER BUTTER MASALA,SAMBAR DAL,TAWA PANEER MASALA,LACCHA PARATHA AND MANY OTHER!!!ALL ARE JUST AWESOME MADE WITH EASILY AVAILABLE INGREDIENTS AND EASY TO COOK!!JUST LOVE THIS SITE
Thanks SRA for sharing positive review on recipes. Glad to read your positive feedback.
its really delicious. i tried this today
thanks sagarika
hi dassana,
ur recipes are excellent ..
thanks marina
Yummy not only taste but even reading the recipe you can tell it is a knock out want to make it all the time
thanks krisna for your positive words.
Hiii!! Thanks for the recipie.about to try it fr lunch today.but I don’t have a small pan as I just shifted in.i just have the normal size pan with me as of now. How can I go ahead with the tadka now?????
yes you can make the tadka in a normal size pan.
I must tell you…this charcoal infusion method is a super hit trick at my home and the seniors loved it…nostalgia at its peaks….but it did not go well with the kids….I loved it too…all kudos to you 🙂 🙂
thanks priya for sharing your experience. yes, kids may not like it because the smoky flavor may not go well with kids.
Been good fun reading your blog and people’s comments et al.
Why would anybody need to go to a restaurant with somebody cooking the way you do at home?
Reminds me of my mother and of what we consider traditional Indian homes, north, south, east, west, anywhere.
Thanks for everything: you, your blog and the simple honesty and clarity of it all. Best wishes. Have no idea how old you are, or would have added blessings as well.
thanks namit for this sweet and encouraging feedback. nice to know that you like the way recipes are presented. as a general rule women stop growing older once they turn 16 🙂
It looks so yummy…….. I cannot resist myself going to try it today………Keep up the good work
Sanjukta
thanks sanjukta
Thanks for the recipe. Can I add the chopped ginger along with the garlic in the tadka ? Or should it be added while cooking the dal itself for it to get the right taste ?
welcome sharmilee. yes you can add chopped ginger during tadka.
Hello,
I made this tadka dal today for dinner,I have tried many recipes for tadka dal but your recipe was awesome,dal came out exactly
Like we get in Indian restaurants,I can’t wait to try your other recipes I love cooking but unfortunately after working whole day
It’s hard to come up with new ideas everyday so my kids and husband will get enough proteins and veggies from home cooked
meal,your recipe was very easy to follow and I loved step by step pictures you show,keep up good work and keep posting awesome recipes for us working moms
Reena
thanks reena for your positive feedback. glad to know that the dal tadka turned out good. since you have experience in making dal tadka many times… so felt good after reading this.
Excellent recipe
Easy tasty and healthy
will make it again and again
thanks
welcome manju
That is so mouth watering Amit. I am not a regular cook but keep trying various custom made recipes when my wife is not feeling well. I am a big fan of Dal Tadka and often visit to a nearby restaurant where the chef makes a special dish of Dal with double tadka for me. I was always wondering how to make it by myself and you made my dream come true. Way to go buddy. Great explanation with nice and crystal clear pictures. If I collect appreciation (Which I am sure I will) all the credit goes to you. I will try double tadka first and then the smoky version may be later some day.
So thankful to you for sharing such a nice recipe. Keep it up.
Good luck and regards
welcome jaymin. thanks for writing a detailed comment. most restaurants gives double tadka and thats what makes the dal so flavorful in restaurants.
Hi, I am new to using pressure cooker, and mine is the “wobble” top, not the whistle type. Can you tell me how to know that the daal is done?
i don’t know what is wobble top and hearing it for the first time. so not sure how things work here. i would suggest you to go through your cooker’s manual and it will have guidelines on cooking various food products like rice or lentils etc.
She probably means traditional Hawkins type and not the slitted prestige type steam release.
thanks namit. i am not sure it is what you are referring to. because later i check on amazon and the whistle was a different type.
Wow turned absolutely yummm…..,i also luv 2 cook,keep on experimenting..i put gin gar paste instead of chopped ginger but still gud…thnx alot…
welcome rumana. ginger garlic also works. and its always good to try and experiment 🙂
Hi, apart from too some ingredients missing (buying Asian herbs in Germany is not as easy) it still turned out good.
Prefer English recipes.
Thank you
welcome tanja. thanks for the positive feedback.
A great recipe, I’ve made this a few time myself – it gave me an appreciation of the impact dried methi can have!
This would be an ideal dish to try out on people who ‘think’ they don’t like lentils. One day I’ll try the smoking technique..
thanks craig for your feedback. yes, do try the smoking technique.
Who much water we have to add
only if the dal appears thick, then you can add about 1/2 cup of water or even upto 1 cup of water. usually dal tadka has a medium consistency.
Love the photos and clear instructions. Tried the recipe…came out so yummy!
thannks mythili for sharing positive feedback on dal.
outstanding
Awesome receipe turned out perfect restaurant style everyone just loved it
thanks abhilasha
Always a hit!
Thanks VG
Seems good.
Will try it soon and get back to you
thanks and do give the feedback if possible.
Hi dear,
Wonderful recipe….i made it and my husband loved it so much….even my kids were licking their fingers
thanks priya. nice to know
Made this one. Turned out awesome!
Have couple of questions: Why does my dal always turn out pale yellow and not bright yellow as your recipe despite adding turmeric?
Second, I don’t have charcoal at home so I want to use onion as you mentioned but how do you burn onion layer. I tried lighting the layer but nothing happened.
turmeric always give a bright yellow color. so not sure why the dal you prepare has a pale yellow color. onion layers are not burned. burnt charcoal is kept on the onion layers 🙂
Hi dassana,
Thanks alot for posting such tasty receipies…I lived it…will try now ..
welcome shanaz
Just made this and our four kids absolutely loved it – that hardly ever happens! I love the brown garlic taste. Really delicious.
thanks JC. glad to know this.
Great recipe. I tried it and my wife and daughter loved it. Thanks and keep posting.
welcome jubith
Thanks for posting this recipe! I’m making it right now. Can I ask where you got your metal serving dishes and spoon?
welcome emily. i bought it from a kitchenware shop in goa.
This dal gets a 10/10 from me. Very yummy and easy to make. Also extra credit for the ‘restaurant-style’ exoticness!
thanks sam for this positive feedback. nice to know that you liked dal tadka recipe.
Lovely..yo every dish is jus perfect..keep posting..finger licking dishes more n more
thanks shag for this encouraging feedback. keep visiting the blog.
I love this recipe. So simple to cook and so tasty. I cook this or the Chana Dal at least once a week. Thank you for your site: it has completely transformed my cooking. With best wishes from (sunny) England.
welcome andrew. glad to know that site has helped you in cooking good food.
Thanks for lovely recipe
welcome shia
I love to cook food and i followed your recipe and it created magic all my family members loved it and that day i didnt got a single spoon of dal tadka.
Today I tried the dal tadka, YES it tuned out really a restaurant style…….too happy and thanx to u 🙂
welcome richa and thanks for the feedback.
Hi Dassana,
I make dis dal all d time n everyone at home really devours it….I am having a party at home for around 25-28 people and I wanted to serve dis dal then….can u please help me with the ingredients required for these many people?
Thanks!
hi devaki
thanks for appreciating the recipe. this recipe only serves for 3-4 servings. it also depends whether you are having with roti/chappati or rice. with rice, you will take more dal.
recipes like dal and gravy can not be proportionately increased. when making for so many people you have to eye ball the ingredients or cook with the indian method of aandaz (estimation). unfortunately, i can not help you with this. even though i have cooked for so many people. because you have to see the proportion of ingredients you are adding to the dal and also taste it in the end.
all the best to you.
Loved the dal…much much better and fresher than the one at the restaurants:)…Thanks
welcome nirali
Hi Dassana – I also need to know how to cook the lentils without a pressure cooker, if you could send me that information. two different types dal make different cooking time, or does it matter?
also i do not have hing……
Thank you.
hi zoey. sicne we are cooking the lentils till they are required to be completely cooked and mushy. hence it does not matter in this recipe. after rinsing soak the lentils in water for an hour. drain and then add the soaked lentils to a pot. add about 3.5 to 4 cups water to the lentils. add a few drops of oil and turmeric powder. cover and cook the lentils. if the water begins to froth and bubble, then remove the lid or cover it partly and continue to cook the lentils till they become mushy and creamy. if the water becomes less, then add some hot water. once the lentils are cooked (takes from 45 mins to an hour or sometimes more… depends on the quality of the lentils). then follow the recipe. beat the dal till smooth. then add the onions, tomatoes and the rest of the herbs-spices and continue to simmer till the tomatoes, onions are softened. the onions should not have any crunch. add water as required. if the dal looks thick, add some hot water. if thin, then simmer for some minutes. then when you get medium consistency and everything is cooked well, prepare the tempering/tadka and add to the dal. this will take longer but the results will be delicious. skip the hing.
Thank you! Going to try this today I think! LOVE YOUR SITE!
thanks zoey.
Fab recipe! This is the second recipe I’m trying from here after the whole masoor dal. This was very easy and very yummy! One of husband’s favs and he loved this version. May cut down the spice if the kids are eating though. Thanks for sharing!
Hello Dassana,
First of all, thank you so much for this wonderful site. I am a student, learning cooking finally, and your site is so so much better than Sanjeev Kapoor, Tarla Dalal, or anything I’ve come across so far. Easy to make with lovely pictures, nice description, and really tasty too!!
Moving on, today I find myself in an unusual situation. I do not have tomatoes, and it’s too late in the night to go get some. Can I substitute them in the dal with tamarind paste? I don’t know how I came up with this idea, but I remember reading somewhere that I could. I might be wrong. I am not expecting an answer right away, but it might be helpful if I ever run into this situation again.
Thanks again.
thanks manan. i am smiling and encouraged 🙂 for dals, you can add lemon juice to get a slight tang. tamarind paste gives a different kind of sourness and usually goes very well with sambar or south indian curries or gravies. so i would suggest you to add lemon juice instead of tomatoes. you can also add amchur powder instead of both lemon juice or tomatoes.
Thanks a lot Dassana. As a very nice coincidence, it turns out that I am in the very same situation again tonight. 😀
Since I am following (and cooking) your sabut masoor dal recipe right now, and it does not have any khatai (amchur) in the recipe, I’ll use it instead of the tomatoes.
Once again, thanks, and keep the recipes flowing. 🙂
This recipe is excellent, so much better than what you get in restaurants in this part of the world (the Nordics)!! I don’t have a pressure cooker, so I’ve first sauteed the onions for about 5 minutes before adding the water and lentils. I haven’t been able to find fenugreek leaves, but this recipe works fine without them as well. Make sure to prepare a large enough portion so that you have some left over for the following day 🙂
thanks anna for your feedback. even without fenugreek leaves the recipe works well. you can saute the onions first. glad you liked and enjoyed the recipe.
I will try this dish. I found it better then other sides. Good!- Balaji das, Goa.
I Will try your Paneer butter masala recipe. It is a good recipe, and detail anyone can try it. Thank you very mauch. I will cook it for my Lord Krishna Lunch Bhoga!, thank you once again.
— Balaji Goa.
welcome balaji.
Hi,
I always thought dal recipes were bland. That was untill i tried this recipe of yours. It was just out of this world. I am trying out your paneer butter masala recipe tonight. Will let you know how that turns out. Love your blog 🙂
thanks aarsha. many dal recipes are spicy, hot or full of flavors. let me know how you like the paneer butter masala recipe.
Hi Dassana,
Made the Tadka Dal tonight. Fabulous. Remarkably easy. My four year old daughter was licking her fingers like a true South Indian! Thanks again for all your effort- we think of you fondly.
Manju
thanks a lot manjari. hugs to you and your daughter.
Dassana,
I tried this recipe yesterday and it turned out really well. It’s a new favorite for my husband and myself. I usually make dal fry and the only dal tadka I’ve tried is a palak dal version with just tuar dal. Using the split masoor makes this dal so much more creamier and gives it a nice taste.
Thanks for the recipe. Now I understand the difference between dal fry and dal tadka 🙂
welcome ansh. glad to know that you liked the recipe.
Thanks for sharing your recipe.
I am planning to try it this weekend.
One query: Am I supposed to mash the green chillies etc that is cooked with the Dal?
That could become very hot …..
Please suggest.
Thanks
no need to mash the green chilies. if you use a medium or lesser hot green chilies, the dal will not be hot.
Oh that’s one of my favourites…
Good
Awesome it gives the exact taste of resto….I n ma etntire family loved it
thanks mayuri for the positive feedback about dal tadka recipe.
thankyou for taking the time to share your lovely recepies with all of us.
welcome sara
OMG…. I am never using another Dal recipe again… The most delicious dal and such a great balance of flavours. I tried a lot of recipes and they all left me thinking is this the dish people rave about….But this recipe is just amazing I doubled it up and used dried coriander leaves(because you can get them now) used fenugreek powder instead of seeds and sour cream instead of cream. I wanted to eat the whole dish it was that good. Thank you for this gorgeous recipe 🙂
welcome susanne and thanks for this lovely comment.
dal tadka so easy to try home so yumiii
hi, ur recipies r wonderful. i luv all of ur dishes. im a bigneer n not tat gud in cooking n my husband is big foody. he wants d fud to be tasty… thanks for posting simple n delicious recipies…
welcome swati. i am glad that the blog is helping you in your cooking journey.
Thanks a lot for the receipe..
Made it… and its very nice… thanks again.
welcome mehul
thanks a lot dassana…..i wasn’t familiar with this method of dungar…..dal tadka has now become my speciality… 😛
thats nice to know kirti 🙂
Could you try adding a little chipotle powder and reduce the fresh chilli? I little heat but with the smoky flavour too?
yes you can.
hiii dassana, made this Daal yesterday nd it was awesomely appealing….simply loved it….also charcoal was available so was able to get that burnt heavenly taste…i just burnt the charcoal red n added it to the Daal n covered it with a lid…is der any other way for adding charcoal…? .thanks once again….
hi kirti burnt charcoal flavor is yum in dal tadka. burnt charcoal is not added to the dal directly. take a small bowl and add the burnt red charcoal in it. keep the bowl in the dal. make the dal a bit thick so that the bowl does not immerse down. pour some ghee or oil on the hot charcoal. immediately cover the dal pan or pot with a tight lid for some minutes. the fumes and smoke which are emanated after adding the hot ghee will infuse the flavors in the dal. this technique is also called as dhungar. try this way next time.
Hi Dassana
Will try this recipe today, Just wanted to confirm we need to try dhungar before tadka or after? Awaiting your response.
Thanks
you do the dhungar before giving the tadka.
Hi, Tried it yesterday, it was nice. Thanks! Can you please share your recipe of Restaurant type Sambhar I would love to make.
Look forward to your response.
Jaya
welcome jaya. i will share hotel style tiffin sambar recipe soon. keep visiting.
Hello there Dassana,
Its me again :p i don’t have a pressure cooker, how do I go about cooking these two dals together, considering one takes longer tham the other?
I want to make it in a bit, so quick reply would be appreciated.
Thanks in advance.
have mailed you.
Hello there,
Thanks for the beautifully authentic dish. Can I use crushed red chilies (flakes) instead of whole ones?
susu, yes you can use crushed red chilies.
Thanks for the recipe. Prepared it today at home to serve with vegetable pulao. Came out really well. Will definitely be making this a lot in future.
thanks marilene
This is a really good Dal Tadka recipie . Superb . But just one change , i think in hotels they give tadka twice . Once for flavour and second for show and more flavour . But brilliant recipie .thanks
thanks. i am not sure if in restaurants, they give tadka twice. but i do have a vague feeling that what you are saying is probably right. hence the dal becomes doubly flavorful 🙂
I cooked today without the charcoal – just using a pressure cooker – and it turned out excellent.
thanks jennifer for the feedback
sure ‘ll try…. 🙂
Finding charcoal must not be an issue. There must be place from where local restaurants procure it. Just ask them. Where I live(in Mumbai) I get 250 gms for 10 Rs.(40 Rs per Kg).
in goa, when i made this recipe, even to get charcoal from restaurant owners was not easy 🙂
When you cook rice ….while it is boiling ,add few drop of fresh lemon or lime juice drops ,the rice will bloom beautifully and you will see very long grain , specially biryani type of rice .”INDIA GATE ” is my favorite ,do not disturb until it cool little bit and it look like long noodle.
i am going to try this tip hemlata when i make biryani next time 🙂
hi Dassana,
Lovely clicks and I fell for your balti. Do you use a Canon? Wat lens do you typically use for the food clicks!!
Shobha
thanks shoba. i use canon. for the pics here i have used the 18-55mm f/3.5-5.6 canon kit lens. otherwise i use 0mm f/1.8 canon fixed lens.
Just two words – ” spot on”
Thanks a lot for sharing such an awesome recipe….
thanks a lot elle.
With my version of Dal Tadka I use Chick pea dal and Moong Dal instead of Masoor Dal and it tests much better. Try it out Proportion of the three dal is 1 Tur Dal, 1/4 Chana Dal, 1/4 Mung Dall.
Even I agree with Hemlata for the tadka and it gives much better flavor and it test too good.
thanks for the suggestion kirit. shall try this proportion of dal next time.
I love Dal Tadka too, anytime a comfort food.
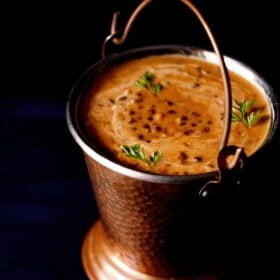
Also the bronze container, where the Dal is placed reminds me of a restaurant called “Golconda Chimney” in Whitefield, where i had a great Dal Tadka years back, looked exactly like the pics you added!!
Thanks Dassana!
thanks pavithra. usually in restaurants they serve dal in these buckets.
i love dal tadka and this receipe i cook vry well
Wow! Really…WOW! Thank you for sharing this wonderful recipe. I did make a little change though. Instead of using ghee or sun flower oil, I used coconut oil. Nonetheless, please share more of these tasty treats.
thanks akhil.
Excellent, was looking for this dal cooking method for long long time.
There was a small get together at my place yesterday and I tried your recipe. My guests praised it with every bite. It was so simple to make yet tasted awesome!!! Can’t thank you enough for sharing it! 😀 Hugs!
awww nidhi… makes me feel so good. thanks dear for trying and loved the fact that your guests loved the dal tadka.
Tried your recipe and it was like Dhaba dhal. Thanks for sharing.
thanks nina
thanks yar. I’ve got what i want.
Hi there!
Learned a couple of new things here, thanks for sharing the recipe too! =D
thanks helene 🙂
Dassana, I do this and it is one of my favourites. I add small slit-green chillies to the tadka too and sometimes cannot resist the South India curry leaves! 🙂
this is a regular at our place shri. when i want south indian style, i add mustard and curry leaves to the tadka. even i add green chili sometimes.
M not getting ur mails, y so, since last week hav not received any mail
hi sonali. thanks for your concern.
i am on a small break. i will resume blogging in one or two days. my latest post of south indian mushroom biryani was almost drafted a week back and i still need to do some changes to it. you will start receiving the recipes mails in a day or two.
I very like dal indian tarka
hi dassana,
needs your help on the timings for cooking various dals. after a use of years pressure cooker whistles are not that good and then our estimate has to be time base…by the way the way I judge my dal timings are aroma…and they are almost 98% correct…even for rajma and both the types of chanas…but i want to know from you how to be 100% precise in dal making…
dal soaking and dal pressure cooking timings….are 2 aspects for what i am looking to you …
and as u say 4-5 whistles…means these on high flame or first high and then low
one more thing Dassana,
i am really poor in making basmati plain rice…it is a matter of chance that the rice turns good….i have tried ur other receipes and they for sure turns out good…please tell me methods to cook plain rice so that they come good everytime I cook …
there r several methods to cook rice too….by discarding boiled starchy water…..keeping the water retained..pressure cooker method …and patila method 😉
would like to know all the methods….
let me remind u …you have my one request already pending and today i have added two more to list….hoping to get ur guidance on all …and that too soon…..
…Dassana…ur blog has given me a platform to expertise in every recepie and I being fond of cooking don’t want to miss that opputunity………
thanks renuka for your positive comments.
i have seen and done with all methods of rice cooking. lets go one by one:
1: cooking in a pot or patila: this is one technique i make rice often with. i don’t pre soak rice unless the recipe calls for it like biryani or pulao etc. to make plain boiled rice, i just add the rice to the water. there ate 2 ways in this:
a: first you heat water and then add the rice.
b: you mix the rice and water and then keep it on the gas stove.
cover the pot and let the rice cook. in between you have to check the rice.
for this method i add 2 cups rice with 4.5 cups water.
2: pressure cooker method: here i add 2 cups rice with 4 cups water and then pressure cook the rice for 3-4 whistles on full flame. at home we prefer a little softer consistency so 4 whistles works fine for us.
3: by discarding the starchy boiled water: i have seen my mom making rice this way many times but i only made a couple of times. here we need to take 6-7 cups water for 2 cups rice. boil the water with salt first. then add rice. cover and let the rice cook. once the rice gets cooked, strain the water and fluff the rice.
4: one more method… that i make rice with when i run out of cooking gas 🙂 microwave method: here i add 2 cups rice with 4.5 cups water in a microwave safe container and microwave on medium power for 14-15 minutes.
5: lastly, i have also cooked rice in an electric cooker. this is the best. here i add 2 cups rice with 4.5 cups water. i don’t need to time anything here. when the rice is cooked the cooker stops. the rice stays warm for some hours and one doesn’t have any issues with reheating the rice etc.
one more important thing: when cooking basmati rice the proportion of rice to water can be 1:2 or 1:1.25 but for some other varieties of rice you may need to add more water.
a tip: adding some drops of oil or ghee to the rice helps the grains to stay separate.
i hope renuka, all these info on cooking rice helps you and also makes you a better cook. i think i should write a detailed post on the various methods of cooking rice.
thanks Dassana,
I will try pot and pressure cooker method and then let u know …how it worked
thank u once again
welcome
ok renuka here we go:
soaking dals: i generally don’t soak dals except for chana dal and whole moong beans. recently i read that soaking dal does not allow them to become mushy and soft. the grains remain separate.
pressure cooking dals: for 1 cup of masoor, arhar or moong dal, i add around 2 cups of water and pressure cook the dal. after pressure cooking on 4-5 whistles on full flame, i switch off the gas stove. i have a small cooker so it does not take much time for me to cook the dal. in a larger pressure cooker, it will take time for the steam to build up.
the dal gets well cooked and a little thick. i add some water to it later, to get the right consistency and let it simmer before adding the tadka/tempering to it.
while cooking dal, if the recipe calls for a soft consistency then you can overcook the dals. but if the recipe calls for separate lentils like a dry moong dal sabzi etc than you just cook the dal in 2-3 whistles.
generally i don’t keep a tab on the time whilst cooking dals or rice. i think 3-4 minutes are fine if you pressure cook the dal on a full flame. i agree with you that aroma of the dals does help in knowing if the dal is cooked or not.
i hope this info and the way i cook dals at home help you.
Hi Dassana,
thanks once again for all ur efforts….
Actually why i had taken this issue was beacause though my pressure cooker is working pretty fine but it does not give proper whistles …i have heard many times people working with dals as per timings…
Dassana…every night at home we have dal with rotis and we make various types of dals…let me list them
moong dhuli
moong dhuli + masoor
masoor
arhar
chana
moong sabut
masoor sabut
moth dal
urad chilka+ chana
urad dhuli
urad dhuli + chana
urad sabut ( mah ki dal)
moong chilka
moong chilka + chana
massor + urad chilka + arhar + moong chilka
Besides I cook also…..
kabuli chana
kala chana
rajma
lobiya ( rongi)
matar ( one used with kulcha i.e. matar kulcha…..even I want you to post that receipe…….me being fond of it but don’t have expertise in it…..I am sorry for being too demanding …Dassana )
I doubt that moong sabut dal will be done in 3-4 whistles or u mean half split i.e. moong chilka …moong chilka may be done in that time..
Once again thanks for being so patient in reading my long mails…
no issues renuka. we also cook dals for dinner.
when i said moong dal, i meant moong chilka. spilt moong dal takes the shortest time to cook than other dals.
the following rule you can apply:
1: skinned and split lentils or split lentils with skin like
arhar, masoor, urad dal: 4-5 minutes
moong dal: 3-4 minutes
presoaked chana dal: 5-6 minutes
2: whole lentils like whole moong, whole masoor which are pre soaked: 5-7 minutes
3: legumes like presoaked rajma, dried matar: 8-10 minutes
presoaked kabuli chana, black chana: 7-9 minutes
presoaked dry white or green peas/matar – 9-10 minutes
presoaked lobiya or moth beans: 6-8 minutes
I hope this helps.
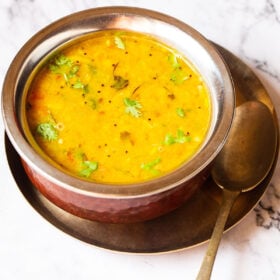
i LOVE that spoon and the copper pot is amazing. so beautiful!
i like to add my idea in your dal ………….boiling the dal with onion is good ,but i like to add ginger garlic and chily after we mix dall well ,so the fresh flavor of chilly ginger does not get lost by over boiling dal in cooker .for me………….dry methi if i put it in dal straight it release the bitter flavor but if i add in tadka…….generous amount it release aromatic flavour.i like spices to go in oil in order for the best and not burnt flavour……first always mustard seed till they pop up >hing start browing>whole red chily start turning dark for smoky flavour>now garlic turning golden some chopped chily>khadi patta >jeera remove from heat > methi leaves>sesame seed ,pour over dal ,add lots if chopped coriander stems only , for bursting flavour,no leaves .stems will release flavour with heat,while leaves will cook and taste bitter,so add just before serving. thank you for sending lots of recipes .
thanks hemlata for your suggestions and tip. i will surely try adding kasuri methi to the tadka. i always add it to the cooked dal.
basically i do not add chili powder to the tadka coz i don’t like the burnt chili flavor.
the idea of adding sesame seeds & coriander stems is unique as well. i will try making tadka the way you have suggested.
just made this…….spot on……i could eat this everyday!…..maybe a little more tomato 🙂
thanks thomas for trying the recipe 🙂
Yum!!!!! I would love to eat this right now 🙂
Very tempting
looks wonderful deliciously done lovely picture
thanks
Dal tadka is comfort food for me… all I need is some dal chawal to lift my spirits up on a sad day…
ohh how I miss having dal regularly, my husband and in-laws are not at all dal people… They need there daily fix with a yoghurt based gravy- Moru… I’m just too lazy to make an extra dish just for myself… But I do make it once in a while to treat myself… I want to try this recipe next time coz I have never used kasuri methi in dal… I always add tomatoes I love the tang it gives…
in my home everybody are dal people. they just love dals. i like moru too.
kasuri methi gives the dal a good aromatic edge and makes it very much like the dals served in the restaurant. mostly the dals that we get in restaurants have kasuri methi added to them.
You post lovely recipes which are simple to make. Thanks for sharing…will try this dal. Love this tadka dal
do try rujuta. this is a very good dal tadka. you can even add your choice of ingredients to the tadka.
This Dal tadka reminds me of dhaba food in Amritsar….Amazing pictures as usual!
hi Dassana..this recipe is simply wonderful..i made it today itself in the dinner with plain rice..i did some changes to it like i added red chilli powder in the tempering to give it a reddish color and also added some moong daal to it as i was running short of masoor dal..and the result was flavourful delicious dal..thank u soooooo much for the recipe..i also made some beetroot tikkis and my hubby just loved it..keep posting such spicy flavourful recipes..
thanks thanks suhani. red chili powder gives a nice burnt color to the tempering as well as to the taste. beetroot tikki has become a favorite at home too.
yes i have some nice recipes coming up… seviyan kheer is the next post followed by many more…
o really m gonna send my hubby to market in the morning to get the sevaiyan..lol
OMG I have to try this very soon. Have pinned for later, thanks.
You are welcome to join in my monthly food blogger event THE SOUP KITCHEN, here for entry details and current theme offering a new theme each month. All bloggers are welcome, hope to see you participate soon.
thanks debs
You know what, during all are meals in any restaurant this Dal tadka has to be there on our table alongside all exotic curries. Lovely clicks Dassana.
i love ur brass bucket(what else can i call that) , and that spoon..!! lovely looking dal..
this looks so delicious, exactly like is served in the North Indian resturants :), would go great with tandoori roti!!!!!
nice presentation- looks yum !
I stumbled upon this recipe quite by accident and I don’t know if it’s the stunning photographs, the array of spices or the the fact that I’m plain up starving, but it looks like the most beautiful and enticing dish I have seen in a long time! It’s definitely going on next weeks menu. I must say, I have always had a bit of difficulty getting my fingers on asafoetida in these here parts even with gluttonously massive African, Arabic and Asian stores. I know that replacing it would not make the dish quite as delightfully authentic, but I was wondering that if one were to replace it, what would you recommend replacing it with?
thanks for your lovely comments juls. there is no substitute for asafoetida. it does add a lot of pep to the dal. but you can still make the dal without it.
some folks do substitute onion and garlic for asafoetida. for this recipe, i can suggest you to add half the onion in the beginning and half to the tempering. but in this case after you add the cumin and they get fried, you add sliced or chopped onions and fry them till they become golden brown or till they get caramelized. add the rest of the ingredients later and fry for a minute. you can also increase the quantity of garlic to 1 tsp more.
Well, I found it! So I’ll be making this tonight – thank you very much!
Love dal, but have never tempered it in quite such a way: the recipe will be much used, I am certain 🙂 !
do try eha.
I don’t think anything can be as comforting as daal! Love that cute bucket 🙂
i love love the pictures.. so crisp and so pure. and perfect for the taste of yellow.
really really ultimate beautiful daal tadka sir thanks
welcome….
It looks very tasty.I will make it today only and the picture is beautiful.
thanks katha.
Hi Dassana! You have lovely recipes on your website. This dal looks so tempting…I could literally feel like smelling the aroma of the dal while looking at the images! Thanks for the recipe.
thanks and welcome pulkita.
Loved the dal my favorite too and amazing pics I am drooling all over 🙂
there are days i can simply survive on jeera rice and daal tadka… and ofcourse not to miss the mango pickle slice along with ity…. my mouths watering 🙂 lovely post and equally wonderful pics… its sinful to post such lovely food stuff especially while i am fasting… 🙂 but i have to say nothing can beat daal chawal 🙂
i agree with you…. nothing can beat dal chawal especially with some pickle by the side.
Hi Dassana,
Please can you explain how to make this without a pressure cooker?
Thanks!
soak the dal first in water for an hour. drain and add the dal and double the amount of water that is mentioned in the recipe. add a pinch of turmeric and a few drops of oil. the oil will reduce the frothing. cook the dal till they are completely mushy. add more water if required. cover and cook with a slight steam escaping. if the dal begins to froth, then remove the lid and let the froth settle down. this will take about 45 mins to 1 hour or more for the dal to be completely cooked.
Hi Dassana, can i use milk or thin layer coming on the surface of the milk into the dal when cream is not available? The taste wouldnt change isnt it?
you can add the top layer of milk, which we call as malai. not a big change of difference in the taste.