Uttapam or Uthappam is a classic South Indian tiffin or breakfast dish. It is one of those breakfast recipes, which is not just popular in South Indian households but also many others across the Indian subcontinent. The reason being the deliciousness, the ease with which it gets prepared as well as the health factor that it has. So, the Uttapam Recipe is basically a thick pancake made with either an idli or dosa batter. On this post, I share a the method of making the fermented rice and lentil batter that will help you make these pancakes from scratch.
About Uttapam
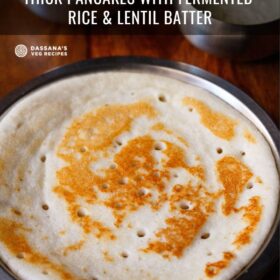
Like I mentioned in the beginning, Uttapam Recipe (also written Oothappam or Uthappam) is a popular and a traditional healthy breakfast choice like idli and dosa in South Indian cuisine. These are soft and crispy pancakes made with a fermented rice and lentil batter.
To make Uthappam, first both the rice and lentils are soaked in water for some hours. Later they are ground separately. Both the batters are mixed with salt and set aside to ferment overnight or for 7 to 9 hours.
The fermented batter is spread thickly on a hot tawa or griddle and cooked on both sides with a drizzle of oil. Once golden and cooked, the uttapam has a crispy outside texture and a soft, fluffy texture from inside.
Table of Contents
There are also many ways a classic Uttapam Recipe can be worked on to make for different versions. There are two more variations:
- Onion Uttapam, topped with onions, herbs and spices.
- Onion Tomato Uttapam, made with a mix of onions, spices and tomatoes.
Uttapam takes more time to cook as they are thick. So ensure that these pancakes are cooked properly and thoroughly.
I have had onion tomato uttapam in a couple of restaurants where the outside was crisp and cooked but the inside of the uttapam was not cooked.
I could literally taste the batter. You don’t want your uthappam to taste like this. So cook them well and also remember not to cook them on a high heat.
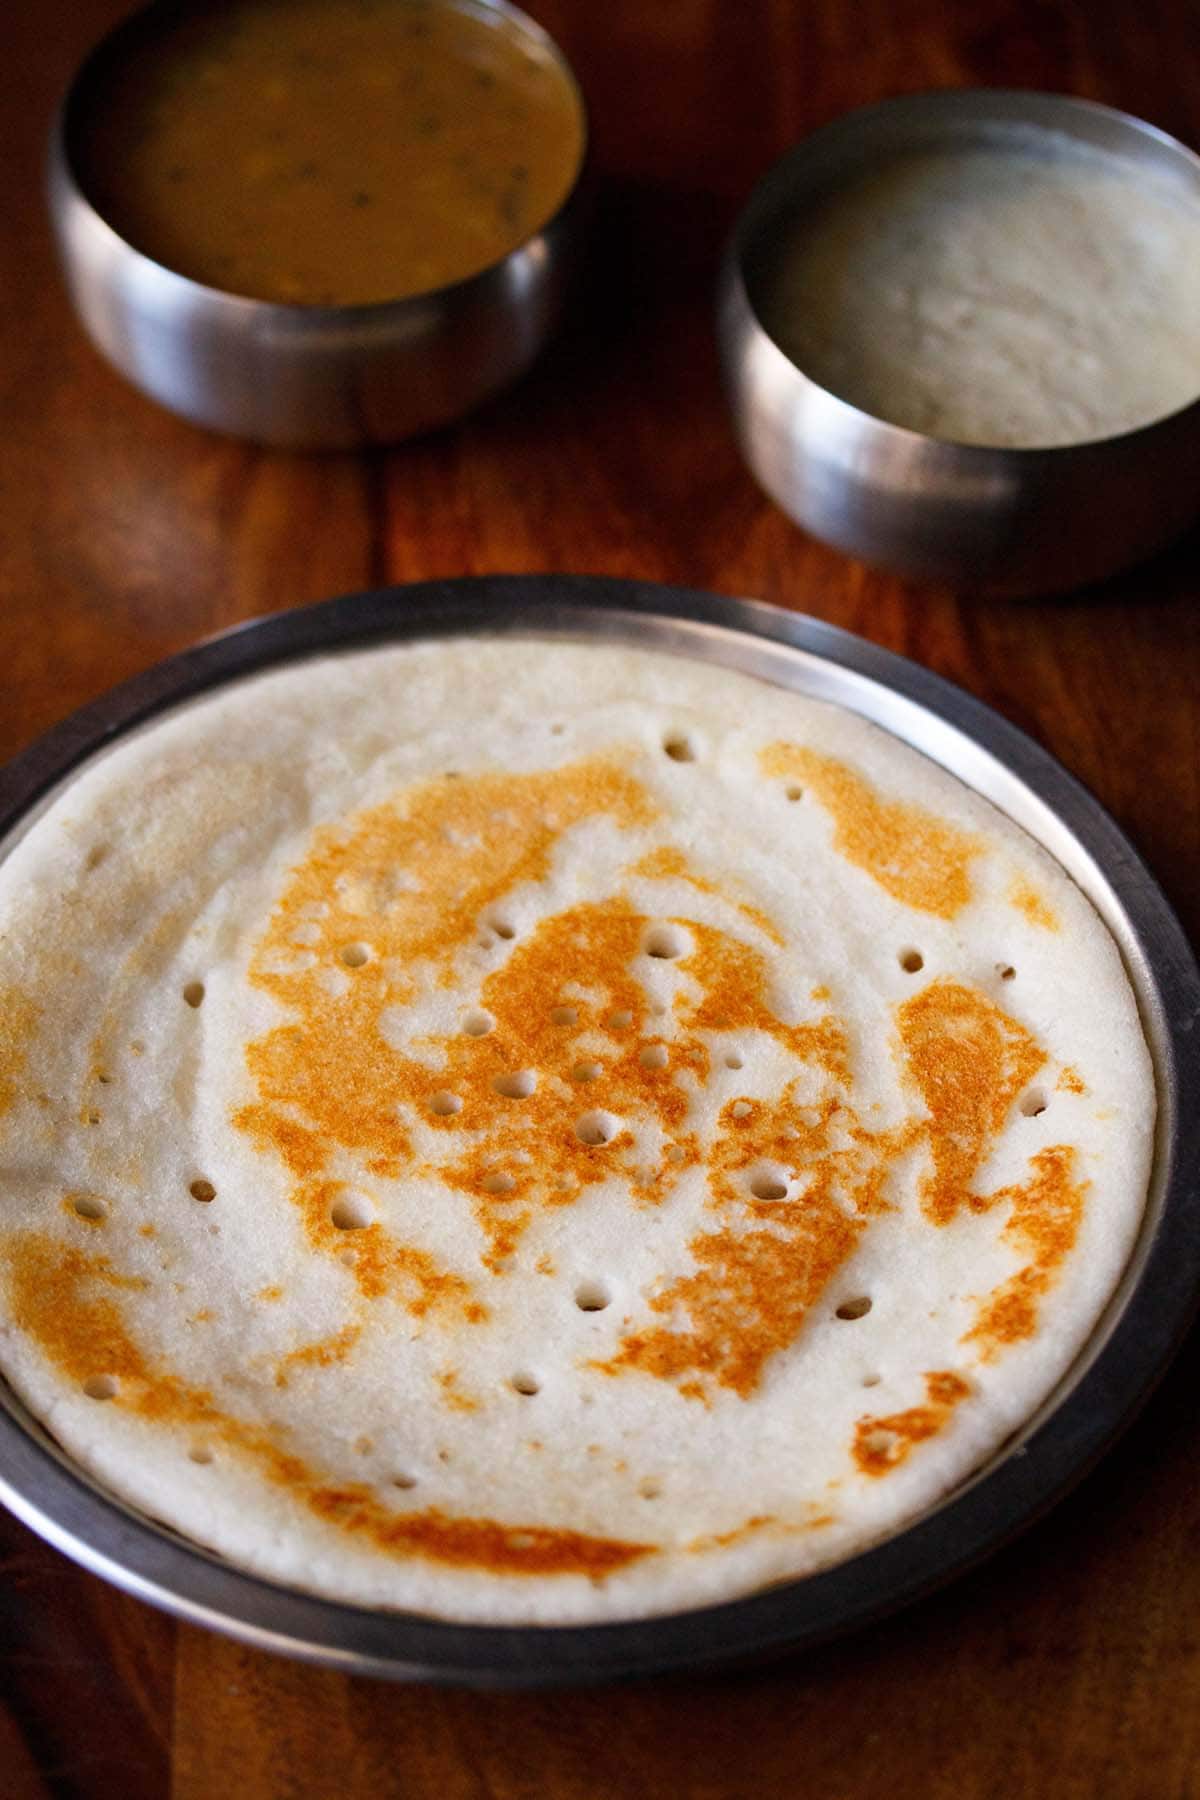
Regionally, after making an Uthappam Recipe, it is served with a coconut chutney, sambar or both.
But at home, you can even make these lovely South Indian style savory pancakes and serve them with tomato ketchup instead.
About This Recipe
In this classic Uttapam Recipe version, I have shown the method of making it with a multi-purpose batter that can be used to make idli and dosa as well.
All the steps – from soaking the rice and lentils to grinding and fermenting the batter is shown in detail. You can also make these with leftover dosa or idli batter.
As with any fermented batter or dough, temperature plays a crucial role in the fermentation process.
So, make sure that you keep the batter of this Uttapam Recipe in a warm place or ferment for a longer time, if the temperature is on the cooler side in your city.
With this Uttapam Recipe batter, you can also make idli on the first day after the batter is fermented and Uttapams on the second day.
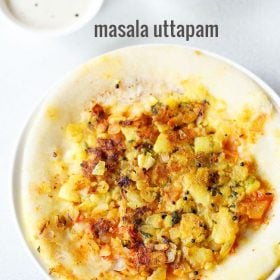
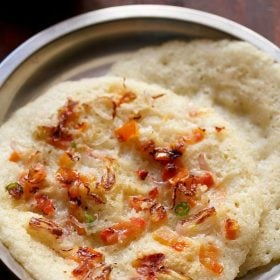
Uthappam can be made plain as shown in this recipe or topped with vegetables. Usually they are mostly topped with onions, green chillies, curry leaves and coriander.
Some variations also top them with tomatoes. Additionally you could also top them with carrots, beets, cabbage, bell peppers or cheese.
As I said, you can relish these with an earthy Coconut Chutney and Sambar by the side and have a delicious South Indian breakfast or brunch. It can also be packed in the lunch box, as it remains soft.
How to make Uttapam Recipe
Preparation
1. In a bowl, take ½ cup husked whole urad dal (husked black gram) and ¼ teaspoon fenugreek seeds (methi seeds).
You can also use split husked urad dal instead of husked whole urad dal.
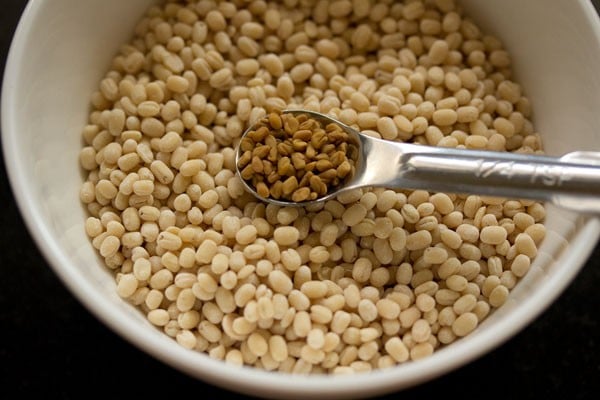
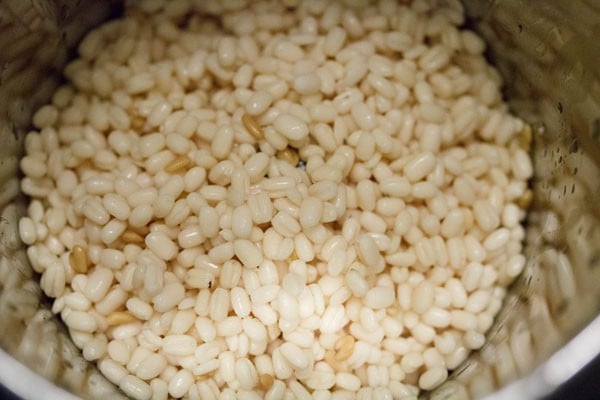
2. Rinse both the urad dal and fenugreek seeds for a couple of times in fresh water.
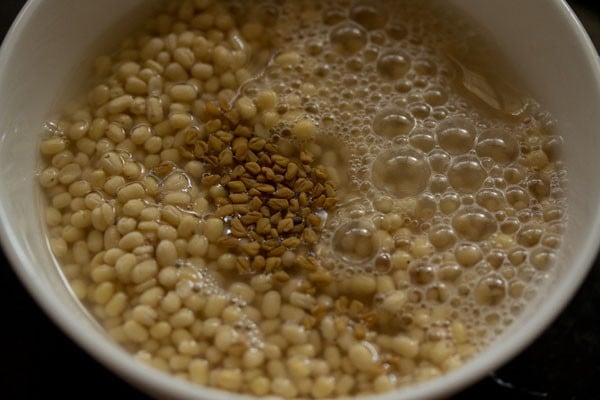
3. Then, soak in 1 cup water for 4 to 5 hours.
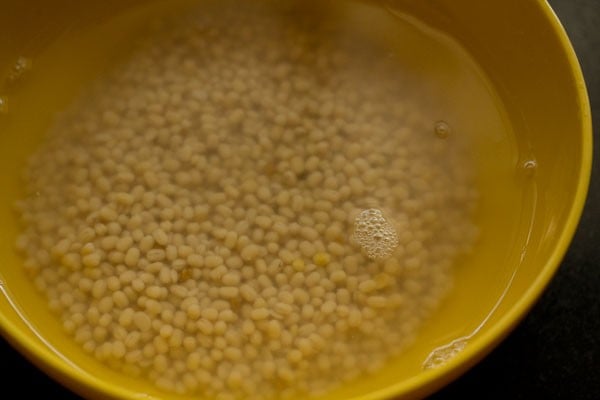
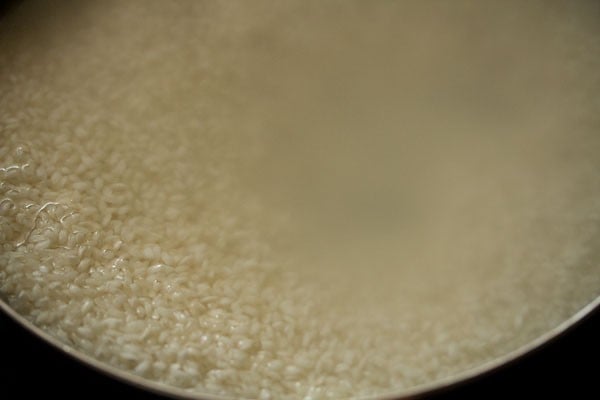
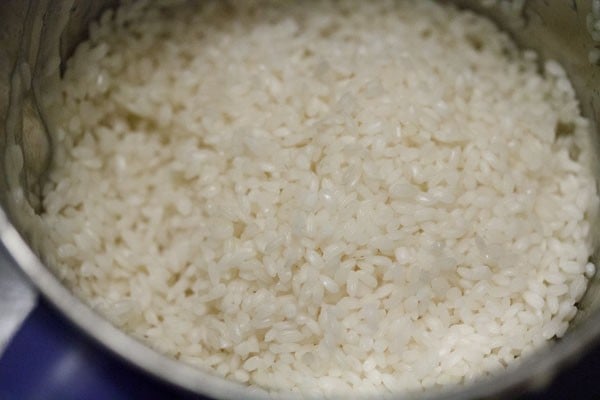
4. In another bowl, take 2 cups parboiled rice or idli rice. You could also use regular rice.
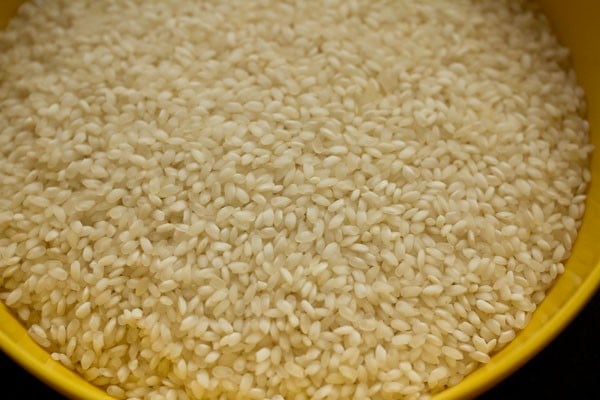
5. Rinse the parboiled rice or idli rice a couple of times. Drain all the water from the rice.
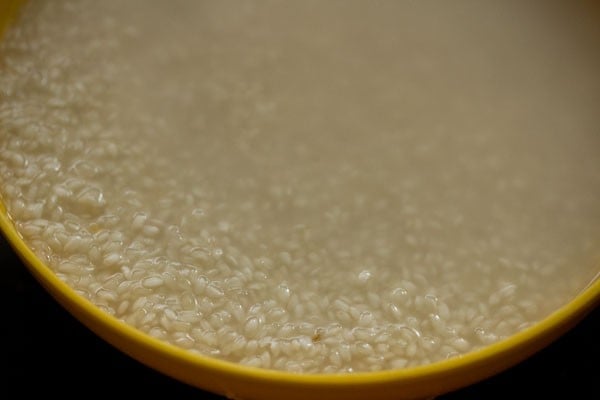
6. Add 2 cups water. Mix well and soak everything for 4 to 5 hours.
Making Urad Dal Batter
7. Strain the urad dal and reserve the water. Keep this water for blending or grinding the dal.
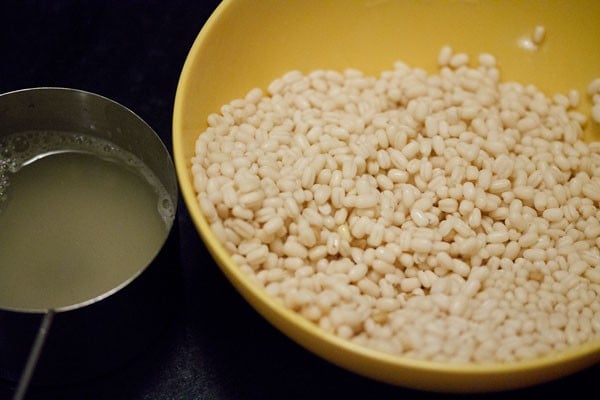
8. Add the strained urad lentils in the grinder or a blender.
9. First, add ¼ cup of the reserved water and grind or blend for some seconds. Then, add the rest of the ¼ cup water and continue to blend till the batter is light, smooth and fluffy.
If the mixer-grinder becomes too hot while blending, then stop. Let it cool down and blend again.
Quantity of water depends on the freshness of urad dal. I always add ½ cup water for blending ½ cup of urad dal.
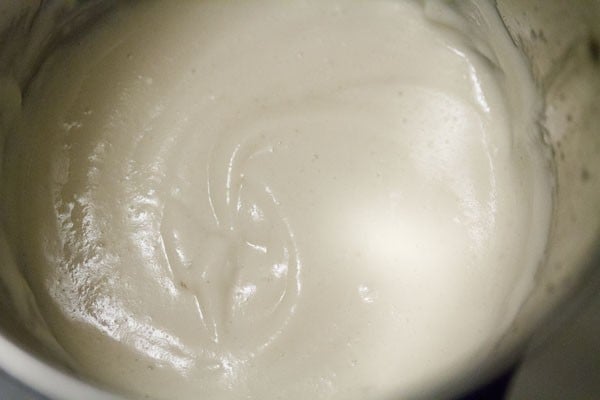
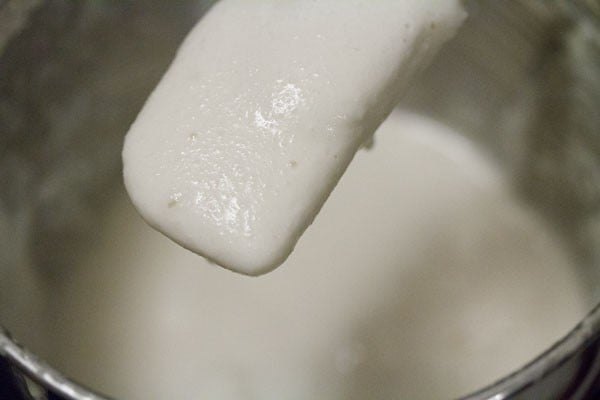
10. Pour the urad dal batter in a large bowl or pan. The batter should be fluffy, smooth and light.
Make Rice Batter
11. To the same mixer-grinder, add half of the strained rice.
12. Add ¼ to ½ cup water and blend till smooth. A fine grainy consistency of rice is also fine in the batter. You can blend the rice in 2 to 3 batches.
I blend the soaked rice grains in 2 batches.
For rice, I always end up adding about ¾ cup water and a few tablespoons on occasions.
Mix Both Batters
13. Pour the rice batter in the bowl containing the urad dal batter.
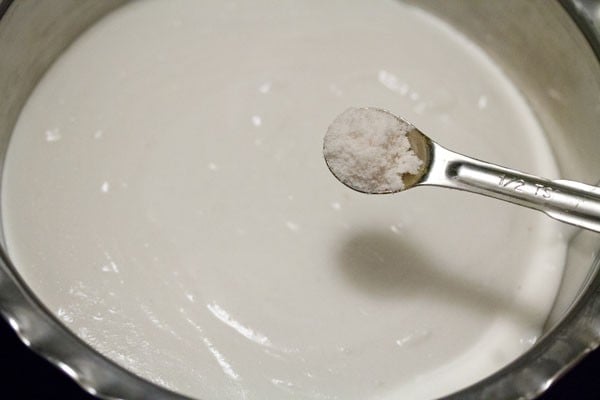
14. Add 1 teaspoon edible rock salt, pink salt or sea salt. You can add the salt as per taste.
In very cold temperatures, avoid adding salt. Instead, add ¼ teaspoon sugar. Sugar aids in the fermentation process.
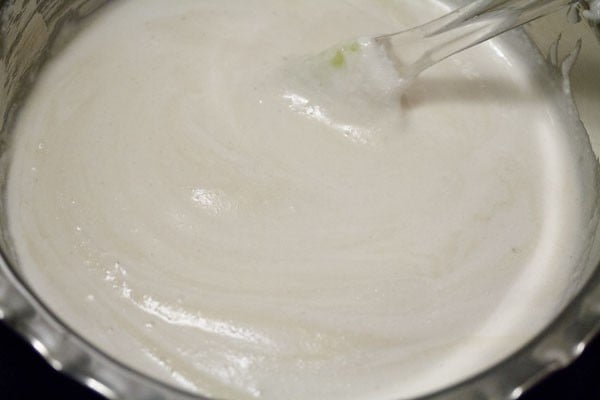
15. Mix both the batters thoroughly with clean hands or a spoon or spatula.
16. Cover the bowl with a lid and allow the batter to ferment overnight for 8 to 9 hours.
The timing will vary depending on the temperature conditions in your city.
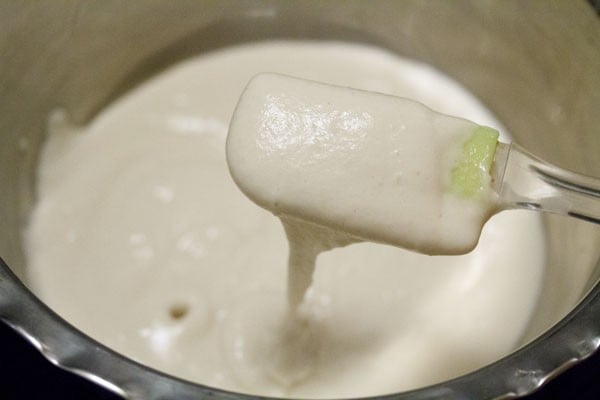
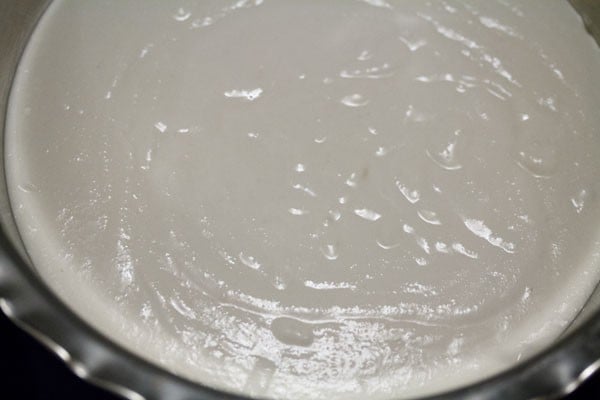
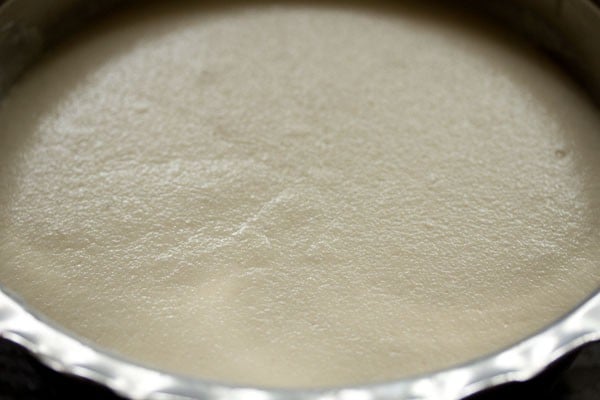
17. The below photo, shows the fermented batter the next day. The batter after fermentation will increase in volume and become double or triple.
You will also see many tiny air pockets in the batter with a pleasant sour aroma.
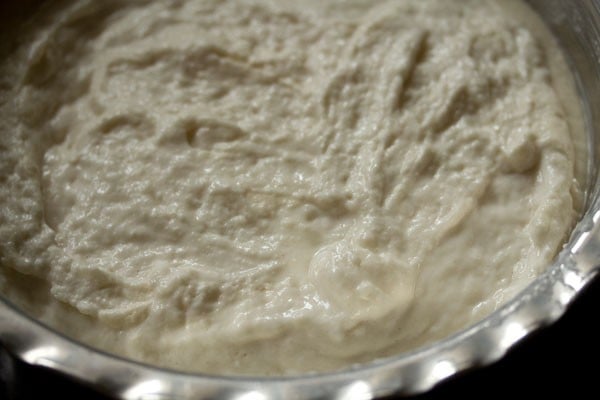
18. Just lightly stir the batter. Check the consistency. If the batter looks too thick, you can add about ⅛ to ¼ cup water or more, if required. Mix well.
Making Uttapam
19. Heat up tawa; cast iron pan or skillet.
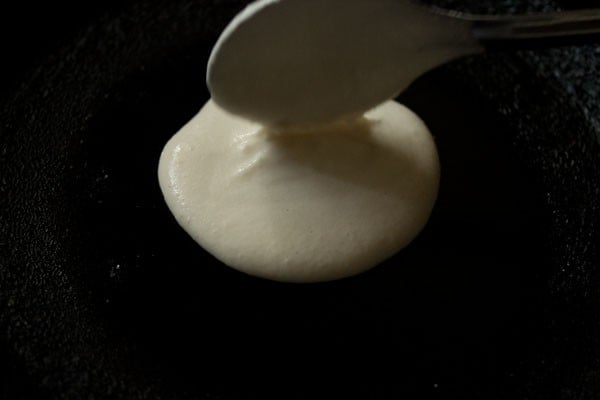
Brush or spread any neutral flavored oil on the skillet. Pour the batter with a ladle or spoon. For a non-stick pan, you need not grease the pan.
The skillet has to be hot. While making Uttapams, you can regulate the heat from low to high. Before pouring the batter, reduce the heat to low.
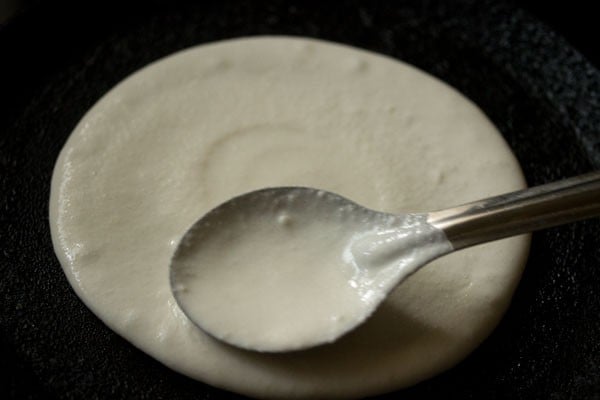
20. Gently spread the batter to a thick pancake.
21. Cook on medium heat. After spreading the batter, you can top the uttapam with the mix of onions, green chillies and coriander leaves.
You could also make a vegetable uttapam recipe by adding some grated carrots, beets, finely chopped bell peppers, tomatoes and shredded cabbage.
If you like cheese, add it once the uthappam is cooked on both sides. Top with grated cheese on the side topped with the veggies and cook until the cheese melts.
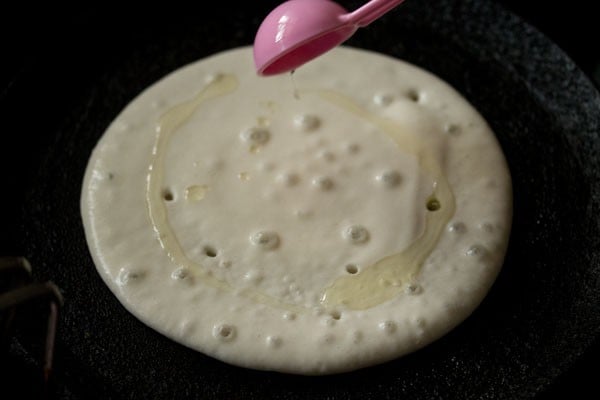
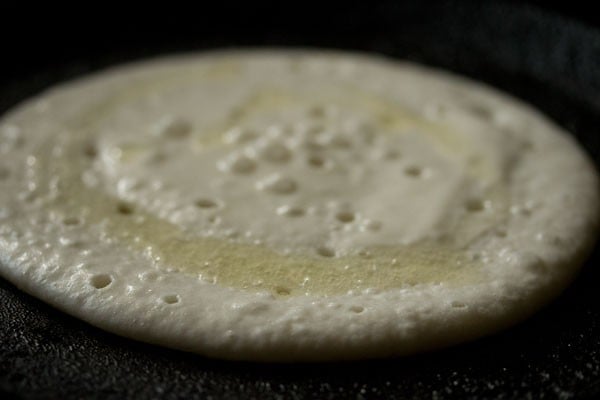
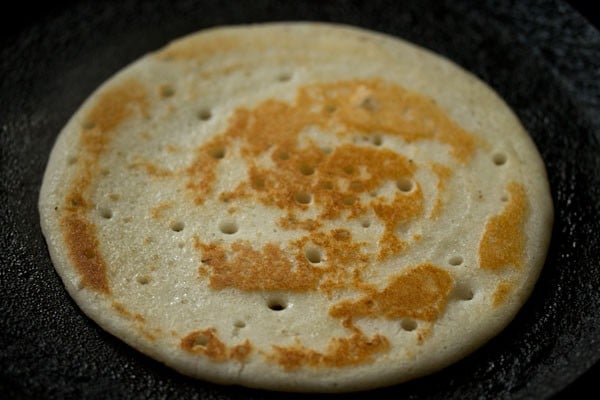
22. Drizzle some oil on the top and sides. You can also add butter or ghee, instead of oil.
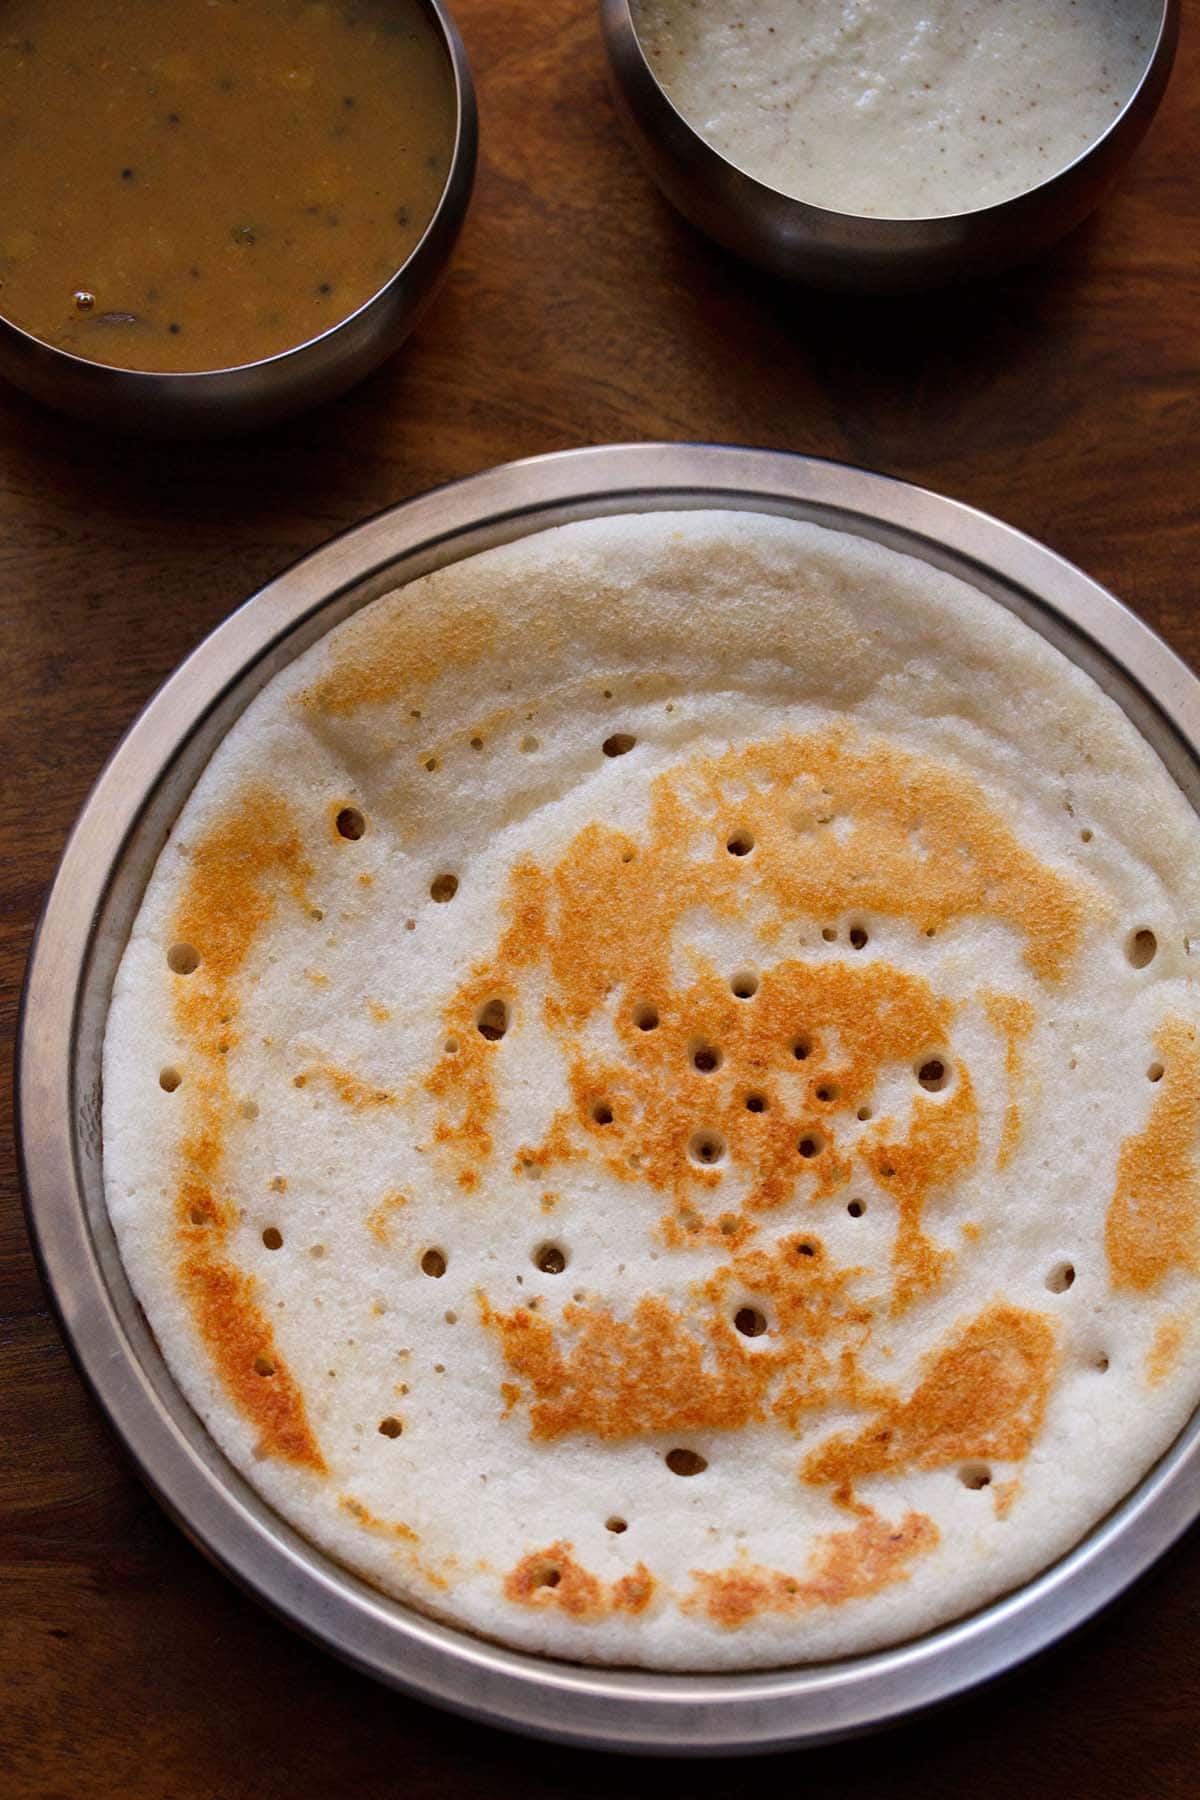
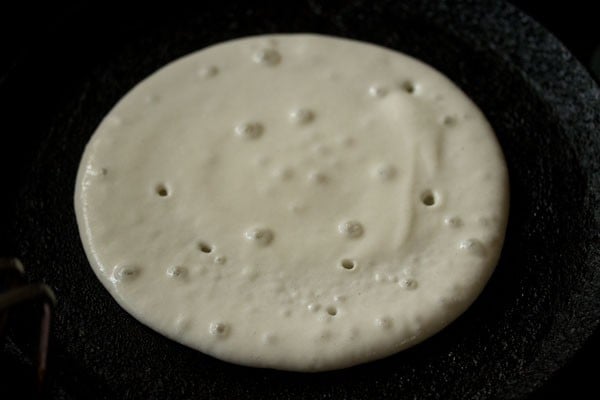
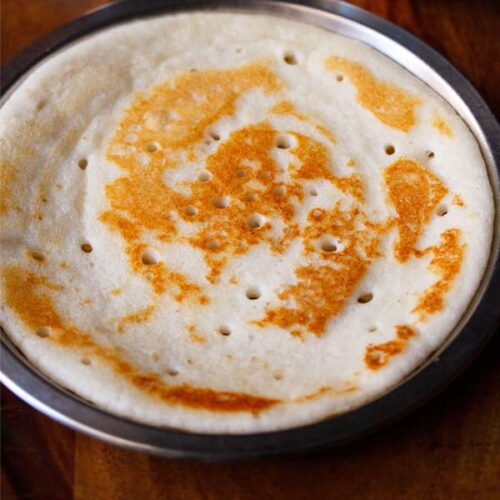
23. These pancakes take a longer time to cook than dosa. Cook until the base is golden.
24. Then, flip and cook the other side.
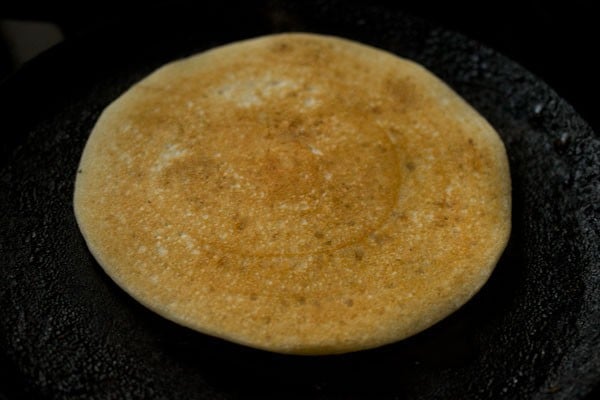
25. Both sides should be cooked well. Prepare them in the same way in batches with the rest of the batter.
Serve Uttapam straightaway after both the sides are golden and cooked thoroughly.
Serving & Storing Suggestions
Serve Uttapam hot or warm with coconut chutney and sambar. You can also pack in tiffin box as they remain soft even after cooling to room temperature.
Uthappam also make for a healthy and comforting evening snack paired with your favorite chutney and filter coffee.
Store the leftover batter in an air-tight container in the fridge. It keeps well when refrigerated for 2 to 3 days. Use up this batter to make either dosa, uttapam, paniyaram or appe.
Expert Tips
- Lentils: This recipe can be made with either husked, whole urad dal or husked, split urad dal. Ensure the lentils are fresh and in their shelf-life, and not aged or rancid.
- Type of pan: The best pan used to make these Uttapams is a cast iron pan. Or ensure using any other heavy skillet pan or tawa. The pan also has to be seasoned well. If not done so, the batter will stick to the pan.
- Choice of fat: You can use either oil, butter or ghee (clarified butter) in this recipe. Uthappam made with ghee or butter definitely taste better.
- Cooking: Make sure to cook on medium heat. Since these are thicker than dosas, they take more time to cook fully and evenly. Also, do not cook on high heat as this can lead to quick crisping and browning of the outside first, leaving the inside batter undercooked.
- Storage: The leftover batter keeps well in the refrigerator for a few days. Place it in an air-tight container and keep in the fridge. You can make dosa, uttapam, paniyaram or appe with this batter.
How To Ferment Batter Properly
- For proper fermentation of the batter, a warm temperature is paramount. In case you live in a colder climate or weather condition, keep the batter in a warm place or near the heater. Also, add about ¼ teaspoon sugar instead of the salt.
- The batter can be fermented in a lit oven as well. In case your oven doesn’t have a light, then preheat it till it’s warm. Then, turn off the oven and put the batter bowl inside.
- If you want to use your Instant Pot for fermenting the batter, then set to less mode using the yogurt function and cover with the Instant Pot glass lid. Don’t use the normal mode. When using the Instant Pot’s regular lid, put the valve in the venting position (not sealing position) or else the lid can get locked. Then, depending on the climate conditions of your city, set a time of 8 to 12 hours.
- The sign of a perfectly fermented batter is that it should increase or become double/triple in volume. Many tiny air pockets and a pleasant sour aroma in the batter should also be felt.
More Breakfast Recipes To Try!
South Indian Food Recipes

Breakfast Recipes
Breakfast Recipes
Breakfast Recipes
Please be sure to rate the recipe in the recipe card or leave a comment below if you have made it. For more vegetarian inspirations, Sign Up for my emails or follow me on Instagram, Youtube, Facebook, Pinterest or Twitter.
Uttapam Recipe | How To Make Uthappam
Ingredients
For Uttapam Batter
- 2 cups idli rice or parboiled rice, 400 grams
- 2 cups water – for soaking rice
- ½ cup urad dal – whole and husked, 120 grams
- 1 cup water – for soaking urad dal
- ¼ teaspoon fenugreek seeds (methi seeds)
- ½ cup water – for grinding urad dal or add as required
- ¾ cup water – for grinding rice or add as required
- 1 teaspoon rock salt (edible and food grade) or pink salt or sea salt – can add as required
- oil or ghee or butter – add as required
Topping Suggestions (Optional)
- 1 cup onions – finely chopped or sliced shallots or pearl onions
- 1 cup tomatoes – chopped
- 1 cup carrots – grated
- ½ cup capsicum – finely chopped
- ⅓ cup coriander leaves – chopped
- 12 to 15 curry leaves – chopped
- 2 to 3 green chilies – chopped
- Idli Podi or Sambar Powder or Pav Bhaji Masala, add as required, optional
Instructions
Soaking rice and lentils
- In a bowl take the usked whole urad dal and fenugreek seeds. You can also use split husked urad dal instead of husked whole urad dal.
- Rinse both the urad dal and methi seeds for a couple of times with water.
- Soak them in 1 cup water for 4 to 5 hours.
- In another bowl take the parboiled rice or idli rice. Rinse the parboiled rice or idli rice for a couple of times and set aside.
- Add 2 cups of water. Mix well and soak everything for 4 to 5 hours.
Blending and Fermenting Batter
- Strain the urad dal and reserve the water. Keep this water for blending/grinding the dal.
- Add the strained urad dal in the grinder or blender.
- First add ¼ cup of the reserved water and blend for some seconds. Then add the rest of ¼ cup water and continue to blend until the batter is light, smooth and fluffy. If the mixer becomes too hot while blending, then stop for a few minutes. Let the mixer cool down and blend again.
- Quantity of water depends on the freshness of urad dal. So add water as required.
- Pour the urad dal batter in a large bowl or pan. The batter should be fluffy, smooth and light.
- To the same blender or grinder, add half of the rice.
- Then add ¼ to ½ cup water and blend till smooth. A fine grainy consistency of rice is also alright. You can blend the rice in two to three batches.
- Pour the rice batter in the bowl containing the urad dal batter.
- Add 1 teaspoon rock salt or as per taste. In very cold temperatures, avoid adding salt. Instead add ¼ teaspoon sugar. Sugar aids in the fermentation process.
- Mix both the batters very well with a spoon or spatula.
- Cover and allow the batter to ferment overnight for 8 to 9 hours. The timing will vary depending on the temperature in your city.
- The batter should increase in volume and double or triple. It will also have a pleasant sour aroma and many tiny air pockets.
- Simply lightly stir the batter. Check the consistency. If the batter looks too thick, you can add about ⅛ to ¼ cup water or more if required. Mix well.
Making Uttapam
- Heat up a tawa or a cast iron pan, brush or spread some oil on the tawa. Pour the batter with a ladle or spoon. For nonstick pan, you need not grease the pan. The tawa has to be hot. While making uttapams, you can regulate the heat from low to high. Before pouring the batter, reduce the heat to low.
- Gently spread the batter to a thick pancake. Note that the quantity of batter to make uttapam will be more than what you would normally use for a dosa. The uttapam must be thick.
- At this point, after spreading the batter on the tawa/griddle, you can consider add veggie toppings of chopped onions & tomatoes, grated carrots or beets, finely chopped capsicum and herbs like coriander leaves, curry leaves and green chilies.
- Cook them on a medium heat. Drizzle some oil on the top and sides.
- These pancakes takes a longer time to cook than dosa. Cook until the base is golden.
- Then flip and cook the other side.
- Both sides should be cooked well. Prepare more uthappam this way with the rest of the batter in batches.
- If there is any leftover batter, store it in the refrigerator. It keeps well for a few days. You can also make paniyaram or appe with this batter.
- Serve Uttapam hot or warm with coconut chutney and sambar. You can also pack them in tiffin box as they remain soft even after cooling.
Video
Notes
- Type of Pan: Use a heavy tawa or skillet when making uttapam. A cast iron pan works very well. But make sure that your skillet or pan is seasoned or else the batter will stick to the pan.
- Cooking: Cook on a low to medium heat. Uttapam takes a little more time to cook than dosa, as they are thick.
- Grinding or Blending Rice: I usually blend rice in two batches. For rice I always end up adding about ¾ cup water and a few tablespoons more at times.
- Fat: They can be made with either oil or ghee or butter. But they taste better when made with ghee or butter.
- Fermentation Tips:
- A warm temperature is very crucial for fermentation of the batter. If you live in a cool place or a cold city, then keep the batter near a heater or in a warm place.
- You can keep the batter in a lit oven. If you do not have a light in the oven, then preheat the oven for 5 to 7 minutes till it is warm. Turn off the oven and place the bowl inside the oven.
- You can even ferment the batter in an Instant Pot. Using the yogurt function, set to less mode. Do not use normal mode. Cover with the Instant Pot glass lid.
- If you use the Instant Pot regular lid then keep the valve in the venting position (not the sealing position) as the lid can get locked. Set a time of 8 to 12 hours depending on the temperature in your city.
Nutrition Info (Approximate Values)
This Uttapam Recipe from the archives was first published on December 2015. It has been updated and republished on June 2024.


Thank you. Your recipes are easy to follow and authentic.
Thank you and welcome.
very very very tasty.
Thanks the nice recipe. Vegrecipes is the best recipe site for South India. Great format of recipe – quick to learn – no need to call anybody to understand the recipes.!! Great service to cooking.
Welcome Vikas. Thanks for your positive feedback and kind words.
I want recipe for thatte idli that is famous in Bangalore
have taken the recipe request on file.
Hi ma’am, your recipes turn out perfect as always. I just want to know if we can add onion and coriander in to the batter and then spread it out on tawa?
thanks kiran. you can add coriander leaves in the batter. but if you add onions, it can be difficult spreading the batter. so i would suggest to finely chop the onions and add.
Perfect Utthapam recipe… Thanks!!
thanks ruchi.
It’s good recipe
this recipe was awesome!!!!!!!!!!!!!
thank you so much.
welcome shruti
Made it this evening for dinner. Turned out to be very nice and tasty. Thanks for posting the recipe.