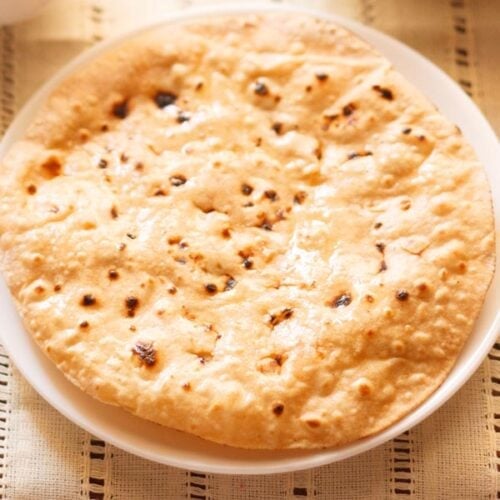
Whether you call this everyday staple Indian bread, Roti or Phulka or Chapati, one thing remains unchanged: it is a humble, comforting and satisfying food that is made in nearly every part of India. Roti is an unleavened flatbread made with just a handful of ingredients – finely milled whole wheat flour, water and optionally ghee or oil and salt. It goes perfectly with just about every Indian entrée you can think of. I share 3 ways of making roti recipe.
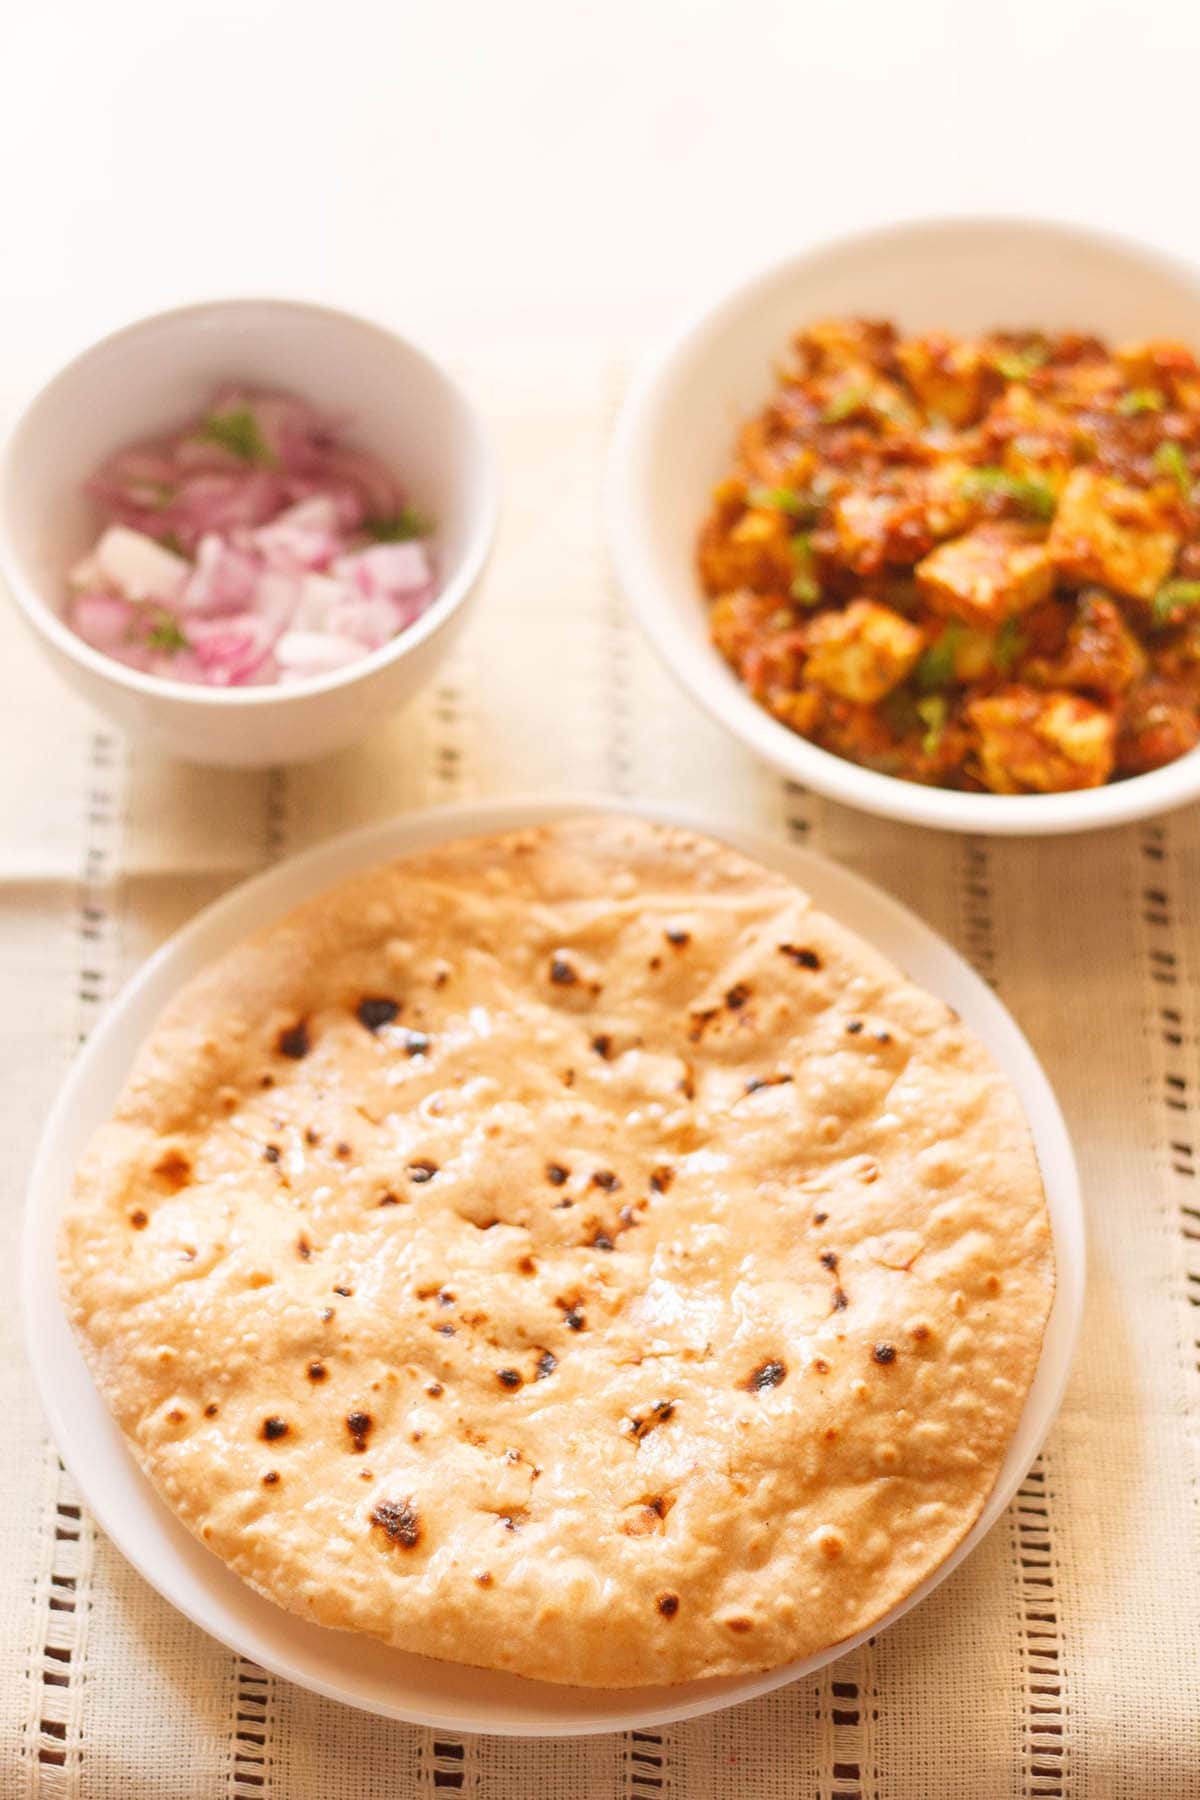
Table of Contents
What is Roti
The flatbread known as roti has many variations all over different regions of India. Whereas I call this particular type of roti, phulka, hubby just refers to them as roti. Toe-may-toe, toe-mah-toe, phulka or roti. Either way is correct!
That said, much like the word “bread” can mean everything from a slice of sandwich bread to a French baguette, roti is also a broad category of flatbreads. While all phulkas are rotis, not all rotis are phulkas.
As far as the dough is concerned the same dough is used to make roti, phulka and chapati. This basic simply consists of whole wheat flour, salt and water. Fats like oil or ghee are optionally included. I prefer to add some oil or ghee in the dough as it makes these flatbreads soft.
Other types of roti varieties include Missi Roti, Rumali Roti, Ragi Roti, and Tandoori Roti, among others. All these roti variants taste different as they are made with different grain flours (like millet); or have various unique seasonings; mashed or chopped greens like spinach; or herbs added to the dough.
What is Chapati
A chapati is a very rustic version of the traditional roti recipe. The word “chapati” is derived from a Hindi and Marathi word “chapat” which means “flat” or “slap”. Instead of rolling out the dough, traditionally chapatis were flattened by hand by slapping portions of the wheat dough.
Of course, it is time consuming to flatten the chapati this way, so nowadays a rolling pin is often used. A chapati can be also thin or medium rolled, much like phulka. While a phulka is smaller in size, a chapati is larger in size.
Chapati are only roasted on the skillet or tawa. While roasting they may puff or not. Roasting them with oil or ghee is also optional. Again after being roasted, it is optional to brush them with fats like ghee or oil.
For roasting chapati, it is best to use a tawa or skillet made of cast iron or iron as these retain heat. Most Indian homes use an iron or a cast iron tawa when making chapati recipe.
What is Phulka
Phulka is a Hindi word, which means to puff. These roti gets puffed up when exposed to dry heat, hence the name. This puffing up can be achieved either on a direct flame or on a tava, which is a concave flat pan for making roti.
Mostly, to make phulka, first the roti is partially cooked on the skillet and then placed over a stove-top flame which helps it to puff.
They have a spectrum of thickness that is considered acceptable, from the very thin phulkas of Gujarat (called rotli) to a more medium-thickness roti as I make here.
The phulka can be smeared with ghee or oil for serving. In my home, we definitely enjoy a bit of ghee on our roti. It is one of our favorite things to eat with veggie dishes like aloo gobi, aloo matar, bhindi masala, lauki kofta or with dals like dal fry, dal tadka, or dal makhani.
What Kind Of Wheat Flour For Roti
These flatbreads are always made from whole wheat flour and water, though ghee and salt may or may not be added. I prefer adding some salt and ghee to the dough for a bit of extra flavor and a more tender result.
The whole wheat flour used for making these flatbreads is known as “atta” in India. Even today, many Indians make their own atta by visiting local grinding mills (called chakki in Hindi). The wheat grains are stone ground making for a really fine flour.
If you do use the wheat flour milled in the United States or Europe or any other country, then sift the flour once or twice to get rid of the bran. Atta is finely milled and ground than the wheat flour that is available outside India.
The best, softly textured roti comes from the Sharbati wheat that is cultivated and grown in the Madhya Pradesh state. I use this Sharbati atta to make roti, and if it is possible for you to get your hands on some, I highly recommend it.
Living outside India? Buy atta from an Indian grocery store or from Amazon or other Indian online stores. Preferably use sharbati atta to get soft and tender roti and also try to get organic atta.
As the roti or chapati recipe is made from whole wheat flour, they are both healthy and easy to digest. In this post, I will explain the basic method of making roti or phulka in 3 ways so you can have this yummy Indian staple at home. Let’s get started!
Knead and Roll Roti Dough
1. Take 3 cups of whole wheat flour (atta) in a bowl. Add about 1 teaspoon of salt or according to taste. Add a bit of water and 1 to 2 tablespoons ghee or oil and start mixing.
For the oil you can use sunflower oil, avocado oil, grapeseed oil, rice bran oil and also peanut oil.
You can measure and keep about 1 to 1.25 cups of water that you will be needing depending upon the quality of the flour.
3 cups of flour might be difficult to handle and work upon. So you can reduce the quantity of flour if needed.
Note:
1. If your whole wheat flour has a lot of bran then sieve it.
2. I am showing the process of kneading the dough with hands. But feel free to knead the roti dough in a stand mixer.
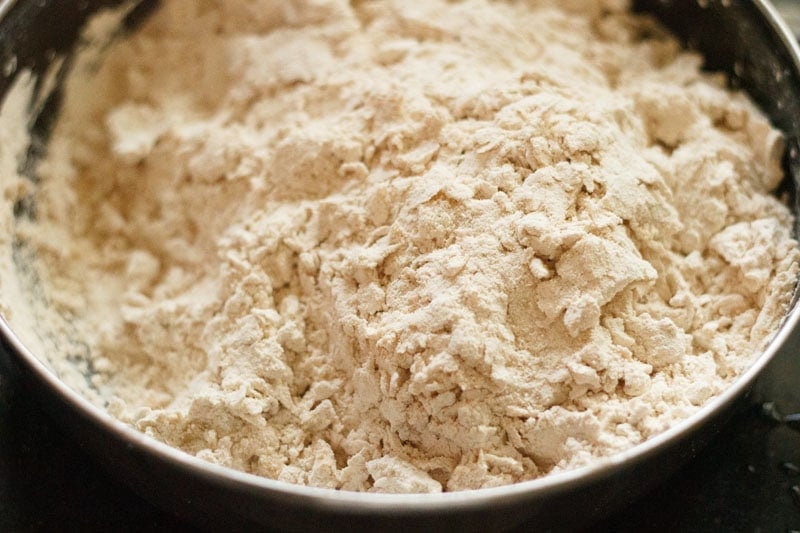
2. Adding water to the dough in parts, begin to knead the dough.
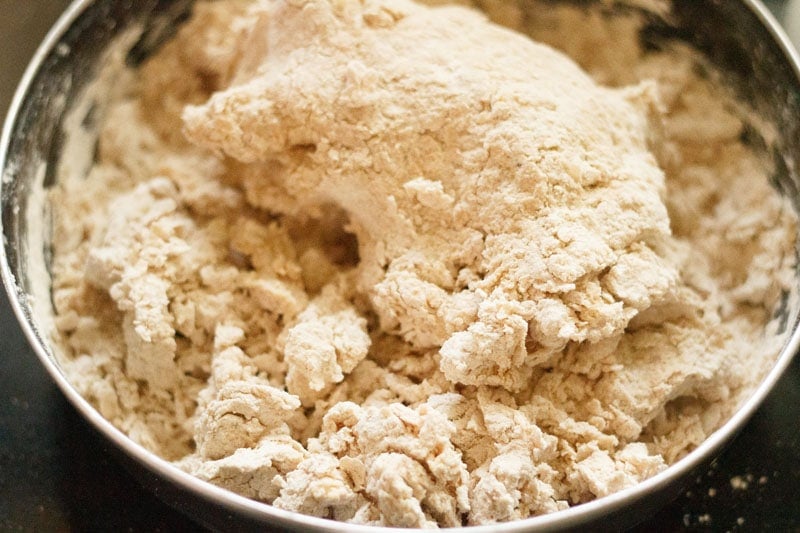
3. Continue to knead the dough. Keep adding water as required, knocking the dough down as you knead to create more gluten.
Tip: If you add all the water at once, then the flour will become too sticky to handle. So add in parts as needed.
At the final stage of kneading the dough, some people prefer to throw the dough from a height of approximately 1 to 2 feet to the bowl while kneading. This helps in making the dough soft.
I personally prefer to apply pressure from my fist rather than using the throwing method. In the pic below you can see the hand posture which is used to knead the dough.
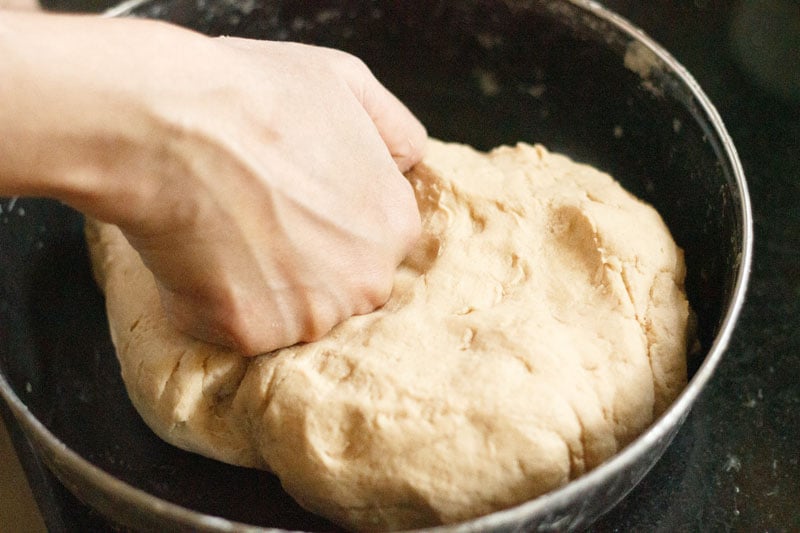
4. Keep on kneading till the dough becomes pliable and soft. The final dough consistency should be neither sticky nor hard. The dough for rotis is more softer than the dough kneaded for Poori (Indian Fried Bread).
After kneading the dough, cover it with a plate or cloth and allow it to rest for 20 to 30 minutes. While you can make the roti straight away after kneading the dough, this 30 minute waiting period helps the gluten relax, which makes it easier to roll out.
Note: You can also use a stand mixer or roti maker appliances to knead the dough if you prefer.
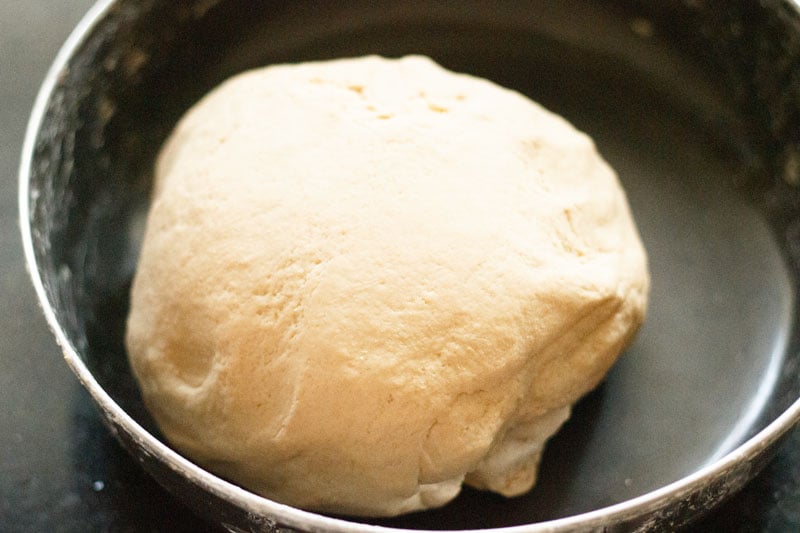
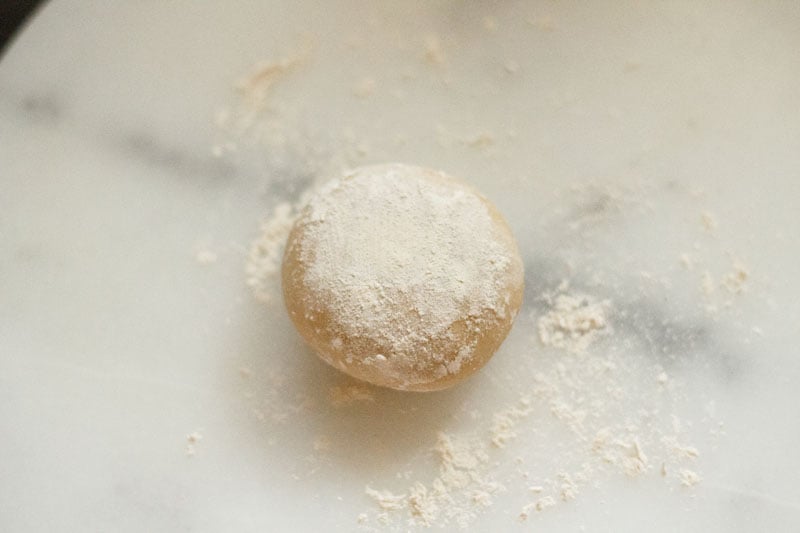
5. Now make small to medium balls of the dough. Roll the balls in the palms of your hands to smoothen it. Flatten the ball and place them on a rolling board or a clean kitchen countertop.
Sprinkle some whole wheat flour on the dough ball. Alternatively, you can also dust the rolling board with flour.
7. Turn on the gas stove and put the tawa to make it hot. The tawa has to be sufficiently hot to make soft roti. I generally make rotis on a medium-high flame.
NOTE: On “sim” or low flame, the roti become hard; and on a very high flame they cook too fast. So regulate the temperature while making the roti.
So how do you find out if the tawa is hot enough to make roti? We sprinkle little whole wheat flour in tawa or griddle. If it darkens quickly then the tawa is ready to make roti.
8. While tawa is getting hot, start rolling the dough ball into a flat round circle.
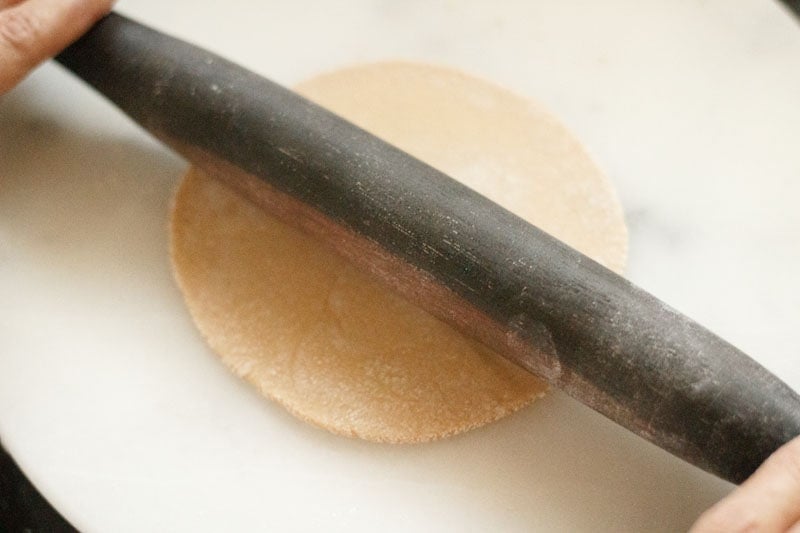
9. Keep on rolling till you get an even circle as shown in the picture below. Making the roti round is not easy!
With practice, you will be able to roll them round, but if they are a little misshapen at first, they will still taste good. Sprinkle some wheat flour if the dough begins to stretch or become sticky while rolling.
The trick to rolling round roti is that when you are rolling the dough then the roti should also be moving in a circular direction.
Also make sure that the rotis are not too thick, as they will take too much time to cook and will not puff up as they should
Note: While rolling the dough, do not coat it with too much of the dry wheat flour. The flour should be lightly used and just enough to help you with the rolling. Too much flour on the rolled roti dough will make for a denser texture. The dry flour particles also burn while roasting and stick to the outer surface of the roti.
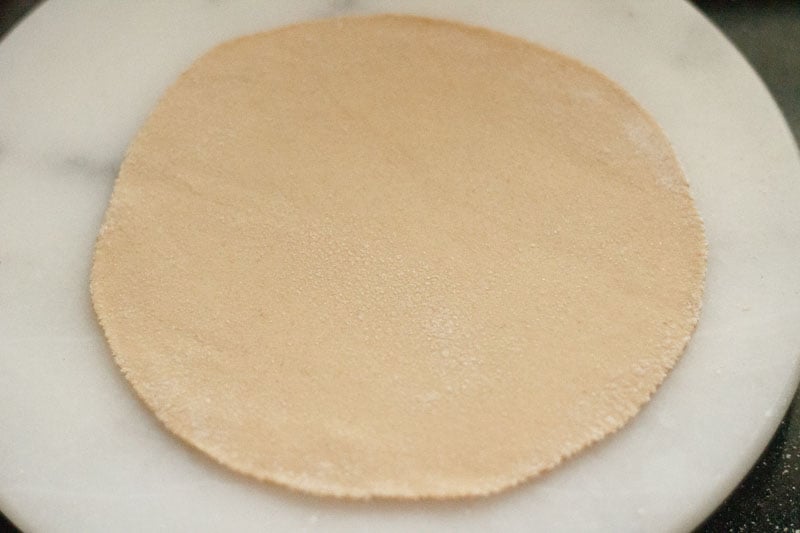
How to make Phulka
10. Now put the roti on a hot tawa or skillet or griddle.
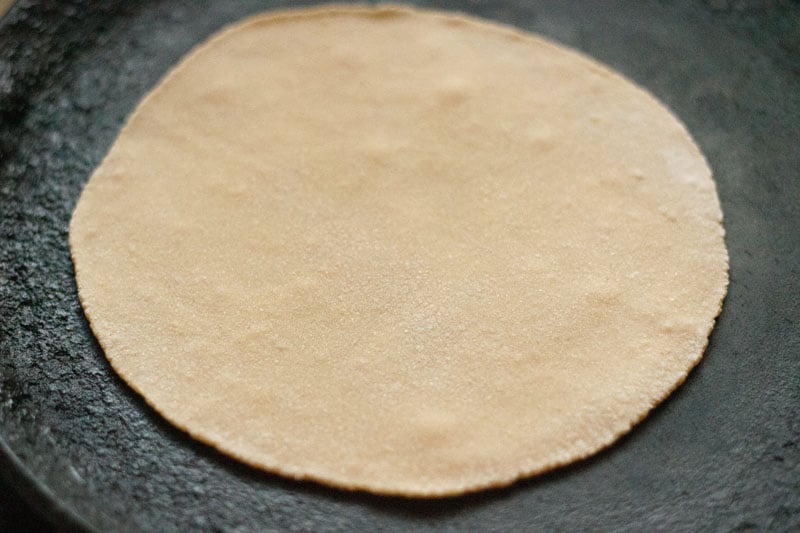
11. First cook one side. It should be about one-fourth cooked, as shown in the photo below. You will see some air pockets forming on the rolled dough.
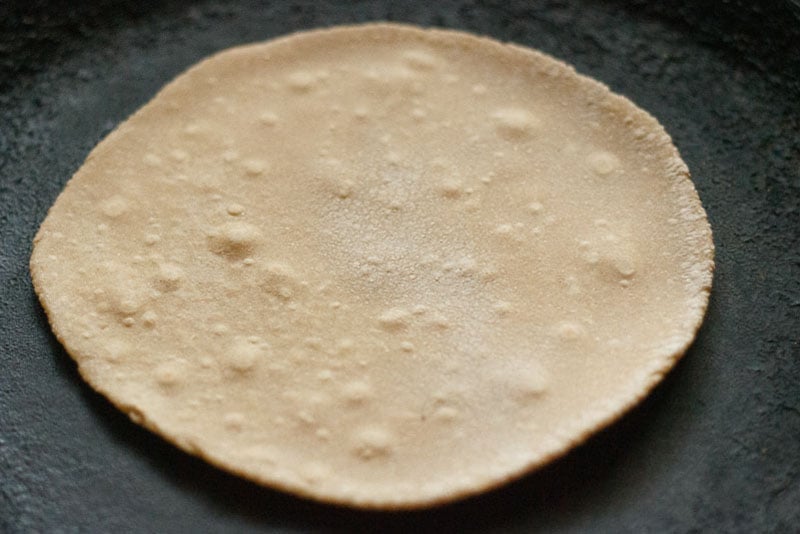
12. Turn with the help of tongs and cook the other side. This should be a little bit more cooked than the first side. Brown spots should be visible. The photo below shows the roti ready to put on fire.
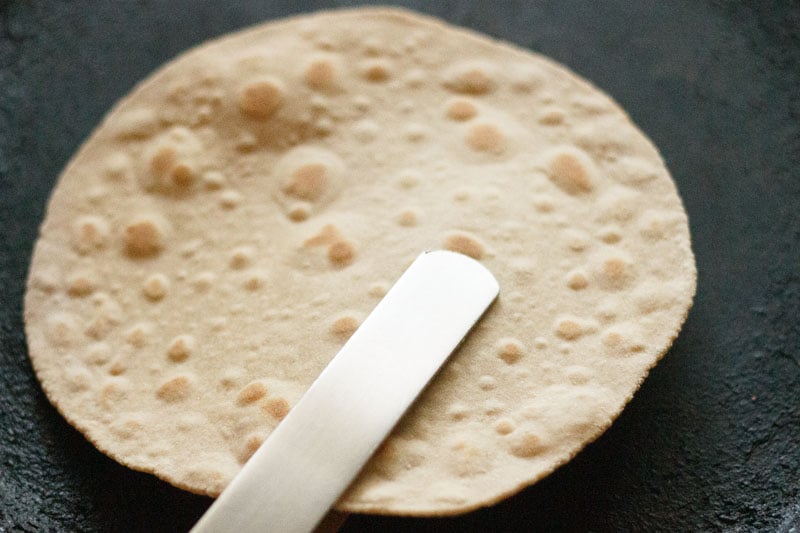
13. Now hold the roti with a tong and place the first side which was one-fourth cooked directly on the fire. It will start to puff.
TIP: If you have an induction stove-top, then keep a holdable baking rack (a baking rack with a handle) on top of the stove or place it in your hands. Keep the half cooked roti on the baking rack and let it puff from the heat of the induction stove. Flip it with tongs or spatula and cook the second side.
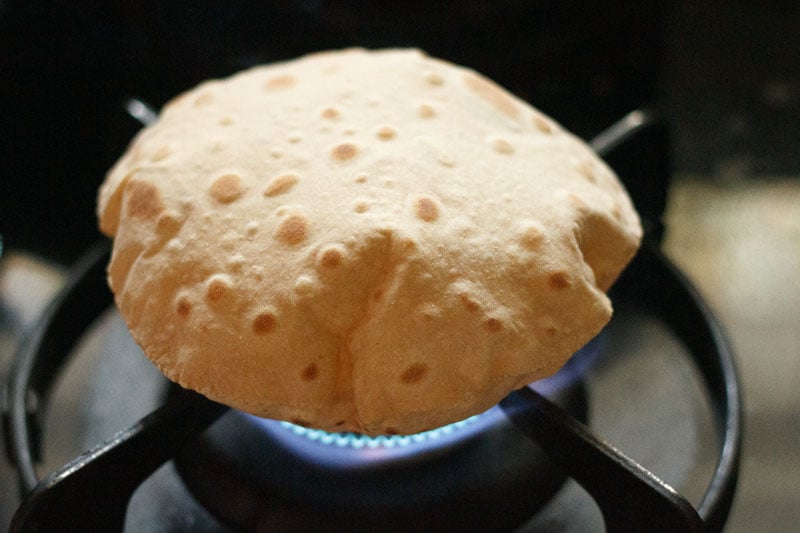
14. Turn and keep the other side on fire. The roti will puff more. Avoid burning or overcooking the rotis, as they will become crisp and hard like papad.
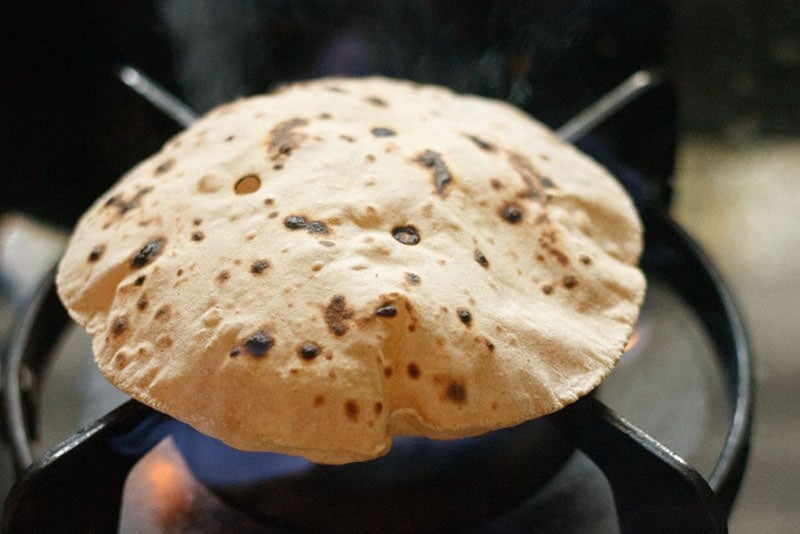
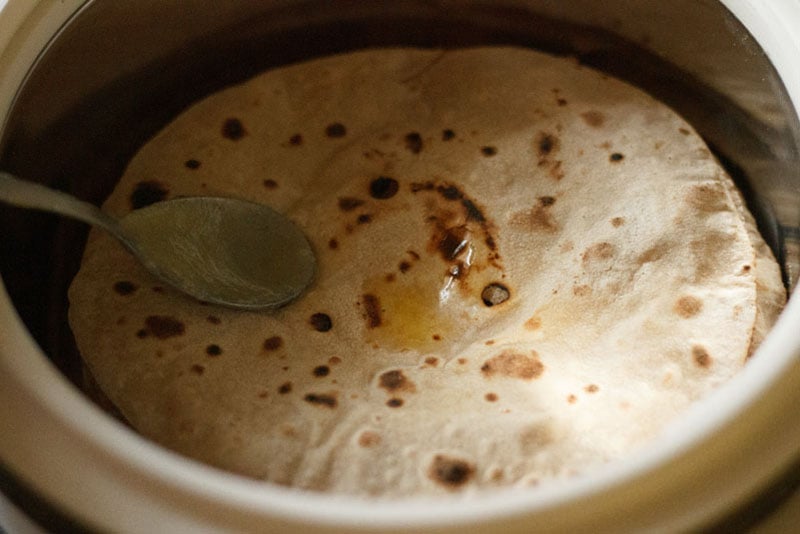
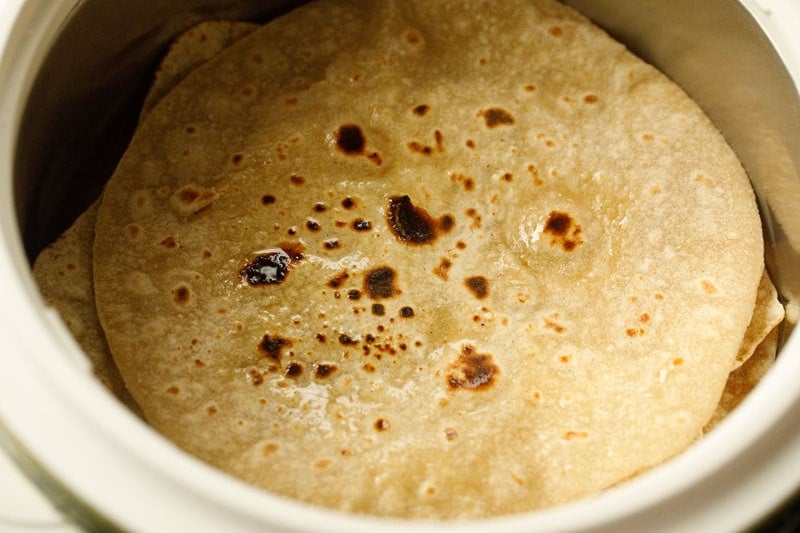
15. Remove and place in a roti basket if not serving immediately. Apply ghee or oil on the roti. Applying or brushing the phulka with any of these fats keeps them soft for a long time.
Roti made with this method is ideally served hot. If you cannot serve them hot, then you can keep them in a container that keeps food warm like a casserole or in a roti basket. You can also wrap them up in a kitchen towel or napkin.
How to make Tawa Roti
Here I show you to cook and puff the roti or phulka on tawa or skillet. This is helpful if you have an induction stove-top.
1. Place the rolled roti dough on a hot tawa or skillet. Keep the heat to medium-high or high. Within some seconds you will see air pockets forming on the raw chapati dough.
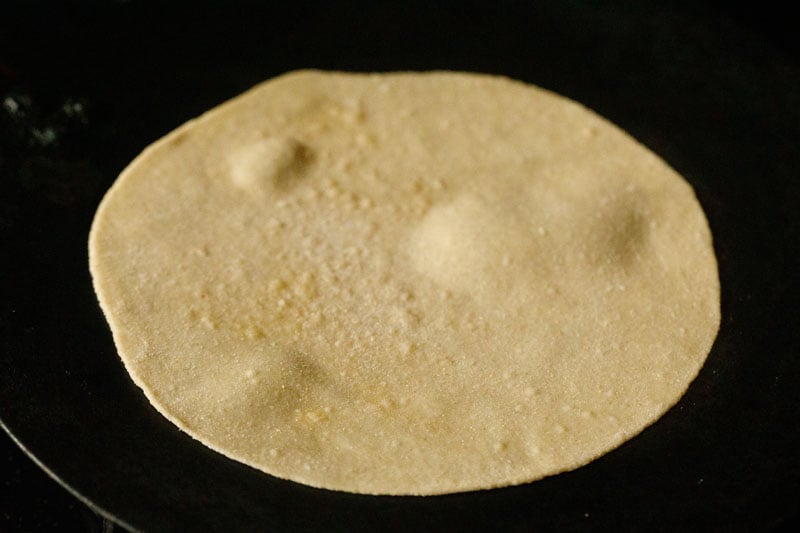
2. Roast for about 30 seconds or so and you will see the air-pockets increase on the surface.
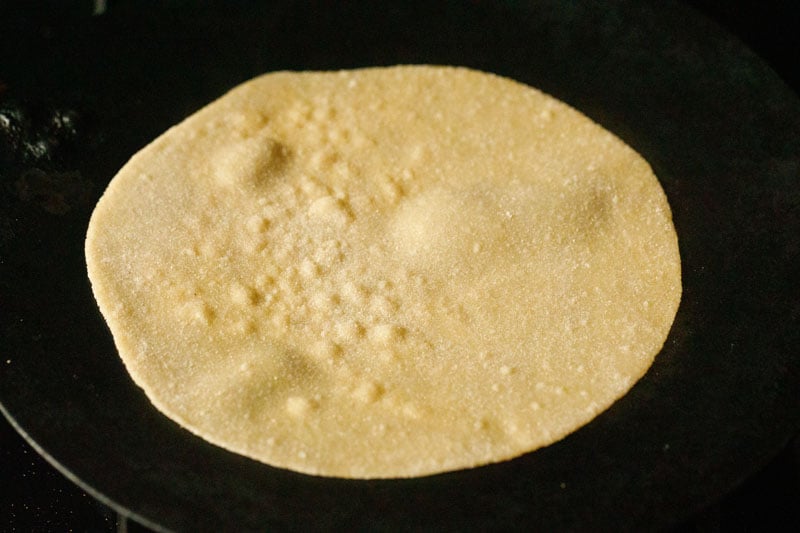
3. Flip with a spatula or tongs.
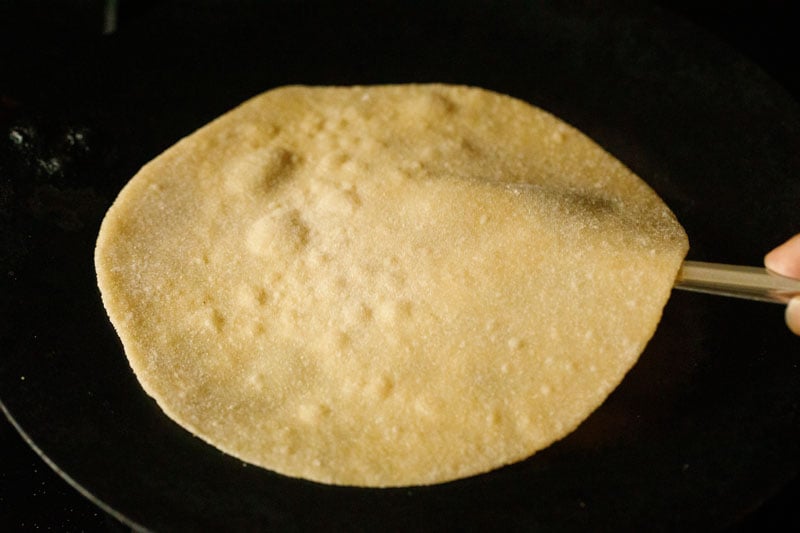
4. Roast the second side for about a minute.
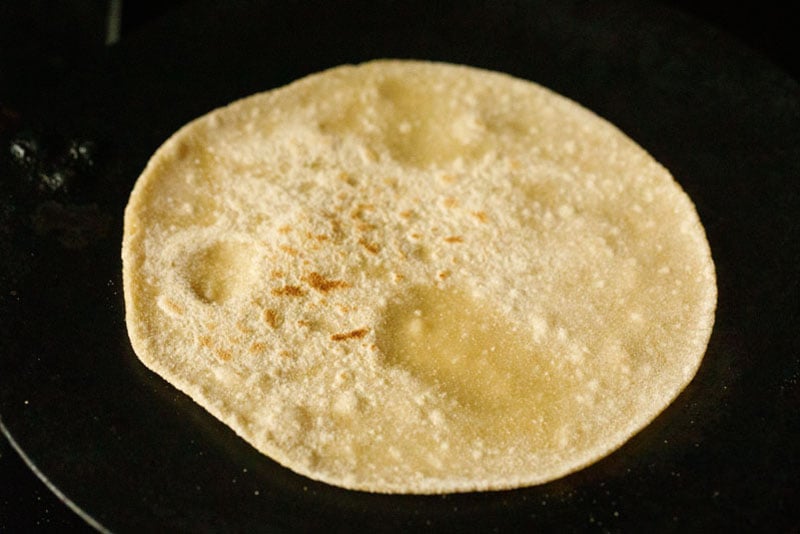
5. Flip again. This second side will be cooked slightly more with some visible brown spots.
NOTE: I am giving approximate timing that can take to roast the roti. The actual timing will vary as it depends upon the thickness of the roti, the intensity and pressure of the flame and thickness and quality of the skillet or tawa.
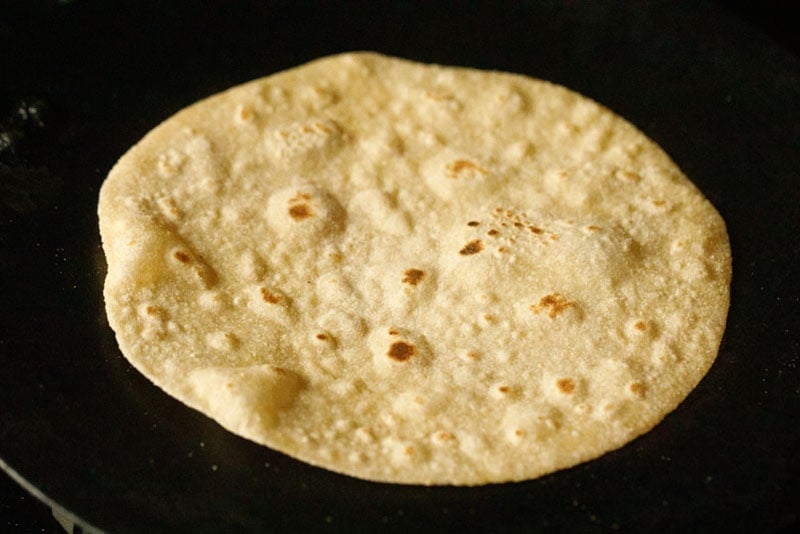
6. Now with a clean folded cotton kitchen napkin or a spatula, begin to press the partially cooked dough on all sides and center.
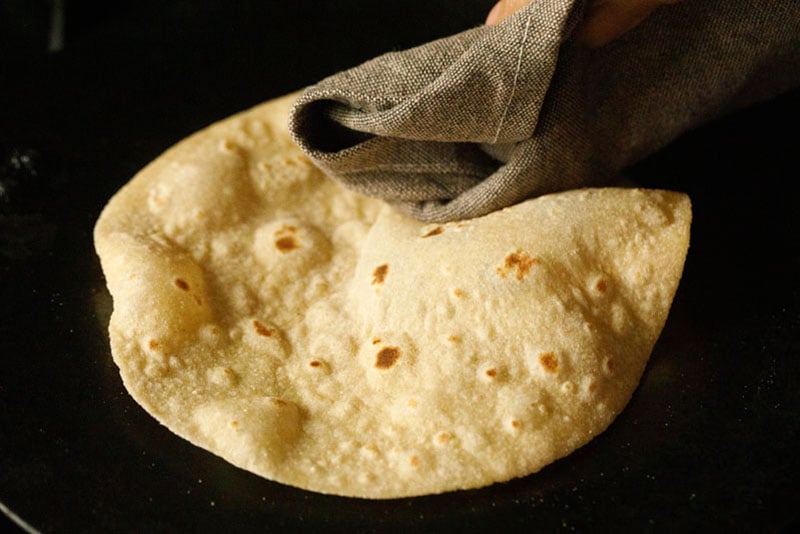
7. Pressing and nudging the chapati gently all over its surface, helps to puff it up.
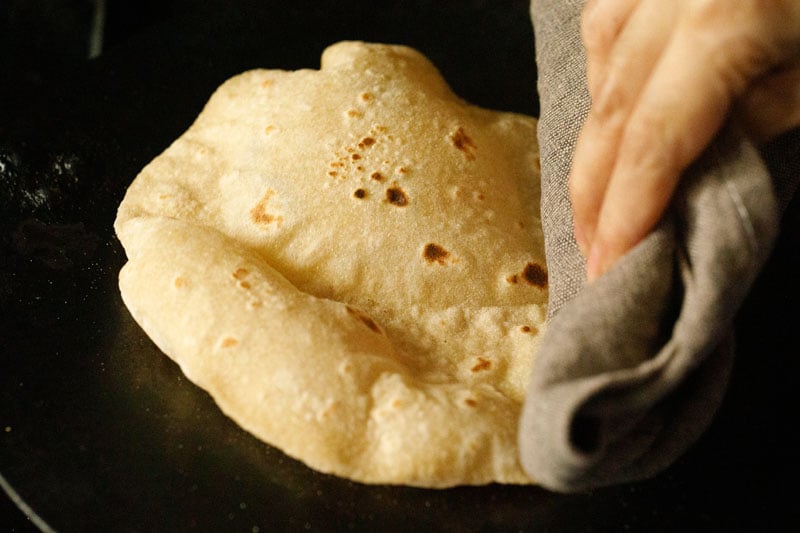
8. Keep on pressing all over, especially the flat portions, so that the entire roti gets puffed up well.
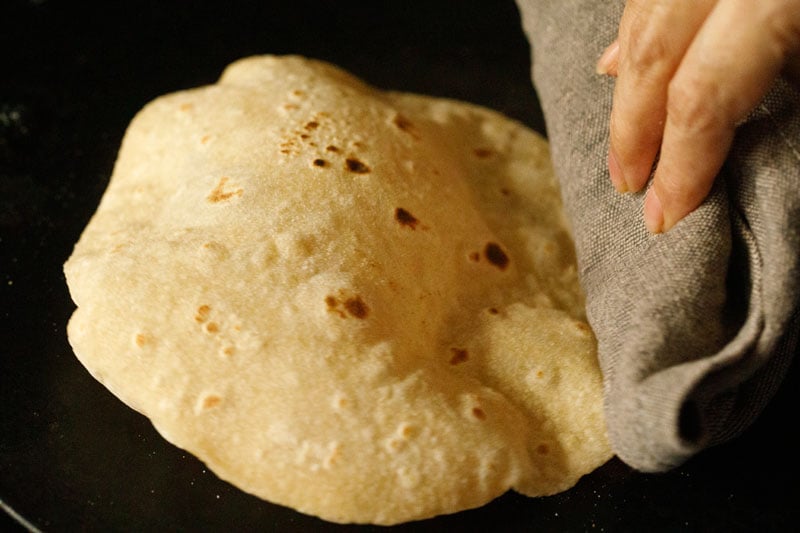
9. Below you see a nicely puffed phulka roti on a tawa. If you want you can flip again and cook the second side too for some seconds.
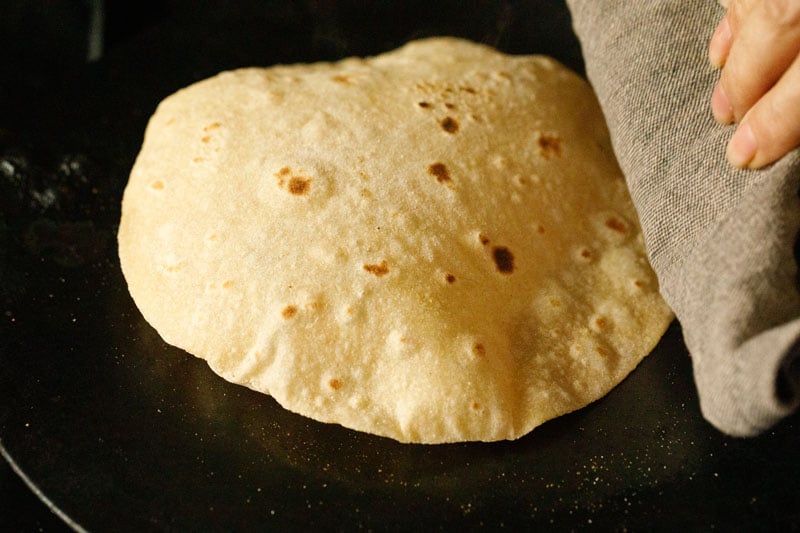
10. Place the soft and puffed roti in a roti-basket and spread or brush some oil or ghee on top.
How to Make Chapati
1. Transfer the rolled chapati dough on a hot tawa or skillet.
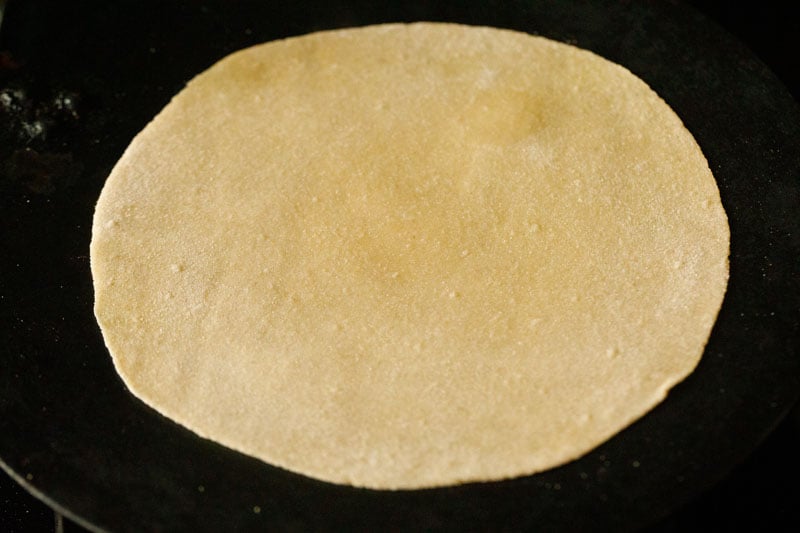
2. Cook for about 30 seconds or so until you see some air pockets all over. Note that the timing will change or vary with the kind of skillet you are using, the chapati thickness and the intensity of the flame.
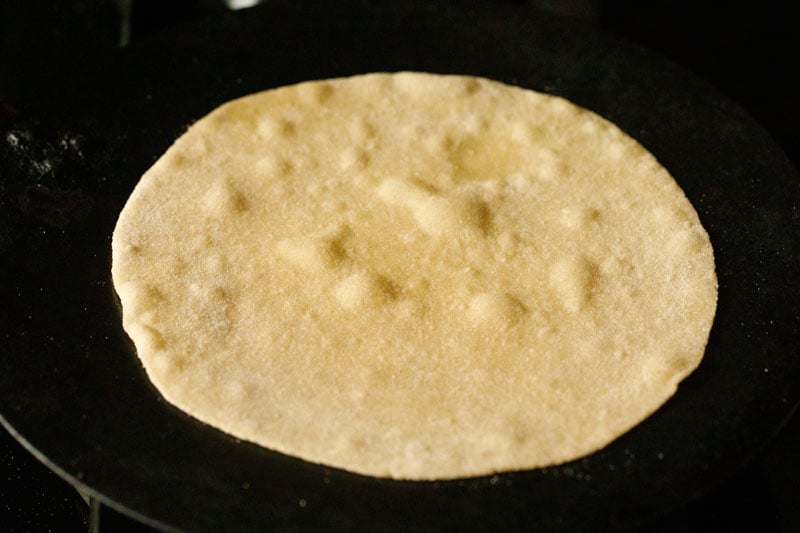
3. Flip the chapati and spread some oil all over while the second side is getting roasted. Cook the second side for about 45 seconds to 1 minute.
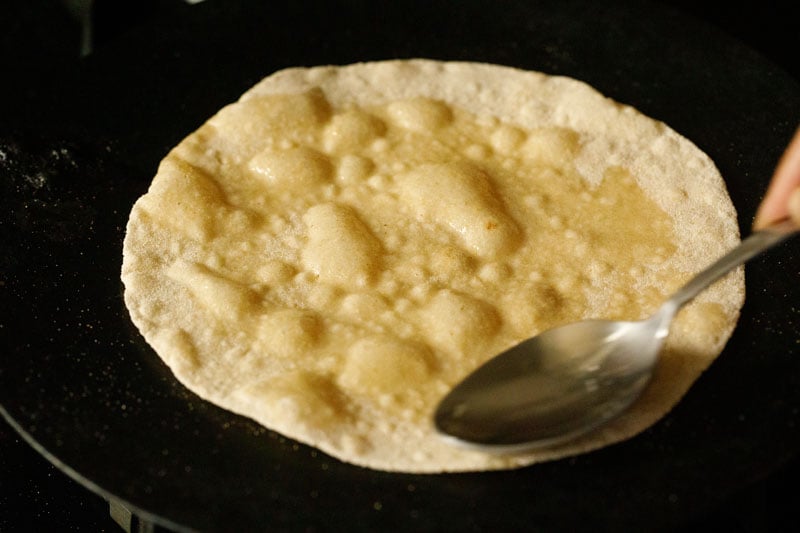
4. Flip the chapati again with a spatula. You will see that the second side is well roasted with some blisters and brown spots.
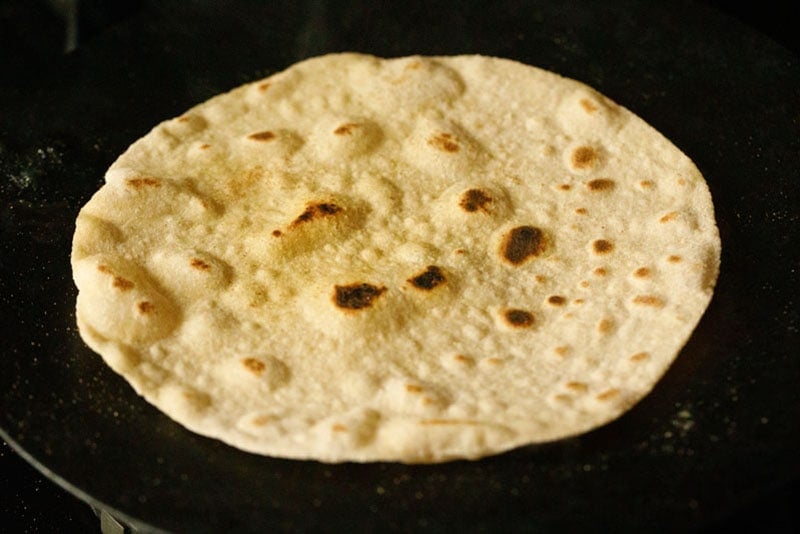
5. Spread some oil on this cooked side meanwhile the first side is getting roasted again. Roast the first side again for about 20 to 30 seconds.
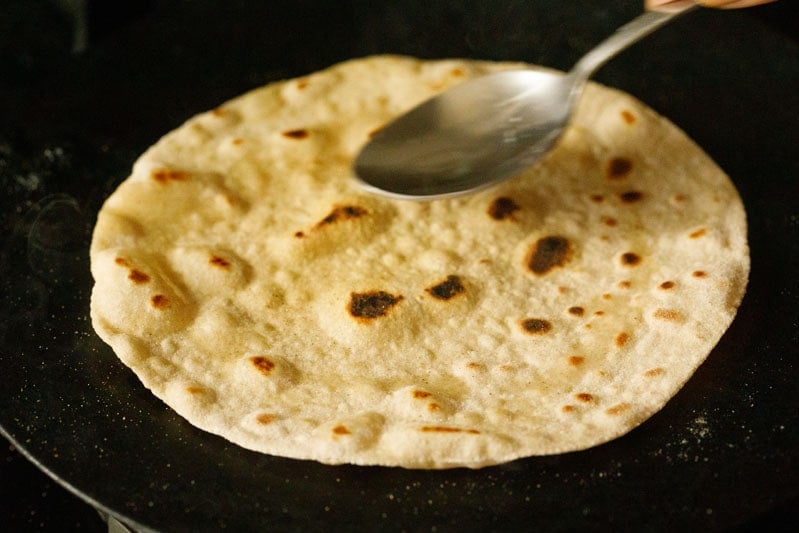
6. Press the edges with a spatula while cooking the second side of the chapati.
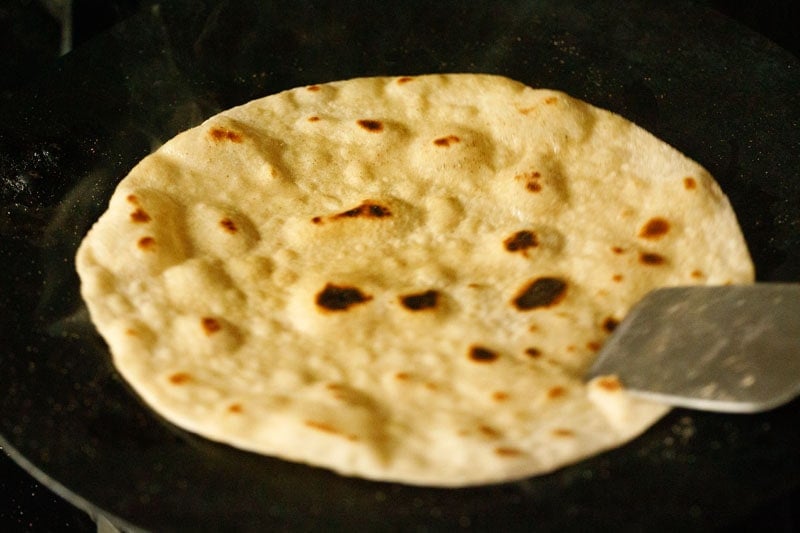
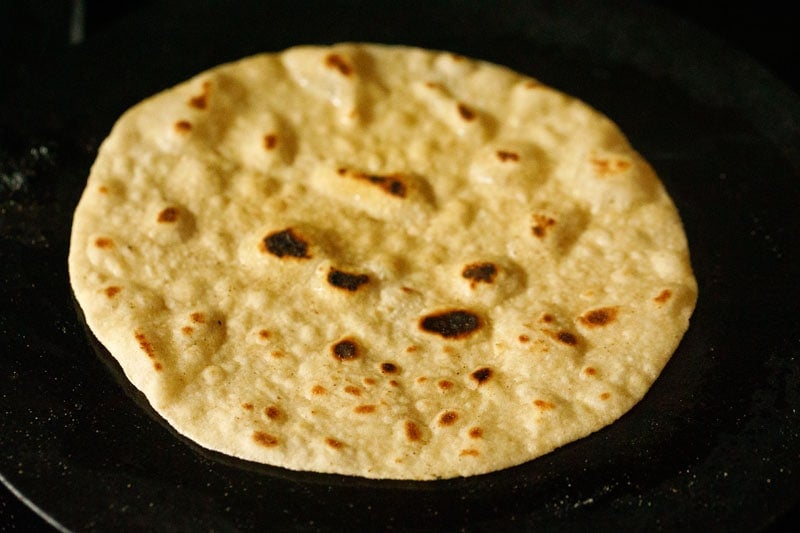
7. Below photo is of the cooked chapati. Make chapati with the rest of the dough in this manner and store them in a chapati container or box.
Chapati is roasted this way with oil or ghee tastes different and more like parathas, than the fire-roasted phulka or roti puffed on tawa. Everyone has a different preference. So make what you and your family like.
Serving Suggestions
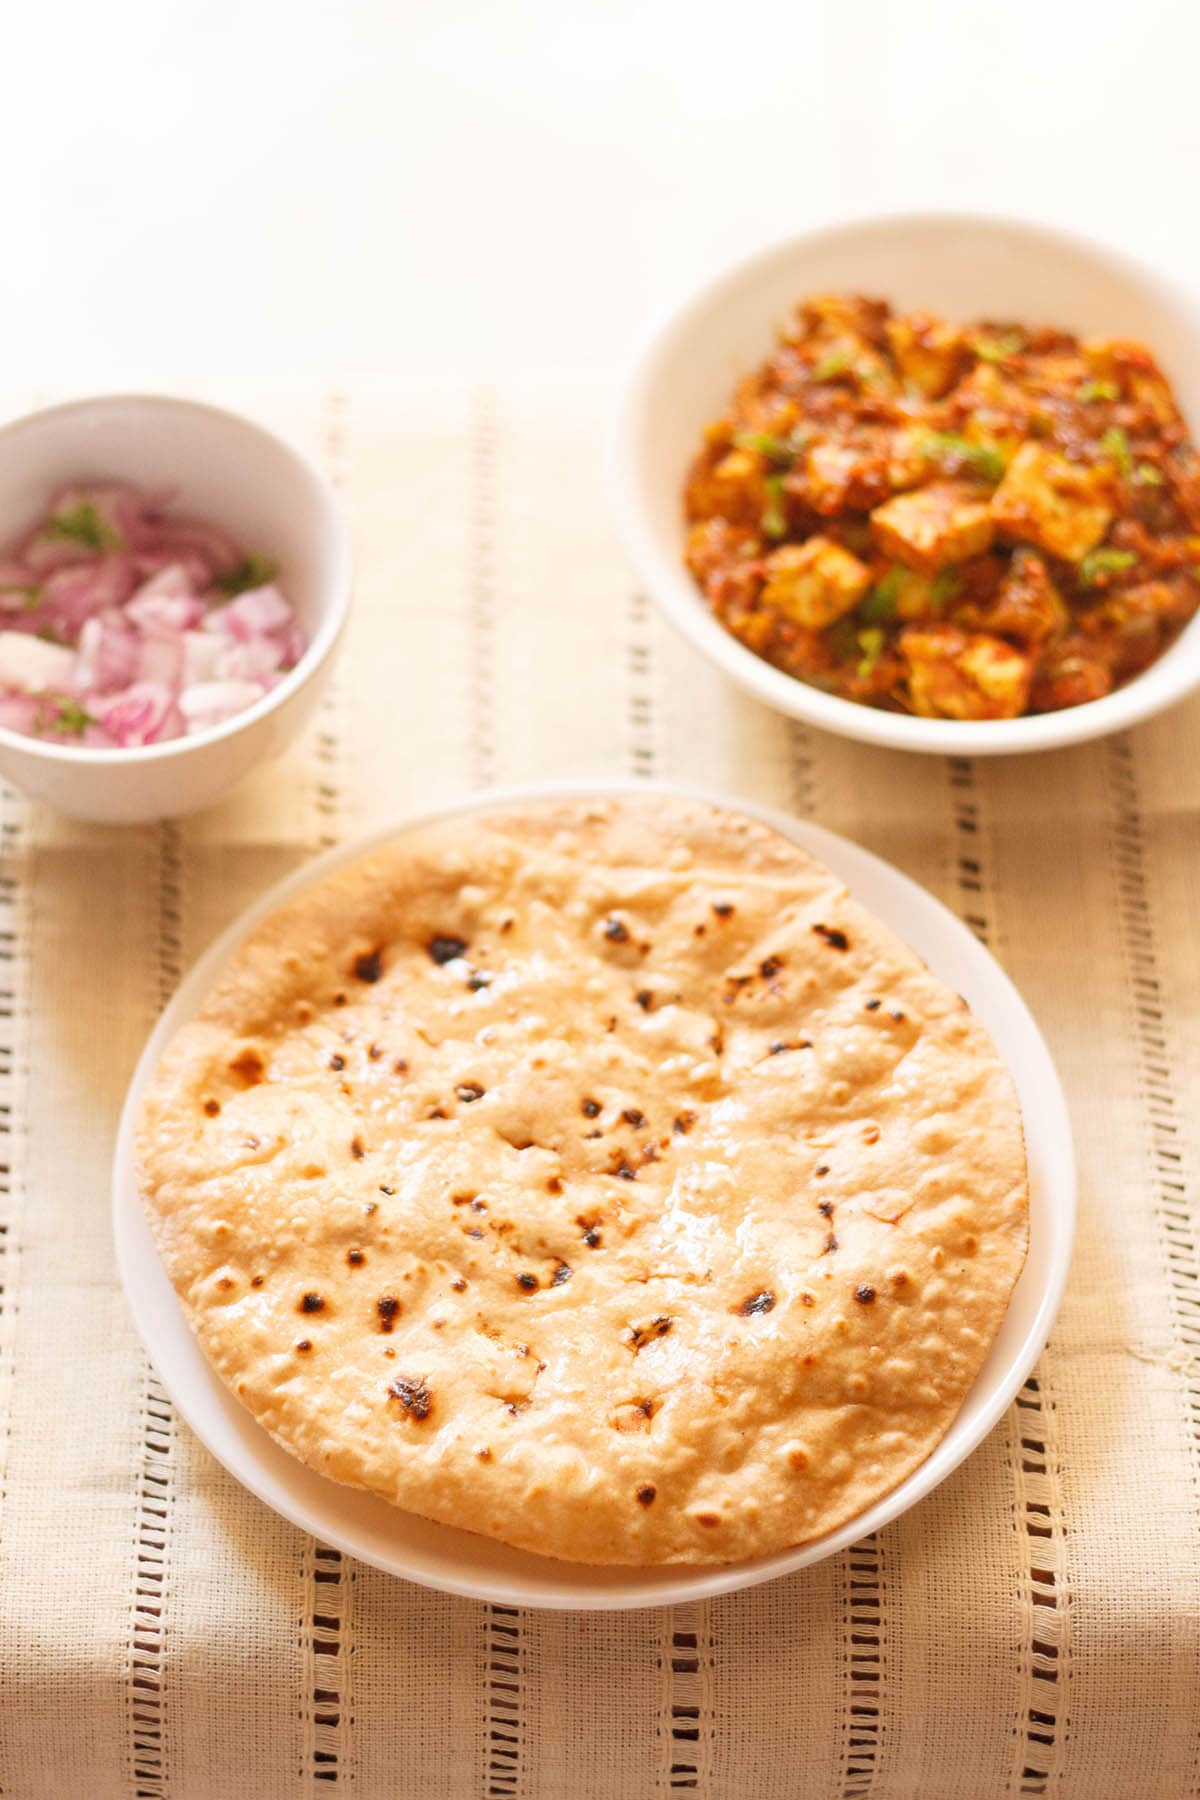
Whichever way you have made these soft roti or chapati, serve them with dals like chana dal, masoor dal, mung dal, dal fry or any Indian veggie dish like aloo gobi, vegetable kadai, stuffed capsicum or curry recipes like rajma masala, paneer butter masala, chana masala, palak paneer, veg kadai, aloo matar etc.
When you plan to serve them with a dry veggie dish, it is best to apply some ghee or oil to rotis while serving them. Applying ghee also helps in keeping the roti soft.
How to Store Roti
Makeahead the roti or chapati just before you plan to serve your lunch or dinner. When they get cooked and roasted well, transfer them to a roti basket or a steel container or box.
Spread some oil or ghee all over. You can fold them if you want. Cover with lid and begin to cook the remaining chapati or roti in batches.
Follow the same process of placing the hot roti in the container, brushing some oil or ghee on them and covering with container with lid. You will get a stack of rotis in the container.
Keep them covered tightly until ready to serve. They may become warm or at room temperature, but will be soft.
For health reasons, I do not freeze roti or roti dough as I am of the opinion that roti or chapati should always be had fresh and hot or warm. Frozen roti can give digestion problems.
To store any leftover dough, place in an air-tight container and use within 1 to 2 days. If the dough has blackened or smells, then discard.
Expert Tips For Soft Roti or Phulka
1. Wheat Flour
The quality and protein content of each brand of whole wheat flour is different. As a result, cooking times will end up being different for different flours.
It will take some experimentation to know the perfect timing for the flour you are using, so I suggest you stick to the same type of flour each time you make them.
Depending on the quality of flour, less or more amounts of water will be required. But keep in mind that your dough should be pliable and soft so that you can roll it easily.
2. Fats
Adding ghee or oil makes the roti soft. You can also skip adding ghee or oil. This is the basic method of making whole wheat flour dough.
This dough can also be used for making stuffed Parathas like Aloo paratha, Gobi paratha, or Paneer paratha. After making roti, apply some ghee or oil to keep the roti soft.
3. Dough Softness
The dough should be kneaded very well so that the gluten is formed. The dough should be smooth and soft to the touch. If the dough is hard then roti will not puff up.
On the other hand, if the dough is too soft or sticky then you won’t be able to roll it evenly and it will not puff up at all.
4. Resting Dough
After kneading the dough, allow it to rest for 20 to 30 minutes. This will also help the roti to be soft.
5. Rolling
Roll the dough very evenly, otherwise the roti will not puff up. The dough should not have uneven surfaces like thick in some places and thin in other places.
An unevenly rolled roti like this will not puff up. It will be hard or crisp from some places and chewy in other places.
Also, remember that the rolled roti should not have any cracks or tears in them. When you place it on tawa then also it should be flat on the tawa and there should not be air bubbles between the rolled roti dough and the surface of the tawa.
6. Roasting
Roti that is puffed on direct flame are softer, however it is not necessary to roast the phulka directly on fire. You can also cook it on the tava or skillet as I have shown above.
Use a heavy spoon or spatula to apply pressure on the roti while cooking on a griddle so that the roti puffs up. Do the same on the other side if you feel the roti is undercooked.
Never roast roti or chapati on a low heat as they will become crispy, crunchy but not soft.
Note: If you want to serve the rotis later and want them to store in a container, then it’s advisable to make them on tawa.
7. Hot Water
Kneading the roti with hot water makes it very soft, and these rotis will have a tendency to remain soft even hours after making them. Use this method when making rotis or phulkas for tiffin box lunch.
Please note that care should be taken when mixing the hot water with the flour. Use a spoon or spatula first, and when the temperature is bearable, then knead the dough with hands. You can also swap in milk for the water, which will result in soft rotis.
8. Storing Dough
If some extra dough is leftover, then keep it covered in the fridge. Keep in an air-tight box or container, so that the surface of the dough does not become dry.
Although it’s better to use the freshly kneaded dough, you can use the leftover dough for 1 to 2 days if kept in the fridge.
After 1 to 2 days of keeping in the fridge, the dough color may start becoming black, hard and smelly. If this happens, discard the dough.
Difference Between Chapati and Phulka
Chapati is also made on a tava and can puff or partly puff. Unlike the dry heat used to make phulka, oil may be used while roasting the chapatis on the tava.
Also unlike phulkas, the chapati never gets roasted on an open flame, cooking all the way through on a tava. Chapati is usually larger in size than a phulka which is smaller in size.
There is also a version of chapati recipe made in Maharashtra known as ‘poli,’ where the rolled dough is layered with oil/ghee and folded thrice before rolling again. This process of lamination is similar to the way we make parathas in Northern India.
Difference Between Roti and Paratha
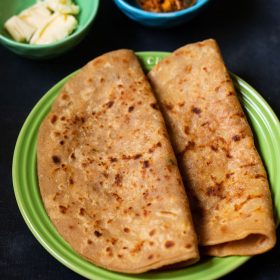
Paratha are also flatbreads but they are layered with ghee, folded and rolled. This layering and folding method of laminating the dough, gives the paratha a soft texture from inside with a well toasted crispy and flaky crust from the outside.
A Roti is simply rolled once and not layered. This is the key difference between roti and paratha.
Paratha is made plain simple or stuffed with vegetable stuffings. The vegetables are mashed or finely chopped or grated.
The stuffing can be mixed with the dough or layered as a single filling inside the dough. There are many variants of paratha that are made in the Indian cuisine.
FAQs
Kneading the dough well, rolling the dough evenly and opting to cook them on the skillet or fire are three important steps that need to be mastered to make soft rotis.
A mistake in any of these steps may lead to hard rotis. I suggest you re-read the section “Tips to Making Soft Rotis” above.
Phulka are best served hot, but they can be made a few hours ahead of time. If you opt to make them ahead, I suggest using the tawa method rather than roasting them on a direct flame, and then keeping them in a warming box or wrapped in a kitchen towel.
Chapati is a type of roti, and often the words are used interchangeably. In my lexicon, chapati is made on a tawa only and roasted with oil or ghee.
Whereas phulka are partially cooked on the tawa and later puffed on direct flame. Also Chapati is usually larger in size than a phulka.
If you make your roti with oil and not ghee, then roti is vegan.
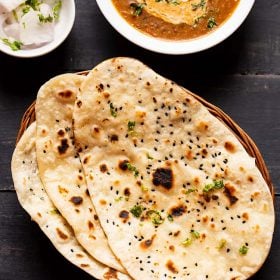
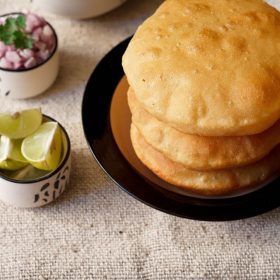
More Indian Breads To Try!
Indian Breads
North Indian Food Recipes
Indian Breads
Please be sure to rate the recipe in the recipe card or leave a comment below if you have made it. For more vegetarian inspirations, Sign Up for my emails or follow me on Instagram, Youtube, Facebook, Pinterest or Twitter.
Roti Recipe | Chapati Recipe | Phulka Recipe (3 Ways)
Ingredients
- 3 cups whole wheat flour or atta – 360 grams
- 1 to 1.25 cups water or add more if needed
- 1 teaspoon salt – optional
- 1 to 2 tablespoons oil or ghee (clarified butter) – optional
Instructions
Kneading Roti Dough
- Take whole wheat flour (atta) in a bowl. Sift the flour with salt if you have flour which has a lot of bran. Add a bit of water, oil or ghee and start mixing.
- Adding water to the dough in parts, begin to knead the dough.
- Continue to knead the dough. Keep on adding water as required.
- Knead the dough till it becomes pliable, smooth and soft. The final dough consistency should not be very sticky or loose or hard.
- Now make small to medium balls of the dough. Roll the balls in the palms of your hands to smoothen it.
- Flatten the ball. Sprinkle some whole wheat flour to the dough ball. Alternatively, you can also dust the rolling board with flour.
Making Phulka
- Turn on the gas stove and put the tawa to make it hot.
- While tawa is getting hot, start rolling the dough ball into a flat round circle.
- Once the tawa is sufficiently hot then put the roti on a hot tawa/griddle.
- First cook one side. It should be less than half cooked or about one-fourth cooked.
- Turn and cook the other side. This should be a little bit more cooked than the first side. Brown spots should be visible.
- Now hold the roti with a tong and keep the first side which was cooked, directly on fire. The roti will start to puff.
- Turn and keep the other side on fire. The roti will puff more. Avoid burning the rotis and also don’t overdo it as roti will not be soft and will become crisp and hard like papadums.
- Remove and apply ghee or oil on the phulka. Applying ghee or oil keep them soft for a long time. Phulka made with this method is ideally served hot.
- If you cannot serve them hot, then you can keep them in a container that keeps food warm like a casserole or in a roti basket. You can also wrap them up in a kitchen towel or napkin.
Making Roti on Tawa
- Place the rolled roti dough on a hot tawa or skillet. Keep the heat to medium-high or high. Within some seconds you will see air pockets forming on the raw chapati dough
- Roast for about 30 seconds or so and you will see the air-pockets increase on the surface.
- Keep in mind that the timing will change or vary with the kind of skillet you are using, the chapati thickness and the intensity of the flame.
- Flip with spatula or tongs and roast the second side for about a minute.
- Flip again and you will see the second side cooked more than the first side with visible brown spots.
- With a clean folded cotton kitchen napkin or a spatula, begin to press the partially cooked roti on all sides and center. Pressing it evenly all over helps to puff up the roti.
- Keep on pressing all over, especially the flat portions, so that the entire roti gets puffed up well.
- If you prefer you can flip again and cook the second side too for some seconds if its looks under cooked.
- Transfer the soft and puffed roti in a roti-basket and spread some oil or ghee on top.
Making Chapati
- Keep the rolled roti dough on a hot tawa or skillet. Cook on medium-high to high heat for about 30 seconds or so until you see some air pockets all over.
- Flip the chapati and spread some oil all over while the second side is getting roasted. Cook the second side for about 45 seconds to 1 minute.
- Flip again with a spatula. You will see that the second side is well roasted with some blisters and brown spots.
- Spread some oil on this cooked side. Roast the first side again for about 20 to 30 seconds.
- Remove and transfer to a chapati container or box. Keep covered. Make chapati with the rest of the dough in this manner.
Serving and Storing Suggestions
- Serve roti or phulka or chapati with any Indian meal. Accompany it with vegetable or paneer curries, stir-fried or sautéed vegetables (sabji) or lentils (dals).
- Store any leftover dough in an air-tight container for just about 1 to 2 days. If the dough has darkened or has a weird smell, then throw it away.
- Store the flatbreads in a roti box or in a covered container for a few hours. Always cover with a tight lid, so that the flatbreads remain soft. Brushing or spreading with some oil or ghee on the roti, keeps them softer.
Notes
- Adding fats like oil or ghee to the dough is optional, but makes the roti or chapati soft.
- Make sure to knead the dough very well. It has to soft, pliable and smooth. Add water as needed as you go on working on the dough.
- The roti dough can be kneaded with hands as well as in a stand-mixer.
- Do not roast the rolled roti or chapati dough on a low heat as they will not be soft and become crispy or hard.
- This basic roti dough recipe is scaleable to make a large or small batch.
- If not using wheat flour labelled as “atta” then sift once or twice to remove the bran especially if the flour is coarser or has a lot of bran.
- For the oil to add in the dough or brush on the roasted roti, you can use neutral flavored oils like sunflower oil, avocado oil, grapeseed oil. You can also use rice bran oil and also peanut oil.
- Note that the approximate nutrition info is for 1 roti made where the dough is made with sunflower oil and no oil or ghee is brushed or spread on the roti.
Nutrition Info (Approximate Values)
This Roti recipe post from the blog archives first published on August 2009 has been republished and updated on September 2021.


another classical recipe that i’ve learned just by following your instructions !! mmm the taste of authentic indian cuisine in an european kitchen…
thank you !!!
Happy to hear! Thanks.
Very good. Thank you for the every day recipes and tips.
Welcome and thanks.
So glad I found your website! I have good friends from India who have taught me some Indian cooking. I need recipes and practice though…. I followed you on facebook. If you send out emails with recipes or updates I would like to receive them by email please. Thank you!
Welcome Heidi. Glad to know this. We don’t have a regular email service. However we share latest recipe on facebook with some old recipes.
I have tried many of your recipes,they turned out awesome.
I am very bad in making chapatis,will try this recipe and let you know..,????Hope it works this time..
Thanks Angel for your positive feedback on recipes. Yes do give your feedback.