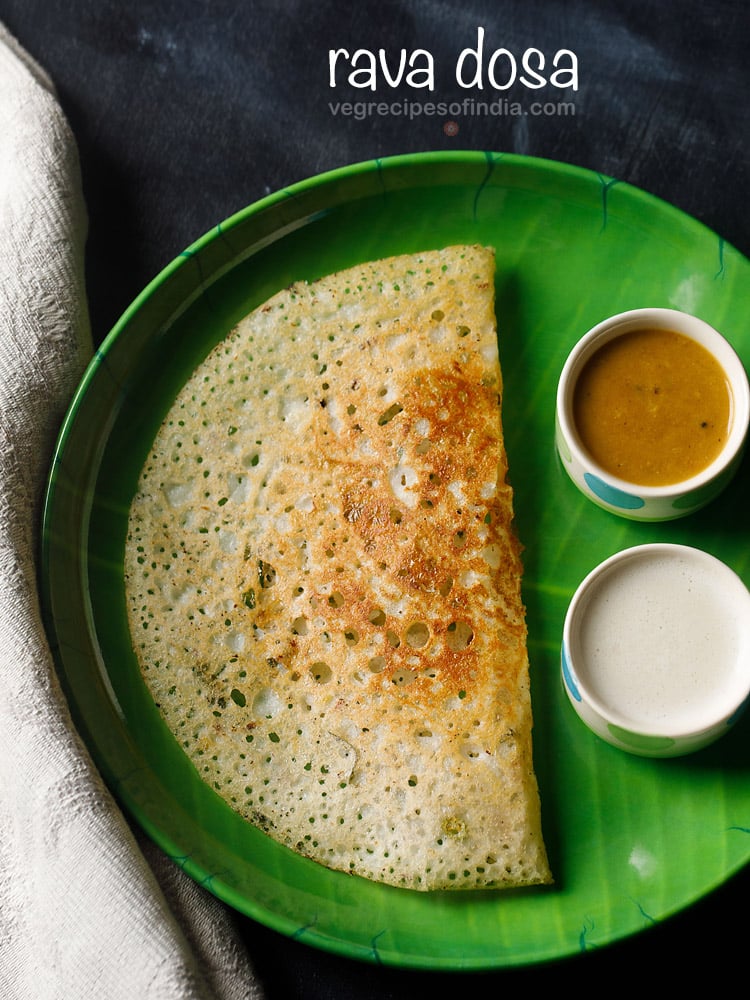
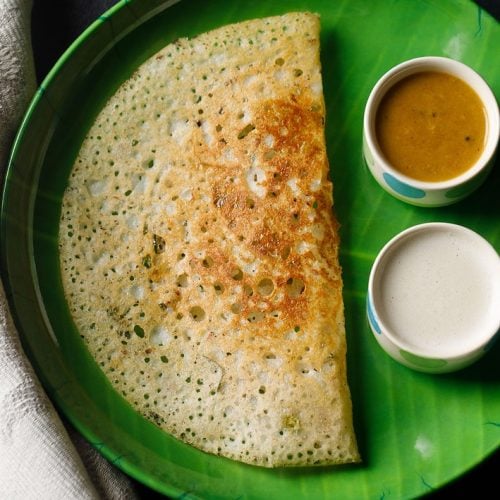
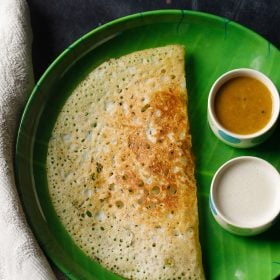
Rava dosa (also known as Suji ka Dosa) is a quick and popular variant of dosa from the South Indian cuisine. These are crispy, netted and thin crepes made with semolina (rava or cream of wheat), rice flour, all purpose flour and spices. These are incredibly easy to make and require no grinding or fermentation, unlike the traditional Dosa Recipe. Make a truly crispy Rava Dosa recipe – one that you will make again and again for a quick breakfast or snack.
About Rava Dosa Recipe
Rava dosa is one of the quick breakfasts I make on occasion. At home, we prefer to add onions and some spices to them.
So I usually add onions, ginger, green chilli and some spices to the batter. At times I even add some chopped cashews. The addition of these ingredients makes the dosa more flavorful and tasty.
You can choose to make the suji ka dosa plain or you can spice it up by adding chopped onions, curry leaves, herbs and spices etc like I have done here.
Here I am sharing my mom’s recipe which is made without curd (yogurt) or buttermilk. Plain water is used to make the batter.
Table of Contents
You can even use curd or buttermilk instead of water to make the batter. This recipe can also be halved or doubled or tripled according to your needs.
If you do double the recipe, then use two tawa or skillets and cook the dosa side by side on two stovetop burners.
A thin batter is made of sooji, rice flour, maida and water or buttermilk. The batter is spiced with onions, green chilies and some more herbs & spices.
The batter is then poured on a hot tawa (griddle) to get netted effect on the dosa. The dosa is cooked till golden crisp and then served hot.
To make perfect crispy instant rava dosa which has a netted texture, the batter has to be thin. So always remember that the batter should be thin, runny and easy to flow.
Also allow some soaking time for rava or suji, so that they soften. I usually mix everything and set the batter aside for 20 to 30 minutes.
How to make Rava Dosa
Make Thin Batter
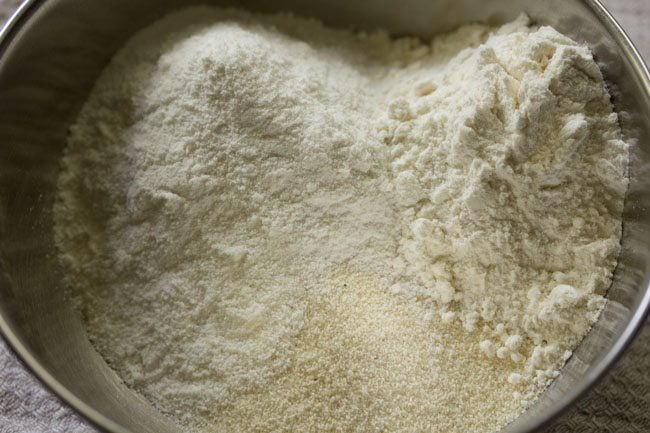
1. Take ½ cup unroasted fine rava, ½ cup rice flour and ¼ cup all-purpose flour in a bowl.
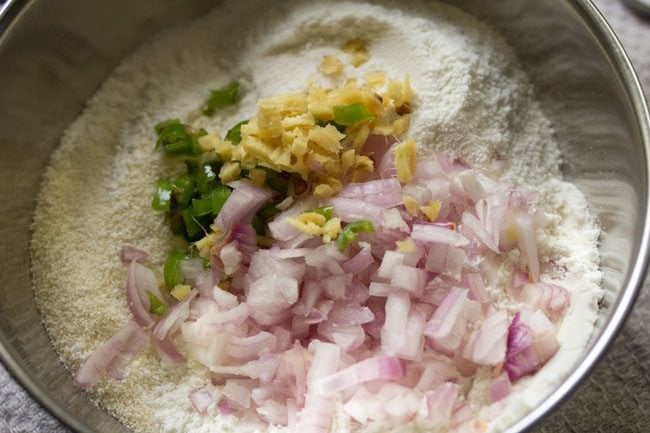
2. Then add ⅓ cup chopped onions, 1 or 2 green chillies (about ½ to 1 teaspoon finely chopped), and ½ teaspoon finely chopped ginger.
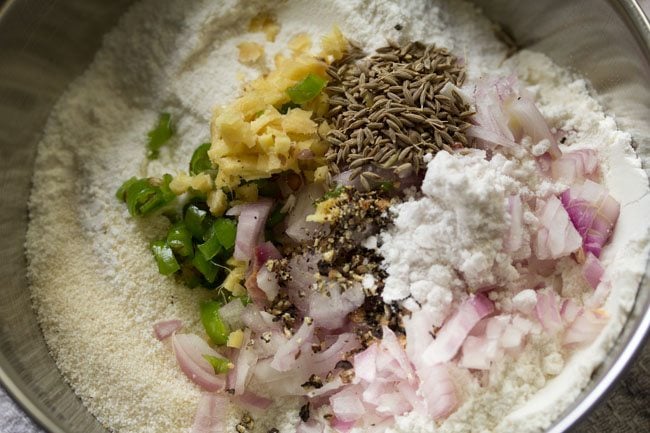
3. Also add ½ teaspoon crushed black pepper, ½ teaspoon cumin seeds, 8 to 10 curry leaves (about 1 tablespoon chopped) and salt as required.
At this point you can also include 1 to 2 tablespoons of chopped coriander leaves, 2 tablespoons of fresh grated coconut or 1 to 2 tablespoons of chopped cashews.
4. Add 2.25 to 2.5 cups water. Depending on the quality of rava or suji and rice flour, you can add less or more water – from 2 to 2.5 cups water.
I added 2.25 cups of water. You can also use buttermilk instead of water.
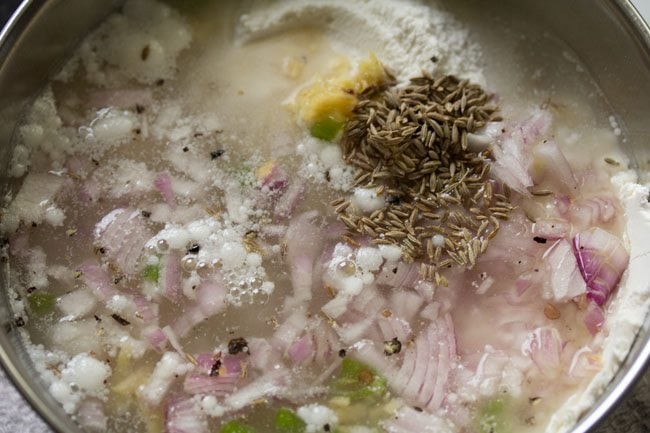
5. Whisk till smooth without any lumps. The batter has to be flowing and thin.
Tip 1: If the batter looks thick or has a medium consistency, then add more water.
Tip 2: If the batter looks very thin and runny, then add some rice flour.
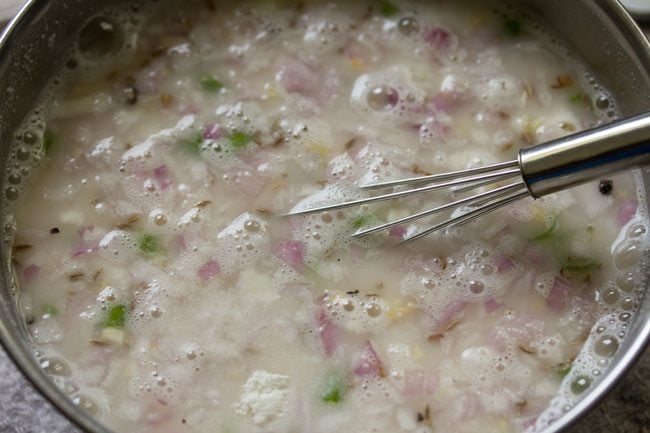
6. Cover and let the batter rest for 20 to 30 minutes.
Once the batter rests, you will see that the rava and the flours have settled down and the water will be floating on top.
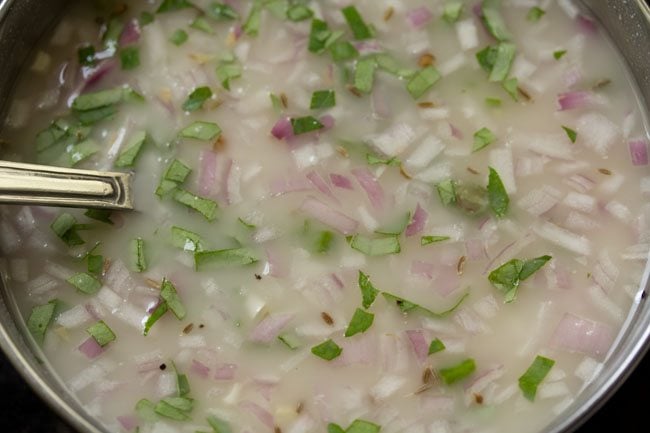
7. Before preparing dosa, mix the batter very well so that the flours and semolina that are at the bottom of the bowl are mixed evenly again.
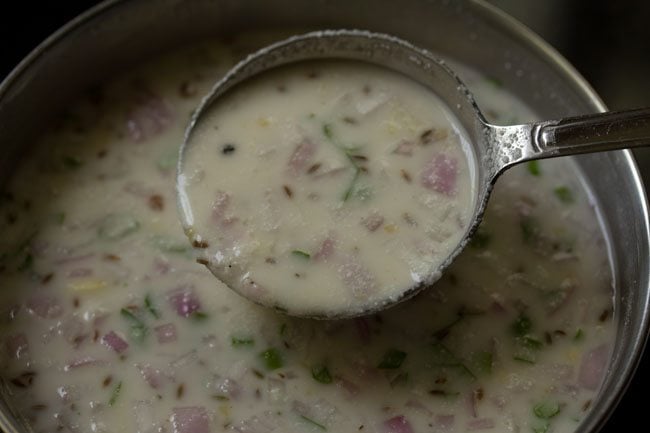
Make Rava Dosa
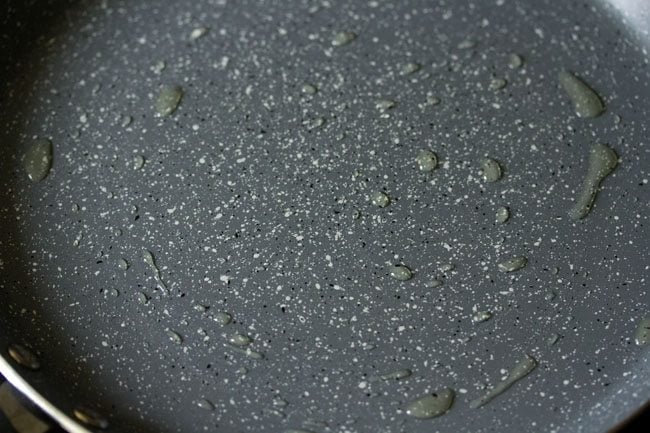
8. Spread some oil on the tawa or skillet. Do make sure that the tawa is hot. Keep the flame to medium or medium-high before pouring the dosa batter.
You can also use butter or ghee or coconut oil. Sometimes I use coconut oil and it gives a really good flavor.
If using a cast iron skillet, I recommend to use one that is well seasoned. So that the batter does not stick to it. You can check below my tips on seasoning the cast iron skillet.
9. With a ladle pour the dosa batter. Start from the edges move towards the center.
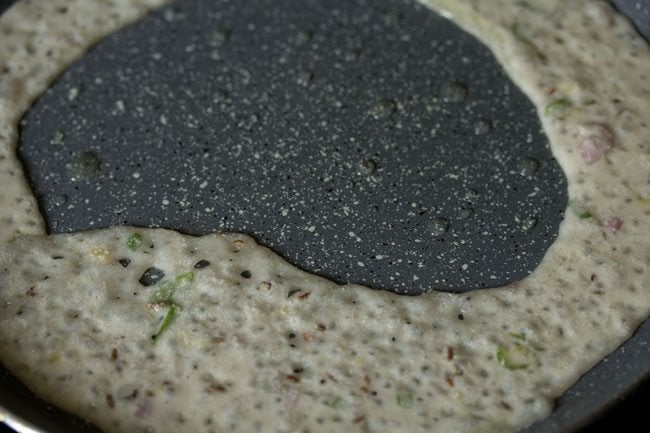
10. If there are big or small gaps, then fill them lightly with the batter.
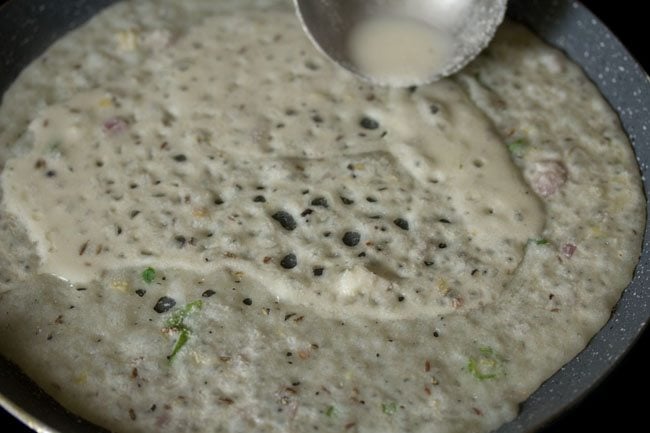
11. On a medium-low to medium heat, cook the dosa. If the tawa or pan becomes too hot, then you can reduce the heat.
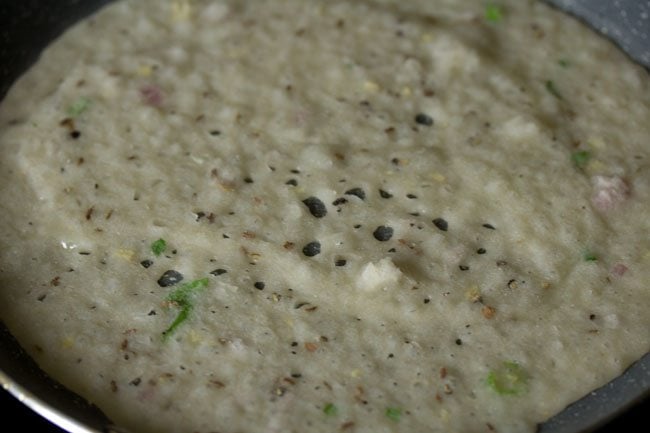
12. When the top side firm up and looks cooked, then sprinkle ½ to 1 teaspoon oil on the top and sides.
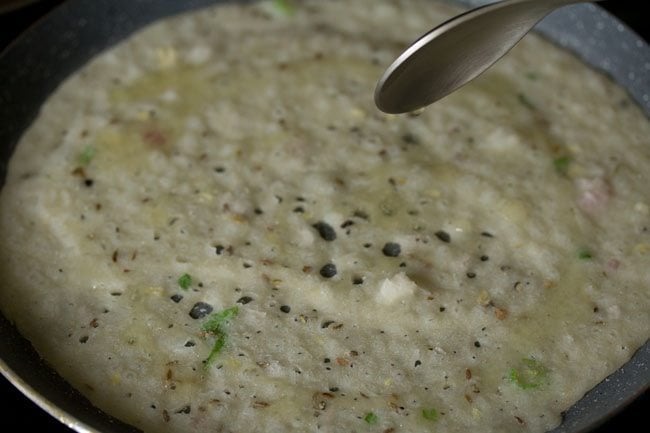
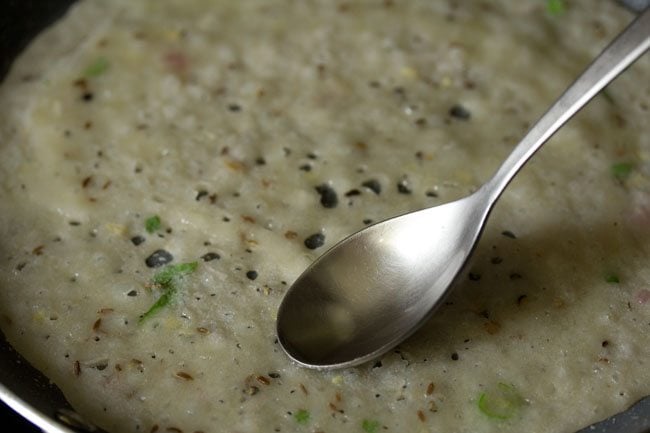
13. Spread oil all over the dosa with a spoon.
14. Instant rava dosa takes a little longer time to cook than the regular plain dosa.
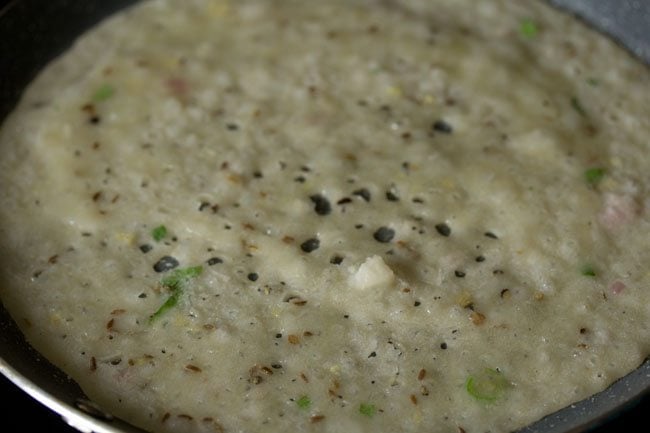
15. Cook till the base is golden and crisp. The edges will also separate from the pan.
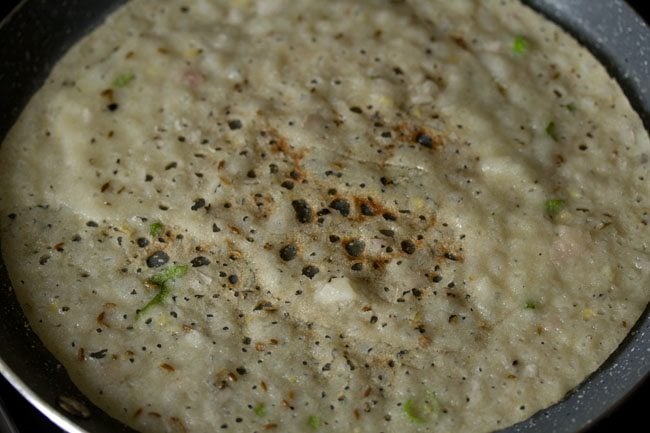
16. The longer you cook these, the more golden and crispy they become. Flip and cook the second side for ½ to 1 minute or as needed.
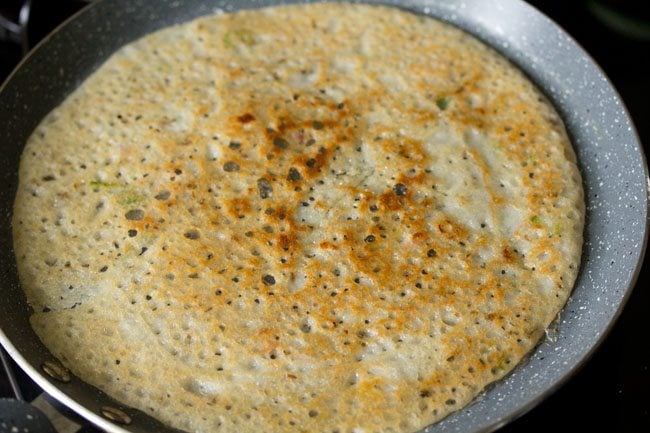
17. Fold and then serve instant rava dosa hot with Coconut Chutney and Sambar.
The flours settle down at the bottom of the batter. So you have to stir and mix the batter very well every time you make dosa.
In case the batter becomes thick after making a few dosa, then add some water and stir again. Make all dosa this way.
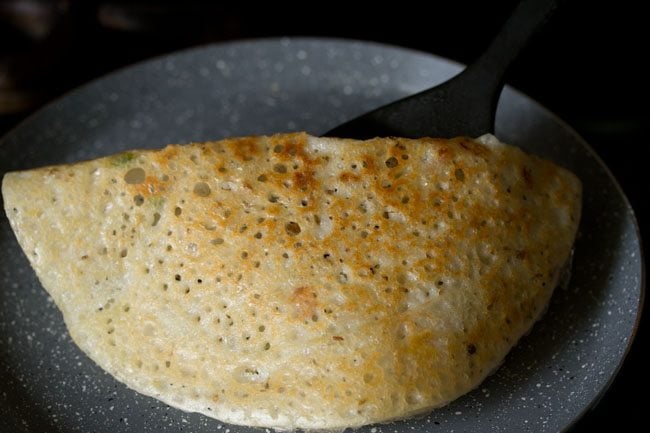
18. Serve rava dosa hot. For the best taste serve these as soon as they are made.
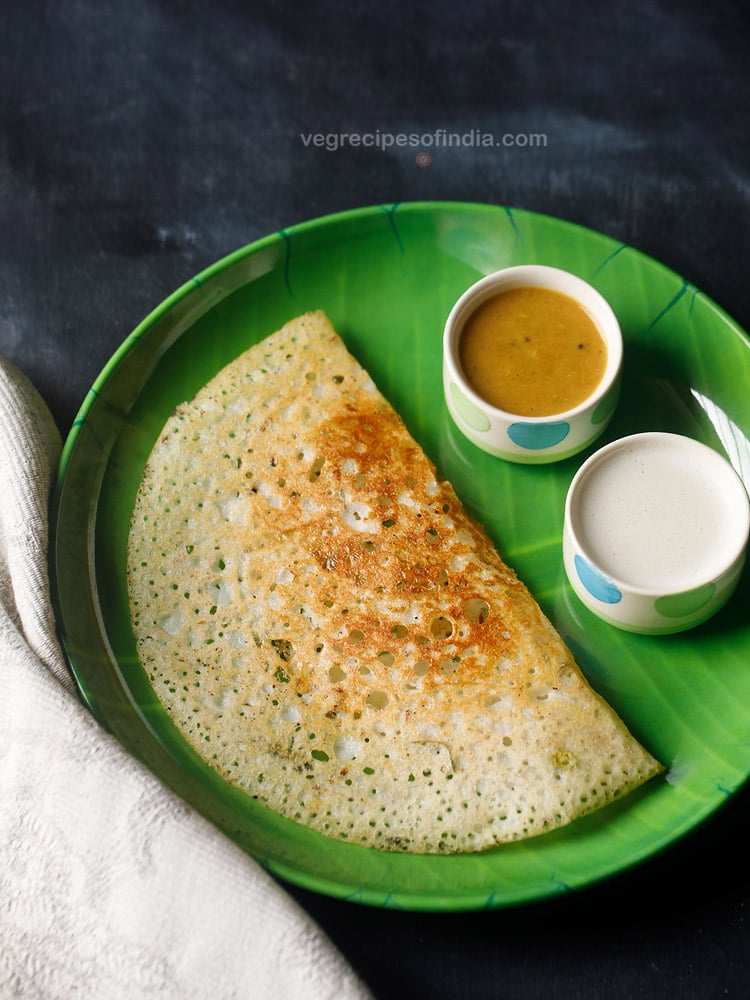
Serving Suggestions
Rava Dosa or Suji ka Dosa can be served with sambar, Coconut Chutney or Idli Dosa Podi or any chutney of your choice. To make it more filling, you can serve it with Potato Masala and make a delicious Masala Rava Dosa.
Rava dosa also pairs well with Peanut Chutney, Onion Chutney, Tomato Chutney and Ginger Chutney.
Variations
With the basic instant rava dosa recipe, many variations can be made.
- Increase or decrease any of the herbs and spices and make a variation. Example: you can make pepper rava dosa by increasing black pepper or onion rava dosa by increasing amount of onions.
- Add ghee or butter and make ghee rava dosa or butter rava dosa. Serve rava dosa with potato masala and you get masala rava dosa.
If you are wondering what is Rava
Rava stands for suji or semolina or cream of wheat. Hence this dosa is named after one of its main ingredients. The type of rava used is the fine variety of rava. You could also use Bombay rava to make these crispy crepes.
Rava is coarsely or finely ground husked wheat. Depending on the type of dish, the type of rava is used accordingly. E.g fine rava is used in making Rava Idli, Upma, sooji halwa, sheera etc.
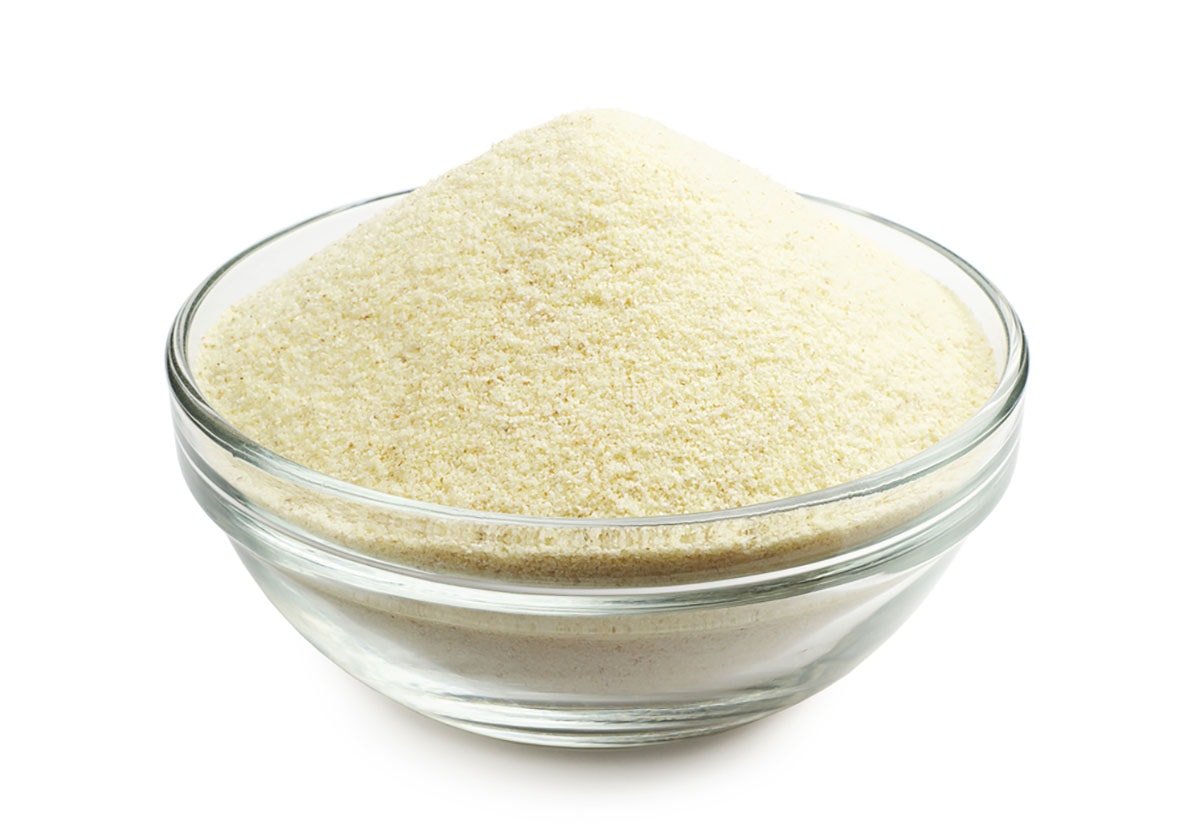
All the three terms suji, rava, semolina flour and cream of wheat mean the same. In western and southern parts of India, the word ‘rava’ is used.
In northern parts of India the word ‘sooji’ or ‘suji’ are used. Thus rava dosa can also be called as ‘suji ka dosa’ or ‘suji dosa’.
Expert Tips
- Soaking rava: Before making them, always allow a soaking time of 20 to 30 minutes for the batter.
- Batter consistency: The batter has to be thin and of pouring consistency. Even if the batter is of medium consistency, the Suji ka dosa will be soft and not crisp. When you make the first dosa then you will come to know whether you are getting the crisp and netted effect or not. If not then you will need to add some more water. Instead of water, you can also add buttermilk to the batter.
- Temperature of skillet or tawa: When pouring the batter, the skillet or tawa has to be hot. When you pour the batter, it will sizzle when it comes in contact with the hot tawa. So keep the heat to medium or medium-high. When cooking instant rava dosa, you can reduce the flame if the tawa becomes too hot.
- Pouring batter: The batter also has to be poured from a slightly more height than what is the norm. This will give you the netted effect on the Suji ka Dosa. When pouring the batter, pour from the edges first and then move towards the center.
- Cooking time: Rava dosa takes more time to cook than the regular dosa.
- Mixing batter: Every time before pouring the batter on tawa, you have to mix it very well as the flours and rava settle down at the bottom of the batter. After making some rava dosa, if the batter looks slightly thick, then you can add some more water.
- Pan type: Always use a heavy or a thick bottomed tawa or pan, so that the rava dosa does not stick to the pan. You can even use cast iron pan.
Your Questions Answered
Why rava dosa sticks to the pan or skillet?
When making rava dosa or any dosa for that matter, always use a seasoned pan. Iron tawa or iron skillets are the best for making dosa.
Seasoning means that the pan is ready to be used or has been used earlier to make dosa. Never use a pan or tawa in which you make roti or chapati as then the dosa will stick on the tawa.
Usually rava dosa does not stick on a non-stick pan if it is heavy or thick-bottomed. In case the dosa starts sticking on the non-stick pan, then make a few small dosa initially on it and later the dosa won’t stick.
How to season iron tawa (cast iron skillet)
- For an unseasoned or new iron tawa or iron skillet firstly heat the tawa. Spread some oil all over. Keep the flame to a medium or high and let the tawa get hot for 1 to 2 minutes.
- Lower the flame and wipe this oil with a cotton napkin or a paper towel. Spread another layer of oil and repeat the process. Lower the flame and then again wipe this layer of oil. Repeat this process once or twice.
- Now spread oil again. Make a small rava dosa. See if it sticks or not. If it sticks then repeat the seasoning method for 1 or 2 times more. Initially a few dosa, in the beginning, will stick, but later they won’t stick.
- After making all the dosa, when the iron tawa cools, then rinse tawa also and wipe it dry. You can then spread a layer of oil on it. Next time before making rava dosa, heat and then remove the oil and then start making dosa.
- You can even season the iron pan a few days before you plan to make rava dosa recipe. Repeat the above process of spreading oil and removing it, 3 to 4 times. Then lastly spread the oil. Switch off the flame.
- Keep the pan with the oil on it for a few days. Before making rava dosa, heat the pan. Then with a cotton napkin or paper towel wipe the oil. Spread oil again and heat it. Then wipe the oil again and then start making dosa.
More Dosa Recipes To Try!
Breakfast Recipes
Karnataka Recipes
Breakfast Recipes
Breakfast Recipes
Please be sure to rate the recipe in the recipe card or leave a comment below if you have made it. For more vegetarian inspirations, Sign Up for my emails or follow me on Instagram, Youtube, Facebook, Pinterest or Twitter.
Rava Dosa Recipe (Quick & Crispy)
Ingredients
- ½ cup rava – un-roasted and fine textured (suji or fine semolina)
- ½ cup Rice Flour
- ¼ cup all-purpose flour
- ½ to 1 teaspoon green chillies – finely chopped or serrano peppers or 1 to 2 green chillies
- ⅓ cup onions – finely chopped
- ½ teaspoon ginger – finely chopped
- 1 tablespoon or 8 to 10 curry leaves – chopped
- 1 to 2 tablespoons coriander leaves – chopped (cilantro), optional
- ½ teaspoon black pepper – crushed
- ½ teaspoon cumin seeds
- 2.25 to 2.5 cups water or add as required
- salt as required
- oil or ghee or butter for cooking, as required
Instructions
Making batter
- Take unroasted fine rava, rice flour and maida in a bowl.
- Add the chopped onions, chopped green chilies ginger.
- Also add crushed black pepper, cumin seeds, chopped curry leaves and salt as required.
- Add water. Depending on the quality of rava and rice flour, you can add less or more water – from 2 to 2.5 cups water. I added 2.25 cups water.
- Whisk till smooth without any lumps. The batter has to be flowing and thin.
- If the batter looks thick or has a medium consistency, then add more water. If the batter looks very thin and runny, then add some rice flour.
- Cover and let the suji dosa batter rest for 20 to 30 minutes. Once the batter rests, you will see that the rava and the flours have settled down and the water will be floating on top.
Making rava dosa
- Before preparing dosa, mix the batter very well. Spread some oil on the tawa. Do make sure that the tawa is hot.
- With a ladle pour the dosa batter. Start from the edges move towards the center.
- If there are big or small gaps, then fill them lightly with the batter.
- On a medium-low to medium flame, cook the suji ka dosa.
- When the top side looks cooked, then sprinkle ½ to 1 teaspoon oil on the top and sides.
- Spread oil all over the dosa with a spoon.
- Rava dosa takes a little longer time to cook than regular dosa.
- Cook till the base is golden and crisp. The edges will also separate from the pan.
- The more you cook the rava dosa and the more golden it becomes, the more crisp it will be. Flip and cook the second side for ½ to 1 minute.
- Fold and then serve suji ka dosa hot with coconut chutney and sambar.
- The flours settles down at the bottom of the batter. So you have to stir and mix the batter very well every time you make dosa. In case the batter becomes thick after making a few dosa, then add some water and stir again.
- Serve rava dosa with coconut chutney or dosa podi or any chutney of your choice. They also taste good with peanut chutney or tomato chutney or ginger chutney or onion chutney.
- For best taste and texture I recommend to serve these as soon as they are made. This recipe can be easily scaled to make a small or a big batch.
- Store any leftover batter for a couple of hours in the refrigerator.
Video
Notes
- Resting batter: Rest the batter for 20 to 30 minutes.
- Batter consistency: The batter has to be thin and of pouring consistency. A medium consistency, will yield soft rava dosa.
- Temperature of the pan: When pouring the batter, the tawa has to be hot. When you pour the batter, it will sizzle when it comes in contact with the hot tawa. So keep the flame to medium or medium-high.
- Pouring batter: The batter has to be poured from a slightly more height and this gives a netted effect on the rava dosa. Pour from the edges first and then move towards the center. When you make the first dosa then you will come to know whether you are getting the crisp and netted effect or not. If not then you will need to add some more water. Instead of water, you can also add buttermilk to the batter.
- Cooking time: Rava dosa takes more time to cook than the regular dosa. You can reduce the heat if the tawa becomes too hot.
- Mixing: Every time before pouring the batter on tawa, you have to mix it very well as the flours and rava settle down at the bottom of the batter. After making some rava dosa, if the batter looks slightly thick, then you can add some more water.
- Pan type: Always use a heavy or a thick bottomed tawa or pan, so that the rava dosa does not stick to the pan. Cast iron pan is also a good choice.
Nutrition Info (Approximate Values)
Rava Dosa recipe from the archives was first published on May 2013.


Hi I tried this recipe today and the taste was perfect however my dosas were not as crispy as I would have liked, how can I make them more crispy?
anu, make the batter thin. if the batter is thin then the dosa will come out crisp. if the batter is thick then the dosa comes out thick and soft.
Thanks, I made it again today and made the batter thinner and it came out perfect! Thankyou!
welcome anu. good to know this.
It’s a really yummy :>
thanks diu
Your recipes are fantastic! One easy way I have discovered is to use an electric hot plate (the long rectangular ones) at 350F. Not only will you not need to flip the dosas, but they will cook evenly. Plus you get a hotel style long dosa, perfect when you are feeding multiple people at once!
thanks shivani for the suggestion and the tips.
I was thinking the same, about using an electric griddle (hot plate as you put it), but how do you spread it? Tava has a natural gravitational effect because of its slight curvature. If I spread it like a regular dosa using a flat ladle (to spread it), I will not get the bubbly effect of a rava dosa.
Hi Dassana,
As I always say, Urs is da blog i turn towards whenever i need to cook sumthing new. This rava dosa recipe was sumthing i ws looking for since long and the video gave a lot of confidence to try it. But alas, my dosas did not come out well 🙁 . Please give an idea how much time approx it takes to cook before flipping it to other side. Mine took not less than 6 min. Isn’t dat too long? I couldn’t flip them before dat and after 5-6 min, the dosa was badly sticking to the tava. I used non stick tava. Please help.
thanks himani. the batter become too watery. thats why so long to cook. the texture of the batter which has too much of water is very smooth and loose and the dosa breaks when flipping. it cannot be flipped in one whole round. next time add less water and just sprinkle a few spoons. if the dosa looks thick, then just add a few tbsp of water. anytime when you make this dosa, you will know when cooking if the batter is thin or thick. for a thin batter, you add more of the rava or rice flour and it thickens. also when you make dosa, each time, you have to stir the whole batter in the bowl very well. what happens is the rava settles down at the bottom and a thin watery batter is at the top. so if you don’t stir, you take the top watery batter and the dosa does not come out well. so stir the whole mixture very well and then take a ladle and pour the batter. this has to be done every time you make the dosa.
Hi Namaste.
May Goddess Annapurneshwari blessings be with you for making very delicious and healthy cakes receipes especially eggless ones. This web site taught me so many receipes. Rava dosa is one. One receipe for all my family . Bunch of thanks to you .
welcome manjula. thanks for sharing your blessings and positive feedback. i have a statue of ma annapurna in my kitchen. before starting cooking i always remember ma annapurna. some time i don’t even taste the recipes because i offer them first to ma and lord ganesha.
સરસ રેસીપી છે…..
thanku 4 recipe
welcome yugandhar
Thanks a lot for this recipe. I loved it.
welcome helena
The best way to learn cooking thank u so much 🙂
welcome gudie
Very yummy recipe
thanks shweta
I enjoy cooking n m very interested in d dishes that u publish
kuljit, nice to know that.
Good recipes
Good recipes
I like all.recipe teach by u.how to make coconut chutney.pls tell me. thanks
you can check the recipes for coconut chutney on the blog. they have been tried and tested by readers too.
SUPER