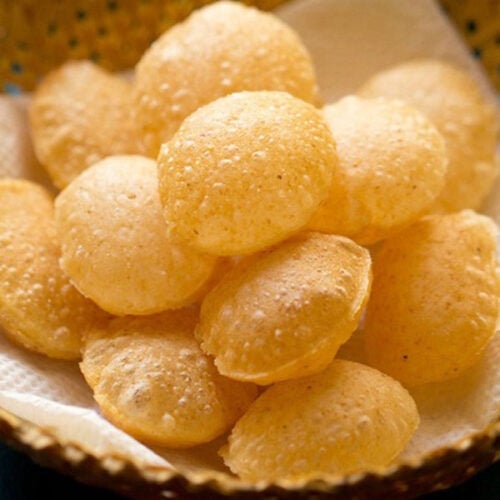
Suji ki Puri for golgappa or pani puri or puchka with step by step photos. These puri made with semolina, all purpose flour dough are light and crisp. Perfect to carry the various delicious pani puri fillings. Make a big batch of these suji ke golgappe and store it in an airtight container to make your favorite pani puri or puchka.
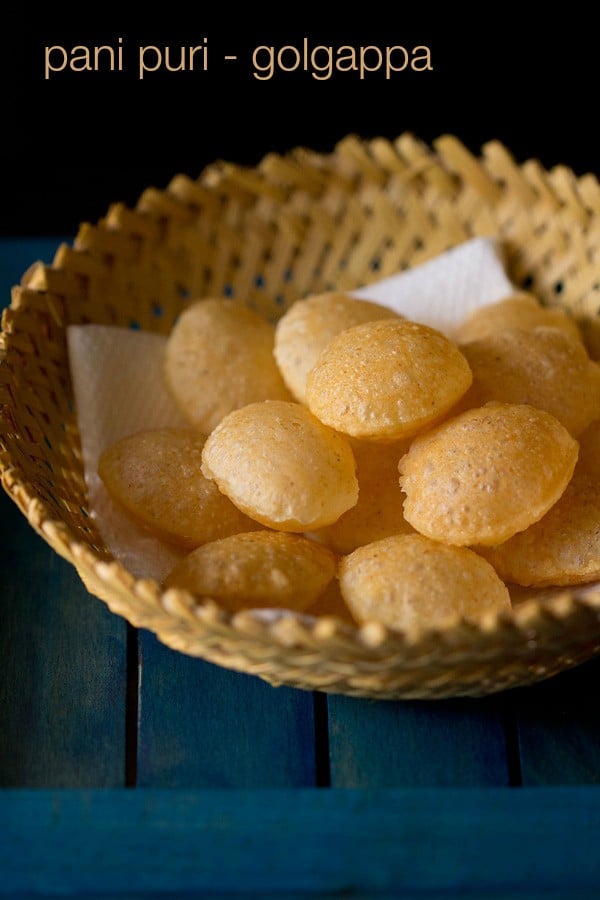
Pani Puri, as I call this awesome snack has always been a favorite since childhood. I remember me and my folks having pani poori from the pani puri wallah on the streets of Mumbai many times.
I have even seen how the puris are made in bulk and then sold. While as a kid, I used to think, how come the puri puffs so much and stays crisp. There was a family, close to my house who used to make these puris in bulk, pack them and then supply them to grocery stores.
We are fond of these crisp puris, that most of the times we just have them plain. I have made these pooris many times. Hence, I have updated this post with better photos and a lot of tips.
I was getting many comments that the pani puri becomes soft after cooling down. when I make them, I never had this issue. I reasoned, that this problem is because the dough was not kneaded well and the poori roundels being thick.
Previously I has just mentioned to knead the dough well. But not emphasized that the dough also need to have elasticity in it. Hence updated this suji ke golgappe recipe post.
I must say its easier to get a packet of ready made puris than to make them. Its does take an effort to make these pooris. So prepare them, when you are free from any work.
The perks of making homemade suji ke golgappe are that fresh oil and ingredients are used. Plus no additives or preservatives are added and you know what goes into them. Also they do taste better than the store brought ones.
These puris can be made in large numbers and stored in an airtight container. This recipe yields 50 to 60 pooris. However you can easily halve or double the recipe.
You could use these suji ke golgappe later to make Pani Puri or Golgappa or ragda puri or puchka or Dahi Puri, just crumble and top it up on Ragda Patties, dahi papdi chaat, aloo chana chaat, sev puri, bhel puri or just have it plain.
How to make Suji ke Golgappe
Make the Suji (Semolina) Dough
1. In a mixing bowl, take 1 cup fine unroasted sooji or rava or semolina (160 grams), 1 teaspoon oil, 3 to 4 pinches of baking soda and ¼ teaspoon salt.
Remember to use fine textured rava. You can also use bombay rava. It should be in the shelf period and not be infested with insects or molds.
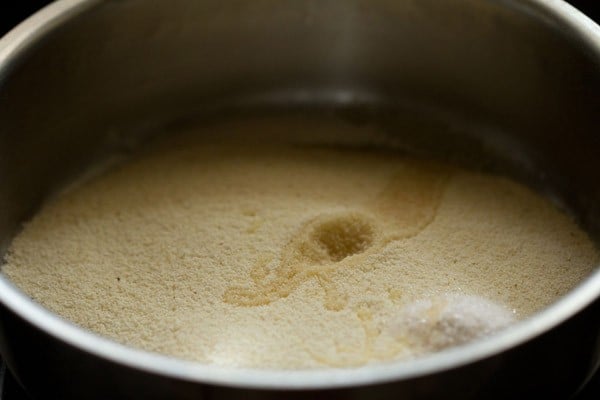
2. With your fingers, mix the oil evenly with the sooji.
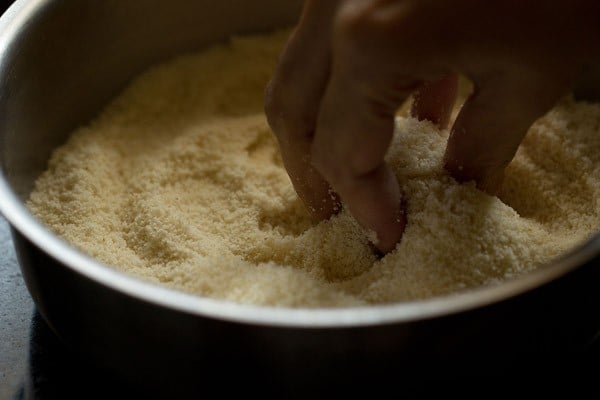
3. Here’s the evenly mixed oil, sooji and salt mixture.
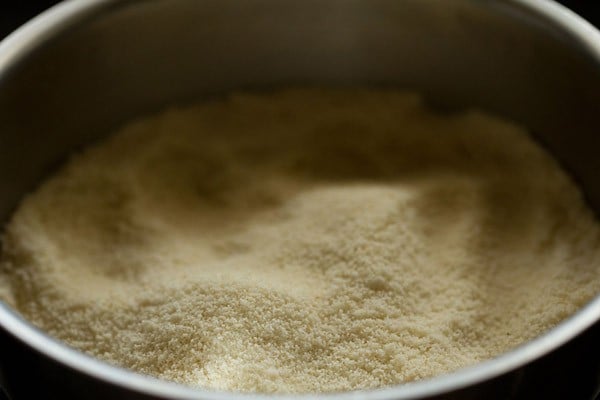
4. Now add 1 tablespoon maida (all purpose flour) to this mixture.
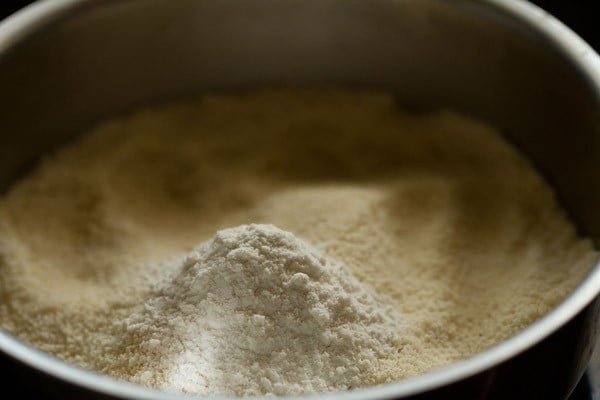
5. Mix again very well so that the all purpose flour is mixed evenly.
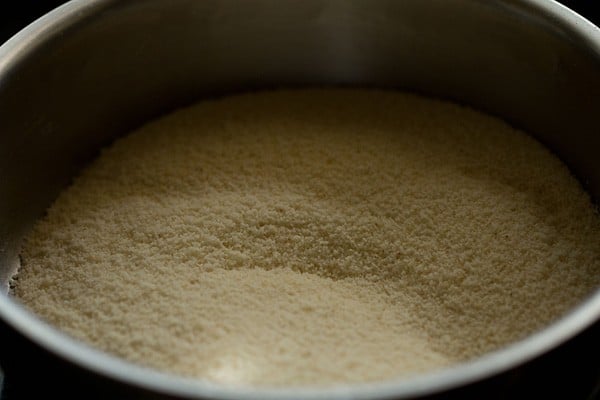
6. Add 3 tablespoons of water first.
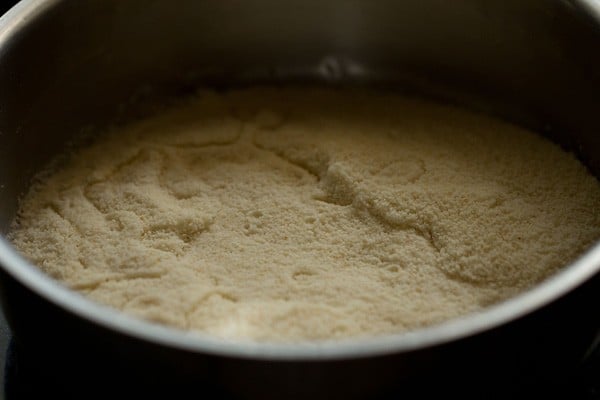
7. Stir and mix again.
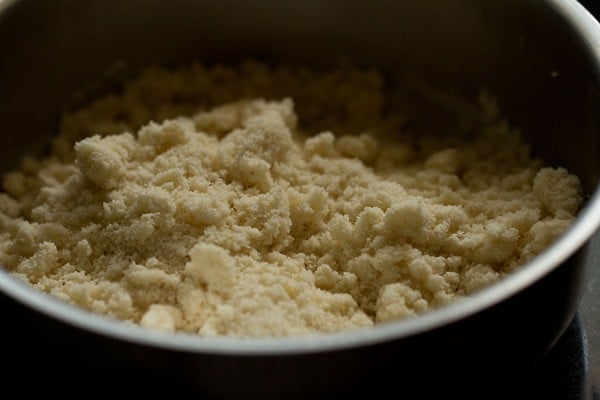
7. Then add 1 tablespoon water more and begin to knead the dough. Sooji absorbs water while kneading. Hence add water in parts while kneading. Then add 2 tablespoons more of the water and continue to knead. I added 6 tablespoons of water.
Depending on the quality of sooji, you may need to add a bit less or more. The kneading is very important in getting the perfect pani poori texture.
Remember that the dough is not soft nor too hard. If you make the dough soft, then add 1 to 3 teaspoon more of the sooji. If the dough looks hard, then add sprinkle some water and continue to knead.
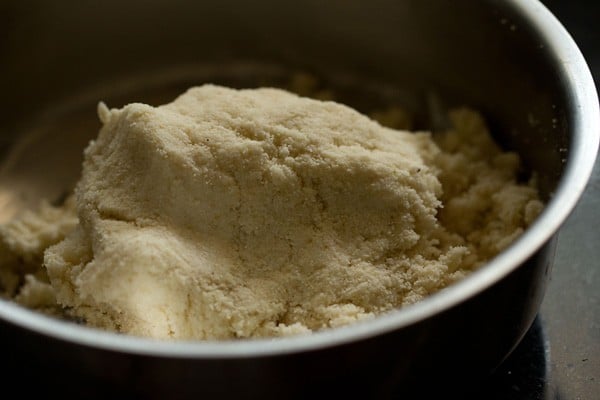
8. The puri dough should be elastic. Gluten strands need to be formed, which gives structure and shape to the pooris.
The correct texture of the dough, also help in puffing pooris and helps in them staying crisp. So knead very well.
Elasticity helps in the rolling dough without cracks and thinly. When rolling, the dough should roll easily without any cracks.
You should be easily able to lift the rolled dough without it tearing or breaking and falling apart.
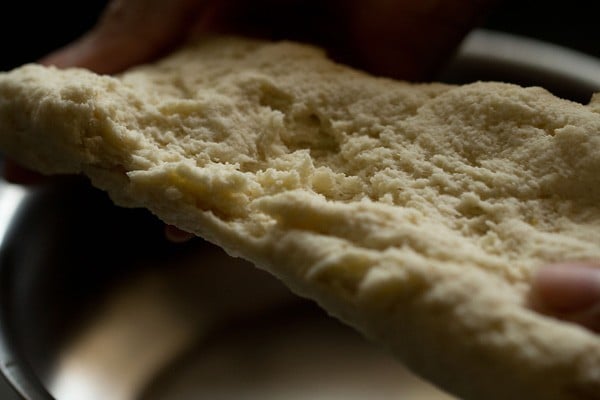
9. Knead to a semi-soft elastic dough.
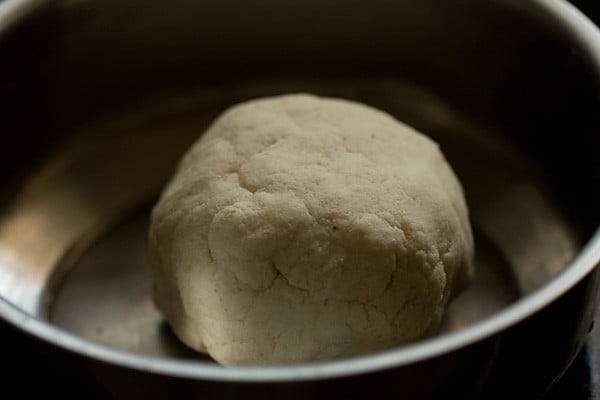
10. Keep the well kneaded dough in a bowl or pan.
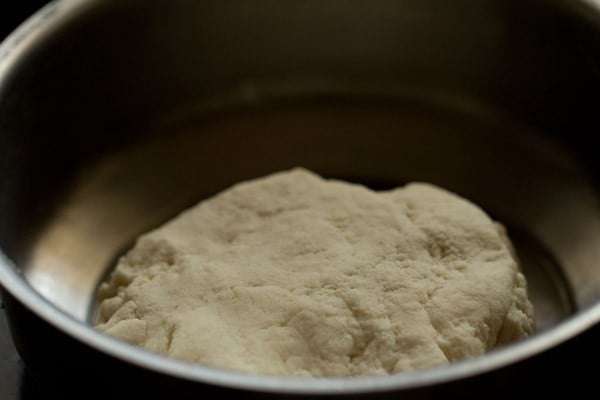
12. Cover with a moist kitchen towel or napkin and allow the dough to rest for 30 minutes.
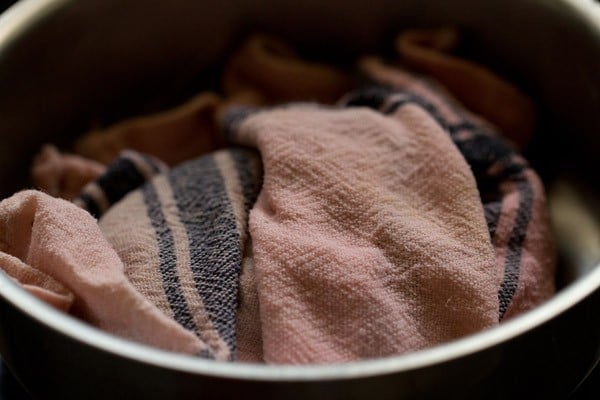
13. Here’s the dough after resting for 30 minutes.
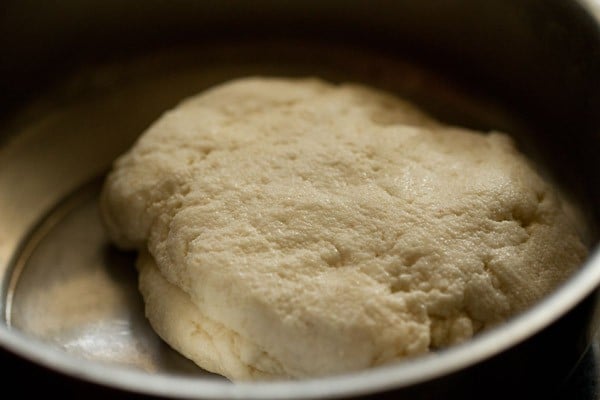
14. Knead the dough again for 2 to 3 minutes.
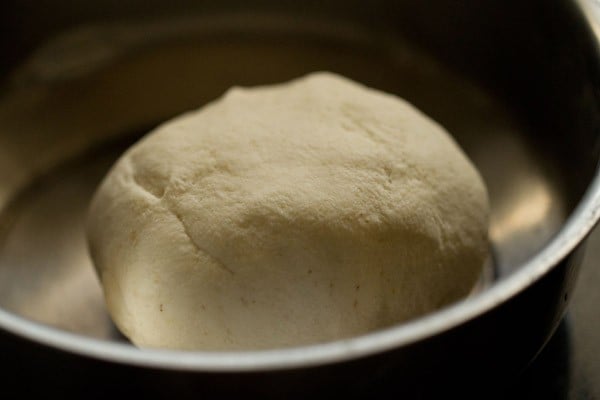
Assemble and Roll
15. Now divide the dough into two or three parts. Take one part on your work surface and begin to roll. Avoid adding any dry flour while kneading. Keep the remaining parts of the dough covered with a moist kitchen towel so that it does not dry out.
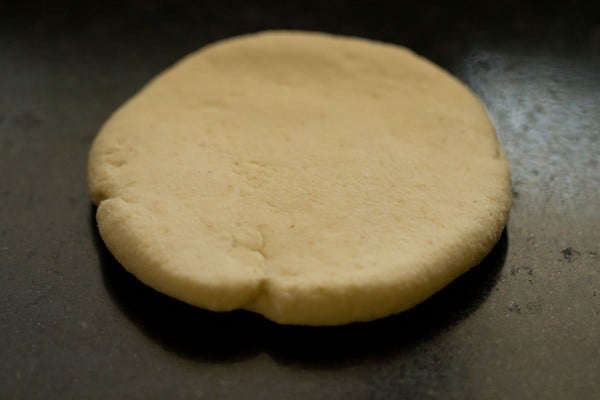
16. Roll to a large round. You see there are no cracks in the rolled dough and the dough has good elasticity. You can flip the entire rolled dough without it breaking or tearing apart.
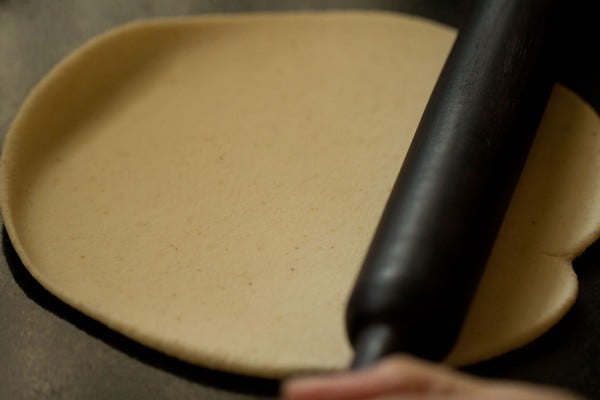
17. Keep on rolling to a thin and even round. The pooris have to be thinly rolled. If not thin, the base becomes thick and remains soft even after frying. If the dough is not rolled evenly, then the pooris won’t puff up.
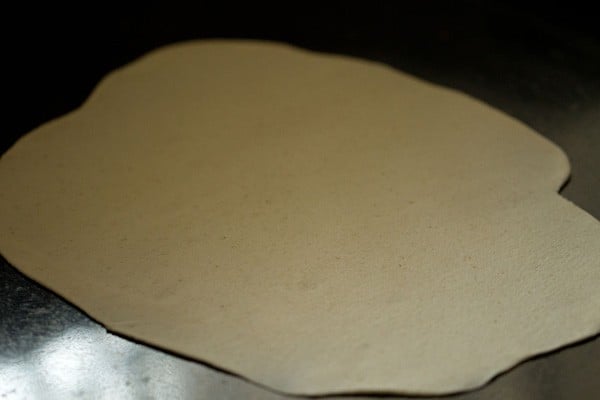
18. With a cookie cutter or a small bowl or a small jar lid, cut small to medium discs from the rolled dough. Using a cookie cutter gives even shape and size to the pooris.
You can also make small balls and roll them with a rolling pin. But then the pooris won’t have an even and uniform shape.
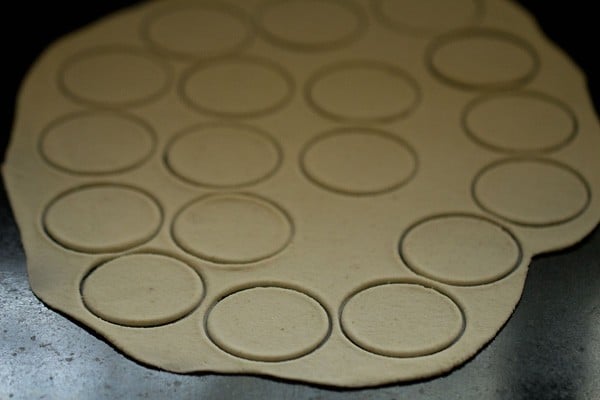
19. Remove the dough edges and place the small roundels on a plate without them touching each other. Keep these pooris covered with a moist kitchen towel.
Collect the dough scrapes and knead them lightly. Again roll this dough and make pooris the same way.
In this way make all the pooris and keep them covered with a moist kitchen towel. You can also roll them and fry simultaneously like I have done.
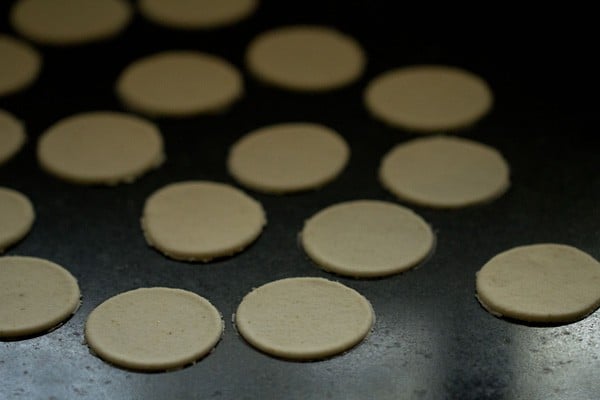
Fry Golgappa Puri
20. Heat oil for deep frying in a kadai or pan. The oil should be medium hot. Add a tiny piece of the dough ball to the hot oil.
If the ball steadily comes up to the surface, the oil is hot and the pooris can be fried now. Don’t fry them at a low temperature of the oil as this will make the puri soggy with oil.
Frying at a high temperature will brown the crust fast but the inside dough will be undercooked and soft.
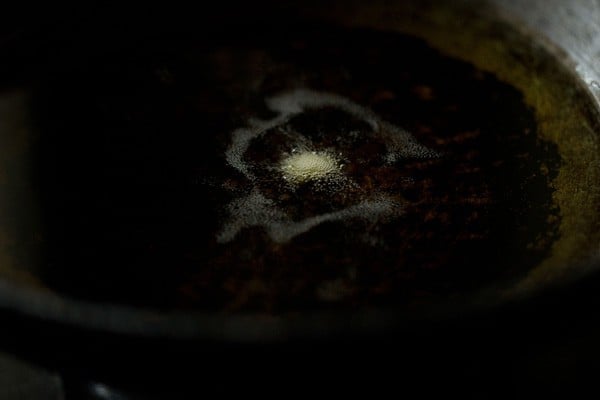
21. Slid a few pooris in the oil. But don’t overcrowd the kadai.
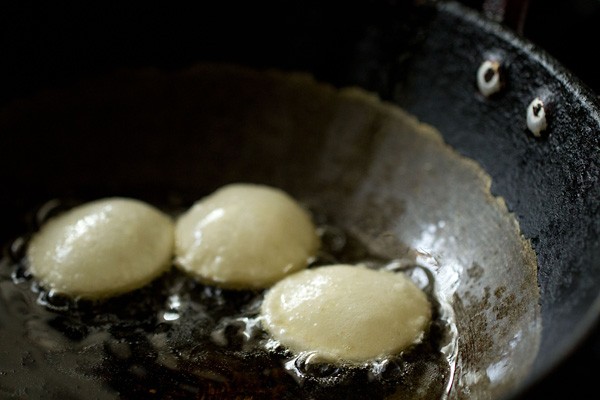
22. They will puff up quickly as soon as you add them to the hot oil. You can fry up to 4 to 8 pieces at a time, depending on the size of your pan. Nudge the pooris with the frying spoon so that they puff up.
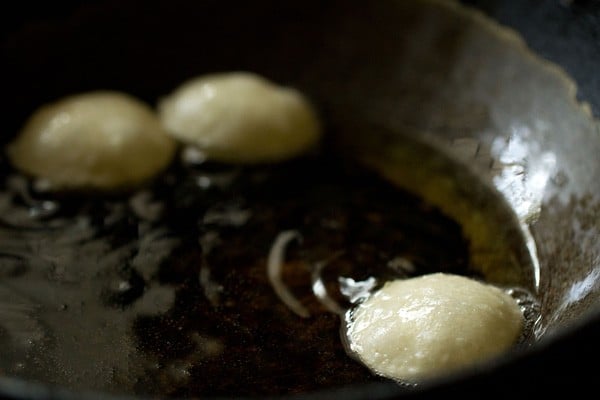
23. With a slotted spoon flip them, once they puff up. Flip a couple of times as needed.
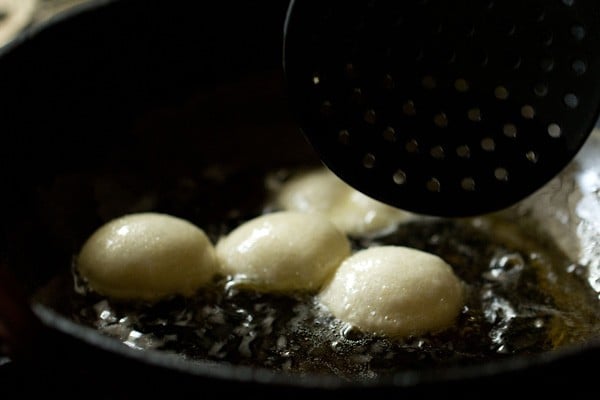
24. Even after oil stops sizzling, continue to fry the pooris till light golden or golden. Even after they become golden, keep them in the oil getting fried for a few seconds, so that they become crisp.
Frying this way, gives a crisp texture to the pooris from outside as well as inside. Otherwise, they may remain soft from the inside and crisp from the outside.
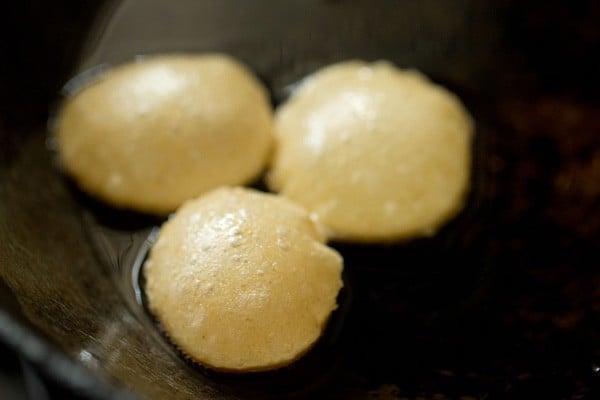
25. Drain puris on kitchen paper towels. There will be a few flat puris too. These you can use to make Sev puri, Bhel puri, chana dal bhel puri or Papdi chaat.
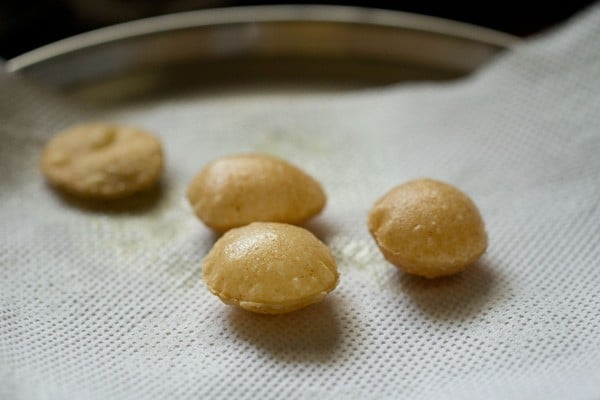
26. Continue to fry the remaining pooris this way in batches.
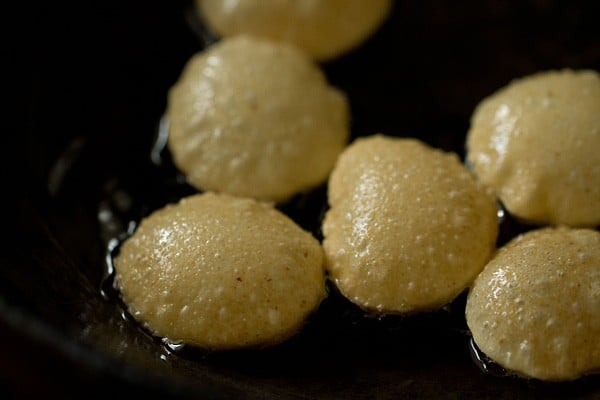
27. Drain puris on paper towels to remove excess oil.
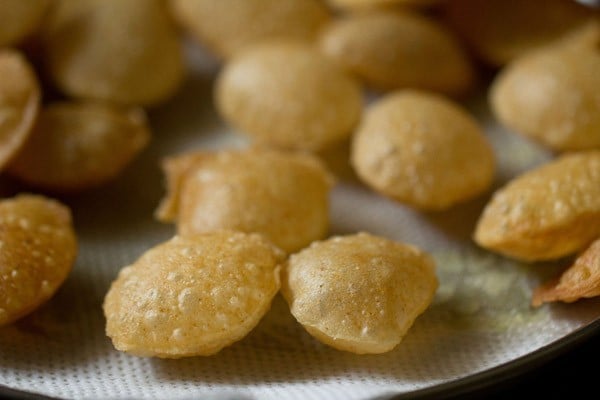
28. Once puris get cooled at room temperature, immediately add them to a jar or box and close the lid tightly.
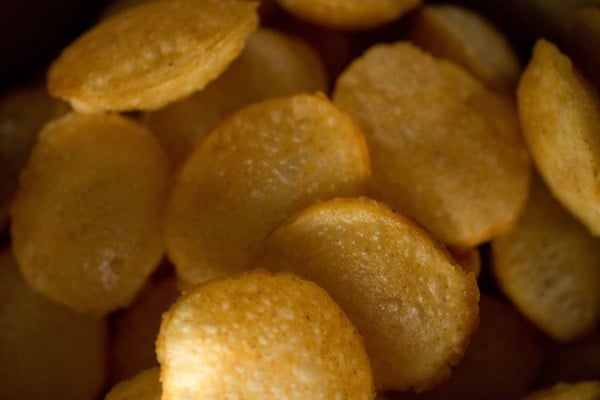
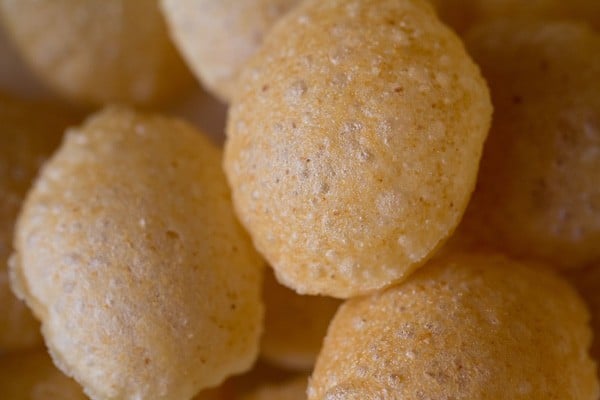
29. A close-up photo showing the crispy texture of the pooris.
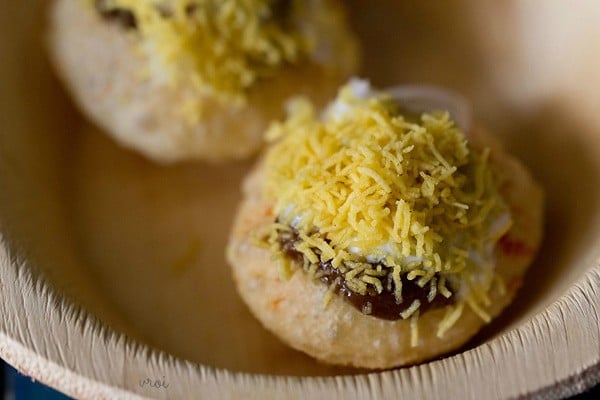
30. Make Pani puri, Dahi puri or ragda puri from these homemade puri or golgappas or puchka.
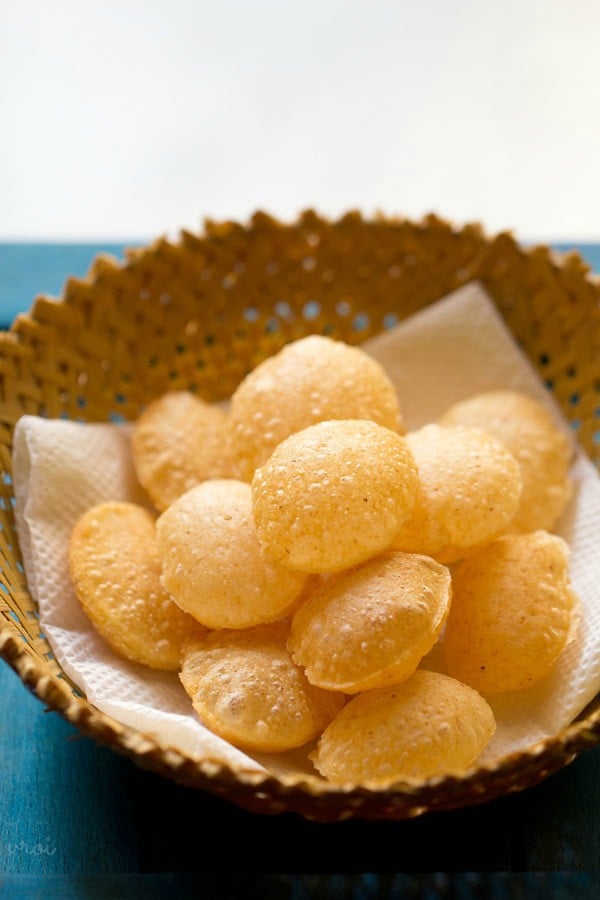
31. You will get 50 to 60 sooji puris from this recipe. They stay crisp and good for a month if stored in an airtight box or jar.
If in case the crispy texture is lost then dry roast the puri in a pan or kadai for some minutes until they become crisp.
Or you can bake them in a preheated oven at 180 degree Celsius for few minutes till they become crisp. But take care that they don’t get too much browned or burnt in the oven. So keep a check when toasting them in the oven.
If you can scale the recipe depending upon the quantity you want to make.
Expert Tips To Make Best Golgappa Puri
- Always cover the dough with a damp cloth even while rolling the puris. If the dough becomes dry, you will not be able to roll the dough easily.
- Ensure that all the rolled puris are covered with a damp cloth. If the puris become dry, then the puris will not puff up.
- These tips comes from experience. Just before frying remove the damp cloth from the puri.
- You could fry 4 to 7 puris at a time depending upon the size of the kadai.
- Do not add oil to the dough while kneading as the suji ke golgappe will become soft later.
- The dough has to semi soft with gluten strands formed in them. There has to be elasticity in the dough. These factors give a crisp puri. The crispness stays even after the pooris are cooled and even later.
- Refined flour or all-purpose flour (maida) is used for binding the dough. Avoid adding more flour to the dough. If the dough is not binding well, then you could add a few teaspoons more of flour. But don’t add too much.
- The puris have to be thin. If you do not roll them thinly, then they won’t puff up well and will remain soft from within.
- Fry the puris in a moderately hot oil. If the oil is not hot enough, the puris will absorb oil and become soaked in oil. Too hot oil, will burn the suji ke golgappe.
Please be sure to rate the recipe in the recipe card or leave a comment below if you have made it. For more vegetarian inspirations, Sign Up for my emails or follow me on Instagram, Youtube, Facebook, Pinterest or Twitter.
Puri For Pani Puri | Suji Ke Golgappe
Ingredients
- 1 cup sooji (rava or semolina), fine and unroasted – 160 grams
- ⅛ teaspoon baking soda or 3 to 4 pinches
- 1 tablespoon all-purpose flour
- 6 tablespoon water or add as required
- ¼ teaspoon salt or add as required
- 1 teaspoon oil – for the dough
- oil – as required for deep frying
Instructions
Making suji puri dough
- In a mixing bowl, take the fine unroasted sooji or rava or semolina, 1 teaspoon oil, baking soda and salt. With your fingers, mix the oil evenly with the sooji.
- Now add all purpose flour to this mixture.
- Mix again very well so that the all purpose flour is mixed evenly.
- Add 3 tablespoons water first. Mix again. Then add 1 tablespoon water more and begin to knead the dough. Sooji absorbs water while kneading. Add water in parts while kneading.
- Then add 2 tablespoons more of the water and continue to knead. The kneading is very important in getting the perfect texture. The dough is not soft nor too hard.
- If you make the dough soft, then add 1 to 3 teaspoon more of the suji. If the dough looks hard, then add sprinkle some water and continue to knead.
- The suji puri dough should be elastic. Gluten strands need to be formed, which gives a structure and shape to the pooris. The correct texture of the dough, also help in puffing puris and helps in them staying crisp.
- Knead very well. Elasticity helps in rolling the dough without cracks and thinly. When rolling, the dough should roll easily without any cracks. You should be easily able to lift the rolled dough without it tearing or breaking and falling apart.
- Knead to a semi soft elastic dough and keep it in a bowl or pan.
- Cover the dough with a moist kitchen towel or napkin and allow the dough to rest for 30 minutes. You can also keep the dough for an hour.
- After 30 minutes, knead the dough again.
Assembling and Rolling
- Now divide the dough into two or three parts. Take one part on your work surface and begin to roll. Avoid adding any dry flour while kneading. Keep the remaining dough covered with the moist kitchen towel.
- Roll to a large round. There should be no cracks in the rolled dough. You can flip the entire rolled dough without it breaking or tearing apart.
- Keep on rolling to a thin and even round. The puri have to be thinly rolled. If not thin, the base becomes thick and remains soft even after frying. If the dough is not rolled evenly, then the puri won't puff up.
Making Suji Ke Golgappe
- With a cookie cutter or a small bowl, cut small to medium discs from the rolled dough. Using a cookie cutter gives even shape and size to the pooris. You can also make small balls and roll them. But then the puri won't have an even and uniform shape.
- Remove the dough edges and place the small roundels in a plate without them touching each other. Keep these puris covered with a moist kitchen towel.
- Collect the egdes and knead them lightly. Roll the edges too and make puris the same way.
- In this way make all the puris and keep them covered in a moist kitchen towel. You can also roll them and fry simultaneously like I have done.
Frying Suji Puri
- Heat oil for deep frying in a kadai or pan. The oil should be medium hot. Add a tiny piece of the dough ball in the hot oil. If the ball steadily comes up to the surface, the oil is hot and the pooris can be fried now.
- Slid a few pooris in the oil. They will puff up quickly as soon as you add them to the hot oil. You can fry up to 4 to 8 pieces at a time, depending on the size of your pan.
- With a slotted spoon flip them, once they puff up. Even after oil stops sizzling, continue to fry till light golden. Frying this way, gives a crisp texture to the pooris from outside as well as inside. Otherwise, they remain soft from inside and crisp from outside.
- Fry them till they are a light golden or golden.
- Drain fried puri on kitchen paper towels. There will be a few flat puris too. These you can use to make sev puri or papdi chaat. Continue to fry all the pooris this way.
- Drain them on paper towels.
- Once they get cooled at room temperature, immediately add puris to a jar or box and close the lid tightly.
- Make pani puri, dahi puri or ragda puri or puchka from these homemade pooris or golgappas. You will get 50 to 60 pooris from this recipe. They stay crisp and good for a month if stored in an airtight box.
Notes
- Fry the puri at medium temperature of the oil. You can keep the heat to medium to medium-high while frying. Don’t fry at low temperature or high temperature. Regulate the heat as needed.
- Knead the dough very well until you get a semi-soft elastic dough.
- The rava should be fresh and within its shelf period. Use fine textured rava.
- You can easily halve or double the recipe according to your needs.
- Note that the approximate nutrition info is for 1 golgappe ki puri.
Nutrition Info (Approximate Values)
This Suji Ke Golgappe recipe post from the blog archives first published in July 2010 has been republished and updated on 8 January 2022.




Very nice. Great recipe.
Thank you for sharing this receipe
Welcome.
Can I heat the puris in oven to make them crisp again?
Yes you can do that. It works.
this looks like such a delicious recipe…. i never had the chance to try cooking this one but was always very curious on how to make these !..
will definitely put on my to-do recipe list !!
thank you, as always looking delicious !!
Thanks and I hope you try making these. Most welcome.
Hello, thank you for the recipe and step by step pictures. I was successful in having the pooris puff up, however they are not crispy enough. Any suggestions? I made sure the oil was hot enough and poori’s rolled as thin as possible.
The pooris have to be fried for a more time, so that they crisp up on the outside. They should have a golden crust on the outside. If they are removed as soon as they puff up, they won’t be crispy. Also when they cool, immediately store them in an airtight container. Keeping them outside at room temperature, will soften them.
makes total sense !
Thank you for recipe. I have already try 5 times panipuri but my pani puri always soft. Why my pani Puri after frying soft. Please tell.
Did you try this recipe for the puri or some other recipe? Do not make a soft dough as it will give soft puris. Fry the puri in hot oil. If the oil is not hot, the puri will become soft and soggy as it will absorb more oil. I hope this helps.
Hi.. i prepared puri with this recipe.. they turned out very well.. 90%of puris puffed up well.. but one problem i faced..is that they socked up too much of oil.. quite more than any deep fried puri does. Can u suggest some trick to prevent this . Thanks for the foolproof recipes u provide.. they are all a hit in my kitchen 😀😀
The soaking is due to the low temperature of oil. Fry at medium heat or medium-high heat and the puri will not turn soggy. Thanks a lot and good to know.
Can we use Readymade roasted sooji for making puri? I think they were very lightly roasted as color looks white only
You can try and I think should work.
Hi Dassana,
We love all your recipes. I had a question, how would you go about making the ready to fry puri you get now a day’s in the market (dehydrated ones) ?. Could you use the same recipe and dry the puris?. Then just pop them in the oven or fryer when needed. Thanks in advance
Thanks Derrick. I am not very sure on the technology used to dehydrate the puri and moreover I have never tried or experimented doing this. But I have seen a few neighbors in our home in Gurgaon, drying pani puri in the sun. So I think drying them should work. I personally think sun-drying is a much better option to dehydrate the puris. Having said that drying in the oven should work too. May be you could make a small batch and test. I hope this helps.
Hi..
I made this recipe but the pooris turned soft though they were puffed. Can u pls tell me y this happened…how to rectify ..
Thank u
they have to be fried in oil for some more time even after they puff up. also, i hope there was not more water in the dough. if the dough becomes soft, the pani puri will also be soft.
Very nice
Namaste.
I made Golgappa puris following my recipe last night using sooji and whole wheat flour (3:1). My puris are a hit or a miss. Last night was a miss as I did not knead the dough enough or perhaps kneaded it too hard. As a result, gluten did not develop 🙁
So I was checking your recipe out Dassana. And, I had a few questions –
1) Can we use whole wheat flour instead of maida in your recipe?
2) Why do we use baking soda in this recipe? I prefer not to use baking soda so I would like to understand.
Thank you so much!
namaste reema, your queries answered below.
1. yes you can use whole wheat flour. if using whole wheat flour, then you will need to add a bit more water while kneading.
2. baking soda is used to help the golgappa puff more and become crispy, but you can skip it.
welcome and hope this helps.
Hi, could you also add a section on air frying these and what it would take to do that? I love all your recipes and have tried many of them, but due to health reasons cannot eat deep fried stuff.
amrita, i doubt if these pooris will work in an air fryer. otherwise, i would have added a note on that in the recipe. some recipes like samosa, french fries etc, which i have air fried – i have added notes on these in the recipe posts.
Love it All! Im a pro chef and dont know much of my Father’s side of authentic Indian food to cook for my fiance! Awesome website!
Thanks Very Much Dassana Amit!)
welcome rob and thank you.
Can I use wheat flour instead of maida?
I am not sure how the texture of puri will be if wheat flour is used.
Amazing, cant wait to try in sha Allah. ???? yum., ????
Thanks Dania
Hi,
I found an article on pani puri which has different types of pani puri’s in India. Probably you might want to check to get ideas on recipes for any of these.
thanks uma. i know about the different types of pani puri available in india. but not made them at home. i will definitely check these articles.
Hai
can i substitute baking soda with baking powder..?!
i would suggest to use baking soda.
Looks tasty !!! ????????
Not for me. I like paani ke bataashe [gol gappe] made from aata [wheat-flour] – neither from maida nor suzi nor anything else].
Awesome…. As usual ?
thanks archana 🙂
Thanks☺️?
Welcome yashwiin
Can we skip baking soda?
yashwiin, i won’t suggest. use the baking soda.
Hi,
You have mentioned serving size as 20-30,does it means the number of puris?
yashwiin, yes it means the number of puris
The recipe was perfect.Thank you
Welcome Vidhi
I tried to make the pani puri as the instructions given here but I found a problem that the puries are puffing up but not getting crispy. I am using ground oil to fry at low temperature.

Please guide me to correct this.
Awaiting for your reply.
Manisha
on a low temp oil, the pooris won’t become crisp. fry on medium temp in the oil. also fry after the oil stops sizzling. this way you will get crisp pooris. removed your mobile number for security reasons.
Hai,
Thank you. I made these Puri today and i was successful. All thanks to you. I cook very confidential whenever I follow your recipe.
Welcome Nanditha. Glad to know this. Thanks for sharing positive feedback on puri recipe.
Excellent tips.
I tried and got it fluffy and crisp.
Repeated the trial the next day. Still better!
Now, I can do it anytime 🙂
Kneading, and adding water little by little, is the key.
Good description.
Congratulations?
Thanks Narayanan for your positive feedback and for sharing your experience.
Hi dassana
I have tried many of ur recipes nd every time its a hit as my son says mom its a killer , or he will say mom u nailed it. All thanx to u i am able to make melt in d mouth phulkas alsp thay too after a long time. This recipe is a little tricky( pani puri) this i am adding for the benefit of other
1the dough has to be REALLY knead well for 8-10 mnts ,forget d teaspoon of water just applying a fee drops by dipping in water nd kneadding it. At first its very har but forms a ball but this is not d desired dough. Keep kneadding after some time it startd to crumble , add a few drops of water md keep kneadding after a few more mnts d dough becomes soft nd can be kept to rest.
2 Many ppl have written thayt it becomed chewy nd soft the reason i found was even after frying both sides it has to be kept in d oil for a few more seconds to make it crisp .
This is my observation as i was making d puri at home
Its turned up crispy nd tasy .
Thanx for all ur wonderful recipes,
And God blesd u.
thats great to know jaya 🙂 also thanks for sharing a detailed note on the kneading and frying part. it will sure help readers. you are right, the key here is to knead the dough really very well. it is hard at first, but then as you go on kneading it softens. also after frying the poori has to kept in oil for sometime, so that they become crisp. i will add this point in more detail in the post. thanks again.
oh…… nice recipe
thank you sameera 🙂
hi, i found it very helpful and easy. i use to think that pani puri can never be done at home. thx for this lovely recipe:)
welcome rina and thankyou so much.
very helpful i always used to wonder how puris of pani puris are made,, thanks once again
thanks ismail and welcome.
you didnt mention addition of baking soda in the recipe. When should we put baking soda. Is it required or not. Pl. clarify.
poonam, i have mentioned adding baking soda in step 1 of the step by step pics.
thanks for replying di ,
can u tell the exact amount of time the oil should be heated
becoz every time my mom makes these puris, they never puff up and i think it is becoz of the oil
praveen, difficult for me to tell the time as i have never measured the time. you can follow these tips. first heat the oil on a medium to high flame. then add a small piece of dough in the hot oil. if the dough steadily comes up to the surface, the oil is hot and the pooris can be fried. if they remains at the bottom of the kadai or comes slowly up, then the oil is not hot enough. if they come up too quickly the oil is very hot. so the flame has to be reduced. hope this helps.
hi dasaana di , i m actually daughter of praveen kr and i try
ur recipes with my mom and we made golgappa also but the puris did not puff up and
became like papdis and me and my
mom became verrrry upset
can u say d reason behind it ? did dis happen becoz my mom used coarse sooji ?
but thanku very much for ur lovely recipe
tell your mom not to become upset 🙂 in cooking at times things do not come out well. its due to coarse sooji. the sooji has to be fine or very fine. like the sooji we use to make sheera or halwa. with the papdis, you can make papdi chaat, sev puri, chana puri or just have them with tea.
Thkx real good.
welcome ahmed 🙂
Thanks for the detailed recipe will try it out
sure vijaya try out and let us know how it was?
Really wanna try it..!
Hi.Awesommeee… Your recipe and the way u explained and the tips u gave were really really helpful. I was thinking why we have to keep the moisture even after shaping it. But now I know its for the puri to puff up. I am a regular follower of your receipes.. When even I want to make something new I refer to your recipe and they just come very well.. Thanks a lot.. It’s very useful..
thanks a lot for this positive comment. welcome.
Simple and superb what is dumroot can u pls give details of this recipe.
dumroot is pumpkin halwa. there is another dumroot which is a baked pudding.
I like gol gappy, I have tried them when I was in pakistan, but now I will tried them in washington, thanks to u
surely try selena 🙂 and let us know how were they? and you are welcome.
Thx for the recipe….very helpful n easy…?
welcome saynmika 🙂
Omg!
My mum was craving some snacks today, and I just decided to make gol gappy on a whim, I’m pakistani, our pani recipe differs a lot from yours, and we dont really have hara masala and onions added to our chick peas, but I add them anyway because its just better that way! 😀 so I opened the first tutorial link I could find ( yours ), and just decided to make them, at first I was disappointed because they didn’t swell. But I decided to fry the whole lot anyway, I found that the one’s that came out flat were not moist enough. The one’s right at the end had more water soaked in them and they came out perfect. This was my first try and I managed to pin point my mistakes, and get a perfect puri at the end of it. This tutorial is amazing, I tried to match your actions as much as I could. Thanks so much. You taught me something amazing today! <3
thanks sughra. you are right. its the moisture or water content that helps in puffing the pooris. unlike the regular pooris, which has more of the water content, pani pooris have less of them. too dry the pani poori dough, the pooris won’t puff up. so nice to know you cracked the issue. i must say you are keen observer with logical reasoning abilities. thanks for your sweet comment and good to know that the pooris came out well finally.
Hello,
Thank you so much for the recipe. I have only coarse semolina.can I make with this or should I grind it in mixie?
Thank you in advance.
welcome jayashree. grind it till you get the texture of fine semolina. recipe does not work with coarse semolina.
so many trials ,finally I have done it,thank u so much for such good and easy to understand the steps of this recipe.
welcome priyanka
My mother tried to make the pani puri,but failed every time.This recipe is too good.So my mother helped with this.Thank you.
welcome sayan. glad to know this.
These puris turned perfect. I hv shared your link on a FB food group I am part of. Thanks!
welcome reena. glad to know this.
Dear Dassana,
At what point should the baking soda be added?
I tried making the puris and since the addition of baking soda wasn’t mentioned in the recipe apart from the ingredients section (or I haven’t been able to spot it), I kneaded the dough without adding it. However, I did add baking soda and tried kneading the dough again, but I guess the soda didn’t distribute evenly. So none of the puris puffed up!
However, we did enjoy a nice papdi chaat made from the crisp flat puris 😀
What can I do to ensure the puris puff up the next time?
thanks priyanka for pointing out. baking soda is added in the first step. even without baking soda, the pooris should puff. baking soda additionally helps more in puffing. some recipes i know do not even use baking soda. its just like how we make pooris and in pooris we do not baking soda. but let me tell you the pooris which we get in restaurants have baking soda. thats why they puff up so much unliked homemade pooris. if you add baking soda once the dough is kneaded, they won’t get distributed. at least good to know that you had papdi chaat from the crisp flat puris.
next time try adding some water. semolina absorbs a lot of water. so i think its not the baking soda that is the culprit but less water. depending on the quality of semolina more or less water is required. but just make sure you don’t make the dough soft or sticky.
thank u so much. its lovely tips thank u once again
welcome sweety
Each n every recipe is so simple and yummy thanks for your help to make indian recipes who stay out of india this site is like mother teache her daughter
welcome dina. thanks for sharing your positive feedback.
Hello Dassana,
Thanks so much for the instructions and the lovely pics!
Can you please, please tell me how to make the atta version of the puri? What ratio of gehu ka atta/rava should I use? And are we supposed to put maida in it? I love pani puri with the atta-waala phuchka, but online I only found recipes of suji ones. 🙁
Hope you reply, thanks anyways!
welcome meena. i have never tried making with atta. i always make with sooji. so won’t be able to help you.
you are explainig everything very carefully. thank you for giving tips.
welcome k.praveena
thanks ,nice nd i try
welcome rupam
To make crisp puri, after frying keep them in microwave convection mode 150 degree for 20 to 30 seconds. Observe n don’t let puri blacken. Then store them.
This tip I received in a recently held chat class. Hope it helps though I am yet to try it.
thanks for sharing the tip usha. will help the readers.
Nice and I try
Let me try ur tips today , previously the puri never puffs , and i end up eating papri
gaurav, do give it a try.
can we use makhi atta instead of maida
mehar, i don’t know. i have never tried. makki atta does not have gluten so it will be very difficult to roll it and make thin puris.
thank you for giving tips.i will try this recepie.
Hi….instead of kneading dough if I do it in food processor. …will it give the same crispy ness.
kirti, yes you can. it will work.
Hi Dassana,
could you tell me the recipe if i want to make these gol gappas with atta?
Thanks!
welcome sneha. i have to try the recipe with atta. i usually make with sooji.
Thank you for replying, I followed your tip and put them in the oven and they literally became TOO crispy and I even stored it in an air tight container. Thanks again for replying.
welcome ayesha. thanks for sharing the feedback.
Thanks for recipe. Although, the puri’s became very soft, they weren’t crispy. So I put them in the oven and still they were too soft. Please tell me what to do.
Thanks:)
welcome aysha. this is because the puri dough needs to be kneaded very well. i suggest keep it in the oven for some more time. they will become crisp.
hi dasanna, I give you full marks. I could make 48 puris and all puffed up. I did feel highly tensed while making it as this is the first time I am frying for storing. Thanks a lot for the perfect recipe. Dk
welcome durgak. good to know this. thanks for sharing positive feedback on puri recipe.
The recipe is good i give 5 stars
thanks pranoy
superbbb
thanks for helping me
.
welcome rishi
Sir for 50 people how much ingredient I need to prepare pani? Each a plate 5pic pani puri will be there….
just increase the recipe of the chutney proportionately.
very nice 🙂
please help me..my golgappas become soft as soon as they become cold..even i used oven for making them crisp..but it didnt work..one more thing the puri’s also had a strong smell of baking powder..please help me nd tell me what mistakes have i made??
whenever i make these, the pooris don’t become soft. i have got a few readers telling me this. i think its the water amount. the dough has to be stiff and tight. i have not mentioned the water proportion as depending on the quality of the rava and maida, the water required may be less or more. baking soda aroma is there, but not strong. next time you can just add pinch of two pinches of baking soda.
Hi Dassana, your all recipes are awesome… I tried chole, samosa, caramel custard and pani puri…and all were successful… Thanks….
welcome pradnya. glad to know that you liked the recipes.
Hi,
Made puri’s as per recipe came out well puffed but it wasn’t crispy… any suggestions?
they have to kept as soon as they cool in a box. if not, then the crispiness is lost.
I made the pani puri today and they came out perfect. A few didn’t swell up. But majority did. Perfect recipe . Thanks for the step by step.
welcome ayesha
Hi,I’m confused between baking powder and bicarbonate soda ,which one shall i use instead of baking soda
sodium bicarbonate and baking soda is same. so use baking soda.
I used baking powder and it came out perfect,thanks
welcome mum. good to know that puri came out well.
Hi,I’m confused between baking powder and bicarbonate soda ,which one shall i use instead of baking soda
Ya as per my knowledge baking powder contain bicarbonate !! so both are same !!
baking powder does not contain sodium bicarbonate, but both are not same. baking powder has other ingredients too besides sodium bicarbonate.
I MADE THE GOL GAPPAS AND EVERYTHING WENT WONDERFULLY WELL.HATS OFF TO YOU MA’AM
thanks zahid for the positive feedback on gol gappas.
Thank you for the detailed way of making the poori with precautions to taken.
welcome C.S.Rajan
Thanx for the recipe
welcome sapna
Hi Dassana, thank u for the recipe..we tried at home but unfortunately they are not puffing up..can you please help us out in this what can go wrong..i had 2 issues:
1) Our dough becomes very sticky during roll out, so we put some oil to roll them out..whether this was causing the problem? i was afraid that if i use maida for rolling, then they will become dry..any suggestions plz..
2) How much should we roll them out..i rolled out very very thin and they become like chips..
One more, either we should use baking powder or baking soda?
It will be very nice of you if you can help us out..we try twice but same thing..they are not puffing up 🙁
the dough has become sticky as too much water is gone in it. you can add some more semolina and knead again to a a firm dough. maida will not make them dry if you keep the puris covered with a moist towel. it should be thin, but not very thin. they should be able to puff up. use baking soda. baking soda is more strong than baking powder.
its good
Hey… I wanted to make this for guests.. so I did much as you suggested.. but here I am .. frying the pooris and they are becoming too soft within seconds of coming out. I would agree its my fault as I replaced suji with atta.. but can you please help me out .
with atta, they will become soft. there is nothing i can do.
i am brougt panipuri masala but noting taste coma please give me any suggestion
suggest to make jaljeera at home and just add 1 or 2 tsp of the pani puri masala to it. jaljeera recipe here – https://www.vegrecipesofindia.com/jal-jeera-or-jaljeera-recipe/
hi, dassana, u know i am a very big pani puri lover. u’r recipe was awesome n thnk you so much for telling this wonderful recipr to us!!!! LUV U!!!!!:)
welcome archana
5 star website always
Hi dasanna,
I have tried this recipe and it was awesome. I would also like to share that ur each and every recipe is excellent. I have tried ur biryani, ragda pattice, chana chat, aloo palak, kadhai mushroom, and too many. And u know what they were excellent. I got too many appreciations. Thank u. U keep it up with ur excellent and delicious menus
hi smita
thanks a lot. your comment and feedback on all the recipes you have tried means a lot to me.
hi i lov gol gappeys so much but we dont get em here so i tried makin this at home.
its a great recipe and the results are wonderful. this is the best website i could get reccipe from.
but i only got stuck at one stage
when I knead the dough and left for half an hour my dough became hard and i still tried to make one of em but they came out flat becuz mi dough was hard. how do it resolve this and make them come out circly
the dough with semolina is usually dense unlike the one made with flour. you could have added a little bit of water and would have got a not so hard dough.
look very tasty yummmmmmmmyyyyyy…………:-)
Hi dasanna, Thank u for posting this wonderful & easy recipe. I prepared the puri, it puffed out very nicely & it is tasty also.
welcome shalini
hai this is sudhashankar,i know before itself how to do pani and puri but i dont know how to make a masala, kara for pani puri. thank you,bye
welcome sudhashankar
I it is nice and easy to learn receipe .it helps me to prepare puris at my home.
Thank u so much.
welcome jalpa
very very thank to you for proper information of making of panipuri. it’s really so good.
thanks asif ji
thank u for the recipe and the additional tips…
Yummy, nice
Very nice…
good!!!!!!! its easier and children wona like to have it………….
hi
This seems to be very easy method to make golgappa. thank you.
very nice
I ve prepared it twice but first time the puri was very nice but secobd time wn i prepared they became soft can u plz help me
am not sure what must have went wrong. may be the oil was not hot enough. just guessing.
puri is soft what to do so the puri get hard
as soon as the puris cool down to room temperature, store them in an airtight box or container. if they become soft still, then just bake them in the oven for few minutes or slightly roast them on the tava or kadai before serving. they will become crisp.
Thanks Dassana…real gud tip
Experience counts
thanks.
Your recipe is very helpful one by one step i tried. so gud im make first time so tasty every thing sososososososssssssssoooogud sssssoooootesty
THANKS SO MUCH
thanks mina and welcome.
what i can do to preserv the hardness of puri’s they beacome soft and don’t taste good .
give me some tips related to frying puri ( time to fry each puri and the one sided or both sided fry etc )
thanx 🙂
as soon as the puris cool down, store them in an airtight box or container. if they become soft still, then just bake them in the oven for few minutes or slightly roast them on the tava or kadai before serving. they will become crisp. when frying puris, first the the side touching the oil gets browned and then you turn and fry the other side.
ooooooooooooooooooooooooooooooooooooooooooooooooooooooooooooooooh
I think its great we die for this pani puri and to finally have a recipe is amazing
good for you
thanks very much
eleanor
thanks eleanor
I cannot get hold of semolina flour, can I substitute it ( I have chick pea flour? ) with something else??
Debs
in this recipe some other substitute won’t work. there is another kind of pani puri made with wheat flour. i don’t have a recipe of it on the blog. you can search on google for this one. i tried searching but i could not get the wheat flour version 🙁
I have found a source of semolina flour about 15 miles away and am going tomorrow to buy some. I’ll let you know how they turn out.
Debbie
thats nice to know debbie… but i will try to add the whole wheat version of pani puri too.
I tried these fro the first time yesterday ( thanks to Araf…workmate! and loved them. I have to try and make them. Ours came with a lovely sour tamarind sauce, do you have a recipe??
Many Thanks
Debs
there is a tamarind sauce recipe here: https://www.vegrecipesofindia.com/tamarind-date-chutney-recipe-sweet-chutney-for-chaat/
Thank you so much.
welcome debbie 🙂
it is about Panipuri (GOLGAPPE)
Excellent Procedure I like this Method very Much.
Which guides us promptly and correct with no difficult steps.
thanks for the recipe. i follow all ur instructions for pani puri,puri puffs realy nicely but as soon as we take puri off the cooking oil it becomes soft..what should i do to maintain hardness???
i really have no clue why the pooris are turning soft. it never happens with me.
still i would suggest a few things… fry the pooris in a moderately hot oil. after you remove them from oil, drain on kitchen tissues and once they cool down to room temperature, then quickly store them in an air tight container.
another thing that you can do is… if you have an oven then bake the pooris which have become soft for couple of minutes at 180 degrees C. baking will make them crisp. this technique you can do just before serving.
i have tried this recipe of puris step by step,but as soon as i t cools it become soft .i dont know why?please suggest
dear ekta, i am not sure why the puris became soft.
a few tips could be helpful which i have already suggested in the previous comment:
1: fry the pooris in a moderately hot oil. after you remove them from oil, drain on kitchen tissues and once they cool down to room temperature, then quickly store them in an air tight container.
2: if you have an oven then bake the pooris which have become soft for couple of minutes at 180 degrees C. baking will make them crisp. this technique you can do just before serving.
3: lastly if you do not have an oven, then sun dry the fried pooris in the sun for a day and then store.
Hi, there
First of all u can be really a good teacher,as yesterday only I took recipe from my frd she gave same thing but it doesn’t work out after an hour it became soft and then I thought to search on goggle n I got yours u won’t believe it was just awsome thx
thanks reshma. glad to the know the recipe worked for you.
very nice recipe but one thing pl clear that how can i maintain crisp of pani puri as they become soft after cooling
if you store them in air tight container, they won’t become soft. also if in case they do become soft, then just bake them for a few minutes in the oven and they become crisp again. you can also lightly roast them in a kadai or pan. this also makes them crisp.
prior to all thank u very much for this kind of recipe,but can u help me.i mean i want to know recipe for ready made pani puri.today evening i purchased few grams ready made gol gappe(pani puri,) and just fry it.,so my need to know how can we make this kind of ready made pani puri ?pls tell me sir…….i m waiting for this recipe………thnx
i am thinking you have the readymade pooris… so just boil some potatoes or chana or moong. soak the chana and moong overnight before you boil them.
you can buy readymade jal jeeera powder and readymade sweet chaat tamarind/imli chutney. make the jal jeera with some water. then just make the pani pooris with the boiled potatoes or moong/chana and the jal jeera and imli chutney… before buying just check the manufacture date & expiry dates.
you can also make a sweet & sour pani from this link here: https://www.vegrecipesofindia.com/pani-puri-recipe-mumbai-pani-puri-recipe/
nw a days i m big fan of yours recipes.
thanks rashmi for your lovely comment.
i am very big fan of panipuri/golgappa…by above panipuri recepie.i can eating panipuri…wen i want to eat…..so thank u so much…i loved this.Mmmmaaaa
thanks cute girl…
please give the recipe of the pani. does the pani of pani puri differs from that of golgappa!!!!!!!!!!!!
there are some different ways of making the green or sour pani. but the same pani can be had with puri or golgappa. here is a recipe of the pani which my mom makes:
https://www.vegrecipesofindia.com/pani-puri-recipe-mumbai-pani-puri-recipe/
ok i will try
Hi yaar……….i have tried doing this receipe and it came out really well…thank you for the help….the pictures and the method really made easy to do it yaar……..really wanna thank you so much………..
Thank U for this amazing recipe and pictures make it more tempting to try it out. But plz tell me how could I make the other items that are served with Panipuri.
here’s the link for making a easy and quick recipe for making the pani and assembling and serving the pani puri: https://www.vegrecipesofindia.com/pani-puri-recipe-mumbai-pani-puri-recipe/
an all purpose sweet chutney for pani puri: https://www.vegrecipesofindia.com/tamarind-date-chutney-recipe-sweet-chutney-for-chaat/
recipe for making the ragda: https://www.vegrecipesofindia.com/ragda-recipe-ragda/
and if you want to make the moong sprouts instead of the ragda. just steam the moong sprouts with some salt and turmeric for the pani puri:
https://www.vegrecipesofindia.com/making-moong-mungsprouts-at-home/
hope this is helpful.
plz teach me how to make sev batata puri’s puri.I am tired of searching
dear prachi,
since you have asked for it i will make the puri’s at home and update it soon on the website.
i was very tired searching for pani puri’s puri but this site gave me the exact way of doing the puris.Thanks for such a good recipie n i also liked the tips u suggested.Thank u once again n we r waiting for more recipies not only indian but also firangi ones
thanks prachi and yes, i am going to add more indian as well as firang recipes…
tried and good
Hi,
i was googling for a perfect recipe for the puris and I came across urs.I tried it day before yday and it turned out awesome.thanks for posting this recipe.I’d love to try some more of ur recipes.i even liked all the tips u mentioned to maintain it’s crispyness.whoever wants to make these puris I highly recommend this recipe.it was very easy to follow and the result perfect!!
thanks azra… do try the other recipes and let me know
Sure I will.I might be making Chana chaat today and in the next few days spinach and corn 🙂
Hii dassana your recepie presentation was awesome loved it….. nice step by step process,….When rolling the puri its neccessary to make a thin puri instead of making a thick puri ? plzz waiiting for your replay….
thanks arvind. yes u have to make a thin puri. if you make it thick than they do not puff up well and the puris become thick and loos their crispiness soon.
Perfect! Like the way you have presented it. One question though, how do you manage to keep the puri crisp? The only way we tried to crisp it is to bake it in owen 🙂 Will be waiting for your opinion!
-Abhi
thanks abhi.
after frying, once the puri cools down u keep the puris in an air tight container. i have also heard of some folks keeping the puris in sunlight for some hours. in monsoons they may become soft, then u could just bake it in the oven or slightly roast them on a tava or pan.
Hello Dear…I am so happy to know that, I can make panipuri very Easily….. otherwise always i m avoiding to make it at home…. today only i will try this n i will get back to u with my experience with your suggesition…just i wanted to ask u that my pani puri is not that much tasty as compared to Restaurents or Road wall’s panipuri ….? might be they r using any different ingradiants to prepare sweet chutny & pani ……can u guide me on this? Thanks a lot…..
Hello Dear…I am so happy to know that, I can make panipuri very Easily….. otherwise always i m avoiding to make it at home…. today only i will try this n i will get back to u with my experience with your suggesition…just i wanted u ask u that y our pani puri is not that much tasty as compared to Restaurents or Road wall’s panipuri ….? might be they r using any different ingradiants to prepare sweet chutny & pani ……can u guide me on this? Thanks a lot.
actually the ingredients they use is the same. the proportions of the ingredients might vary. however there are different types of pani that is prepared… some only use coriander and tamarind as the main ingredients, and some use mint, coriander as the main ingredients. however i have heard that some pani puri wallah’s add a drop of acid to the pani and hence the taste is different. also the water they use is not clean and unhygienic.
Hi All,
I believe the Pani for Puchka plays one of the major role for the taste !
I make it using:
1. Tamarind
2. Little Fresh Coriander Paste ( So that it dissolves completely in the Pani )
3. Jal Zeera Powder.
4. Red Chilli Powder.
Trust if the proportion of the above is good in the mixture, the Pani will be amazing ..
Can also drop few slice of Ginger to enhance the flavour.
But – Thanks to Dassana, for the Puri recipe …
This was what I was not perfect in 🙁
Now – Every one will say ….
Wah Wah .. Wah Wah .. Wah Wah …. 🙂
thanks roshan for the pani recipe. it will surely help the readers.
wow fantastic recipe. IN SHA ALAAH i will try. thanks ALLAH PAK BLESS you.
thanks tehreem for your best wishes. much appreciated.
dear dassana
I am very confused how to make pani puri, then i go to your site and feels very comfortable to understand how to make pani puri, your method is very very good.means mouh main pani aa gaya.I will try to make pani puri today.
god bless you
thanks
Pooja
thank you pooja…
Thank you soo much
appreciate ur help
i liked the way u made it and put all the pics up here … it makes easy for us
You can make poori/puri without soda also. check this out
http://yummyfood-khusi.blogspot.com/2010/12/pani-puri-golgappa-or-phuchka-or.html
I would like to get the receipe for the panipuri , which can fry once it drried properly and it can puff during the fry
i do not know of any pani puri recipe which needs drying before frying.
Hey
This is an amazing recipe and pictures make it more tempting to try it out. I have never seen a recipe of pani puri (the puri part of it) and so its great to see it here. Btw 1 small suggestion, I have never been able to make good samosas so if u can just help posting some punjabi samosa recipe 😉
Thanks
Thank you Priyanka for your positive comments.
In fact, for some 3-4 weeks I have been thinking of making punjabi samosa and posting the recipe with step by step pictures on my blog. Its just that I did not get enough time to make the samosas at home. But I am surely going to make it and post it soon.
You can subscribe to my blog’s feed here at http://feeds.feedburner.com/VegRecipesOfIndia to get the latest recipes by feed. You can also subscribe through email and the email form is on the blog below recent comments.
Hi, i tried many times many recipes of golgappa but it didn’t work :(. my daughter like golgappa very much so i want to make it nicely. could you help me please how can i make them puffy?
while kneading the water added should not be much. meaning the dough should not be soft. addition of baking soda helps.
Thank you. in one cup suji, what amount of baking soda i have to add?
1/4 tsp of baking soda is fine.
Hi ,
I tried it today.puris puffed well but as soon as they cool down they became soft.i followed all steps of yours
as soon as the pooris cool down, you have to store them in an air tight box. in fact even if cooled further, they become soft. so once they come to room temperature, you have to quickly store them in an air tight jar. other wise they will become soft.