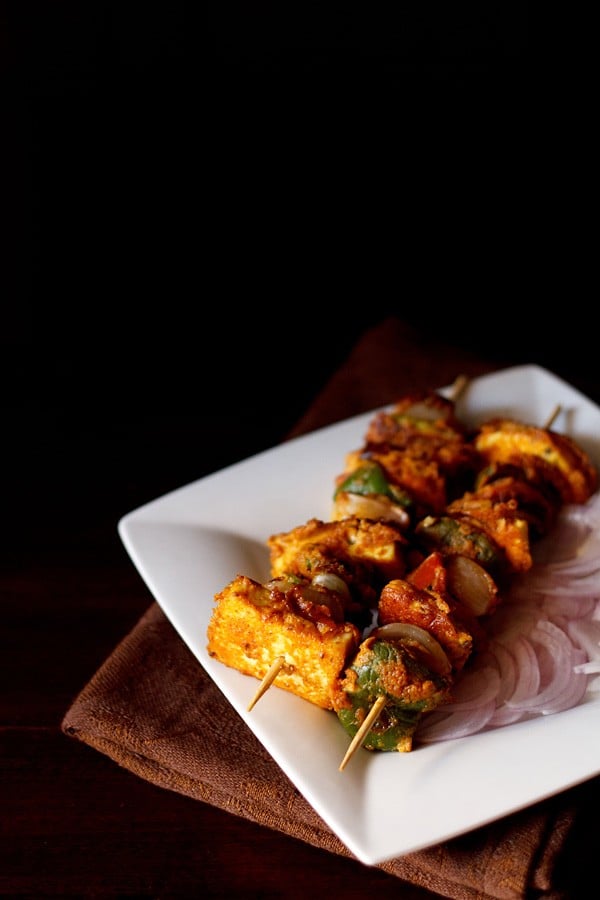
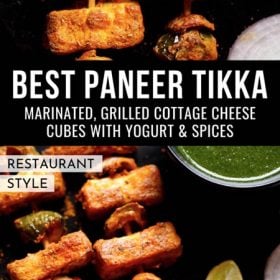
Paneer Tikka is a popular and delicious tandoori starter and snack where Paneer (Indian cottage cheese cubes) are marinated in a spiced yogurt-based marinade, arranged on skewers and grilled in the oven. Worry not if you don’t have an oven – instead of grilling in oven, you can make Tandoori Paneer Tikka Recipe on stovetop on a tawa/skillet. In this post I am sharing both the oven and stovetop methods.
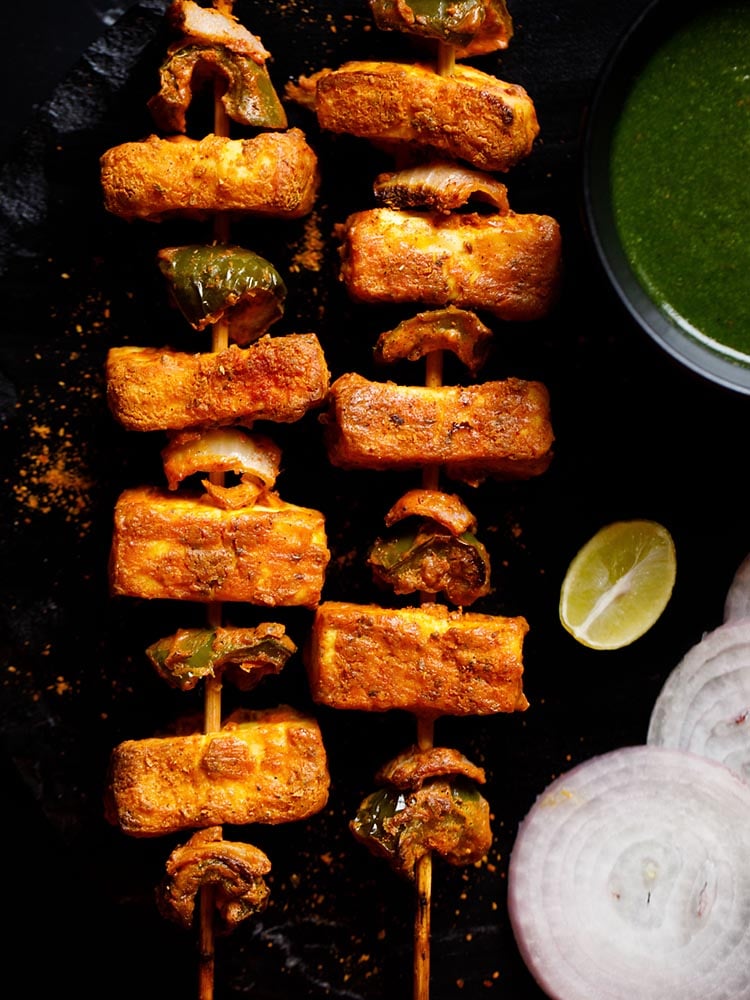
About Paneer Tikka
Tikka basically means anything that is marinated and then baked or grilled or fried and paneer tikka is a popular vegetarian tikka dish.
This tasty homemade version is similar to the dish served in restaurants, but I would say actually tastes better!
The Indian spice powders mixed with the yogurt (curd) make a flavorful marinade that is soaked up by the porous paneer cubes. Grilling the skewers then produces a nice slightly crispiness on the paneer.
Table of Contents
You can easily use this recipe of paneer tikka to make the very popular curry based dish of Paneer Tikka Masala.
What is Tandoori Style Cooking
For newbies to Indian food, tandoori style cooking is when marinated ingredients or Indian flatbreads, in this case paneer cubes, have been threaded on a skewer and grilled in a tandoor, which is a cylindrical clay oven.
This produces a subtle charcoal flavor and is a popular way of cooking in Indian restaurants. In this homemade version we grill the paneer skewers in the oven, although you can even bake them.
Most of the times for tikka recipes, the yogurt-based marinade is made which is unique to the tandoori style grilling.
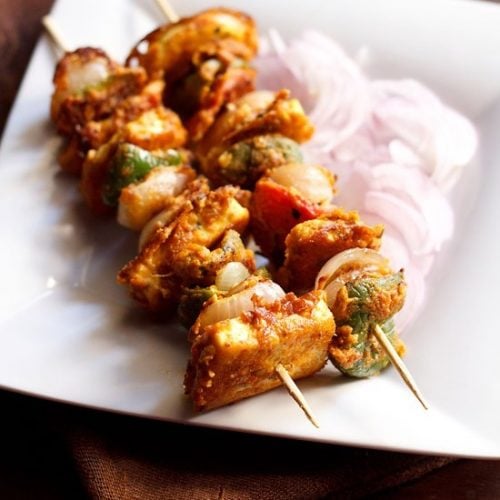
This restaurant style paneer tikka be easily made at home. In this delicious recipe, paneer cubes are marinated in a spiced yogurt-based marinade, arranged on skewers and grilled or baked in the oven.
This spicy snack is a dry dish, meaning it is not in a gravy sauce, but the paneer cubes themselves are juicy and succulent.
Bell peppers (capsicum) and onions have been added to the skewers in this recipe. The veggies add flavor and nutrition and you can add as many as you like. This vegetarian dish makes a great appetizer or side.
Ingredients You Need
- Paneer (Indian Cottage Cheese): This is the main ingredient in the dish and it is important to use a good quality paneer. In fact, as with all my paneer recipes, I recommend using Homemade Paneer. This ensures freshness and avoids any hidden ingredients and preservatives found in store-bought paneer.
- Marinade: Homeade Hung Curd (Hung Yogurt) is used as the base of the marinade. You can even use Greek Yogurt. The ground spices are then added to balance out the sour yogurt taste and give a flavor kick to the dish.
- Veggies: Here I have used bell peppers (capsicum) and onions. You can use veggies of your choice, including baby corn, mushrooms, cauliflower, tomatoes, broccoli and more.
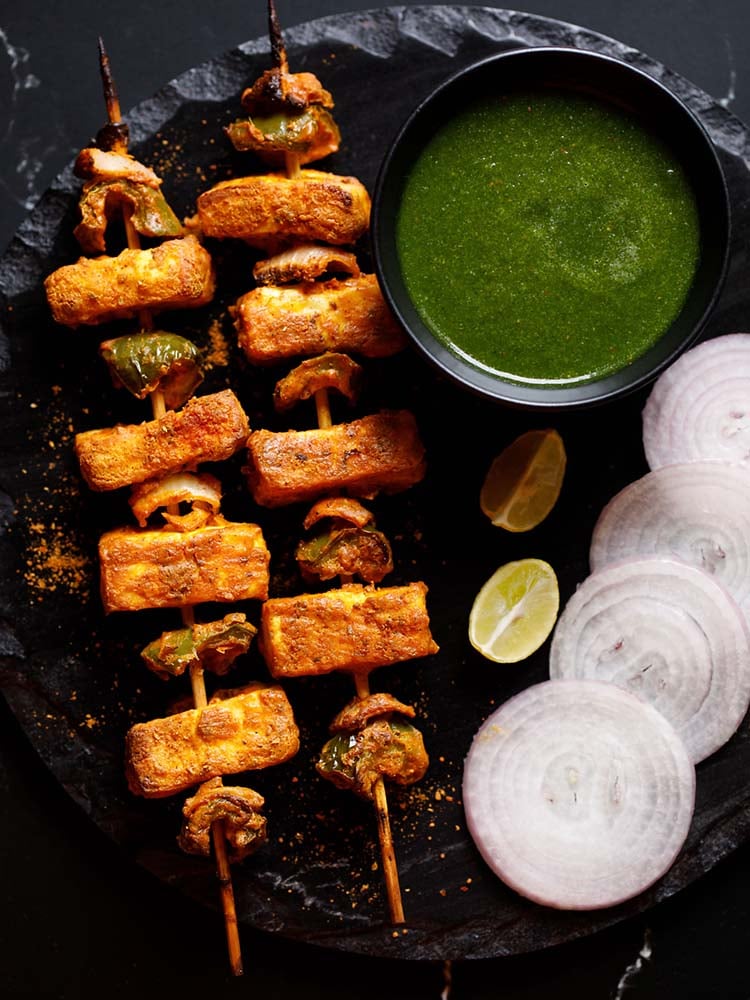
How to make Paneer Tikka – Restaurant Style
Prep Work
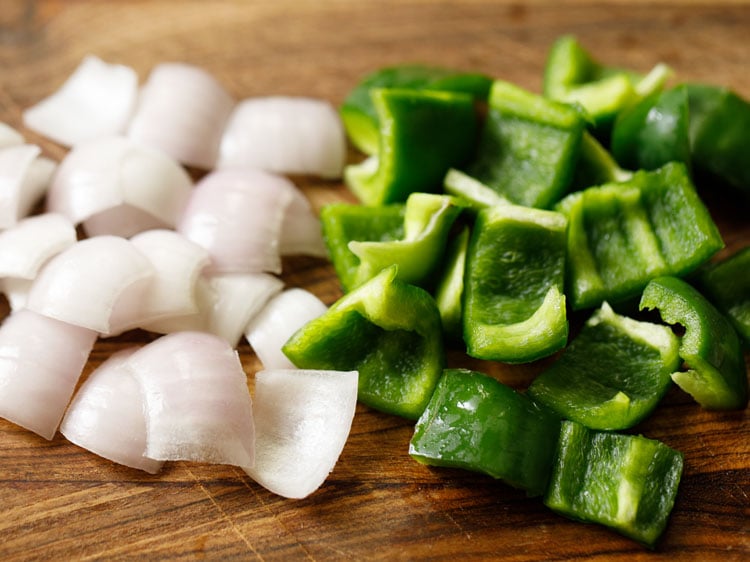
1. Peel, rinse and dice 1 medium-sized onion in square shaped 1 to 1.5 inches pieces. Rinse and slice 1 small to medium sized capsicum (green bell pepper) in 1 to 1.5 inches pieces.
You will need ½ cup each of onions and capsicum. Set these aside. You can also use tomatoes if you want.
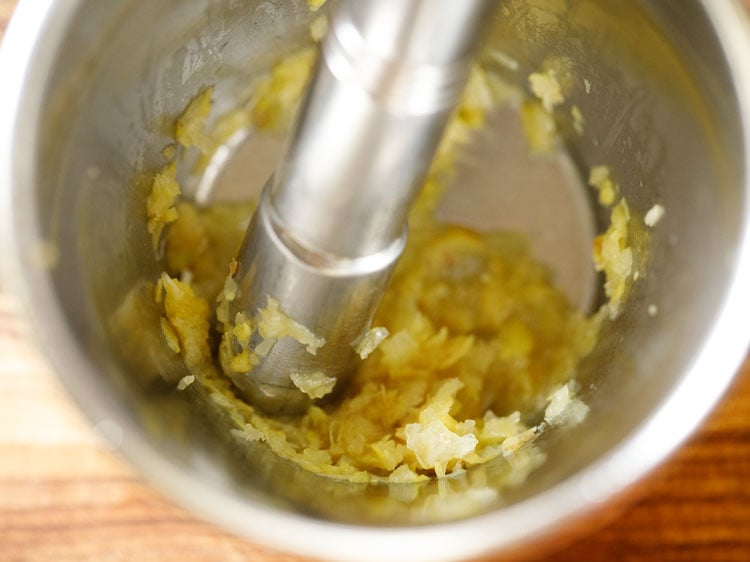
2. Crush 1.5 inches ginger and 6 to 7 small to medium sized garlic to a fine paste in a mortar-pestle.
You will need 1 tablespoon of crushed ginger-garlic or 1 tablespoon of ready ginger-garlic paste.
3. Slice 200 to 250 grams block or paneer into cubes or squares and keep aside. Best is to use homemade paneer.
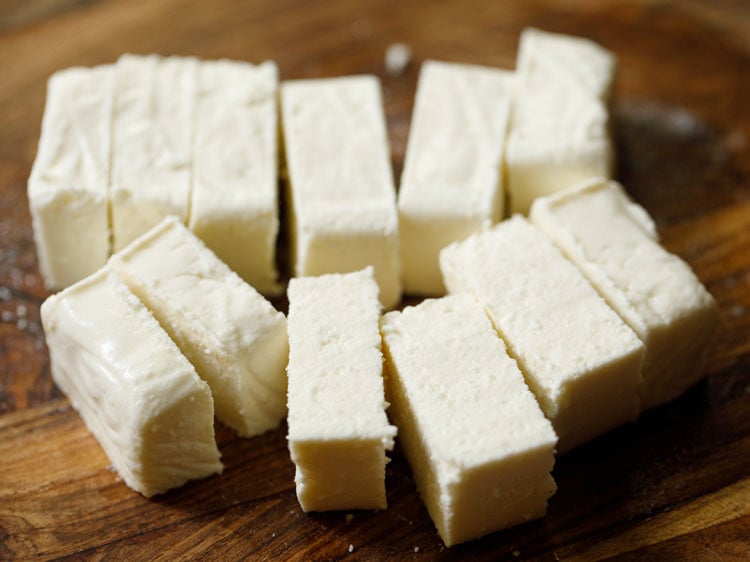
Make Tikka Marinade
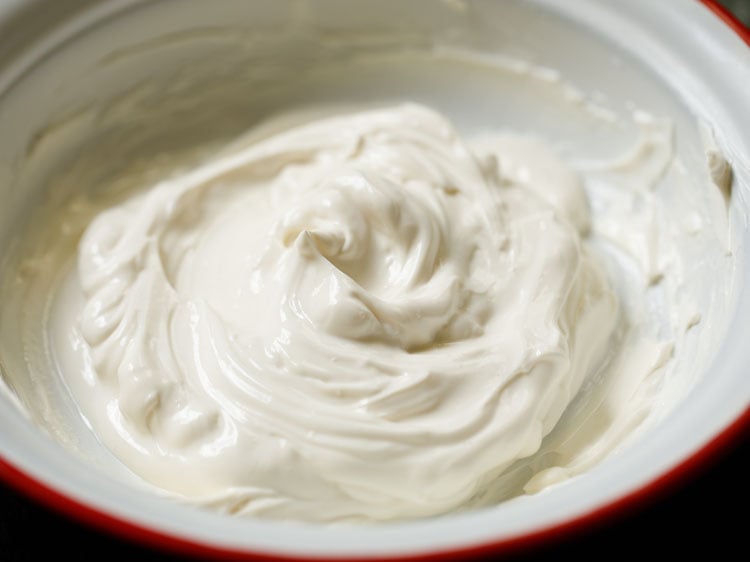
4. Put 200 grams hung curd (greek yogurt) in a bowl. With a whisk beat the curd lightly till smooth.
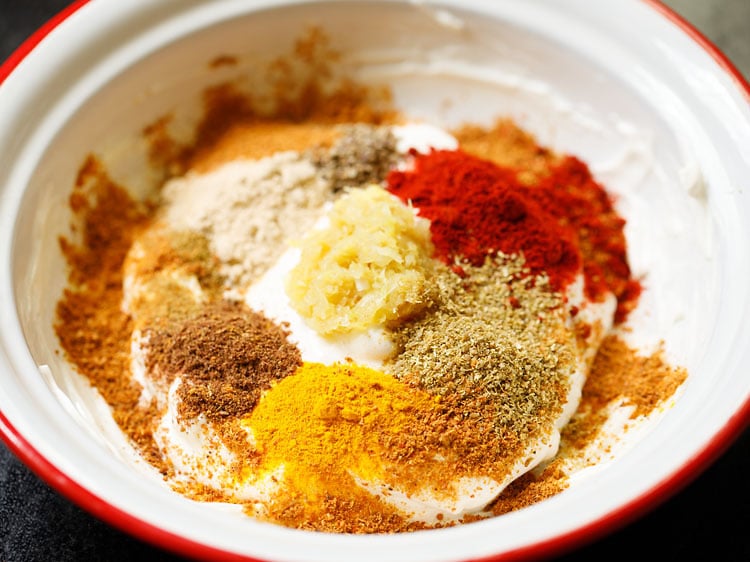
5. Now add 1 tablespoons ginger garlic paste or 1 tablespoon crushed ginger garlic to the curd. Also add all the dry spice powders. Below you see the following Indian spice powders in clockwise order:
- 2 teaspoons kashmiri red chili powder
- 1 teaspoon coriander powder
- ½ teaspoon turmeric powder
- ½ teaspoon garam masala powder
- 1 teaspoon cumin powder
- 1 teaspoon dry mango powder (amchur)
- 1 teaspoon ajwain (carom seeds)
- 1 teaspoon chaat masala
- ½ teaspoon black pepper powder (optional)
Kashmiri red chili powder gives a nice red color to the food but is not spicy and hot.
Instead of kashmiri red chilli powder, you can add 2 teaspoons of sweet paprika or ½ to 1 teaspoon of cayenne pepper.
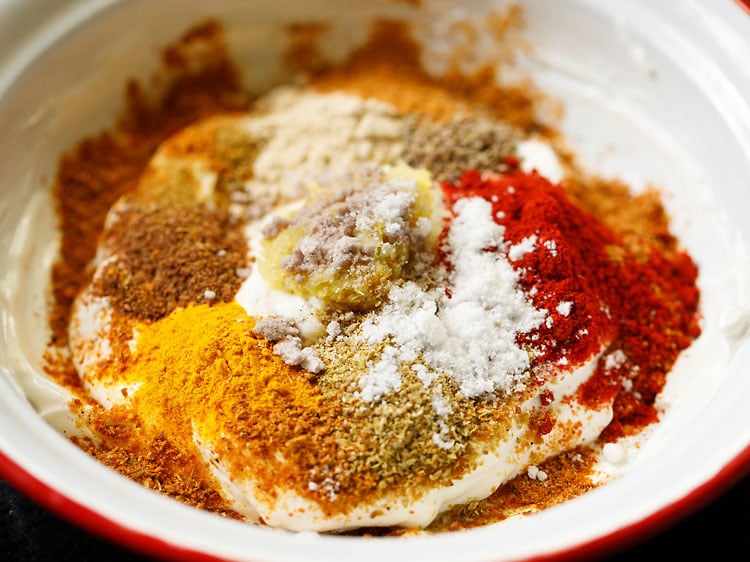
6. Add ½ teaspoon black salt and regular salt as per taste. If you do not have black salt, then skip it.
7. Add ½ tablespoon (1.5 teaspoons) lemon juice.
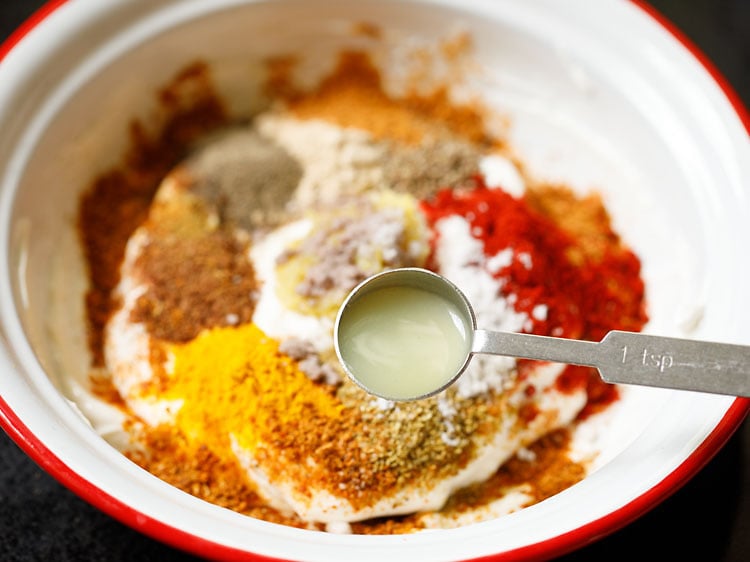
8. Next add 1 tablespoon mustard oil. If you do not have mustard oil, then use a neutral tasting oil.
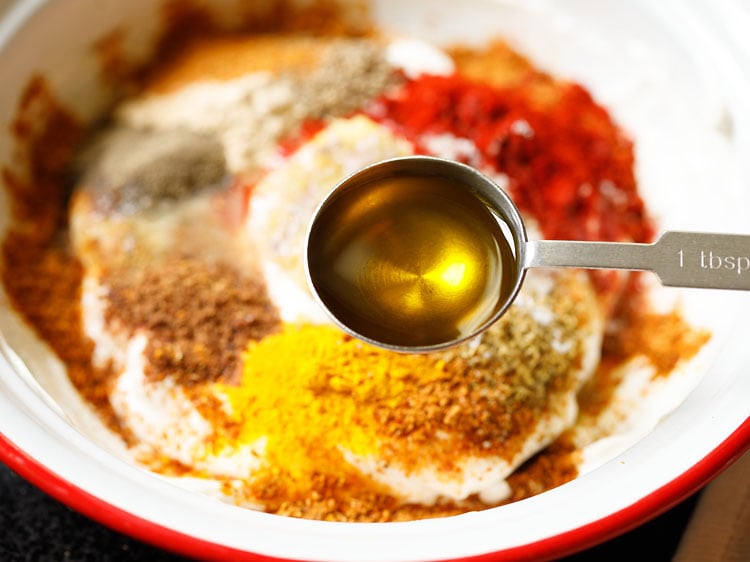
9. Mix very well. Check the taste and add more seasonings if required.
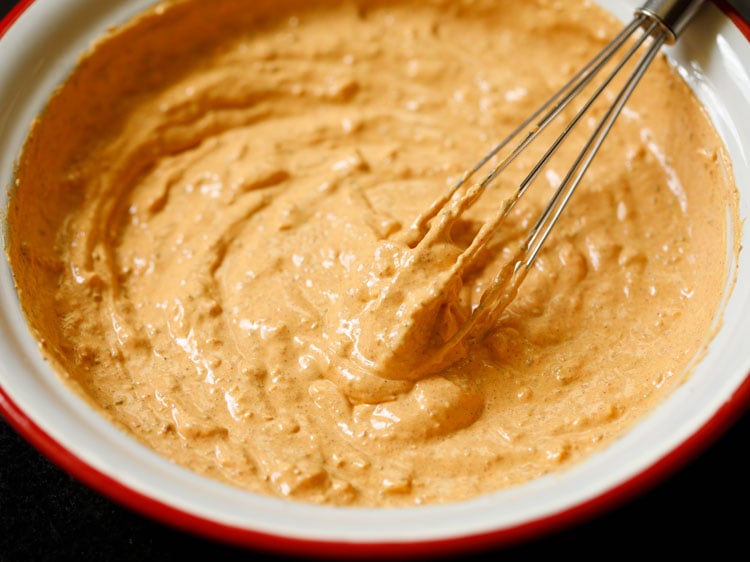
10. Add the onions, capsicum and paneer to the marinade.
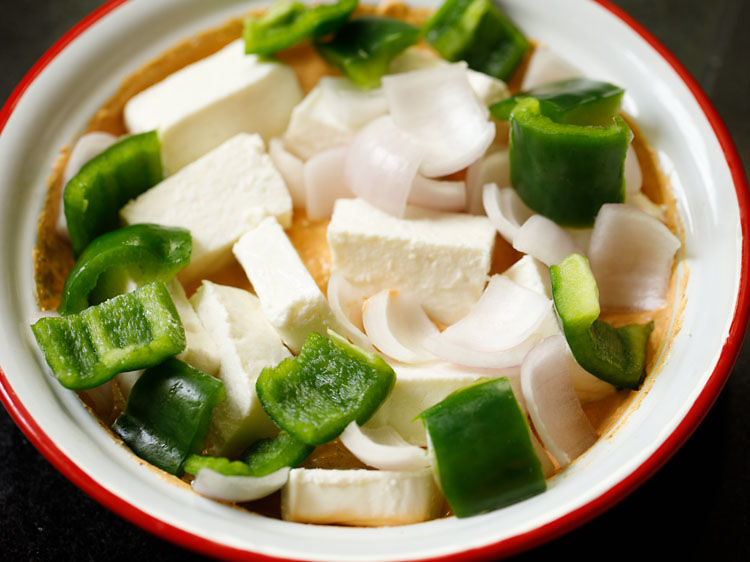
11. Slowly and gently mix them with the marinade. Cover and keep the marinated paneer and veggies in the refrigerator for 2 hours or more.
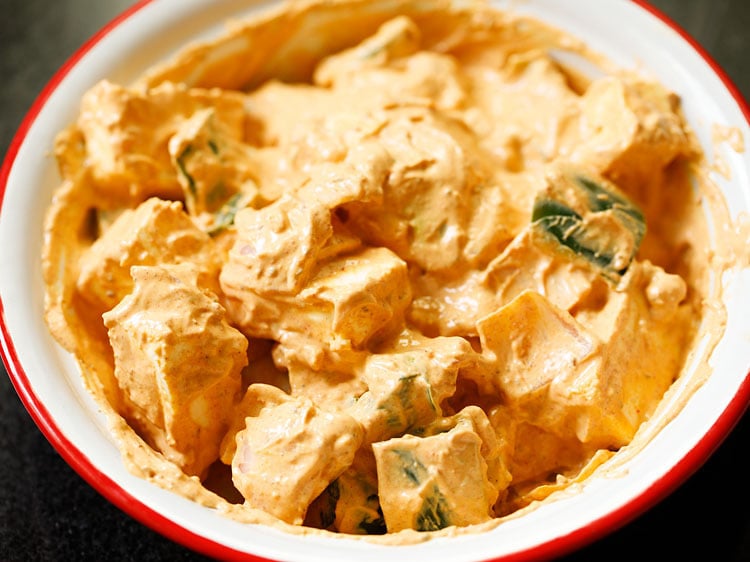
12. This is how they look after 2 hours.
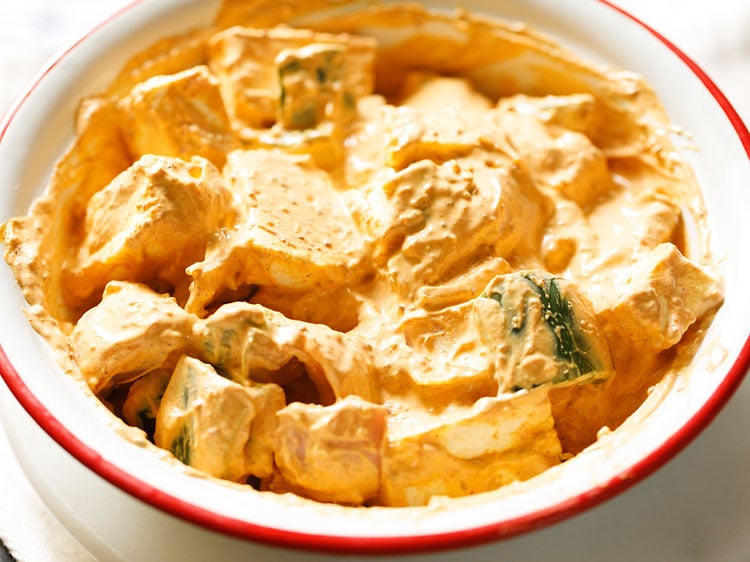
Assemble and Grill
13. Begin to thread the veggies and paneer alternately on bamboo skewers. Before you begin to thread preheat oven at 230 or 240 degrees Celsius or 464 degree Fahrenheit for 15 to 20 minutes.
Use only the top heating element while preheating as well as grilling. Soak or rinse the bamboo skewers before threading.
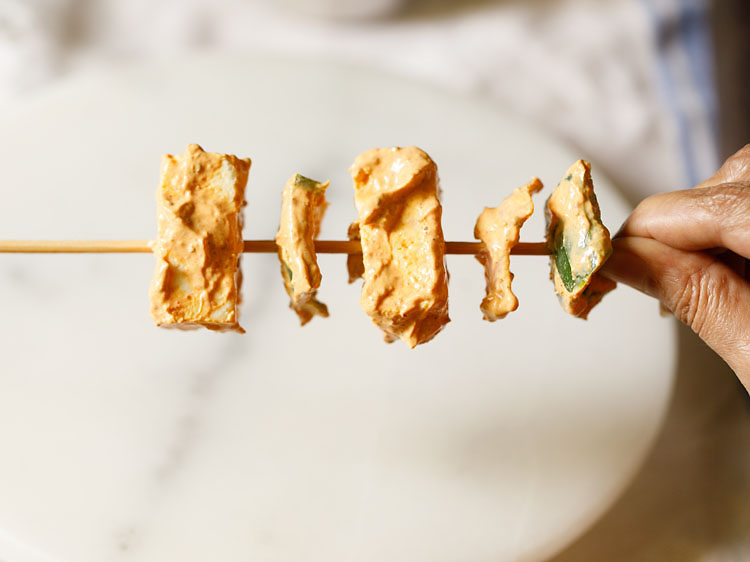
14. Place them on a tray lined with aluminium foil or parchment paper.
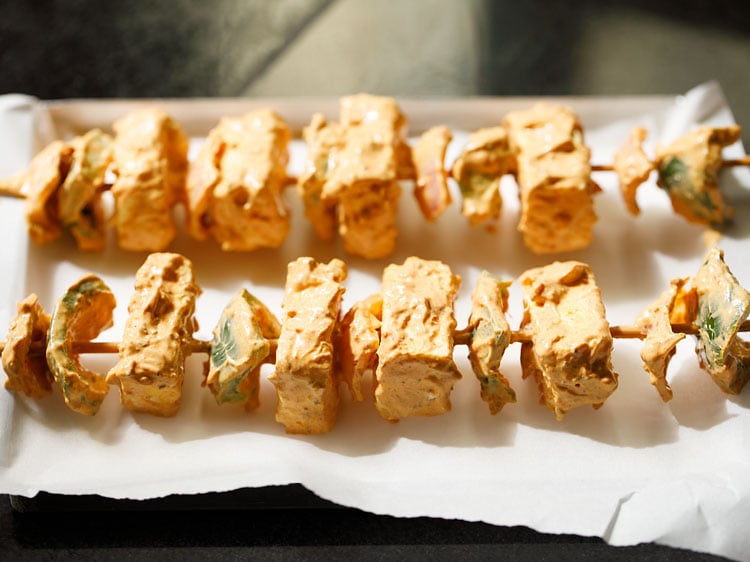
15. Brush with some oil all over.
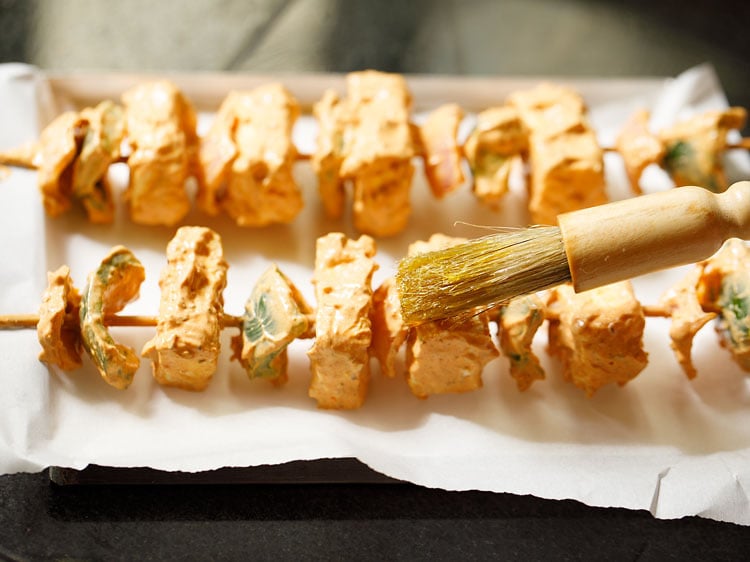
16. Place the tray on the top rack and grill in the preheated oven for 7 to 10 minutes first at 230 to 240 degrees Celsius or 464 degrees Fahrenheit.
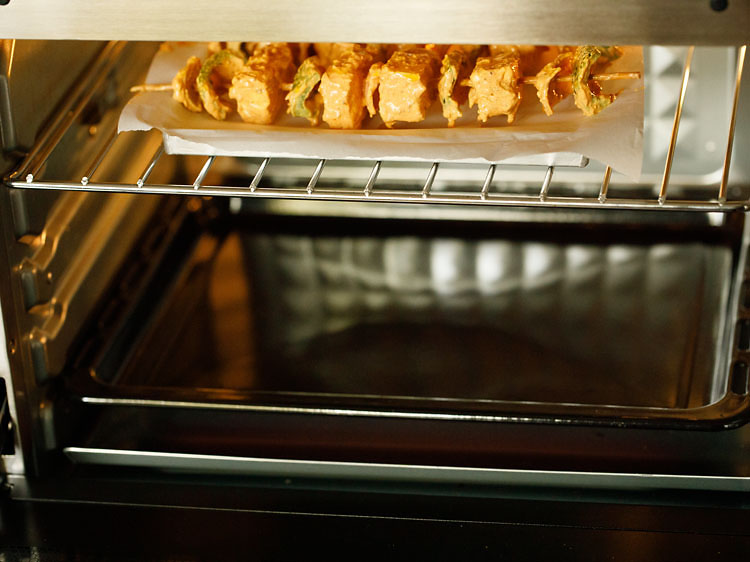
17. Then remove the tray from the oven and turn the paneer tikka skewers.
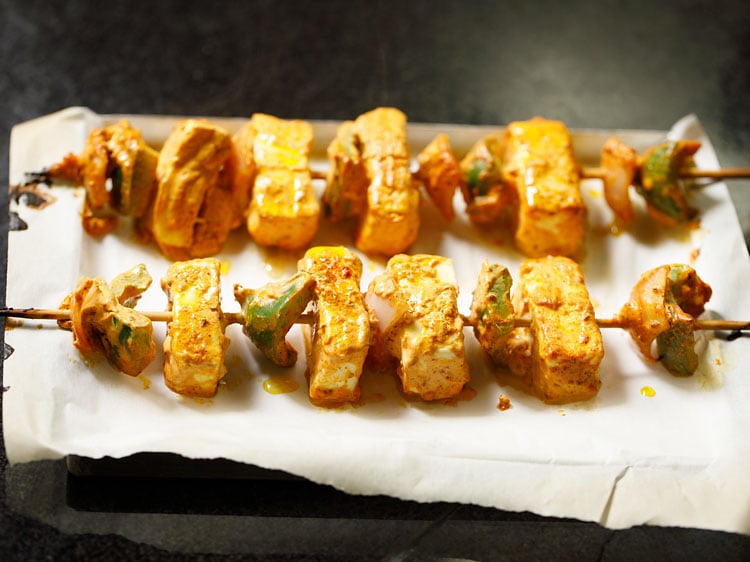
18. Again keep back on the top rack in the oven and continue to grill till the edges of paneer and veggies are golden or slightly charred for about 3 to 5 minutes.
Do not grill for a long time as then paneer becomes hard. Since temperatures vary from oven to oven do keep a check.
You can reduce or increase the time as required. Total grilling time will be 15 to 20 minutes.
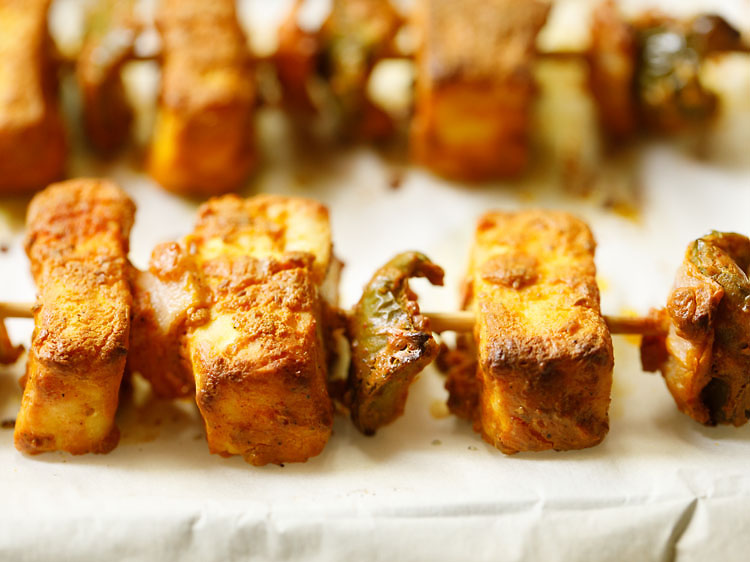
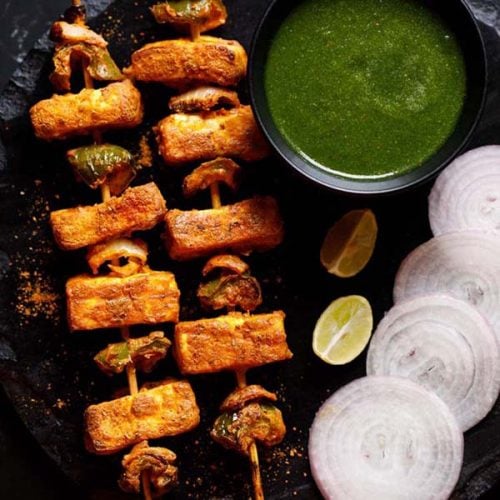
19. Remove once done. Serve the paneer tikka sprinkled with some chaat masala and lemon juice. Also serve mint chutney, onion slices and lemon wedges as sides.
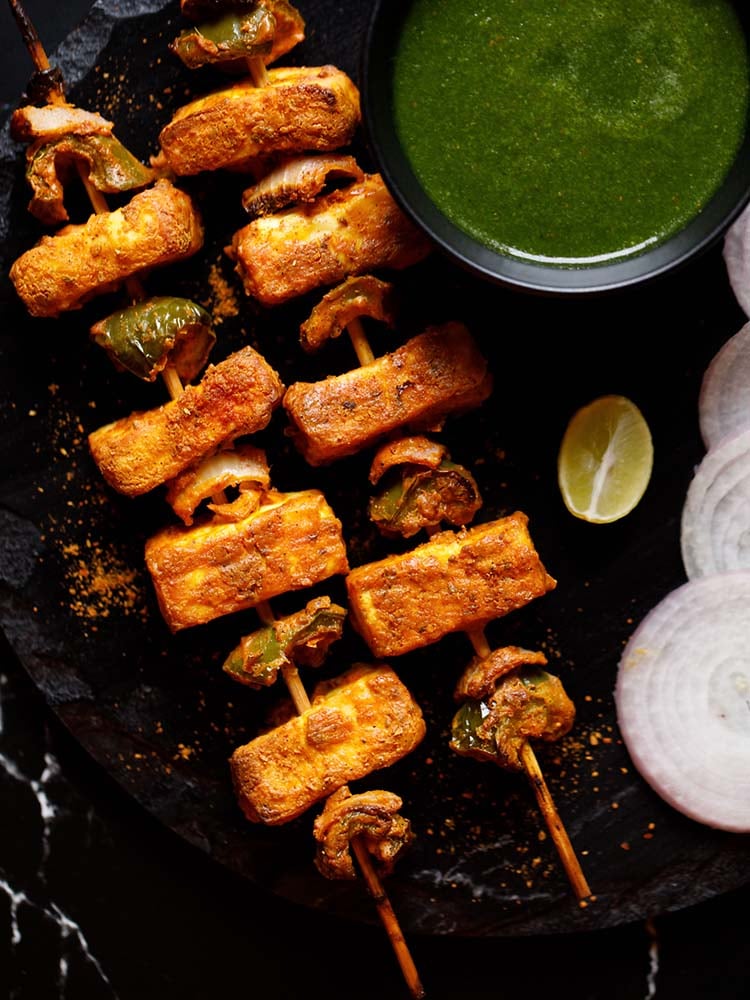
Paneer Tikka On Tawa
This is an easy and foolproof recipe of a delicious paneer tikka on tawa or stove top or griddle or skillet.
I had got many comments on how to make paneer tikka on tawa . So I decided to share this easy method. Since not everyone has an oven. If you don’t have a tava then you can also make this tikka recipe in a frying pan.
Many years back, I did not have a baking oven. We had a microwave oven, but its only function was to heat or cook food with the microwave rays.
Those days, I used to make paneer tikka on tava. When for the first time I made the tikkas, the paneer squares were sticking on the tawa and would get slightly burnt.
So here the tawa was at fault. I would use tawa which were used to make roti without any fat (ghee or oil) and so were not seasoned.
Later while frying them on non stick tawa, the paneer pieces would not get stuck. I also experimented with adding besan (gram flour) to the marinade and felt it gave a good crispness and taste to the tikka. The besan also would help in the paneer not getting stuck to the tawa.
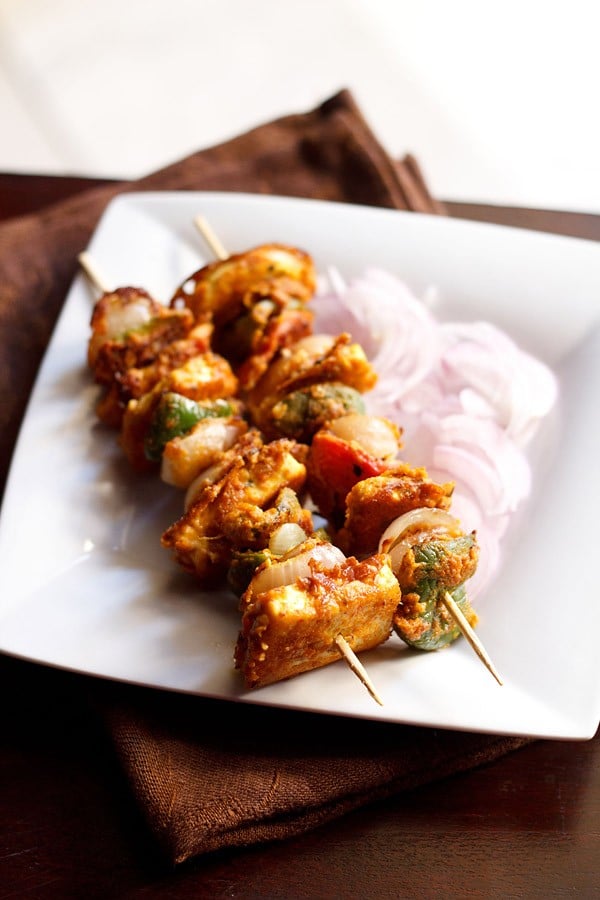
Prepare The Tikka Base
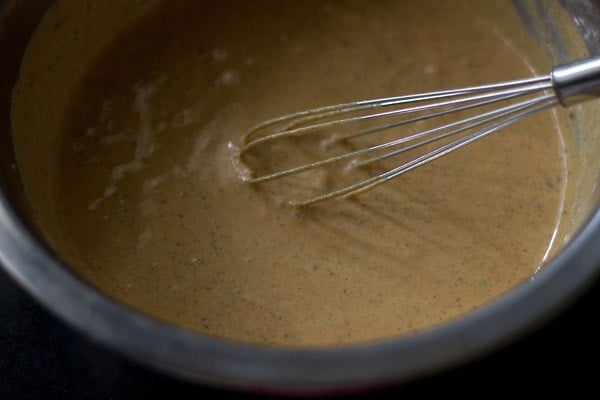
1. First whisk 2.25 cups of thick curd or hung curd till smooth in a bowl or pan.
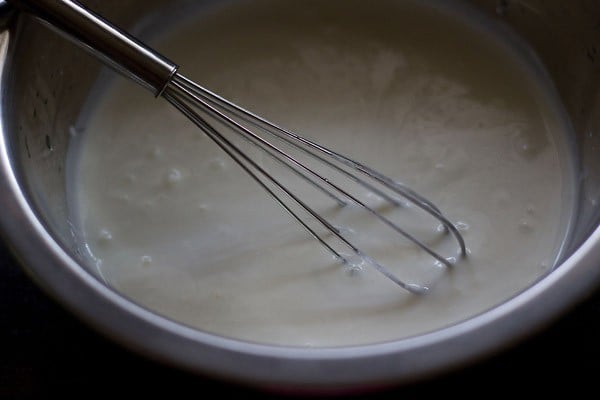
2. Add all the spices and herbs including besan (gram flour) & salt.
- 4 tablespoon besan (gram flour)
- ½ teaspoon turmeric powder (ground turmeric)
- ½ teaspoon black pepper powder
- ½ teaspoon carom seeds (ajwain)
- ½ teaspoon caraway seeds (shahjeera)
- ½ teaspoon crushed kasuri methi (dry fenugreek leaves)
- 1 teaspoon coriander powder (ground coriander)
- 1 teaspoon cumin powder (ground cumin)
- 1 teaspoon garam masala powder
- 1 teaspoon dry mango powder
- 2 teaspoon Kashmiri red chili powder
- ¾ tablespoon ginger garlic paste
- ¾ teaspoon regular salt or edible rock salt or add as required.
3. Stir and mix well.
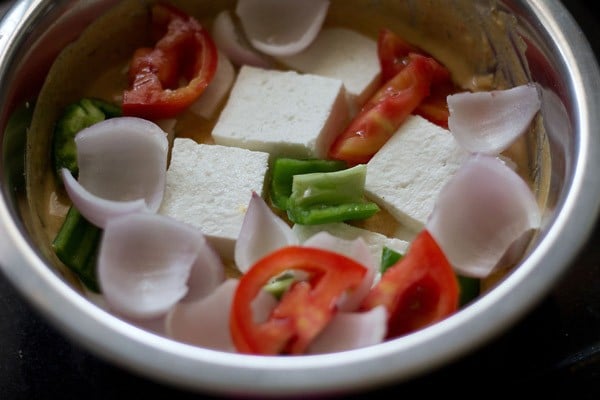
4. Add the diced vegetables – 1 medium to large bell pepper/capsicum, 1 medium to large tomato and 1 medium to large onion. Also add 250 to 300 grams paneer slices.
5. With your hands or spoon mix very well so that the marinade coats the paneer and veggies evenly.
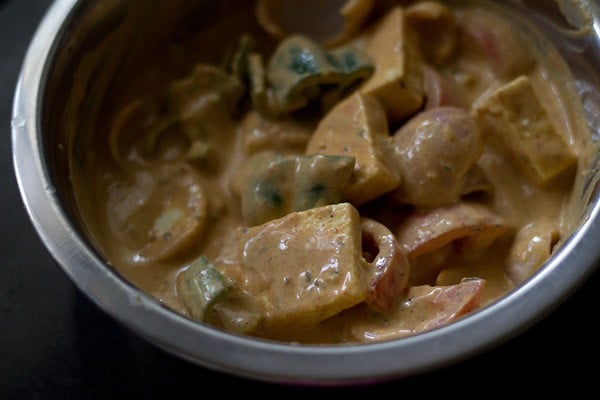
6. Cover the bowl and keep the marinade in the fridge for 45 minutes to 3 hours. You can also keep overnight. The below photo is of the marinated paneer and veggies after 1 hour.
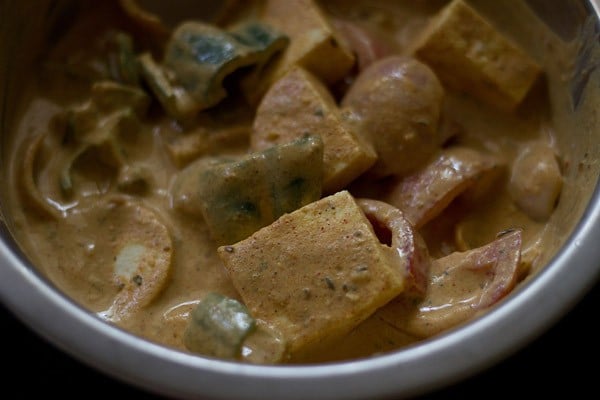
7. Heat 1 tbsp oil in a non stick pan/tawa or a well seasoned cast iron skillet. Coat the paneer and veggies with the marinade and place them on the tawa.
You can fry at a low heat or medium heat. I fried in 3 batches and overall used about 3 tbsp oil.
Another way is to skewer the paneer, veggies and then fry them. I chose to fry them directly as they get fried evenly and the texture is better.
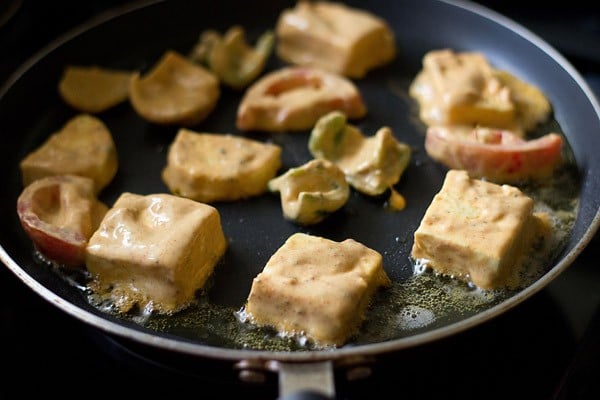
8. When one side gets browned, gently lift and turn over. The paneer cubes will get cooked faster than the veggies.
So remember to remove the paneer cubes as soon as they are golden. You can char or brown the veggies more.
For the vegetables, you have to make sure the marinade on them gets cooked. So lightly press them while cooking.
If you want you can fry the paneer cubes first and then the marinated vegetables. Pan fry all till they become golden.
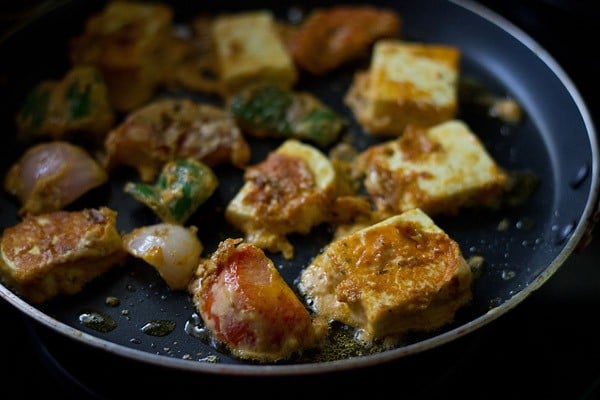
9. Remove paneer tikka on a plate. I have not removed them on paper tissues, as due to heat and moisture from the paneer cubes, they stick to the paper tissues.
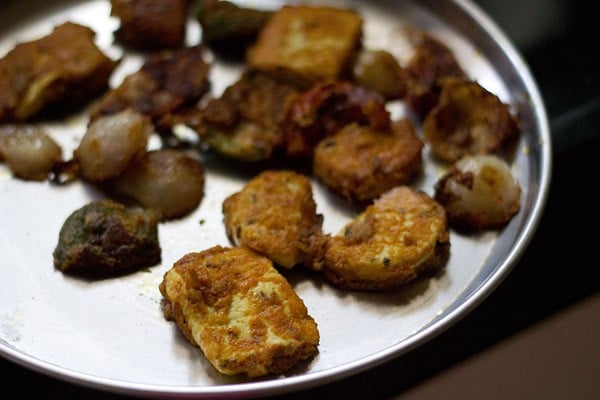
10. While still hot, then skewer the fried paneer cubes and veggies on to a wooden skewer or toothpick.
You can also have this paneer tikka straight away without skewering. Sprinkle 1 teaspoon chaat masala and ¾ teaspoon lemon juice on the paneer cubes while serving.
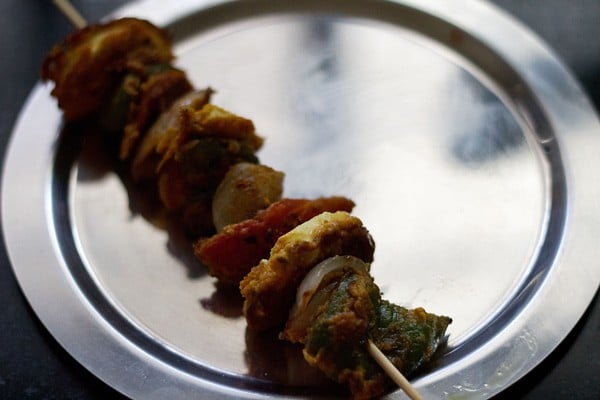
11. Arrange them in a serving plate and serve the paneer tikka hot or warm with onion lemon salad or mint chutney.
Serving Suggestions
Whether you have made paneer tikka in the oven or on the tawa, it is always served with this bright Mint Chutney that is made with curd (yogurt). This chutney is the traditional sauce or dip that is served with all tandoori dishes.
Onion slices and lemon wedges are also traditionally served with this appetizer dish or starter snack.
They even go well as a side dish. You can even eat paneer tikka with roti, naan or bread or make wraps or rolls with them filled with your favorite toppings and veggies.
Expert Tips
- Barbecue: You can also cook the paneer tikka on barbecue grill.
- Grilling in the oven: In the oven grill for 15 to 20 minutes at 230 or 240 degree celsius with only the top heating element on. Basically here we are broiling the dish.
- Marination Time: It is best to marinate the paneer cubes for 2 hours or more. You can also keep the marinated paneer overnight in the fridge. Since I made the paneer tikka for dinner, I marinated the paneer and veggies for 2 hours in the refrigerator. The longer it marinates, the better flavors get infused into the paneer and veggies.
- Vegetables: The veggies used can be of your choice. In the step by step photos, I have used onions and green bell pepper (capsicum). In the video I have used red, yellow and green bell pepper with onions. You can use baby corn, mushrooms, cauliflower, tomatoes, broccoli etc. For cauliflower blanch them before marinating.
- Adding Oil: While grilling or baking, the paneer cubes and veggies can become dry. Oil is added to paneer and veggie mixture to prevent this from happening. The paneer cubes and veggies are also brushed with some oil to avoid them from becoming dry.
- Overcooking: Don’t overcook the paneer as they then become rubbery, dry and hard. The paneer should be soft, well cooked but also succulent.
- Marinade: The leftover marinade can be applied or brushed on the paneer tikka before grilling them. If you are making paneer tikka masala gravy, you can use the extra marinade in the gravy.
- Vegan Options: Use tofu, seitan or tempeh in place of paneer. Use a vegan yogurt like almond or cashew yogurt in place of dairy yogurt.
More Tips
- When you prepare paneer tikka on stovetop, either use a non stick or ceramic pan or use a well seasoned tawa or griddle. Even tawas on which you make dosas also work well.
- I have used both non stick and iron tawa and both work fine. For iron tawa or skillet, just remember that the tawa or skillet has to be seasoned very well. If you make roti or chapati on this tawa, then the paneer cubes will get stuck.
- For this paneer tikka recipe, I have used fresh homemade curd. The yogurt was thick enough and so I did not strain or hung it. Adding besan also helps in slight thickening of the marinade.
- If you use homemade or store brought yogurt, then ensure that the curd is thick. There should not be much whey in it. In case there is whey, then strain the yogurt in a cheesecloth for a few hours in the refrigerator, till you get thick yogurt.
How to season a skillet or tawa
Basically, seasoning means to prepare the tawa or skillet for frying/roasting, wherein you heat the skillet and then apply oil. Let the oil get heated and then switch off the heat.
Wipe the oil with paper napkins or cotton napkin. Again apply oil and let the skillet or pan cool. Store the tawa/skillet with the oil on it.
You can repeat the first step twice or thrice. When you want to cook, heat the tawa and wipe off the oil. Then proceed with the recipe.
I am also sharing reader Priya’s tip from the Pesarattu Dosa (Moong Dal Dosa) recipe post. She has been kind enough to give her grand mother’s tip on seasoning tawa while making dosa.
They have been using this technique for many years. This method is also helpful for folks who do not eat onions (to let you know, onions are used for seasoning tawa or pan wherein half of an onion is dipped in oil and then smeared on the tawa before making dosa).
The method follows: Heat the tawa or skillet. Add a teaspoon of sesame oil. Add ½ to 1 teaspoon of mustard seeds. Wait till the mustard starts spluttering. Spread the entire mixture of oil and mustard seeds with a spatula or spoon on the tawa and remove the oil and seeds. The tawa or skillet is ready to be used.
More Tikka Variations
Paneer Malai Tikka – Melt in the mouth tikka variant which is richer due to the inclusion of cream. This variant has more mild flavors than your regular paneer tikka.
Achari Paneer Tikka – Robust, fragrant and delish version made with the typical Indian pickling spices.
Hariyali Paneer Tikka – Adding fresh green herbs to the marinade makes this version green and so tasty.
More Paneer Snacks To Try!
Pakora Recipes
Paneer Recipes
Paneer Recipes
Indian Street Food Recipes
Please be sure to rate the recipe in the recipe card or leave a comment below if you have made it. For more vegetarian inspirations, Sign Up for my emails or follow me on Instagram, Youtube, Facebook, Pinterest or Twitter.
Paneer Tikka Recipe (Tandoori Paneer Starter Snack)
Ingredients
main ingredients
- 200 to 250 grams Paneer or Indian cottage cheese
- ½ cup diced onions or 1 medium sized onion
- ½ diced capsicum or 1 small to medium bell pepper – green, yellow or red
for paneer tikka marination
- 200 grams Hung Curd or greek yogurt
- 1 tablespoon Ginger Garlic Paste or 1 tablespoon crushed ginger-garlic
- 2 teaspoons kashmiri red chili powder or 2 teaspoons sweet paprika
- ½ teaspoon turmeric powder (ground turmeric)
- 1 teaspoon cumin powder (ground cumin)
- 1 teaspoon Coriander Powder (ground coriander)
- ½ teaspoon Garam Masala
- 1 teaspoon ajwain (carom seeds)
- 1 teaspoon dry mango powder (amchur powder)
- 1 teaspoon chaat masala
- ½ teaspoon black pepper powder – optional (ground black pepper)
- 1.5 teaspoons lemon juice
- 1 tablespoon mustard oil or any neutral tasting oil
- ½ teaspoon black salt – optional
- salt as required
- some mustard oil for brushing
Instructions
Preparation
- Chop the paneer in square shaped cubes.
- Dice the onions and capsicum in 1 or 1.5 inches square pieces.
Making Marination
- In a large bowl, take the hung curd (greek yogurt) and whisk it lightly till it becomes smooth
- Add ginger-garlic paste, all the spice powders, carom seeds, black salt, regular salt, lemon juice and mustard oil.
- Mix very well. Check the taste and add more seasonings if required.
- Add the veggies and paneer to the marinade. Slowly and gently mix them with the marinade.
- Cover the bowl and marinate for at least 2 hours or more in the refrigerator.
- After 2 hours thread the paneer and veggies alternately on bamboo skewers. Soak or rinse the bamboo skewers before threading.
Grilling Paneer Tikka
- Preheat the oven for 15 to 20 minutes at 230 or 240 degree celsius or 464 degrees Fahrenheit. Use only the top heating element.
- Line a baking tray with aluminium foil or parchment paper. Arrange the paneer skewers on the tray. Brush some oil on the veggies and paneer cubes all over.
- Place the tray on the top rack. Grill the paneer tikka first for 7 to 10 minutes at 230 or 240 degree celsius or or 464 degrees Fahrenheit. Then remove and turn the skewers.
- Place back on the top rack in the oven and continue to grill for 3 to 5 minutes more till the edges of the paneer are golden or slightly charred. Do not grill for a long time as then paneer cubes becomes hard.
- Since temperatures vary from oven to oven do keep a check. You can reduce or increase the time as required. Total grilling time will be 15 to 20 minutes.
- Remove from the oven and then place the paneer cubes on a serving plate. Sprinkle some chaat masala and lemon juice.
- Serve paneer tikka with mint chutney and onion rings with lemon wedges
Video
Notes
- Barbecue: You can even use the barbecue grill for making the paneer tikka.
- Grilling in the oven: In the oven grill for 15 to 20 minutes at 230 or 240 degree celsius with only the top heating element on.
- Marination Time: I always suggest to to marinate the paneer cubes for 2 hours or more. You can also keep the marinated paneer overnight in the fridge. More marination, the better the flavors get infused in the paneer and veggies.
- Vegetables: Add a mix of veggies like bell pepper, onions, tomatoes, baby corn, mushrooms, cauliflower, tomatoes, broccoli etc. For cauliflower blanch them before marinating.
- Adding Oil: While grilling the paneer cubes and veggies can become dry. Hence oil is added to the marination mixture. The paneer cubes and veggies are also brushed with some oil to avoid them from becoming dry.
- Overcooking: Don’t overcook the paneer as they then become rubbery, dry and hard. The paneer should be soft, well cooked and yet succulent.
- Marinade: The extra marinade can be applied or brushed on the paneer tikka before grilling them. If you are making paneer tikka masala gravy, you can use the extra marinade in the gravy.
- Vegan Options: Use tofu, seitan or tempeh in place of paneer. Use a vegan yogurt like almond or cashew yogurt in place of dairy yogurt.
Nutrition Info (Approximate Values)
Paneer Tikka on Tawa
Ingredients
Main ingredients
- 250 to 300 grams Paneer (Indian cottage cheese)
- 1 bell pepper – medium to large green capsicum (or yellow or red)
- 1 tomato – medium to large
- 1 onion – medium to large
For marination
- 250 grams hung curd or thick curd – about 2.25 cups of greek yogurt
- 4 tablespoon besan (gram flour), can use chickpea flour instead
- ½ teaspoon turmeric powder (ground turmeric)
- ½ teaspoon black pepper powder or white pepper powder
- ½ teaspoon carom seeds (ajwain)
- ½ teaspoon caraway seeds (shahi jeera)
- ½ teaspoon dry fenugreek leaves – crushed (kasuri methi)
- 1 teaspoon Coriander Powder (ground coriander)
- 1 teaspoon cumin powder (ground cumin)
- 1 teaspoon chaat masala powder
- 1 teaspoon Garam Masala or tandoori masala powder
- 1 teaspoon dry mango powder (amchur powder)
- 2 teaspoon kashmiri red chili powder – if using a hotter variety of red chili powder, then reduce to 1 teaspoon
- ¾ tablespoon Ginger Garlic Paste – about 5 to 6 medium to large garlic cloves and ¾ inch ginger crushed in a mortar-pestle
- ¾ teaspoon lemon juice
- 2 to 3 tablespoon oil or as required
- ¾ teaspoon salt or edible rock salt, add as required
Instructions
Preparation
- Slice the paneer into ¼ inch squares or cubes or rectangles.
- Rinse the veggies. Halve the onion and remove each layer one by one.
- Dice the capsicum/bell pepper into square shaped slices.
- Dice the tomatoes too the same way. Remove the seeds from the tomatoes.
- Keep the veggies and paneer aside.
Making marination
- First whisk the thick yogurt (curd) till smooth in a bowl or pan.
- Add all the spices and herbs, besan/gram flour and salt, except oil. Stir and mix well. Taste the marinade and add salt it required
- Add the diced vegetables (onion, tomato and capsicum) along with paneer slices.
- With your hands mix very well. So that the marinade coats the paneer and veggies evenly.
- Cover the bowl & keep the marinade in the fridge for 45 minutes to 3 hours. You can also keep overnight.
Making paneer tikka on tawa
- Heat 1 tbsp oil in a non stick pan/tawa or a well seasoned griddle. Coat the paneer and veggies with the marinade and place them on the tawa. You can fry them at a low flame or medium flame.
- In all I fried in 3 batches and overall used about 3 tbsp oil. Another way is to skewer the paneer, veggies and then fry them. I chose to fry them directly as they get fried evenly and the texture is better.
- When one side gets browned, gently lift and turn over. The paneer cubes will get cooked faster than the veggies.
- You can can char or brown the veggies more. But remember to remove the paneer cubes as soon as they are golden. If you want you can fry the paneer cubes first and then the vegetables. Remove them on a plate.
- While still hot, then skewer the fried paneer cubes and veggies on to a wooden skewer or toothpick.
- You can also have this paneer tikka straight away without skewering. Sprinkle some chaat masala & lemon juice.
- Arrange them in a serving plate and serve the paneer tikka hot or warm with pickled vinegar onions (sirke wale pyaaz), or pyaaz lachcha (onion lemon salad) or mint yogurt chutney.
Notes
- Try to use a well seasoned tawa or skillet so that the tikka pieces do not stick on it.
- You can adjust the ground spices and seasonings as needed.
Nutrition Info (Approximate Values)
This Paneer Tikka recipe post from the archives first published in October 2011 has been updated and republished on June 2022.


Tried this paneer tikka recipe in regular oven. Very good. Like to have it with lemon. Thanks !
Thanks for letting me know. Thanks for the rating too on the recipe.
This paneer tikka recipe is really amazing !! If you want to impress your guests try preparing this one a while before so that it marinates !! So yummy you will lick all fingers 😛
absolutely delicious!!!! my favorite indian recipe 😍😍😍
so much water in my mouth !… this will definitely be a starter for my last dinner of the year !!
and since the year is closing, i must say that I don’t know how you all manage to do such a complete website with so much proper and accurate information, visuals, photos, videos… you can’t go wrong when following this instructions step-by-step.
most of these recipes we have cooked from your website, we’ve cooked them for the first time and it came out super delicious !!
congratulations for the great result of this super complete “encyclopedia” of your website veg recipes of india !!
wishing you a beautiful new year of 2023, full of blessings
thank you – namaste
Thank so much for the honest and detailed feedback. So glad and happy!
Wish you also a beautiful and happy new year with light and blessings.
Namaste.
Have made this a few times for our barbecue parties and it’s been everyone’s favourite, thank you!
amazing!!!
Wow, my personal favorite to have anytime of day!
Excellent recipe!!
I tried this recipe out and it worked perfectly. Thank you very much.
Also, Do you think you could post a recipe for honey chilli cauliflower?
Thanks Vaishali for the feedback. I will try to add the recipe.
Hello, I wanted to ask will this work in the covection microwave ovens? If yes then i should keep it for how long? And please bring your app back. I miss your app as it was rather convenient .
yes, paneer tikka can be made in the convection mode of the microwave oven. preheat the oven first in convection mode for 10 to 15 minutes at 240 degrees celsius. then grill for 10 to 15 minutes or more at the same temperature in the convection mode. will see if we can get making an app again. managing the earlier one was difficult and too time-consuming.
Amazing recipe! Have used it maybe six times using the oven with some mint chutney to serve. My family never order paneer tikka out anymore as they say it is a disappointment now compared to this recipe. I also keep the marinade in the fridge and reuse it for more veg tikka/ to make a creamy mushroom curry as I don’t want to waste it. Thank you 🙂
yay… thank you very much. definitely, the extra marinade can be used for other vegetables and even for a curry. thanks for the rating too and welcome.
Hello Dassana,
Hope you are well. Just a QQ, if we follow the recipe and cook in the oven, how long should it take?
hi rumi, i am fine. i have mentioned the time in the oven. 15 to 20 minutes at 240 degrees celsius. it may take less or more time also as temperatures vary with the oven type and model.
Very good recipe. Thank you
Thanks for sharing this recipe. Is it ok to add kasuri methi?
yes you can about 1/4 to 1/2 teaspoon of kasuri methi.
Hi,
Do you think if I use tooth picks to make this then the tooth picks will get burnt in an OTG?
tooth picks can burn in the OTG. they will darken. you can soak toothpicks in water for 20 to 30 minutes and then use them. this way the possibility of the tooth picks getting charred is less.
Hi Dassana
I love your food blog.
I have made a lot of recipes and learned cooking through your website.
Can you please guide, how can I use this paneer tikka recipe and cook it in an airfryer
Thanks
thanks sakshi. i am not sure if paneer tikka will turn out good in air fryer. i have made samosas, patties and onion pakoras in air fryer, but not sure about paneer tikka. you will have to give a try.
Hi Dassana i tried this tday but not sure what i did wrong. The masala which was inside the capsicum and even a bit of masala on the paneer looked uncooked. I was scared of burning the tikka so took it out of the oven. Pls help!
Btw the masala was yum. Thks for this amazing recipe!
thanks anjana. don’t worry. the tikka won’t burnt. it need some time to cook. while cooking, the sides and corners get charred first. so when you see the sides and corners getting charred, then you can remove the tikka. if you keep for some more time even after the sides get charred, then the tikka can get burnt.
Hi
I want to try this reciepe. Here I need to grill the paneer or bake it in convection mode.
either will do. you can either grill or bake in convection mode.
Hi., Just went through your recipes. Really awesome.
Saw the recipe of Panner Tikka. In case we keep it on Non stick tawa on gas, should we cover with a plate. How long will it take to cook in Tawa/gas..
thanks meena. if you keep on non stick tawa, then no need to cover with a plate. also you can fry the veggies and paneer separately. there is no need to thread them on skewers. it takes about 3 to 4 minutes for paneer to cook and veggies take a slightly longer time.
Hi Dassana,
I have been following and trying all ur receipes from long time or u can say I learned cooking frm this site only,I made paneer tikka today and it taste awesome dear,thanks a ton for such yummy receipes,keep posting love u…..
Welcome Pritee. Glad to know that recipes helped you in learning cooking. Thanks for your positive feedback.
Some cooking site says to use besan in Tikka ,is it optional or not required? Which is better with or without besan ?
if preparing paneer tikka in oven, then no need to add besan. if preparing paneer tikka in a tawa or pan, then besan gives a nice crisp coating and also avoid the tikka from sticking to the pan. both ways paneer tikka tastes good.
I made this yesterday. Came out really awesome. Thank you for the recipe.
Welcome Ramya
Hi, dassana ma’am I really love all your recipes and you have the most attractive way of presenting them, you must be a very good photographer too?. The dishes are soooo appetizing and making me prepare something. I’m basically a non-veg lover but your dishes made me vegetarian?. I really appreciate and honour your effort to it. God will bless your family for this. And I want to try this recipe can I make this with tofu, will it be with the same procedure as for paneer. And will all the paneer recipes can be substituted with tofu ? I’m wanna try please guide me ma’am.
thank you very much vidhya. you can use tofu. if using a tofu block, then just press the tofu block between two heavy weights like a heavy bowl or plate and keep it like that for some minutes. you can check this method on google.
wish you all the best in life and happy cooking 🙂
Step by step and easy lunch recipe description with attractive images. Thanks for sharing it in such a wonderful way.
Welcome Smita. Glad to know that you liked the recipe presentation.
Yes, keep posting new things..! 🙂
Hi Dassana,
I make paneer tikka on gas, today I want to add baby corn in it. How can I add? Should I boil it first and then add ?
Thanks
supriya, if you want to use baby corn, then you do need to blanch them, so that they get partly cooked or you can even half steam or cook them. for blanching, boil water. then add baby corn to boiling water. boil for 2 to 3 minutes. then switch off the flame. cover the pan and keep aside for 10 to 15 minutes. then marinate along with paneer and other veggies.
What is the best time to keep in oven on grill mode?
pranay, are you referring to grill mode in microwave oven or an OTG. there is no standard time as all ovens have different capacities. for grilling, the top heating element is used. due to this the food gets slightly charred when its grilled. if the food is kept very close or close to the top heating element, the charring is fast and quicker, but here one needs to give attention to the grilling process or else the food can get burnt.
My marination came awesome, I preheated the oven to 180 F and heated the tikka for about 35 minutes – I did it flip it after 10 minutes, brushed oil, but I still felt the paneer was not cooked.
gayathri, you can keep for some more minutes for baking. temperature varies from oven to oven and so the time cannot be exact for any recipe. so in this case, you can keep the paneer tikka for some more time.
But can we make it without an oven
you can. check the method on this link – https://www.vegrecipesofindia.com/paneer-tikka-on-stove-top-recipe/
Thnks
The paneer tikka is awsum and i love to make it and eat it just awsum in taste
thanks.
Hi your print link on the recipe does not work. I tried to copy and paste it wont let me do it either. Can you please fix? Thanks
i checked the print option and its working for me on the desktop. we have disabled copy and paste due to a lot of copying that is happening in the internet world.
Hi Dassana ,
Will this recipe work well with store bought paneer (particularly the variety that you get at the Indian store in US)? I am planning to prepare a big batch for an office picnic where we will be barbecuing outdoors and making paneer at home won’t be possible at such short notice.
it will work, but do make sure that the paneer is fresh and within its shelf life.
Hi dassana.. I love ur receipes.. U really make food making easier. Thank you. I just wanted to ask can I grill them without skewers or tooth pick in oven?
yes prachi, you can grill paneer tikka cubes without skewer or tooth pic. line a baking tray with aluminium foil. place the marinated paneer cubes on the foil. half way through baking, just turn them over once or twice, so that they are grilled from both sides.
I have Electrolux microwave oven and it doesn’t have degree option .. but its surely have grill option toh isme kitne tym k liye grill Karna hogs aur kaun se mode me combi 1 ,2,3
Pls help
use only grill mode. do not use combi mode or grill + microwave mode. grill till you see some golden or charred spots on the paneer cubes.
Came out Restaurant Like … Just Perfect …… like all recipes I’ve tried from your site.
My small suggestion here is to use Mustard Oil for basting/ adding in marinade to give the genuine restaurant taste.
thanks jai for positive feedback and thanks for sharing your suggestions.
Nice description in short . i m tried this recipe & i got yummy tempting paneer tika .
thank you priti 🙂 for the positive feedback, glad you liked it.
Great description in short. Tried and got testy paneer tikka. Thanks
welcome sudhir and thank you for your positive views 🙂
I tried this Recipe …..it ws so yummy
Thanks a lot for sharing this awesome recipe.
welcome and thankyou amandeep 🙂
Thanks.
Let me check.
Thanks for your reply. I got the size.
Want to know the make of the skewer. It will be used in microven.
fine. these are bamboo skewers. can be used in the microwave oven. you can also soak them in water for 20 to 30 minutes and then use.
Nice Recipe. Want to know about skewer. Please give us the size and make of this skewer for microwave.
skewer comes in standard size in market hope this help’s you.
can i know whats the reason for using hung curd instead of normal curd??
bhoomika hung curd is thick and firm hence preferable to marinate paneer. normal curd would have lot of moisture which would yield a runny batter. hope this help’s you.
thank you
What mode should the microwave be set to ? Microwave or grill mode or a combination of both ? Its not mentioned .
grill mode or convection mode. please do not use the microwave mode or combination mode.
Tried this and it turned out to be simply awesome. My family liked it very much and I just loved it. It was like something that we had in a restaurant. We also had with chappathis and you bet, I was out of the world.
My sister praised that I have learnt cooking so well like an experienced one and I just attributed it to this site….
But i didnt use so many masalas, but just added sambar powder( which is a combination of chilly powder, coriander powder and cumin powder) and garam masala powder.
Nowadays whatever recipe I look for, I just search the web, even if it was found elsewhere in the other sites, I always feel safe to try it from your blog rather than other food blogs. With lucid explanations and vivid pictures and also in clarifying doubts, you stand among us like the chief chef. Even a novice can try and make it a success if he/she refers your site.
Keep up the good work. God bless you and your family.
very pleased to know this shruthi thankyou so much for your kind, positive and encouraging words. god bless you and your family 🙂
Very yummy .. Tried this receipe . my all family members liked a lot ..
thanks a lot sneha for the feedback and sharing your experience.
I just tried this yummy recipe from your blog and it has come out really yummy!! 🙂
This is my first paneer tikka and I am quite happy with the outcome…
Thanks for sharing this easy recipe 🙂
glad to know this connor thankyou so much and you are welcome.
MAAM i have prepared this dish today and this is my first dish that i have prepared after watching it from internet and no doubtly all who have tasted it said ” from which restro you have ordered it” really it was very very delicious and much better then served in restro thank u ma’am .
now i ll prepared rava dosa after checking out its receipe from ur site.
thanks a lot nishant for this awesome feedback. good to know 🙂
Very good
Hi, very nice recipe with beautiful pictures. Thank you for sharing. I would like to add that if you soak the paneer pieces in very cold, salted water for an hour before adding them to the marinade, they turn out to be extremely soft and literally melt in the mouth :).
thanks sandi and also thanks for the tip of making the paneer cubes soft.
Hi, is it ok to omit ajwain seeds? i don’t have any on hand at the moment and want to make this today.
yes you can omit the ajwain seeds.
Good
Thankyou aaradhyaa 🙂
Nice try
Can we half d ingredients if making for 2 to 3
shweta you could reduce the ingredients into half for making for 3-4. hope this help’s you.
Thank you so much for delicious recipes. Picture by picture explanation is perfect for beginners as they don’t confused when they try something first time. I tried some of your recipes and they were perfect………
welcome geetanjali. nice to know this. thanks for sharing positive review on recipes.
It’s waw! Recipe sir
Sir please add paneer roll recipes
thanks mukesh. i have noted down the recipe request and will try to post soon.
Really…very nicely….given step by step…gud…I lu ved it.
Thku
welcome kajal
Thanx you shar tha resepi
welcome manisha
Am 13years old and today I am gonna try making this at home I wanna be a chef when I grow old and I am moving towards my goal faster thank you for ur recipes I hope it helps me move forward…???
welcome aryan. glad to know this. feel free to ask any query about recipes posted. happy cooking.
Hmmm yummy recipe it’s superb
thanks falak
I tried it.
It was delicious.. I omitted dhaniya.powder n instead added paste of fresh green coriander, mint leaves n 1 green chilli.. Gave a wonderfull flavour.. Made it on gas.. Bt jst one prblem.. While making on non stick pan on gas, chaaro taraf se to ache se sik gya, par jo batter veggies n paneer k bich me th, vo ni paka th.. It was still sticky n undone
Fr d while i jst took out all stuff from stewkers n fried d undone sides, was it ok?? Or some other way should b adopted..
thanks heena for this positive feedback. i liked the green paste that you made. it will overall contribute to the flavors. the batter between the paneer and veggies will be on the skewer. so that won’t get cooked. to get an even frying, its better to just pan fry all of them separately and then once they are fried, then thread them on the skewers. what you did was right 🙂
hi. Can I prepare d marination of this recipe and tandoori aloo recipe previous nite? So tat Al I have to do is pop it into d oven next day morn? Also wil this effect d taste of d finished dish in a bad way?
rithika, yes you can. the paneer and aloo will absorb the flavors more. keep it in fridge. it will be good.
I am loving all this recipes .Thanks
welcome dibyendu
Hi wanted to know if I use broccoli & cauliflower would they be cooked with paneer & onion or will take longer to cook
vaishali, they would take longer to cook. i would suggest to parboil them and then cook.
Please tell what kind of vessel i can use in convection mode in microwave.. And i hav to put the vessel directly on the base of microwave or on a grill provided with microwave.. I want to make it on convection mode
And the jeera powder is bhuna jeena powder or normal jeera powder..
normal jeera powder.
you can use the grill provided with the microwave. what i would do is i would place the grill on the black pan which is usually provided with the microwave oven. the metal pan is oven safe in the convection mode but not microwave safe in the microwave mode. the pan below is collect the drippings if any.
Actually what i wanna know is.. I arrange the stewkers on the black pan.. Now i hav to put that pan on the base or d grill.. Grill is lyk a shelf in the microwave
heena, you can arrange the skewers on the black pan or on the grill. if arranging the skewers on the black pan then place the black pan in the microwave. cover the black pan with the aluminium foil so that the drippings don’t get stuck on the black pan and hence cleaning is easy. if arranging on the skewers then place the skewers on the black pan and same way cover the black pan with the aluminium foil.
Thanku so mucj for ur response.. Actually i have quiet confused
. Now i hav understood by again going through ur recipe.. Just wanna ask if the grill taken should be high or low.
Srry fr multiple comments.. Actually some bug with me cell.. Dnt knw if d comments r actually getting posted or not
welcome heena. grill can be medium to high.
Thanku sk Much.. Will definitely try soon n tell u how it came 🙂
welcome heena
Each time the marinade falls at the base of oven. How to prevent it.? Very less marinade remains on panner. Plz guide me.
darshita, you have to keep an aluminium foil cover pan below the paneer pieces or the tray on which the paneer skewers are kept. if you use hung yogurt then the marination will not fall.
Hi Dassana, is it safe to put our Indian steel plate in the oven? I don’t have a baking tray, hence this question.
sneha, don’t use steel plate in the oven. use a baking safe aluminimum tray or pan. or you make paneer tikka on tawa – https://www.vegrecipesofindia.com/paneer-tikka-on-stove-top-recipe/
Thanks Dassana. I decided not to risk it and in this instance I put everything flat in one big oven safe dish and baked it. This is a sure fire success recipe. It is so delicious that my husband keeps waiting for lunch/dinner the whole day when I say I will make it. 😀 It tasted better than any restaurant’s paneer tikka. I will send you the photos soon! 🙂
welcome sneha. sure do send. thanks for sharing your experience and feedback.
very tasty recipe, i don’t have convection mode, I have microwave oven with grill, how should I cook in this, could you help me?
Thanks
welcome nasee. cook at the same temperature as mentioned in the recipe. the time may vary. only use grill mode and don’t use microwave mode.
Just tried it and it was delicious. Just loved it. Thankx alot for it.
welcome aman. glad to know this.
i dont have oven what to do
geeta, try this recipe of paneer tikka on stove top/tawa – https://www.vegrecipesofindia.com/paneer-tikka-on-stove-top-recipe/
Thanks
Please suggest some veg snacks as I am having practical
But should be nutritional
Suggest
Please
welcome jasmeet. please check the collection of starters and snacks recipes here – https://www.vegrecipesofindia.com/recipes/indian-snacks-indian-starters/
Which drink can be served with paneer tikka ????
Please suggest
jasmeet, you can serve lassi.
Thanks 🙂
Can it be sweet lassi???
And please tell what to serve with soya rolls
As I am having practical
Please suggest some veg snacks which can be made but should be equally nutritious …
yes sweet lassi. with soya rolls you can serve mint chutney or coriander chutney. both recipes are posted on the blog. you can have a look at veg snacks on this link – https://www.vegrecipesofindia.com/recipes/indian-snacks-indian-starters/
Hi nice recipe….i would like to use the grill mode in that case what temperature nd time should I set
thanks sunitha. you can use same temperature that is 180 degree celsius.
Nice dish n I tried this recipe it was tasty
thanks tejaswi
Hi awesome recipe I followed it step by step my kids loved this thanks for this mouthwatering. Recipe
welcome achla
Hi just wanted to know ….. should we add besan as a binding material in the marinade….. or how will the marinade stick to paneer
poorva, if you want then you can add besan. if the curd has been hung well and all the whey has been removed then the marinade sticks to the paneer.
While putting tikkas in the screwers the tikkas broke into pieces.where did I go wrong.please guide
did you chop the paneer pieces thinly. then they will break. also depends on the quality of paneer.
Awesome Recipe… I followed above steps and sauce was Superb!! Thank you so much. Our New Year celebration credit goes to you, everyone liked the food… Keep Rocking !!
thanks siddharth. thats good to know. thanks for taking the time to comment.
looks delicious… just wanna know as you say you baked it for 25 min at 180 C…..is it in microwave? also what about the grill mode in Microwave….which mode is better?
This recipe was made in the convection mode of microwave. I find the grill mode very slow hence i use the convection mode. According to me convection mode is better.
its a superb receipe and i enjoyed while making it. thanx to u.
welcome sapna
Hi
Its a very tempting and easy recipe. I make paneer tikka at home with almost same ingredients n method but on tava n hv always faced this issue of paneer sticking on the tava while shallow frying it. The adding besan tip is awesome. Will definitely try it next time.
Thanks. Keep cooking and sharing.
welcome krishna. happy cooking.
Awesome to prepare at home n pleased to follow your recipes …. 🙂
thanks venushree
I could make excellent paneer tikkas following u’r recipe. Thank you.
welcome vijaya. glad to know this.
Is there anyway to get it to be crispy? Like char grilled? Without burning off the marinade?
you can pan fry on tava with some oil. fry on a low flame, so that the marinade does not get burned. you can check this post to get the idea – https://www.vegrecipesofindia.com/paneer-tikka-on-stove-top-recipe/
This tikka came out awesomely well… I refer to your recipes almost all the time and have always gained appreciation from my husband and son. Thanks a ton. Love your kala chana (gravy version) too…
welcome sridevi. glad to know this.
Hi… seems like a simple and tasty recipe… just one question… I plan to make Panner tikka in a OTG/oven… Should i add gram flour to marinade? raw or roasted? Looking fwd to early response… planning for dinner tomo 🙂
you can skip gram flour if making in oven. even if you add does not matter. gives a good taste. i always add raw gram flour and you cannot feel the rawness after baking.
Thanks a lot for such a prompt reply 🙂
welcome shilpi
I made this recipe of Paneer Tikka tonight. It smelled amazing. Last night I made the paneer homemade, mint chutney, and onion chutney.
It was way to hot for me to eat. I put 2 tsp of Kashmiri red chilli powder, is that why? Is the chaat masala also hot? Can you suggest how I can modify it? When I ate at an Indian restaurant last Saturday I ordered medium hot so I was surprised this was too hot for me. Thanks!
2 tsp of kashmiri red chili powder will make the food hot. thats why the tikka was spicy. chaat masala is neither spicy nor hot. just add about 1/4 to 1 tsp of kashmiri red chili powder for serving of 4. in any recipe, you can keep this as a rule, unless otherwise the recipe calls for addition of lots of chili powder. 1/4 tsp of kashmiri red chili powder, makes the food mildly spiced with very less heat. 1/2 is fine to go in most recipes. 1 tsp will make the food medium hot.
Thank you!!! You really know your spices. That helps a lot!!! 🙂
welcome joanna
Hi..ive been reading ur recipes since a year..and u wont believe I hv stopped reading any other chefs recipes..u r awesome..i hv tried many of ur recipes n my family just loved them.keep it up.
thanks chidambara for this lovely feedback. keep trying the recipes and feel free to ask any query.
Visually well explained receipe…will definitely try @ home
Wow such a wonderful recipe… well explained step by step..I surprised my wife with this recipe she was amazed
thanks ashok for this positive feedback
Wonderful explaination of receipe ….i will love to cook this after reading this…..because this is my favourite dish
do try 🙂
Very easy , delicious , and quick recipe ..
All the ingredients are easily available at our homes … loved all of your recipes …
All are very easy …
I haven’t expected such easy recipes from the Internet …
Liked the recipe of Homemade paneer also ..
I tried this tikkas with my small tandoor kit .. along with 3 strings to keep upon …
Thanks once again …
Keep sharing recipes … loved all
thanks princess. lovely name 🙂 most of the recipes have easily available ingredients and easy to make. do try some more recipes. happy cooking 🙂
Happy Diwali Dassana,
I made this and the kaju katli from your blog this Diwali and both came out very good. A special mention about this particular recipe which i tried out in my new airfryer and it was absolutely tasty..after the marination it took me less than 15 mins to cook. I used cornflour instead of besan in the recipe….very flavorful and tasty. Thank you:-)
happy diwali to you ashwini. i have been wondering whether to buy air fryer or not. since my kitchen has no space to have a new stuff 🙁 heard a lot of good reviews about it. then i don’t mind making samosas and french fries in it 😉 thanks for your feedback dear. much appreciated.
Can one marinate a fairly large qty and keep it in the frig for upto 2 weeks, using it bit by bit?
Reg the making, as a solo male looking for a quick way to whip up a somewhat faux but still tasty panneer tikka to go as a snack with drinks, can I just bung the marinated panneer (abt 100 gms of a larger lot)) in a microwave and heat for (1-2-3?) a few minutes? May not be fully cooked, but then panneeer doesn’t really hv to be fully cooked to be tasty. So is microwaving an option?
the recipe can be doubled or tripled and large quantities can be made. but would not suggest to keep in the fridge for 2 weeks. best to use in a day’s time. you can microwave. and the paneer will get cooked. but there won’t be the roasting & browning of the edges which typically happens in the oven or in the grill.
Such a wonderful recipe… So well explained step by step..I will surely try…thanks for a new thing …..I use to eat it only in restaurant.. Thanks 4 sharing
welcome anju
This is an aweeesssoommmeee recipe………
i’m doing this now!!! ;->
thanks bhavani
well done i like it
Hi Dassana,
I regularly prepare this but I loved your version with carrom seeds. I add Kasuri Methi which gives a very nice flavour.
I wanted to share a tip, not sure if you already have it on any of your other recipes.
After the marination or even after cooking keep the tikka in a vessel. In the center keep a small bowl. Heat a charcoal piece and keep it inside the small bowl, quickly add some ghee on the charcoal and immediately cover the big vessel with a lid. Because of the ghee the charcoal will generate smoke and the tikka will have a smoky flavour.
thanks jahnvi. i know this method of charcoal smoking. but still thanks for sharing your tips. i shall try adding kasuri methi to paneer tikka.
can u tell me how to cook paneer tikka in tandoor
i have never used a tandoor. so am afraid i cannot help you. if you have any literature or book available with the tandoor, then there may be instructions on how to use tandoor.
I am a beginner in learning and experimenting cooking. I have made it a couple of times, and every time i get compliments. Its explained so well, that anyone can learn it. Thank you so much !
welcome smati for the positive feedback. your comment will surely inspire more people to try the paneer tikka recipe.
One correction: You say “lemon,” but I think you mean “lime.” I’ve heard Indians at work say “lemon” when they are actually talking about limes. The flavor is quite different.
adam, i know the difference but you are right. many indians used the word interchangeably. in this paneer tikka recipe, i have used lemon juice.
I prepared it in grill oven and I must say yar so nice. I ka to loved it and always i eagerly wait to prepare it next time. Easy, Tasty, and less time taking. The only thing u need is to b preplanned. Lovely dish. Thanks dear thanks allot.
Just want to prepare it in tava.
suman, keep the skewered paneer on the tava and fry the paneer and veggies till cooked.
welcome suman. glad to know that you liked the paneer tikka.
Awesome…too gud…
hello dassana…
I luv cooking a lot…nd now I’m a mother of two kids…jus three yrs nd other one seven months…time nahi milta par after seeing ur recipes mann karta hai yeh bhi try karu woh bhi try karlu…
too gud…thnx a lot dear…. Ek request hai agar infants nd thhree yrs +kids ke liye kuch healthy yummy dishes hai toh plz help me…
tik hain neha. dekhti hoon, kuch recipes add karne ki koshish karoongi.
Really liked the way it is told. Keep up the good work!!! All the very best!
thanks amandeep
Hi, I made this dish and it came out really well. I used the convection mode in my microwave. But the capsicums were undercooked n too crispy. Is there anything that can be done about that?
thanks nivedita. the capsicums are not thoroughly cooked in a paneer tikka. there is always a slight crunch to them. it also depends upon on how thick or thin you sliced the capsicum. if you want a more cooked capsicum, then just blanch or lightly steam before you add to the marinade.
Hey, I made paneer tikka using this recipe, and it was just PERFECT. the flavors were so well infused because of the marination and because of your perfect recipe and your step by step pictures! Thank You!!!
P.S used fresh paneer – doesnt work well because it is so soft that it breaks while you put it in the skewer. But this also didnt matter – it was still tasty!
Then i used paneer which was made a day earlier and refridgerated – worked perfectly! 😛
thanks palak. i use fresh paneer. i think it depends on the quality of paneer. even refrigerated paneer works well.
Thank u so mch….
It was awesome…yummy. …..my hubby liked it so mch…he was vry happy hving dis dish at home….Thanks a lot again
welcome dr.Priyanka
Wonderful receipe with step by step explanation
thanks richa
Hi Dasana,
Why is the Paneer tikka recipe different on your Paneer tikka masala page ?
janavi, the recipe is little different. there can be many variations of a recipe. you can use this paneer tikka and masala from the other recipe. this dry paneer tikka is slightly spicy and the other version is not spicy as i am going to add into the gravy.
Nice sir thanx
I’m not able to rate the recipe for some reason, but I give it 5 stars! I have made it several times now and my family loves it! I also use the marinade to make chicken tikka for my husband and he also loves it. Thanks!
thanks ruby for the feedback and 5 star rating. its alright if you cannot give rating as sometimes it does not work.
Hi ,
I tried this recipe . For some reason it when I grilled it , it gave away a lot of water. And the paneer was slightly chewy. Its almost like it lightly curdled.
pls help me. I am very keen to get it right 🙂
Anita
the yogurt has to very thick or the whey has to be drained out. its always better to strain the yogurt for some hours in the fridge before making the marinade. you can use greek yogurt if you live abroad. or else take the yogurt in a muslin or thin cotton napkin. secure tightly and then hung the yogurt for a few hours till all the whey is drained. the chewiness is as the paneer has got overcooked.
Looks very amazing recipe.. And the picture taken are awesome… Will try it soon. Thanks for such a detailed post Dassana.
welcome janisha
I had make this dish and it was a great success. All of us from my family liked it very much. Thank you Dassana
welcome Kshitij
This is a awesome recipe, I made it schools food festival, and we got a 1st prize, I just wanna say Thanks Dassana
thats great. nice to know.
I want to ask i have to put the marinated paneer in the freezer or simply in the fridge
keep the marinated paneer in the fridge and not in the freezer.
I love it! I m gonna make it today it looks great!
hi..!!!!
Dashana,
I have a question..there is my brother’s b’day and i want to make this dish and gift to him but problem is that i dont know how to use oven….i have oven but can i make this dish on the tava..????reply me soon..
niyati, to make paneer tikka on tava follow this:
1. use a non stick tava so that paneer does not stick while frying.
2. add two tbsp besan in the marination. this will prevent the paneer from sticking to the tava and will give a nice taste.
It was awesome recipe….but i made it in a tandoor …..
thanks srishti
excellent taste
thanks sukumar
nice
its easy to understand
n right way to know how to make paneer tikka
2dy i will definetly make this dish
thnks
welcome dimple
This was a great recipe. Very easy to follow and the results were pretty yummy. We served these as an app and will likely do them again for new years. Thanks for posting!
welcome dale. nice to know that you liked paneer tikka. its a good starter.
easily understandable recipe.thanks a lot dasanna.iam going to make it for my daughter’s birthday…………..
thanks vizzi. just cut down on the spice powders like red chili powder etc as this is a slightly more spiced version of paneer tikka. you can also add 1 or 2 tbsp of cream to the marinade.
Hi Dassana!
I tried this for Diwali dinner and it came out wonderfully well! Your detailed instructions are awesome and were extremely helpful in the kitchen. I made these in a tawa because I don’t have an oven. Yet they came out perfectly good. Thank you so much…
thanks and welcome aishwarya.
I used frozen paneer but it was completely defrosted. Even the grill pan was screaming hot. But I’ll give besan a try. Thanks for the help.
alright janvi. screaming hot 🙂 then its the quality of paneer. on a few occasions when i have got paneer from outside, they become so sticky and gluey after cooking and that too in a paneer curry like paneer makhani & paneer pasanda. as if they are melting and sticky too. so i have stopped buying paneer from out completely. i would some times buy organic paneer. but not now. its always better to make paneer at home. nowadays when i want to make any paneer dish i make the paneer a day or two before and refrigerate it. till today no issues with homemade paneer.
Hi Dassana,
I had a quick question. I made paneer tikka the same exact way. But when I bake it in the oven it starts leaving water (I don’t know why?). I even tried doing it on a cast iron grill pan (well greased) but the paneer ends up sticking on it (I even sprayed the panner tikka with oil). Could you please help me understand the reason behind both the problems?
hi janvi, did you use fresh or frozen paneer. water should not come out of the paneer. i make paneer tikka often and they bake very well. if you have used frozen paneer, then they have to be brought at room temperature before mixing in the marinade. the sticking part happens if the oil or pan is not very hot or does not have a good thick base. so about 2 tbsp of besan can be added to the marinade. the besan will not allow the paneer to stick if they are being fried or grilled.
seems like yummmmmmmmmmm……. 🙂
I have microwave with convection, grill, combi and micro option. What should i select and what temperate and time should i do at?
Can i use a aluminium pan and put the paneer directly or put skwers on the pan without touching its surface?
P.s I heard we can do all baking recipes in microwave in convection mode.
you can use the convection or the grill option. if you use an aluminium pan, then i suggest to use skewers. not touching the surface is better. skewers are easier to turn and turning each piece of paneer in the pan. line the aluminium pan with an aluminium foil and then place the skewered tikka on it. its easier to clean the pan then. check this post on how i have done – https://www.vegrecipesofindia.com/paneer-tikka-masala-recipe/
Wow very nice recipe and good walkthrough on the post. We all loved paneer tikka. Thanks for sharing.
welcome sachin
Very nice! I like the way you have put the pictures of every step you performed. Makes it easy to understand. Keep it up!!
thanks sob
Actually ii really liked ur step by step cooking receipe. Since I am a south indian , I wish 2 north indian recipies. Actually a day bfore only I learnt hw 2 make panner. And I didn’t knw the paneer recipies. 2day I saw tis panner tikka and cooked it. Actually the pictures admired a lot 2 cook. And the taste s also very excellent. Thanks a lot. Can u tell me how 2 make mint chutney n north indian style
thats nice to know suganya. i have a lot of north indian mint chutney recipes on the blog. which one you you are looking for. just use the google search bar on the top right hand side or use the recipe index.
very nice tutorial.. it has very simple step by step instructions which is very helpful…Thank you fr the recipe really loved it
thanks nikita
Looked so delicious that I had to try making it the same day.
But my marinade melted away in the oven. As in all the curd thing stuck to the paneer became watery and dripped to the bottom of the oven . I marinated it for more than two hours. Where could i have gone wrong? Could you please help me with the same?
hi megha. did you use hung curd. the curd has to very thick and should not be watery. i have made tikka with paneer and other veggies many times and never had a problem. some drips will be there and if you have not kept the tikka skewers on a wire rack kept on top of a tray or pan, then they will fall at the bottom. but as you say, its not watery. i don’t suspect the quality of the paneer. so my assumption is the thin consistency of the marination.
Thanks a lot for your reply. Guess I did not hang the curd for enough time. Will try again .
Hooked to this website !!!
welcome megha. next time when you prepare, hung the curd in a muslin overnight or for at least 5-6 hours. you can also thick yogurt if that is available in the market.
I’m so freaking happy that I found your blog! I’m a food blogger in Brazil and I just love indian food. There’s only one really good indian/thai restaurant next to me, so I always wonder if I could make my own indian food. I’m definetely trying the paratha bread today and, hopefully, if I find the ingredients, the masala!
You’re right into my “favourites” list!
🙂
thanks carol. i am glad you liked the blog.
I really loved the way u have presented the recipe. It helps to understand better and the picturesque view looks so tempting. Thanks for this wonderful recipe 🙂
thanks bhavya
Fantastic recipe!!! Wonderful taste, kids and adults both loved it,This became the star at our barbecue , now aim gonna try it at home in our oven.
thanks bommi
Hi
I’m wondering why there is no salt in this recipe? Is it not required because we add the black salt? Looks delicious none the less:)
black salt can be added individually or both black or regular salt can be added together.
Hi. I made it and it was better than hotel .
Thanks a lot . I never try anything to cook before, but after seeing pictures of these recipes i think i can make anything :D.
So thank you again dassana and i hope you will help next time if i needed.
thanks parth.
Hi,
Your recipes are really detailed and presentation is fab. You have inspired me.
Plating on white make the colors pop out that much. Keep up the good work.
For this recipe, I am making it for a huge party and would like to know if I can make it several hrs ahead AND keep it warm somehow without drying it out. Will await your input.
Thanks.
thanks laxmi. white is a good color when shooting food. you can make the marinated paneer in advance and keep in the fridge. you can also keep the marination overnight. just cover the bowl with a lid or cling film. the upper surface of the paneer may dry out but then just stir the whole marination again well before grilling or baking and the dryness goes away.
How to exactly cook it using the barbeque option? I have vertical standing barbeque rods given with my Microwave. What should be the temperature and for how long should i cook it using barbeque.?
hi kavita, i have never cooked with barbeque in a microwave. so i am unable to help you on this. i suggest reading the manual that came with your microwave oven.
Hi Dassana,
Loved your recipe.
Thanks a lot !!! 🙂
thanks milind
yummy……………. your recipe is awsome………..
jus came across ur site few days back…. tried ur paneer tikka and green chutney…. it was soooo yummy… i made it for my guests , they loved it,… thanks a lot… so its gonna be a dinner @ my home tonight with frnds… i am searching recipe in ur site….. love ur site…. thank u again…..
thanks varshitha for making the recipes as well as for encouraging comments.
Hallo Mam… ur alll recipes r jst amazingggg!!!!!!! i liked ur site a lotttt!!! Mam just tell can we cook this paneer tikka on Gas?? if yes plz tell how???
dear mehak, you can cook the paneer tikka on gas stove. heat up a tava or a flat pan. add oil. place the marinated paneer in the oil and pan fry these. just add some besan/gram flour about 1 or 2 tbsp to the marination. this helps in the paneer not sticking to the pan and makes life easy. also the paneer becomes crispy.
I m really eager to make it n the way u present it give an inspiration to try the dish
yes do try the recipe.
Really like the way u share the recipe..I can’t stop my self to try it..
thanks priyanka. do try the paneer tikka…
Hey easy to understand the way u have given ur recipe.Great
can this be done in microwave?
no… better to avoid making the paneer tikka in the microwave. the paneer will quickly become dry and rubbery without getting browned at the edges..
either you bake it or grill it or fry individual marinated paneer pieces on a non stick tava or pan.
will it taste the same if made on a tawa not in oven.
the taste will be same but the texture will be crispy… and trust me it tastes really good…
I tried it first in convection mode in microwave.. bt even after 10 min, it was not cooked at all.. then i took it out and cooked on tava. As it was not a non stick tava, so started sticking on tawa.. however d taste was good.. any idea why convection mode of microwave didnt help?
did you preheat the your oven in the convection mode. also temperatures vary from oven to oven. you could have kept if for some more minutes.
I tried it and it was delicious. Thanks you so much for awesome recipes that too step by step preparation.
Please keep sharing recipes.
welcome shefali
Thanks, it is realy good for cooking….
thankyou pradip 🙂