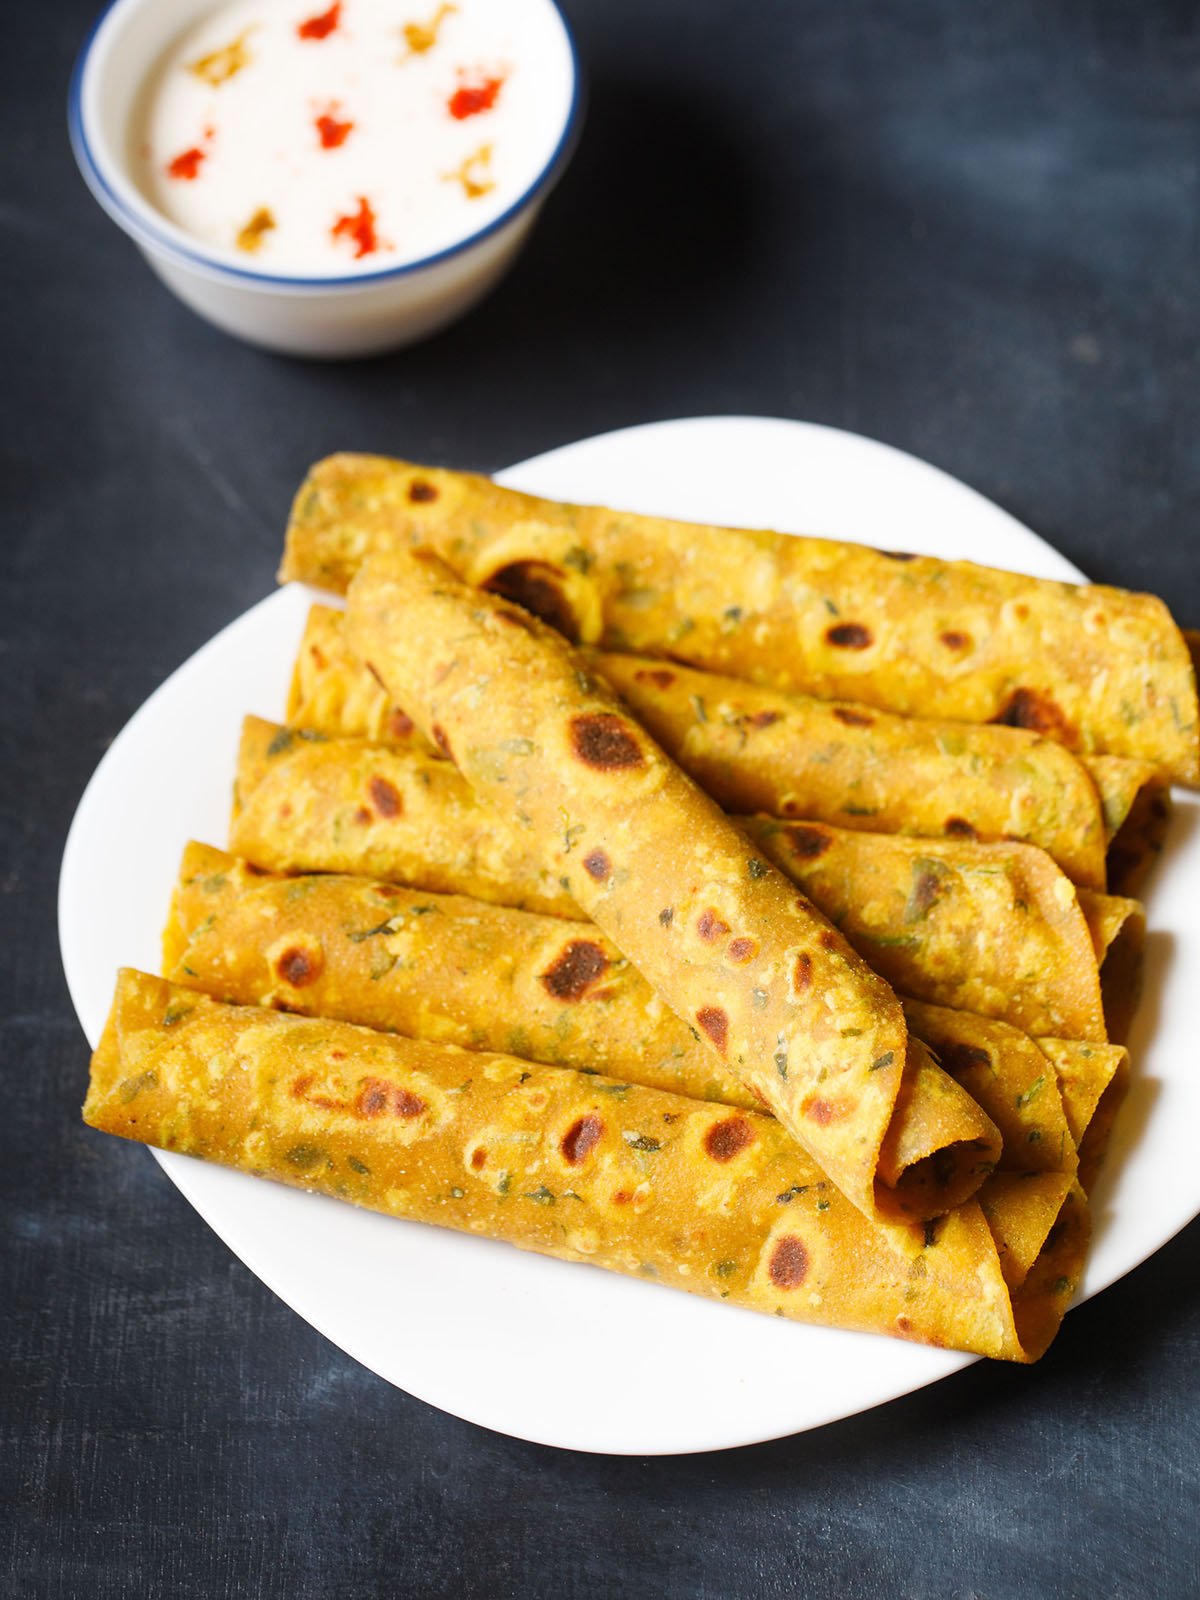
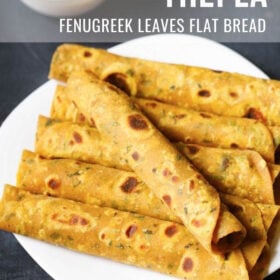
Faintly bitter, and wonderfully spiced Methi Thepla are savory flatbreads that are delicious to enjoy as a delicious snack any time of the day. My step-by-step instructions with photos and video will show you how to easily make this classic Thepla recipe with fresh fenugreek leaves and whole wheat flour. Plus, get tasty suggestions for some sides to eat with Methi Thepla!
About Thepla Recipe
Thepla are flavorful flatbreads that are made with spices, herbs, yogurt, whole wheat flour, gram flour and optionally millet flours with or without the inclusion of greens or veggies.
Methi thepla is made with fresh fenugreek (methi) leaves and whole grain flours. These leaves are slightly bitter with a hint of maple, and smell fantastic both raw and when cooked.
Fenugreek also happens to be quite healthy and is known for helping to reduce inflammation and blood sugar levels.
When combined with spices and a blend of whole wheat flour, gram flour, sorghum flour, and pearl millet flour, the deep earthy taste of the methi is beautifully balanced.
The multigrain thepla dough is then flattened and lightly roasted to create tender and soft flatbreads that are delicious as a snack or fun side dish.
Methi thepla pair well with nearly any savory or sweet dipping sauce, mango pickle, or creamy yogurt. Continue reading for easy steps and tips (plus video!) for making the best multigrain thepla recipe with fenugreek!
How do you store fenugreek leaves?
As soon as they are purchased and home you should pluck the leaves from the fenugreek stems. Then thoroughly wash and dry the leaves, and keep them in an airtight container or a zip lock bag in the fridge.
I like to keep the plucked methi leaves in a steel container, and the leaves stay fresh for 4 to 5 days. Then whenever I want I can add a sprinkling of methi leaves to pakoras or pulao and even dal.
For more advice for properly cleaning methi be sure to read this Aloo Methi recipe post!
How to make Methi Thepla Recipe
Prep Methi Leaves
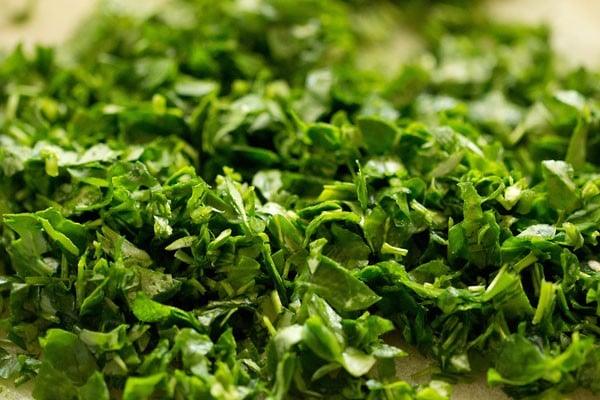
Before you begin making thepla recipe, you have to prep the methi leaves and make the dough. Pluck the leaves from the stems and tightly pack them in a measuring cup of 240 or 250 ml. Only use the leaves and not the stems.
1. First prepare the fenugreek: Rinse 1 cup of methi leaves very well in cool running water. Then drain them thoroughly and dry with a kitchen towel or paper towel. Chop the leaves finely and set them aside.
Tip: You need to finely chop the methi leaves. If not finely chopped, you will find it difficult to roll the dough and the leaves may tear the dough when rolling.
Make Thepla Dough
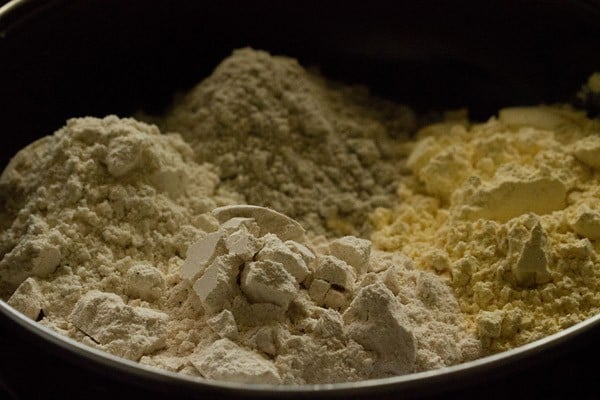
2. In a large mixing bowl, add the following listed flours:
- 1 cup of whole wheat flour
- ¼ cup besan or gram flour – you can replace it with chickpea flour
- ¼ cup of pearl millet flour also known as bajra atta in Hindi
- ¼ cup sorghum flour called jowar flour or jowar atta
Note that if you don’t have or prefer not to use millet flour – simply leave out and instead add 1¼ cups of whole wheat flour and ½ cup of besan flour.
3. Next, add the spices and herbs:
- 1-inch ginger, grated or crushed (in a mortar-pestle)
- 1 or 2 green chilies, crushed – about ½ to 1 teaspoon chopped green chilies or serrano pepper
- ½ teaspoon red chili powder or cayenne pepper
- ½ teaspoon turmeric powder
- ½ teaspoon cumin powder
- ½ teaspoon coriander powder
- ¾ teaspoon salt or add as required
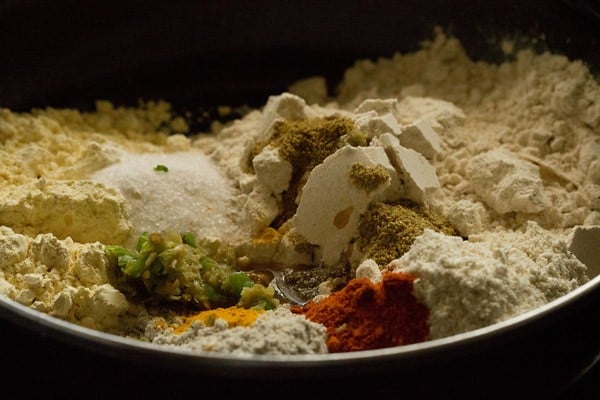
4. Now add the chopped methi leaves.
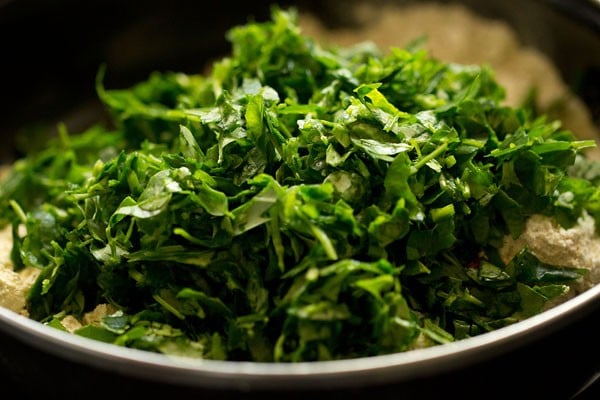
5. Mix everything well.
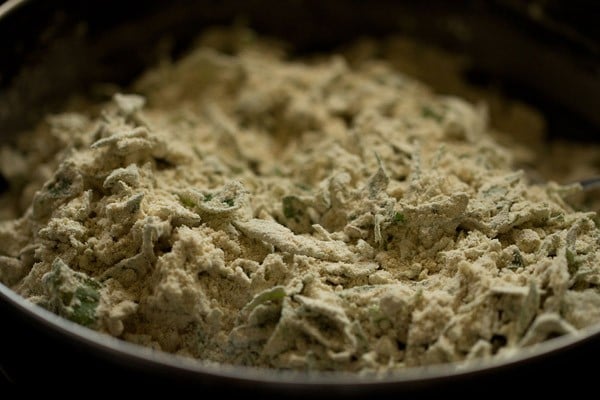
6. Next add 4 to 5 tablespoons of curd or yogurt. To make a vegan thepla add 4 tablespoons of water or vegan yogurt instead.
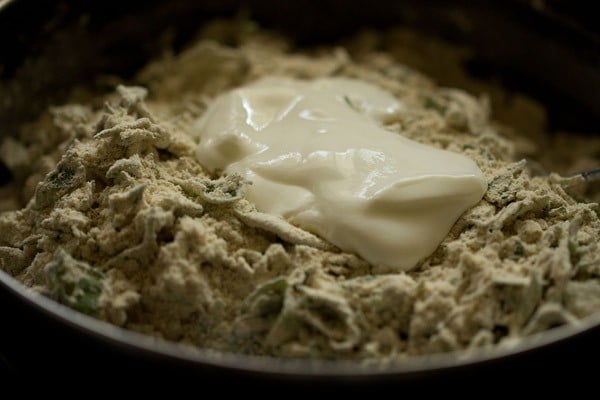
7. Mix again and knead into a dough. Do not add any additional water while kneading, as the methi leaves release water.
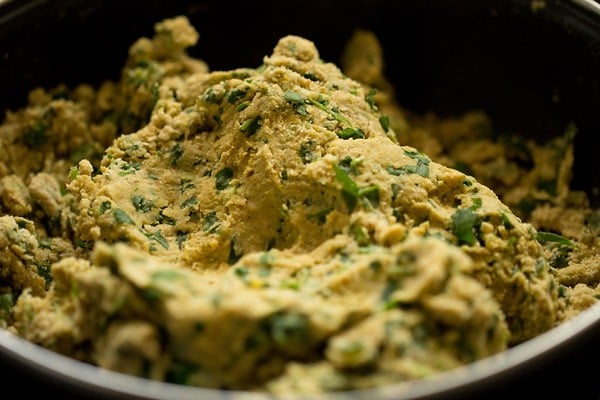
8. Knead very well to form a soft, smooth dough. You can add more curd a tablespoon at a time if required while kneading.
Tip: If the dough looks hard, add a few tablespoons of curd and knead. If the dough becomes sticky, add some wheat flour. Mix and continue to knead.
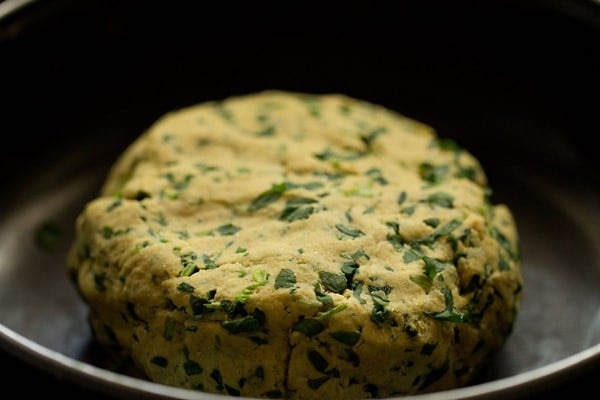
9. Now make 10 or 11 medium sized balls from the dough.
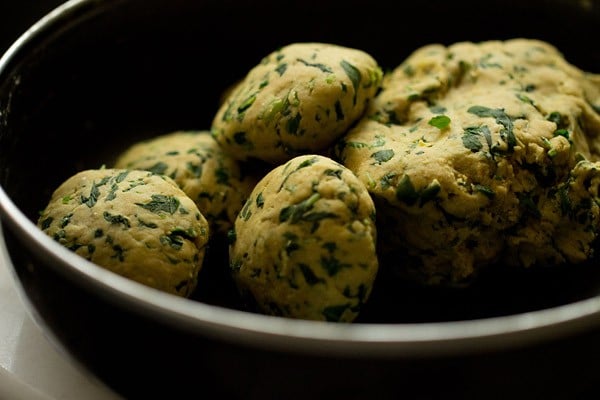
Roll Into Flatbreads
10. Working one at a time, take a thepla dough ball and lightly sprinkle with flour on a clean, lightly floured surface.
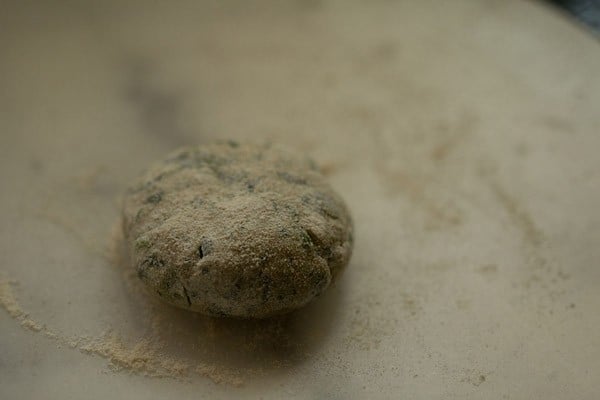
11. Use a rolling pin to flatten.
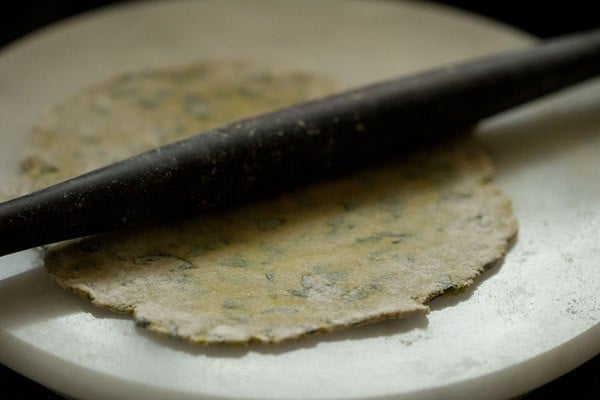
12. Roll the thepla to a round flatbread of about 5 to 6 inches in diameter.
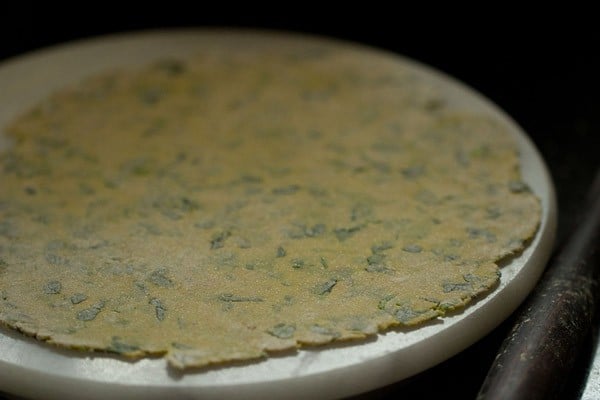
Cook Methi Thepla
13. Heat a tawa or large skillet over medium-high heat. Once hot, place the flattened thepla onto the surface.
Let cook for under a minute until just starting to become light golden or you see faint air pockets on the top.
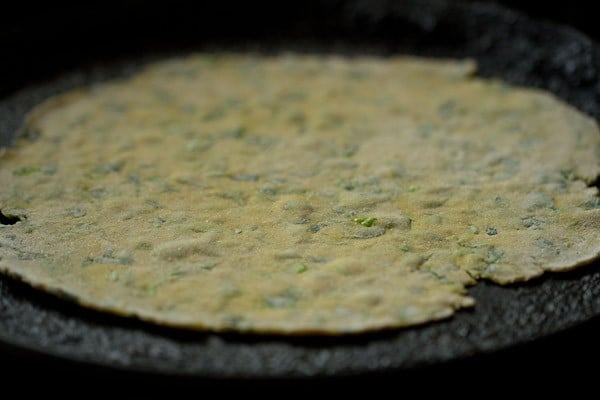
14. Use a spatula to flip.
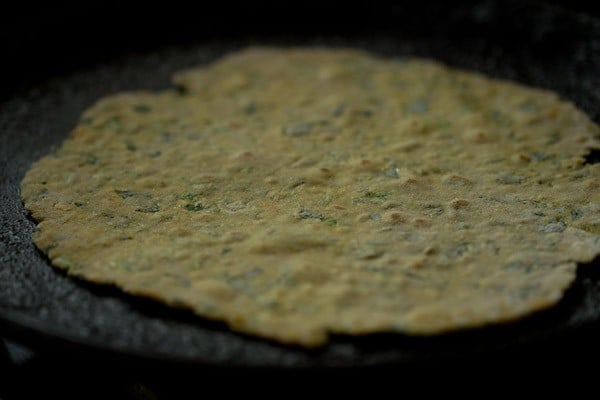
15. Spread oil lightly on the top side to coat, like in the picture below.
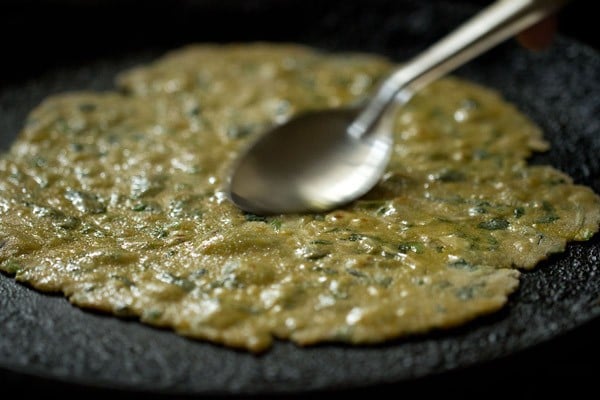
16. Flip the thepla again when the second side is half-cooked.
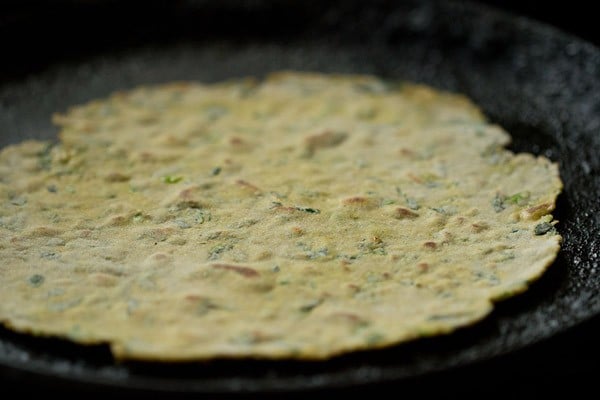
17. Now spread a bit of oil on this side, too.
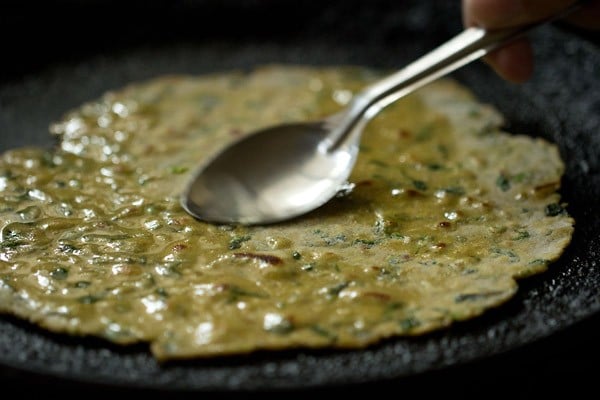
18. Continue to flip back and forth a couple of times, allowing the thepla to cook for just under a minute or so each time until the flatbread becomes golden brown with even, slightly darker brown spots.
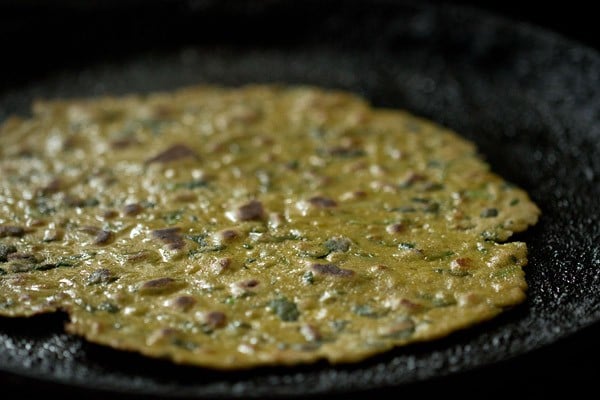
19. If needed you can press methi thepla with spatula to get an even cook.
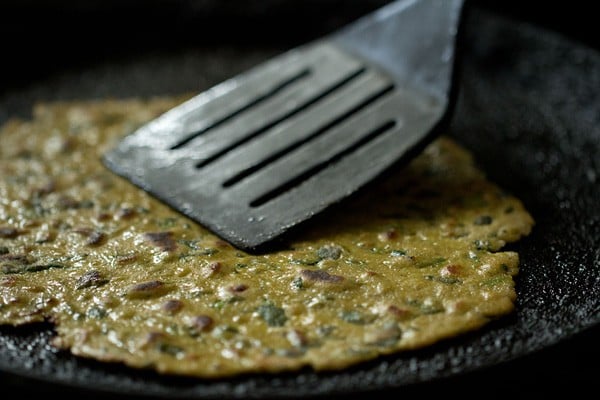
20. Note: Since I plan to serve them after a few hours, I have added a good amount of oil so that they remain soft. If you plan to serve them immediately then you can add less oil.
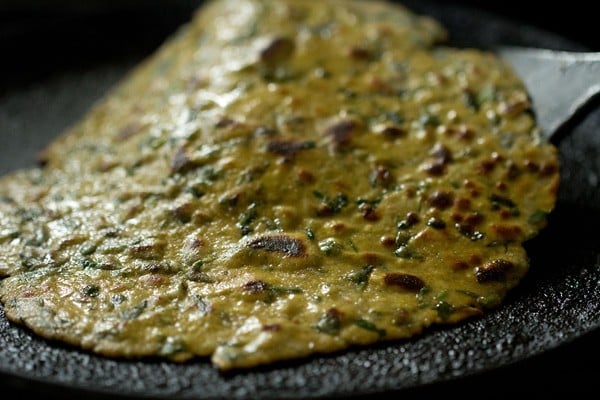
21. Remove the thepla from the skillet, and keep transfer to a roti basket or a covered platter to serve. Continue to make all thepla this way.
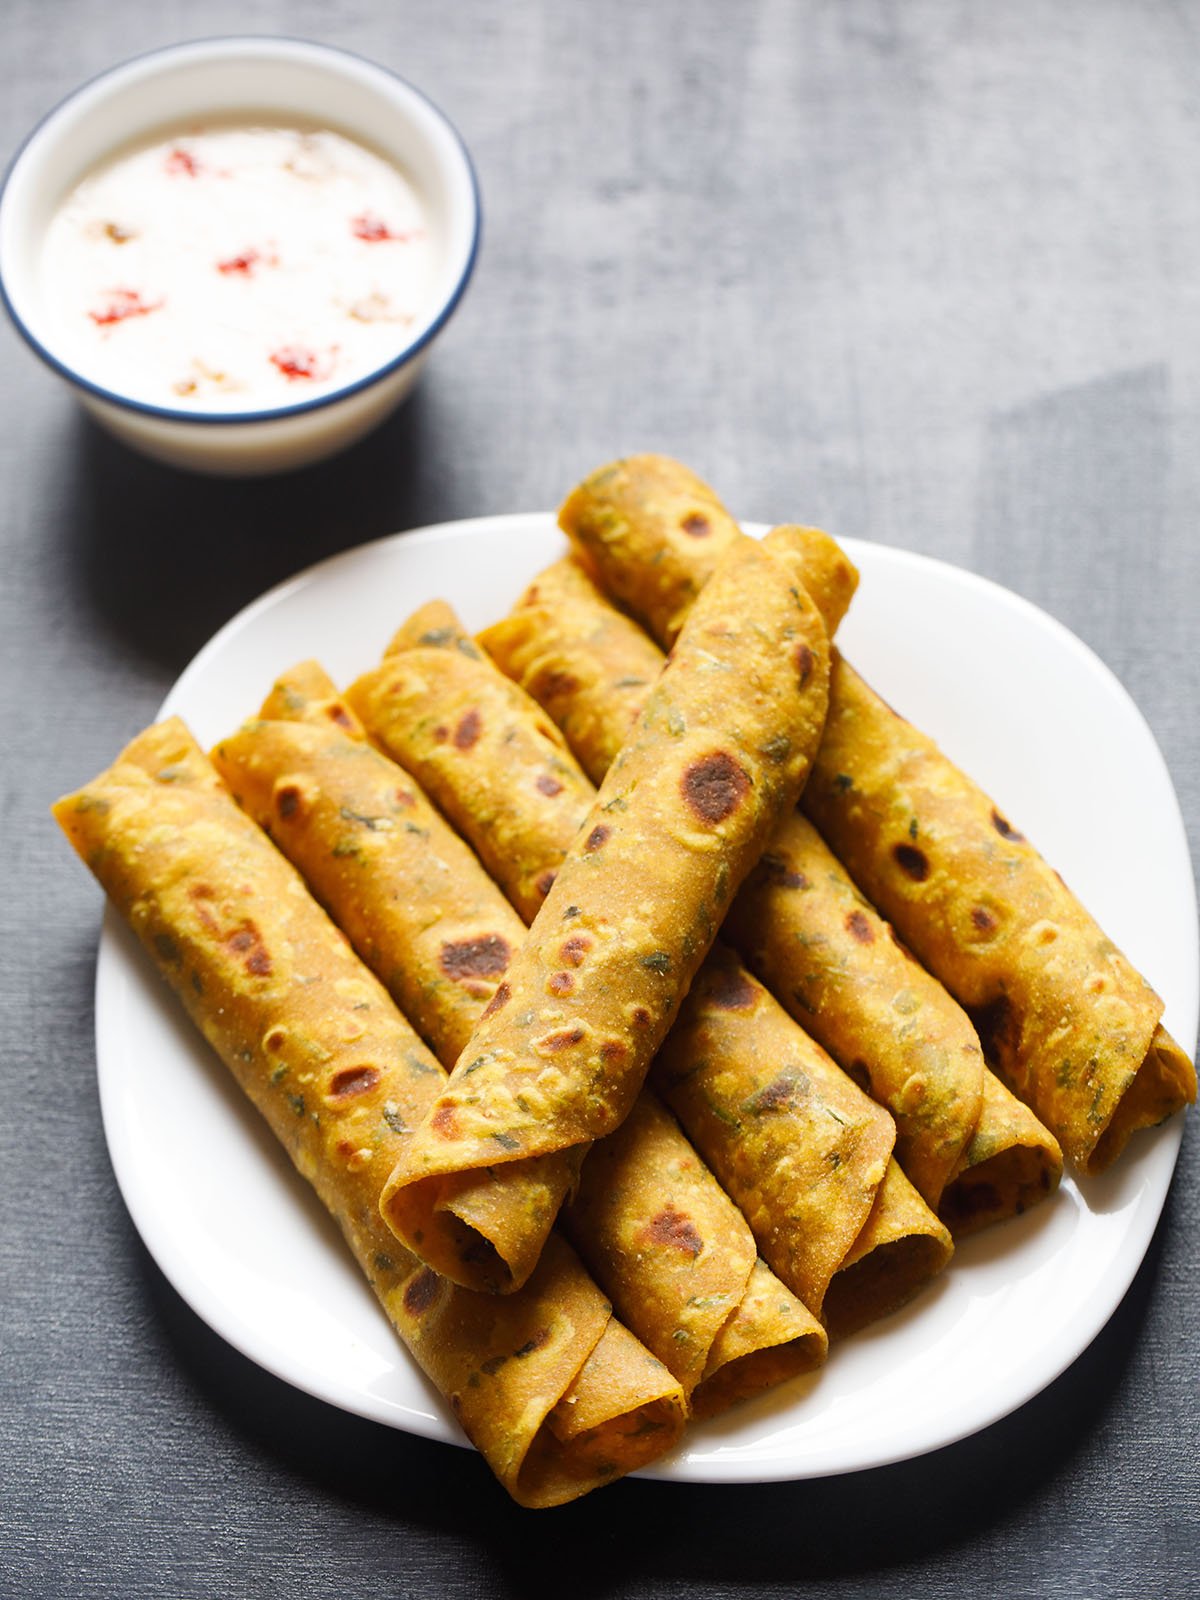
Serving Suggestions
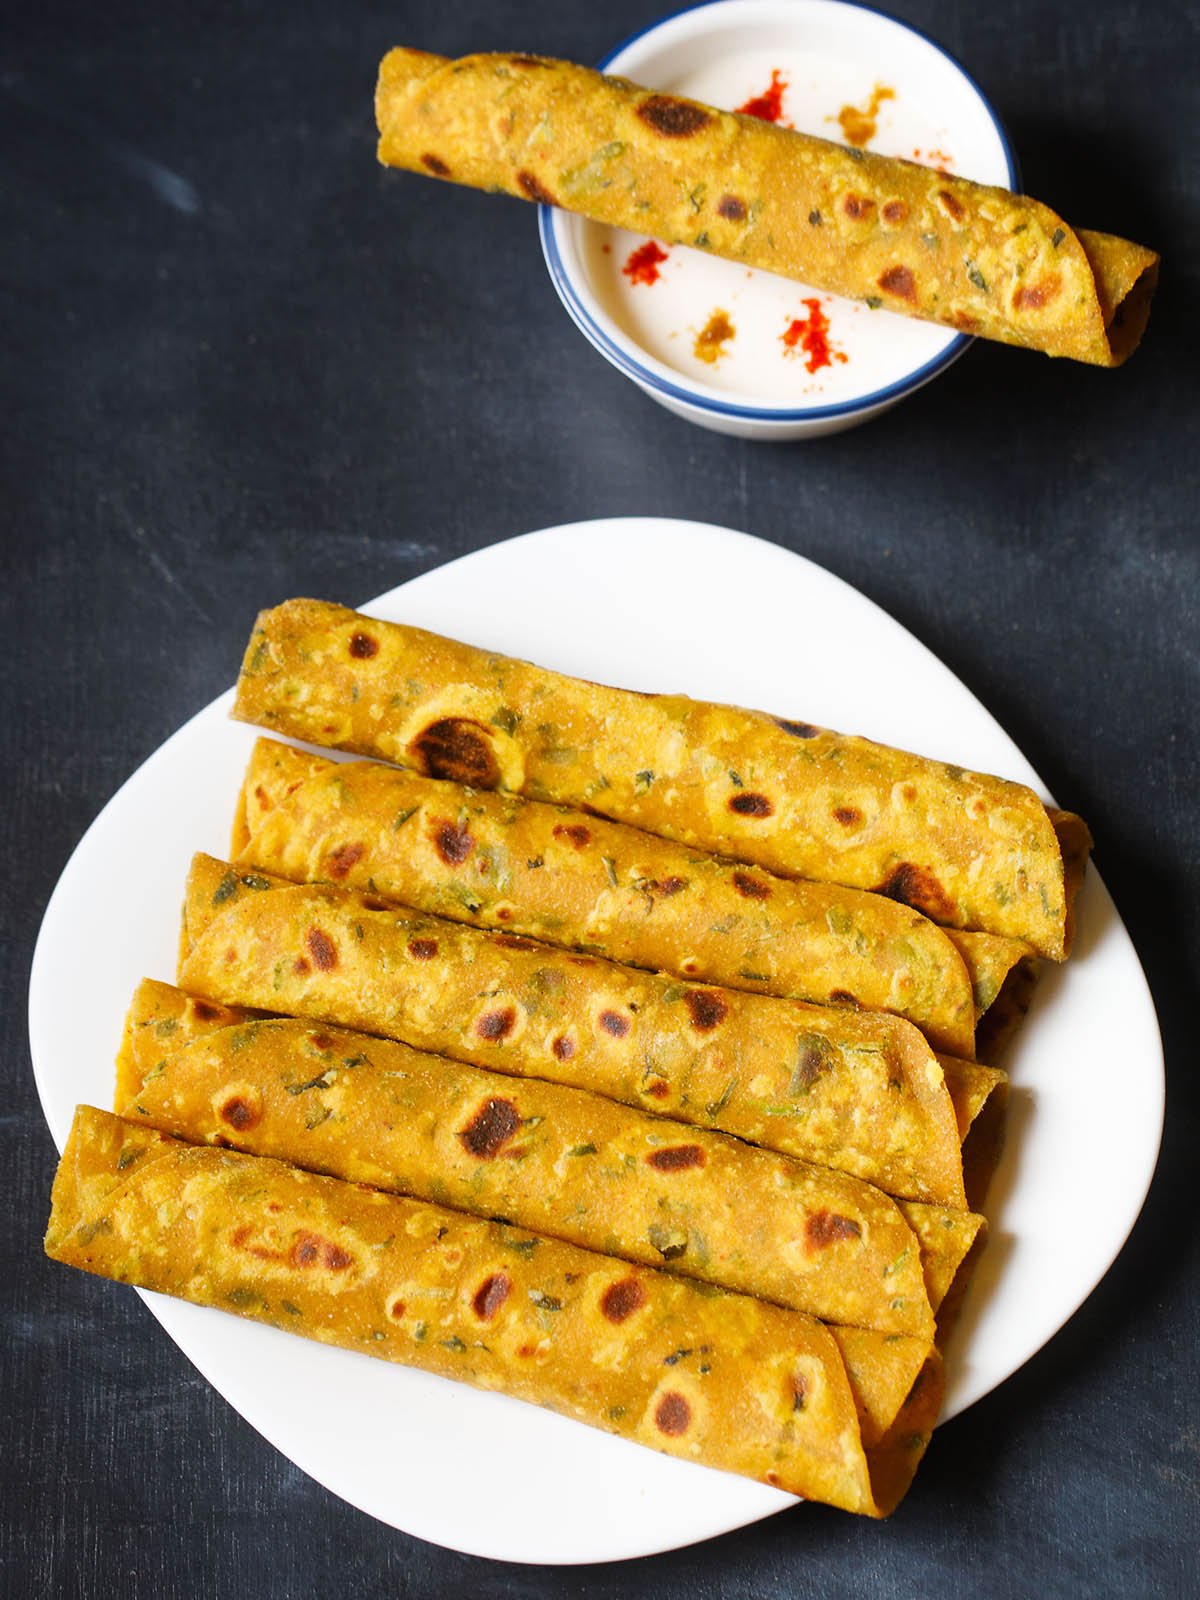
Serve Methi Thepla with plain curd (yogurt), lemon or Mango Pickle, Mango Chutney, or Mango Chunda. The bitterness from the fenugreek pairs perfectly with the sweetness of the mango!
You can also eat these with a simple Batata nu Shaak. Methi thepla also pairs well as a side snack with Masala Chai. I also love to eat it with Dal Fry.
How do you store Methi Thepla?
Methi thepla are best when enjoyed either right away or later the same day. They will keep well for up to 3 to 4 days when you make them without curd.
So if you want to have them later after a few days, do not add curd as it will lessen its shelf life. Simply knead the dough with water. Store cooled flatbreads in an airtight container and keep at room temperature.
They also freeze well. Simply wrap a stack of cooled methi thepla in foil before storing in an airtight freezer bag, and keep in the freezer for up to 3 months.
Thaw in the fridge and later reheat these flatbreads either in a skillet on the stove or in the oven for just a few minutes until warm.
Variations
There are many variations of making thepla recipe and each family has their own method and proportions of flours that they add. Make a plain thepla recipe or add a few veggies that make them healthier. I have shared a few thepla recipe variations and have listed them below.
- Lauki Thepla: I make these soft flatbreads with bottle gourd (opo squash, calabash). My lauki thepla recipe is different from methi thepla wherein I do not include millet flours but only add whole wheat flour and gram flour.
- Mooli Thepla: These rustic flatbreads made with tender white radish, whole wheat flour and spices are simply delicious. Both mooli thepla and mooli paratha are different unique recipes. To make mooli thepla mix the radish with the flour and then knead to a soft dough. But to make paratha, you stuff the grated radish as a separate layer in the rolled dough.
- Plain Thepla: Make the simplest version of plain thepla recipe without any vegetables. Omit fenugreek leaves in this recipe. Add some water to knead the dough. You can also omit the millet flours and include 1½ cups of whole wheat flour and ¼ cup of gram flour.
- With Kasuri Methi: We call dried fenugreek leaves ‘Kasuri Methi’ in Hindi. These dried aromatic leaves come in handy when you do not have fresh leaves. You can substitute fresh methi leaves with Kasuri Methi in this recipe – simply add about 2 to 3 tablespoons. Add some water as needed while kneading.
- Other Greens: You can make this thepla recipe with green leafy vegetables like spinach or amaranth leaves.
Expert Tips
- Flours: You can include various combinations of flours with different ratios. However, always add more whole wheat flour. With lesser amounts of wheat flour, your thepla can become chewy or hard and you won’t be able to roll the dough easily. A relevant point to be remembered is not to increase the amount of gram flour (besan) too much. This can make your methi thepla hard and dry.
- Dough consistency: The thepla dough has to be smooth, soft, and pliable. If your dough looks hard, the thepla will become dry and hard. With a soft and sticky dough, you won’t be able to roll evenly and it may tear. To correct hard dough, add a few tablespoons of curd or water and knead. For a sticky dough, add some wheat flour.
- Longer storage: If you want to make thepla for a journey or you plan to store it for some days. Then add about 3 to 4 tablespoons of oil to the flour, while you form the dough. Not only adding oil will make thepla soft but also help in preserving them for some days. Omit to add the curd (yogurt) as it decreases the shelf life of thepla.
- Spicing: For a spicy thepla add more green chilies and red chili powder. You can always add less or more ground spices and green chilies according to your preferences.
- Fats: For roasting thepla, you may use ghee (clarified butter) instead of oil.
- Other Greens: You can make this thepla recipe with green leafy vegetables like spinach or amaranth leaves.
More Similar Healthy Recipes
Indian Breads
Indian Breads
Indian Breads
Andhra Recipes
Please be sure to rate the recipe in the recipe card or leave a comment below if you have made it. For more vegetarian inspirations, Sign Up for my emails or follow me on Instagram, Youtube, Facebook, Pinterest or Twitter.
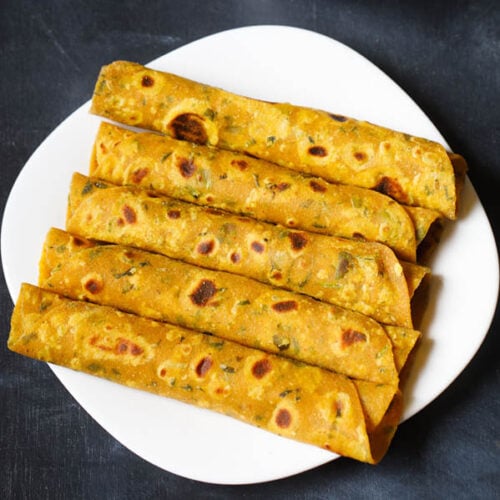
Thepla Recipe | Gujarati Methi Thepla (Multigrain)
Ingredients
- 1 cup fenugreek leaves (methi) – tightly packed
- 1 cup whole wheat flour – 120 grams
- ¼ cup gram flour (besan), 40 grams
- ¼ cup pearl millet flour (bajra flour), 40 grams
- ¼ cup sorghum flour (jowar flour) or 40 grams
- 1 inch ginger – crushed to a paste
- ½ to 1 teaspoon chopped green chillies or serrano pepper – crushed to a paste
- ½ teaspoon red chili powder or cayenne pepper
- ½ teaspoon turmeric powder
- ½ teaspoon cumin powder (ground cumin)
- ½ teaspoon Coriander Powder (ground coriander)
- ¾ teaspoon salt or add as required
- 1 tablespoon oil
- 4 to 5 tablespoon Curd (yogurt) or water for kneading or add as required
- oil as required for roasting thepla
Instructions
Kneading dough
- Rinse 1 cup methi leaves very well in water. Then drain them and chop finely.
- In a mixing bowl, take whole wheat flour, besan, sorghum flour and pearl millet flour. I have used millet flours but you can skip them if you don't have. In this case, simply add 1.25 cups whole wheat flour and ½ cup besan.
- Add all the spices and herbs.
- Add the chopped methi leaves. Mix everything well.
- Add curd (for a vegan option add very little water instead of curd).
- Mix again and knead into a dough. Don’t add water while kneading as methi leaves release water.
- Knead to a soft and smooth dough. Add more curd if needed while kneading.
Rolling to flatbreads
- Make medium sized balls from the dough.
- Take a medium sized ball and sprinkle some flour on it.
- With the rolling pin begin to roll the thepla.
- Roll them to a round of about 5 to 6 inches in diameter.
Cooking thepla
- On a hot tawa or skillet, place the thepla. Flip when one side is partly cooked, about one-fourth or half cooked. You will see some faint air pockets on the top and this is the time when you need to flip it.
- Spread oil on this side. Flip the thepla again when the second side is half-cooked.
- Now spread the oil on this side. Flip a couple of times till you get golden spots and the methi thepla is cooked evenly.
- You can also press the thepla with spatula while cooking.
- Remove and keep it in a roti basket.
- Serve methi thepla hot or warm or at room temperature.
Serving suggestions
- Enjoy methi thepla with plain curd (yogurt), lemon or Mango Pickle, Mango Chutney, or Mango Chunda.
- You can also eat these with a simple Batata nu Shaak. Methi thepla also pairs well as a side snack with Masala Chai or Ginger Chai.
Storage
- Methi thepla are best when enjoyed either right away or later the same day. They will keep well for up to 3-4 days when you make them without curd.
- So if you want to have them later after a few days, do not add curd as it will lessen its shelf life. Simply knead the dough with water. Store cooled flatbreads in an airtight container and keep at room temperature.
- They also freeze well. Simply wrap a stack of cooled methi thepla in foil before storing in an airtight freezer bag, and keep in the freezer for up to 3 months.
- Thaw in the fridge and later reheat these flatbreads either in a skillet on the stove or in the oven for just a few minutes until warm.
Video
Notes
- Flours: You can include various combinations of flours with different ratios. However, always add more whole wheat flour. With lesser amounts of wheat flour, your thepla can become chewy or hard and you won’t be able to roll the dough easily. A relevant point to be remembered is not to increase the amount of gram flour (besan) too much. This can make your methi thepla hard and dry.
- Dough consistency: The thepla dough has to be smooth, soft, and pliable. If your dough looks hard, the thepla will become dry and hard. With a soft and sticky dough, you won’t be able to roll evenly and it may tear. To correct hard dough, add a few tablespoons of curd or water and knead. For a sticky dough, add some wheat flour.
- Longer storage: If you want to make thepla for a journey or you plan to store it for some days. Then add about 3 to 4 tablespoons of oil to the flour, while you form the dough. Not only adding oil will make thepla soft but also help in preserving them for some days. Omit to add the curd (yogurt) as it decreases the shelf life of thepla.
- Spicing: For a spicy thepla add more green chilies and red chili powder. You can always add less or more ground spices and green chilies according to your preferences.
- Fats: For roasting, you may use ghee (clarified butter) instead of oil.
- Other Greens: You can make this recipe with green leafy vegetables like spinach or amaranth leaves.
Nutrition Info (Approximate Values)
This Thepla recipe from the archives first published was first published in July 2012. It has been updated on November 2024.


Great recipe and easy to follow.
Can we mix the dry flours and store them to use whenever we want?
Yes, you can do that.
Thanks for this website which is a great resource for me living in the UK. I have learnt a lot of new recipes, they are very clearly written and come out well. Keep up the good work!
Thanks a lot and glad!
Hi, I love all your recipe especially this one. I want to try with whole wheat flour, ragi and besan. Can you help me with the proportion. Thank you in advance
Thanks Sejal. You can try with 1 cup whole wheat flour, ¼ cup ragi flour and ¼ cup besan. Welcome.
Excellent recipe.!! Absolutely fabulous taste, all your recipes are great.
Thank you so much. Glad you liked the methi thepla recipe.
Can I use dry methi leaves. We don’t get fresh methi out here
Yes, you can add 1 to 2 tablespoons of dried methi leaves.
Yep you definitely can. I always make with dried leaves due to lack of availability of fresh leaves.
If i add spinach, should I cook it first and squeeze out the liquid? How much spinach could I add? Thanks!
No need to cook them first. Just add finely chopped fresh spinach and reduce the amount of water. You can add 1 cup.
Successful.
Thanks for the quick response. i made rotis today as advised by you and they were really nice and soft.
welcome winnie and thank you for letting me know.
All your recipes are simply amazing and turn out tasty. this recipe with different flours was too good. loved it with plain curds.
Rotis/ parathas are a regular fare at home. i do not use multigrain atta but get ragi,jowar and bajra ground separately. please advise me as to the correct proportion of these flours to be used along with wheat flour to make 12 to 15 rotis. thanks.
thanks winnie. i also do not use multigrain atta. i mix the individual flours and then use them. to make roti with these flours, atta always has to be more, so that it is easy to roll the roti. add hot water when mixing and kneading the dough. this will soften the jowar, bajra flours etc and make for a soft roti. the hardness or chewiness will not be felt. so if making 12 to 15 roti, you can use ¼ cup each of ragi, jowar, bajra flour and 2 to 2.25 cups of whole wheat flour. hope this helps.
You are awesome. Love your site. Keep it up. God bless you
thanks a lot soviya for your kind wishes. wish you all the best.
Every time when I have had to look up for a recipe at the last moment, this website has come up as a savior and has been the best guiding point each time helping me to sail through the doubts and prepare the dish well. Thank you for making this website, the description with pictures is so helpful, each step so well put that it’s very clear to understand. Very detailed, precise and clear description. Love to visit this website. Thanks again, keep up the awesome work! Loads of love and good luck 🙂
thank you very much nidhi. i feel good to know that the detailed description, step wise photos and tips are helpful. hugs and wish you all the best. happy cooking.
If I have to search any recipe on the Internet – this is my go to place. Never once have your recipes gone wrong! Keep doing the good work you do! And thank you for maintaining this website.
welcome rashmi and thank you for this comment. so glad to read and i am happy that the recipes are turning good for you. thanks again.
This recipe is amazing! My mum and I made this for lunch today and paired it with a simple raita. Sooo good!
thanks saritha for the feedback and rating. yes methi thepla tastes good and can be had with a pickle or raita.
Your recipes are very simple to follow and it turns out very tasty. Thanks for sharing yummy recipes. I love cooking and like trying different recipes.
thanks zeenat for this feedback. same here and i too love cooking.
Can I make it with kasuri methi as I dont have fresh methi leaves?
yes you can use kasuri methi. you can add 1 to 2 tablespoons of kasuri methi.
I made the methi thepla using Ur recipe, my family loved it. Am gonna make it again tomorrow. Thanks.
Welcome Bhavya. Glad to know this.
Can I preserve this for around 3 days, without a fridge ?
I will be travelling and planning to take a couple of these for 2-3 days.
suhana, you can easily keep theplas at room temperature for 3 to 4 days.
I am amazed to see your site I have been watching many cooking site But I found your site very fascinating I am amazed to see how you use ordinary ingredients and make an extra ordinary recipes We are able to eat different foods with the ingredients easily available in every kitchen Thank you so much
Welcome Meena. Glad to know that you liked the website. Do try some recipes. I try to use everyday ingredients in recipes whenever possible.
Is we can use curd for we need to store for a day? thank u
you can store for a day if curd is used.
Oh this looks fantastic! I LOVE Indian food. Veg Indian food is the best. Glad I found your channel. Thank you for sharing!
Welcome Carolyn. Nice to know this.
I want to make theplas for 5-6 days of traveling without refrigerating. Please let me know what to use for kneading the dough.
Thanks and regards
Welcome Nita. Methi thepla can easily last for 3-4 days. Don’t add curd if you want them to last longer. Fry them with little extra oil.
Can we use kasoori methi instead of fresh methi leaves in case we don’t have?
PS, yes you can. Just add 2-3 tablespoon.
Very yummy..made it came out well.
Thanks Kumari
For longer stay how to prepare and store thepla can i keep it for 20 days
20 days is a long time, especially for a country like india where we are in the peak of summers. if you live in a cold climate also, i would suggest to keep theplas for a week to 10 days. reason being food should be consumed when its cooked. leftover food along with foods which are kept for a longer period of time, increases the vata dosha in the body. increase in vata dosha gives rise to stomach problems, indigestion and other related issues.
if you plan to keep for longer time, then avoid adding curd. hope this helps.
hello, right now I have only plain flour (maida), wheat flour & besan. Can I make thepla with those 3 flours ? plz give me the quantities , thank you
Welcome Akbar. don’t use maida. just use 2 cups whole wheat flour (atta) and ¼ cup besan.
Thank you so much for the recipe.
Please share Sada Thepla/Plain Thepla recipe too.
Welcome Beena. Will try to add.
Hi..something went wrong with the recipe..the atta is become sticky.. and i m nt able to roll out. What do i do?
if the atta becomes sticky, then add some more atta and continue to knead till the stickiness goes away.
Hi,
I had a question…can we skip bajra flour and add only besan and jowar flour….??
Thanks,
NImisha
Welcome NImisha. Yes you can. But don’t add too much besan as then the thepla will become hard.
Hi Dassana
Thx for the recipe. For how many days can we keep this thepla….pls suggest
stays good for a week in the fridge.
Nice receipe. Wanted to know whether the thepla will remain soft and fresh in airplane travel by just adding curd and no water?
sam, yes the thepla will remain soft. add less besan and more whole wheat flour.
Accept my heartfelt thanks for allllll the recipes, the illustrations with key points, your enthusiasm shows in your posts and it’s infective! Love the food photography! You are indeed doing a noble job.. Not a day goes by without looking up ur version of a certain dish and making yummy food for family n friends!! Stay blessed
we are very pleased to know this asha thankyou for your kind and positive words 🙂 god bless you.
Hey, i usually use multi-grain atta so what should be the proportion of besan and atta in that case?
use the same proportion as mentioned in the recipe.
1 cup atta and ¾ cup besan, right? Sorry, I am just a beginner
no problem neha. add ¼ cup besan and 1.5 cups multi grain atta.
Good recepies
thankyou poppy.
Testy, superb recipe and one thing can we add more veggies?
you can add veggie like grated carrots, beetroots or even grated lauki.
Thanks again Dasanna. Made this for breakfast today from the methi I grew in my garden. Loved it – very tasty and wholesome. Will have to make some for a friend. Thankyou very much again!
we are pleased to know this tasneem 🙂 thankyou so much and you are welcome.
Thank you so much for helping me cook better. Whenever I want to trý some new recipe, i always search on your site.
Thank you once again!
pleased to know this sweta 🙂 thankyou for your kind words.
Hi Dassana.hope u r doing gud.Thank u for all d recipes that u post,I always cook looking at ur recipes and it always turns out to b d best.god bless u.take care
pleased to know this rose 🙂 and god bless you too. thankyou so much.
Thanks for the recipe, I didnt know we have to use besan also in Theplas.
Can we store the theplas for a long time? I have generally seen people carrying it for long vacations, etc.
besan can be added or even skipped completely. you can store them for some days.
How long do you rest the dough before baking them on the griddle?
deepti, i don’t rest the dough.
Been a South Indian idli n dosas made a regular for breakfast . Wanted to explore more n found dis . It’s amazing . Even made n took some while travelling . Thank u so much
welcome anisha. glad to know that you liked the recipe.
Hi Dassana.. i had a question.. whenever i make theplas they get chewy after cooling down.. i always cook it at high temperature and roll it thin… so I don’t think it is undercooked.. Could it be that i cook it longer??
How to usually figure out quantity of salt in the dough?? Is there a thumb rule or it comes with practice??
hi sruabhi, it could be due to the besan. try making thepla with less amount of besan or no besan. even cooking longer can give a chewiness. so you have to see which reason is contributing to this chewiness. there is no thumb rule. i usually add by andaaz.
this recipe too good . my husband enjoyed this today as I made this in breakfast. My daughter loved this thepla which is full of nutrition. Thanks a ton to you . All your recipes are very good and easy to understand and easy to follow as well. Moreover images of step by step process is like SONE PE SUHAGA. All the best .
welcome rashmi. glad to know that all of you liked the thepla recipe. thanks for sharing positive feedback on recipes.
amazing.
Made thepla yesterday, turned very very taste. Thks Dassana!
welcome mohini. glad to know this.
Hi dassana.. I love this site and your recepies.. with pictures you make the pictures clear in our minds
thanks supriya
Methi thepla was awesome. Thank you.
welcome sonam
wah !! super.
sunder , apratim . i like it.
thanks.
Awesome recipe, instant n things wt are at home can make through it lovely
thanks suni.
Hello bassana.
While rolling the thepla’s what will be better to apply flour or oil
suni, i apply flour. only while making poori and bengali luchi, i apply oil while rolling.
hi dassana.the theplas were awsome.just wanted to know when i make khaman dhoklas i beat the mixture but after it steams it is not fluffy but quite hard.could i have beaten it more than required?
you have to beat the mixture before you add eno/fruit salt. after adding eno, just mix quickly and keep in the steamer. may be the amount of water is less, thats why the dhokla is becoming hard.
Good recipe!!!! Keep up the good work!!!!!
Hi Dassana,
The photographs were so wonderful, I just had to try this recipe! I had limited success, so I was hoping you could help me out. My theplas turned out quite tasty, but they seemed a bit raw from inside, so I tried making thinner ones. Those turned out crispy like a papad. I used butter to fry them. I think I’m almost there since the taste was really good, but I have to figure out the secret to making them soft and cooked through.
Thanks!
for making theplas or chapatis or parathas, one rule is that the tava should be really hot enough. also the thepla should be rolled evenly, neither thick nor thin. next is to not overcook them. if you overcook or over roast them, they become like papads, especially the thinly rolled theplas. you can use any fat to fry them – oil, butter or ghee. generally, cook one side till one-fourth cooked. then turn over and cook the other side till half done. sprinkle ghee or oil on the one-fourth cooked side when you are cooking the other side. flip and then again spread some oil or ghee. flip once and twice and the thepla is done.
Methi thepla prep as above is having a wonderful taste as well as nutritious for us. you can have this with plain amala murraba also.
thanks chitra for sharing. always welcome.
Thanks for the lovely and easy recipe!!
Definitely trying it tomorrow, will let you know.
welcome mez
I tried this recipe yesterday and I came out awesome…. lovely way to sneak in some greens to my hubby..
thanks anitha for this positive comment.
Hi,
I recently saw your website. I`m really impressed. Tried the banana bread. My family just loved it, so thanks to you!
I would try methi theplas as well.
Neelam
thanks a lot neelam.
thanks subiya
Hello , can we knead and keep the dough in fridge ? if so, hw many days ?
hi shifa. you can keep the thepla dough in the fridge. i would suggest max 2 days, not more than that.
i made this last weekend but used a slightly different recipe. should have checked yours first. the ginger and green chillies would have been a nice addition.
yes, ginger and green chillies do make a difference.
healthy roti with good presentation, tempting us to eat.
Hi, thanks for nice receipe… i love making thepla at home.
however my thepla does not trurns out these soft..specially after cooling, my thepla become hard and dry. can anyone please suggest a some tip for making soft thepla.
when kneading add hot water to knead the dough. this helps them to be soft and even remain soft after cooling. another tip is to add some 2-3 teaspoons of extra oil to the thepla dough while kneading. do try these tips to make soft theplas.
Looks yummy, nicely presented nice pics…
thanks ajeeth 🙂
As I said on the Methi Muthiya post, I need to spend more time with Gujarati cuisine, I do a vegetarian blog and this will be a great addition of cuisine to our house…
Thanks.
thanks. gujarati cuisine has a lot of food that is made without onion and garlic. so is the south indian & kashmiri cuisine. do explore all the three cuisines.
hi dassana , all your recepies are so lovely . The photographs posted are even more tempting . Thankyou so much for sharing such lovely recepies
thanks sheena for the lovely comments.
I love theplas! Love the photographs and how perfect your rounds are!
I fried these theplas in ghee and ate with aloo-methi sabji and tea. After eating ma husband said- “this is really a healthy and yummy breakfast”, I also like this thepla.
thats nice to know swati.
love the taste and a very good breakfast receipe…
My Mom loved it.
thanks sapna
i made these lovely theplas and ate them with the mango chunda i made 2 days back..thanks for sharing the recipe..
thanks also to you shivani for making the recipe and commenting as well 🙂
Well…if i may add my 2 cents. kasuri methi makes better thepla then the green methi.
Any views?
it is a matter of personal preference. i have made theplas with kasuri methi before, but at home we all like with fresh methi.
Dassana loved your pics very creative and I am drooling over my computer right now.
These methi ka theplas look amazing! Love how soft and thin they are. The clicks are superb!
love the photos, thepla is my all-time favorite option. your thepla look so soft!
is it necessary to use the stored fenugreek leaves .can i use the fresh ones?
dear muskaan mostly methi thepla is made with fresh fenugreek leaves. i have used fresh fenugreek leaves.
by storing the fenugreek leaves does not mean they get dried or wilt away. the freshness is still there. you can store them for 4-5 days and not more.
the dried fenugreek leaves are kasuri methi and they have a longer shelf life.
i hope this clears your doubt or confusion.
I hardly ate thepla in my life but I remember always enjoying it. With methi leaves which is one of my fav, i got to try this sometime at home.
Very interesting and healthy recipe, thanks for sharing dear!
i love theplas with sweet & sour chutney, these look so good !
These are my favorite, looks so soft and flavourful.
I love thepla, your post made me realize that I haven’t made it in a long time 🙂
Thepla looks so delicate and beautiful, love the presentation.
Yesterday was Sunday and I took the plunge and made the methi thepla.
I used dry kasuri methi that was available at home and still got excellent results.
I am the chef of the house now.
Thanks to dassanaji.!
thats great to know vermaji 🙂
Hey dassana, wonderful pics… i simply love the pics. this is one dish that i make evry week atleast for breakfast… i enjoy it thoroughly and so does my little one 🙂 lovely lookin post…
I just ate Mooli thepla in breakfast today and then I saw your post methi thepla. I am feeling hungry again. 🙂 Pics are gorgeous and attractive. As being Gujarati I love to eat any kind of theplas with mango chunda..
thanks kanan. even though i am not a gujarati, but i am a big fan of gujarati food.
Love to try this
sure… do try
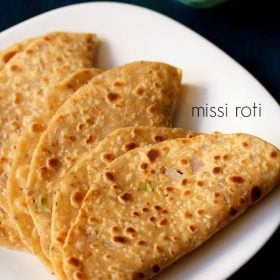
This called Missi roti in north i think . I have made this before & it is yum yum.
Thanks dassana for reminding me.
welcome monika. missi roti and thepla are similar but not the same. first of all the use of spices is different in missi roti and also adding fenugreek leaves is optional.
my fav too- looks yum
Love these. And now I know what I will make for dinner today.
Dassana my mother makes exactly like these.. They simply taste yum try eating it with dry garlic chutney..
i am sure garlic chutney & methi theplas must be a good combo.
I love how you demystify the finer aspects of cooking….i had ally my life imagined that great food just happens…now i am understanding.
Thanks
thanks for your positive comments. much appreciated.
Wow, these sound amazing & the pictures are making me really hungry! I can’t get fenugreek leaves so could i add fresh coriander instead? Or maybe even spinach?
you can add fresh spinach or coriander or any other greens of your choice.
I love the energy with which you post pictures of your food. Lovely lovely pics. theplas look great!
thanks anshie 🙂
i love the thepla i always see your dishes and make them
thanks vanya. keep visiting.