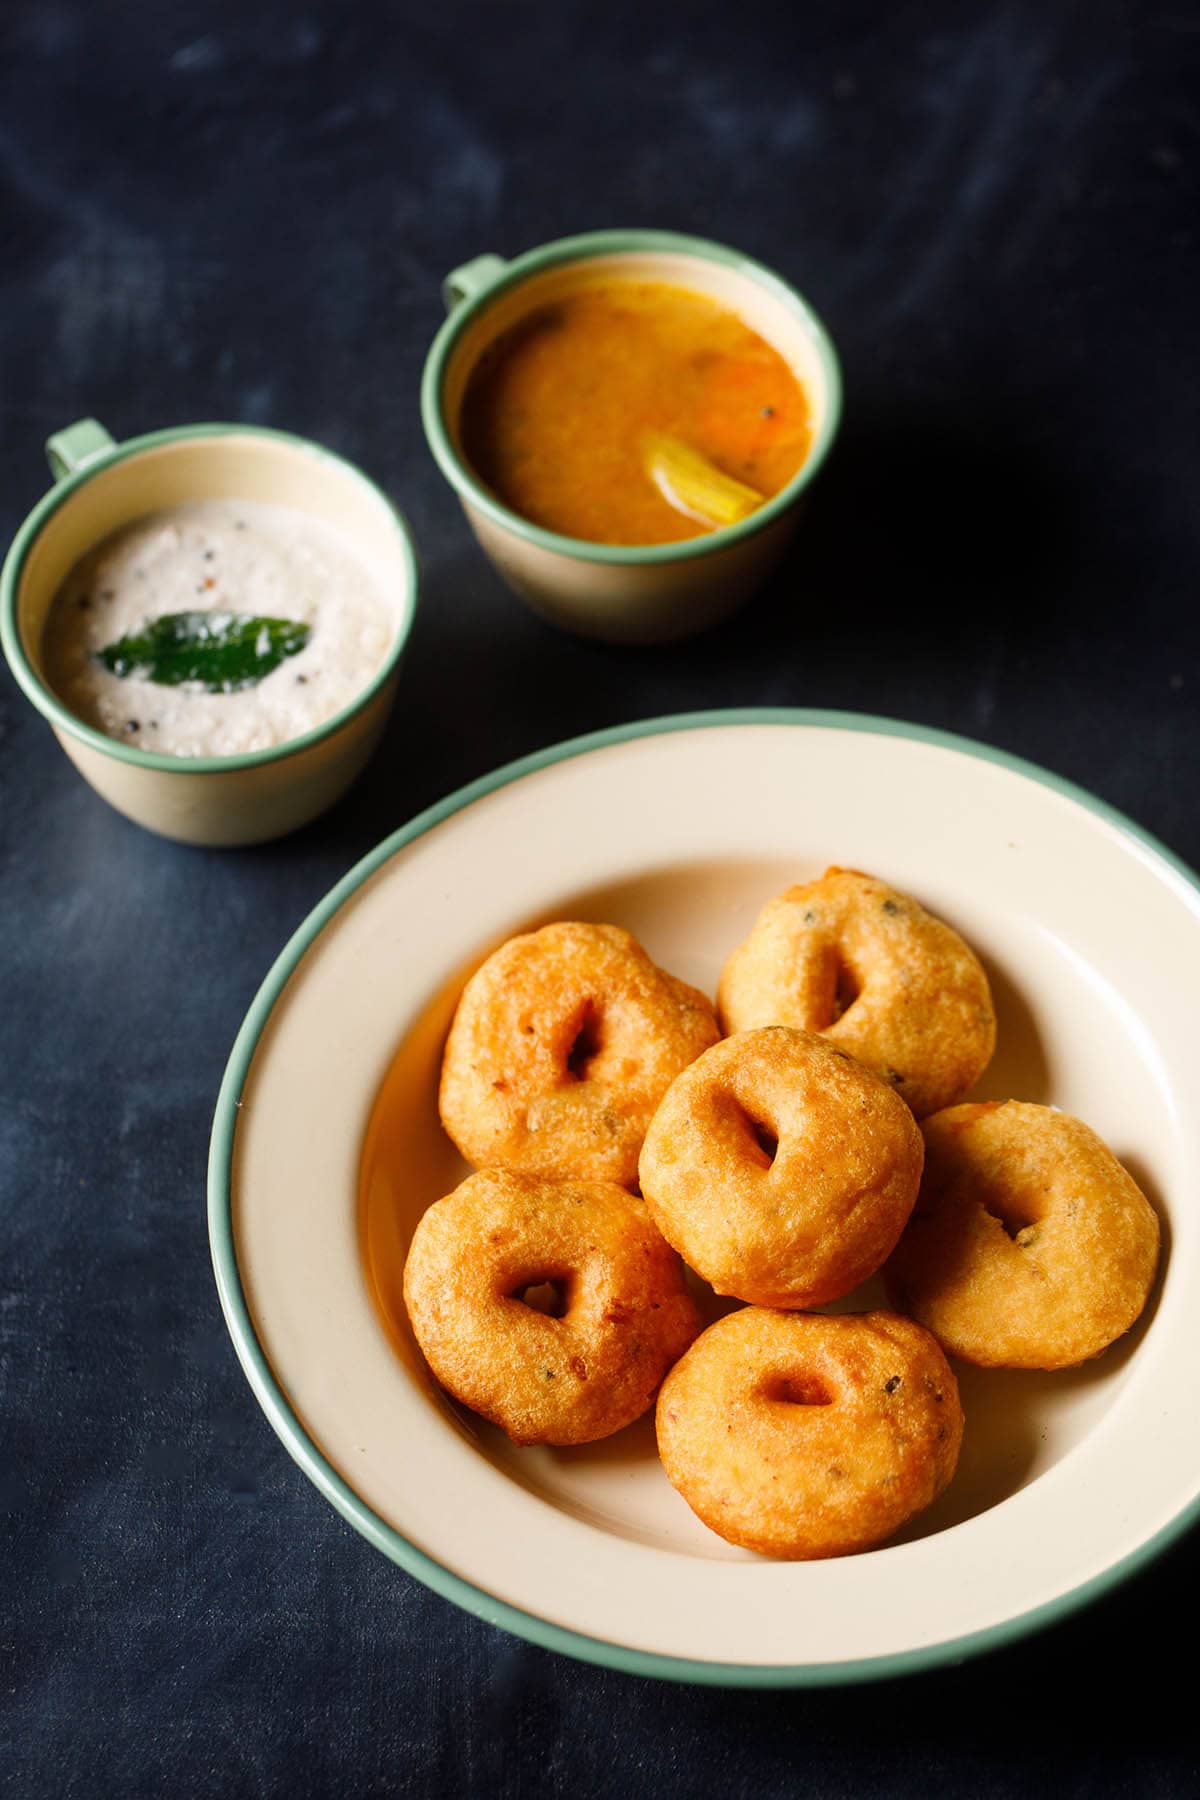
Medu Vada is a popular South Indian breakfast snack of donut shaped lentil fritters that are fluffy, crispy, soft and delicious. If sweet breakfast isn’t your thing, try this recipe for savory spiced donuts made with black gram lentils, spices and herbs. Traditionally paired with Sambar and Coconut Chutney, these make for a comforting, filling and satisfying breakfast or snack.
About Vada
If you’re in India and you come across ‘vada’ or ‘bada,’ you must know that this is a category of savory snacks, which are usually fried. Largely, some different variations of these vadas can be classified as cutlets, fritters, dumplings or donuts.
A typical vada can be made using lentils or legumes, vegetables, sago or a combination of all, along with veggies, seasonings, spices and herbs that are added to enhance the taste, texture and nutritive value. Some vada versions include Dahi Vada, Sabudana Vada, Maddur Vada and more.
Vadas found in different regions of India have their own name. For instance, vade, wada, bara, wadeh or vadai. According to the famous Indian food scientist and historian and nutritionist K. T. Achaya, vadai was very common during 100 BCE-300 CE amongst Tamils.
All these various vada have different recipes and methods of preparation. Mostly in many variations, the lentils are soaked and then ground to make a batter. In some variations like in Batata Vada recipe the batter is made from dry gram flour rather than whole lentils with a spiced savory potato stuffing encased inside.
While the term vada is often used interchangeably with medu vada, it should be noted that medu vada is part of the vada family, but not all vada are medu vada. Example this Dal Vada recipe is made with a spiced, savory chana dal batter.
About Medu Vada Recipe
Medu vada is one of my favorite snacks of all time. I loved them as a kid, and they clearly withstand the test of time because they are still one of my most beloved dishes. I love most South Indian snacks because they remind me of my growing up days.
Want more delicious South Indian breakfast tiffin recipes? Try my Rava Dosa, Idli or Masala Dosa!
Medu vada are essentially savory donuts made with black gram, herbs, coconut and spices. The word medu means soft and vada means fritters in Kannada language. This particular type of fritter is also known as:
- Urad Dal Vada in Hindi
- Garelu in Telugu
- Uzhunnu Vada in Malayalam
- Uddina Vada in Kannada
- Medhu Vadai, Ulundu Vadai in Tamil
The hero ingredient in medu vada recipe is urad dal (skinned black gram), but the herbs and spices also add a savory and spicy quality to these fritters that is absolutely addictive. The hotel-style medu vada also includes onions, which lend a lovely sweetness.
If you are making these for kids, you can consider adding extra veggies like grated carrots, shredded cabbage, or grated beetroot to sneak in a little extra nutrition. Hidden vegetables are still vegetables!
I especially like serving the crispy, fluffy medu vada or garelu the traditional way: dunked in hot sambar with coconut chutney by the side.
This popular, satisfying meal that is also called sambar vada with coconut chutney is very famous all over India. It tastes awesome, so is loved by many.
Whenever I make medu vada, I go the extra length to make sambar. While you’re free to serve them with only coconut chutney, vada sambar is one of those joyful foods that bring up many wonderful memories. Don’t you agree?
You can enjoy piping hot vada with any variety of Sambar.
But if you are pressed for time, simply serve with coconut chutney, mint coriander chutney or tomato ketchup.
You could also use any savory or spicy dip of your choice. Remember that medu vada or garelu are fritters, so they’re going to taste delicious no matter what!
Mastering this classic Medhu Vadai recipe does take time and some experience. Making the doughnut shape from the batter is the most difficult step.
Not to worry: I also struggled with it in my earlier days of cooking! Below I share all my tips and tricks that I have learned over the years. I hope you enjoy making them as much as I do.
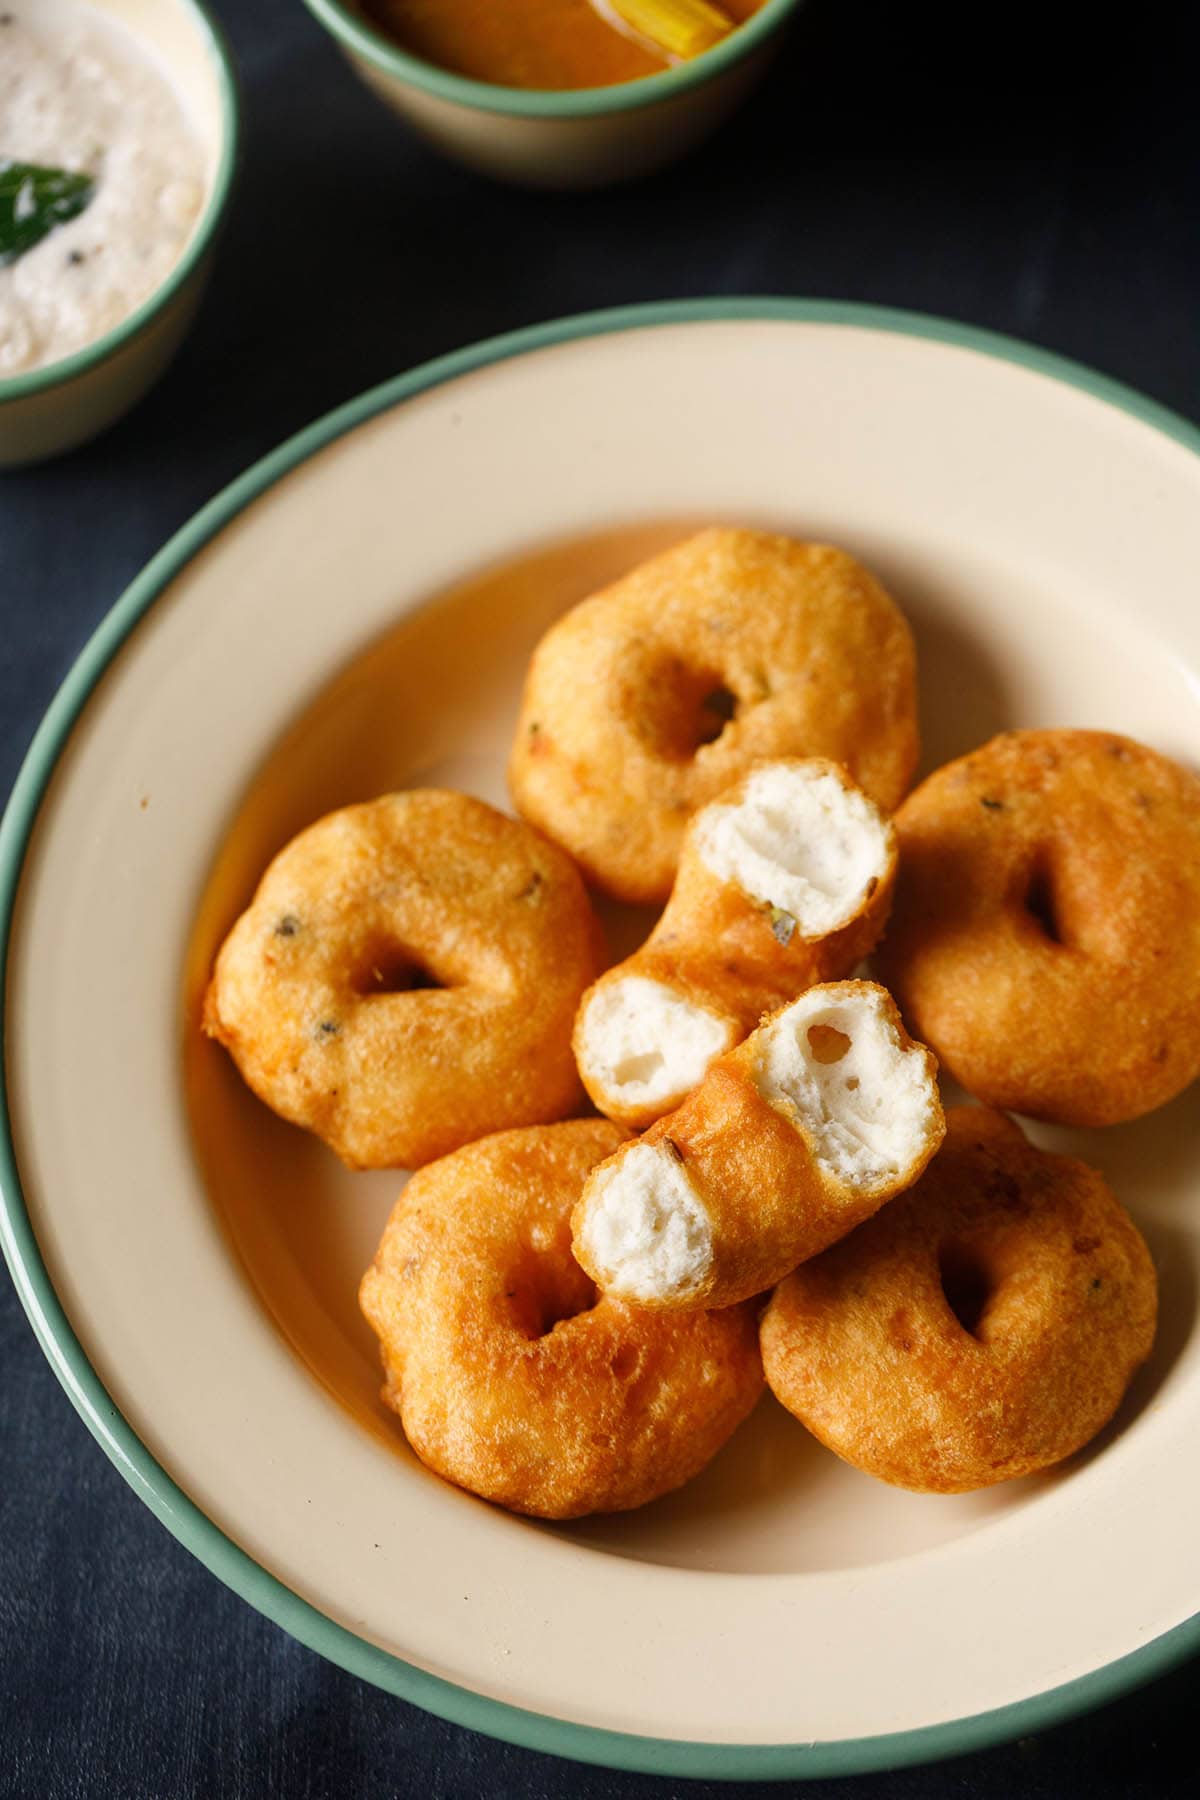
Are you ready to make the absolute best vada recipe with a light, porous texture inside and crispy on the outside? Just take a look at the photo below. Isn’t the texture incredibly fluffy and soft like a cloud? Yum!
Come along with me in the kitchen and I’ll show you how to make this classic South Indian snack with easy to follow step-by-step photos.
How to make Medu Vada
Soak Lentils
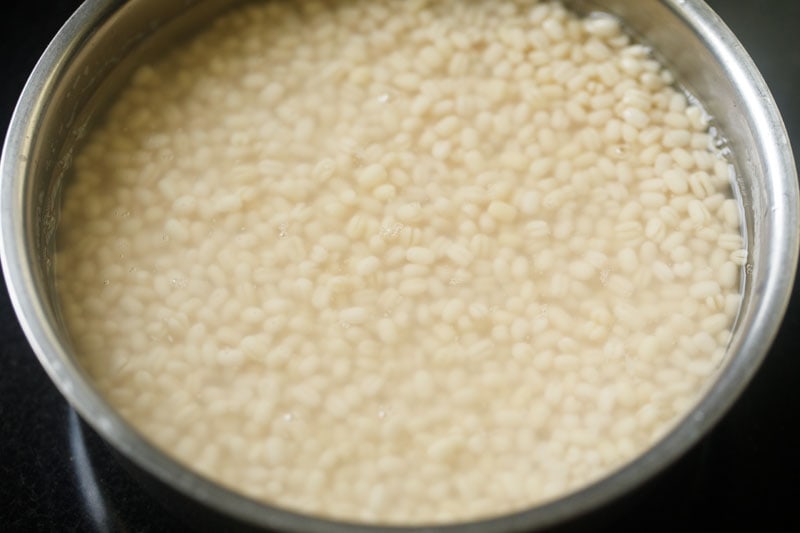
1. Rinse 1 cup urad dal (husked and split or whole black gram) a few times in water. Then soak the lentils in 2.5 to 3 cups water for at least 4 to 5 hours or up to overnight.
Preferably use unpolished urad dal to make this vada recipe.
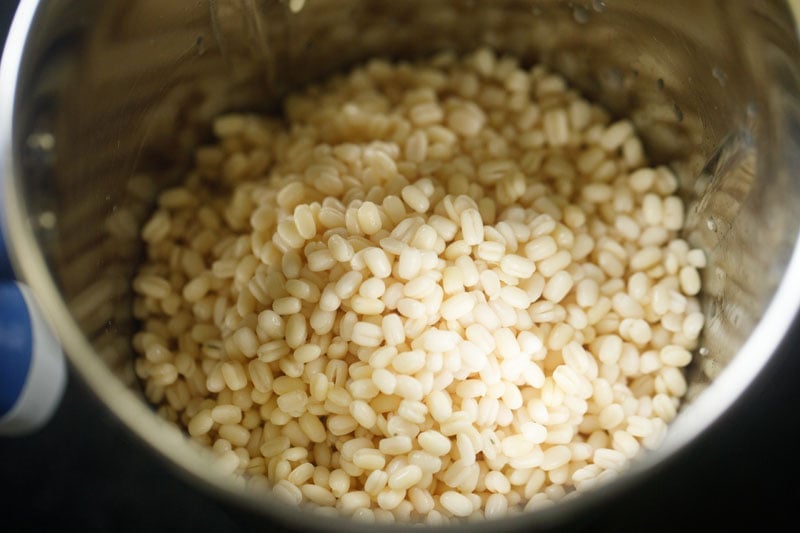
2. Drain and discard the water. Add the soaked urad dal to a grinder jar. Add 3 to 4 tablespoons fresh water or as needed. Just be sure not to make the batter too thin!
Do not add too much water while grinding. The batter should be like a soft moist dough but yet light and fluffy.
It should end up looking like a cake batter rather than a crepe batter. I recommend blending in steps and adding water as needed to achieve the right consistency.
Make Urad Dal Batter
3. Begin to grind or blend the urad dal to a smooth batter. The batter should be fluffy and thick.
You can grind in two batches or one lot depending on the capacity and size of your blender or mixer-grinder.
Scrape down the sides of the blender as you go to ensure all the lentils gets blended to a uniform consistency.
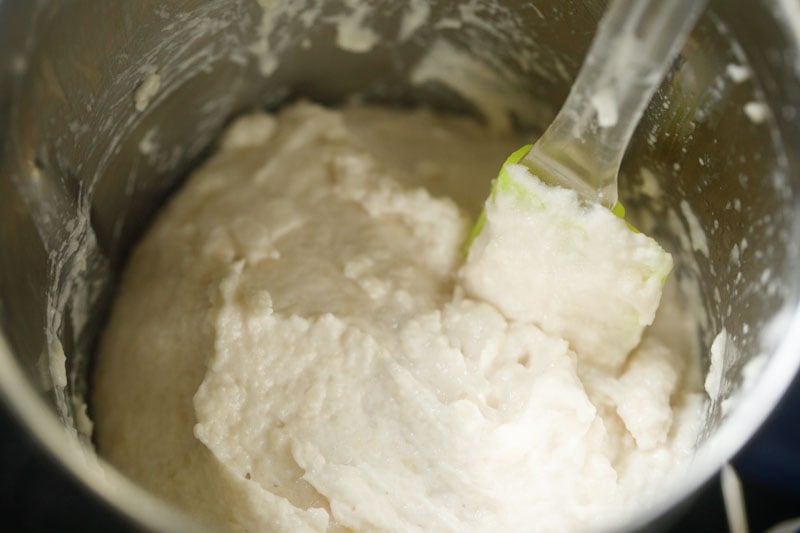
4. Continue to grind at intervals by scraping the sides with a spatula. If your mixer or grinder becomes hot, then wait for a few minutes until it cools down.
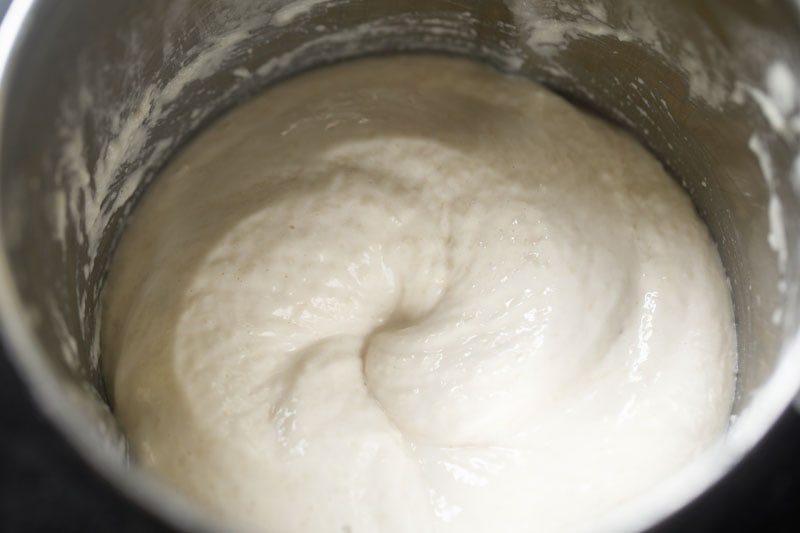
5. Continue to grind or blend until you achieve a smooth, fluffy batter. Remember there should be no fine grits or chunks of urad dal in the batter.
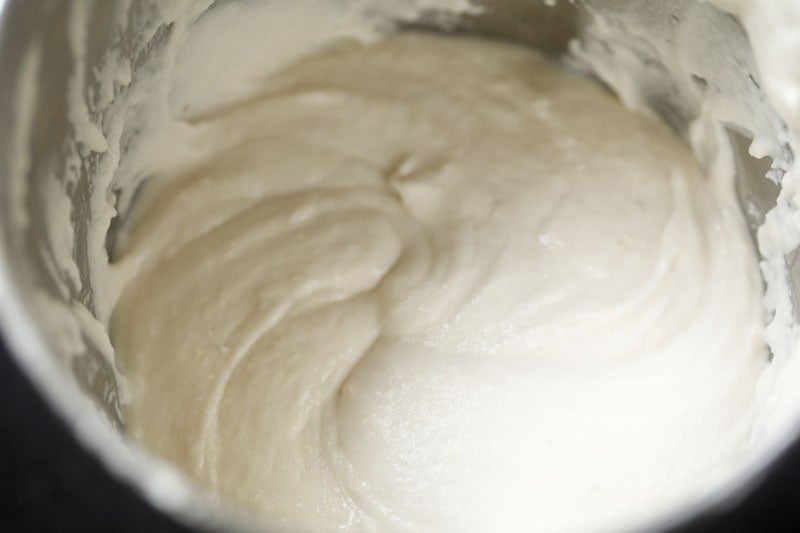
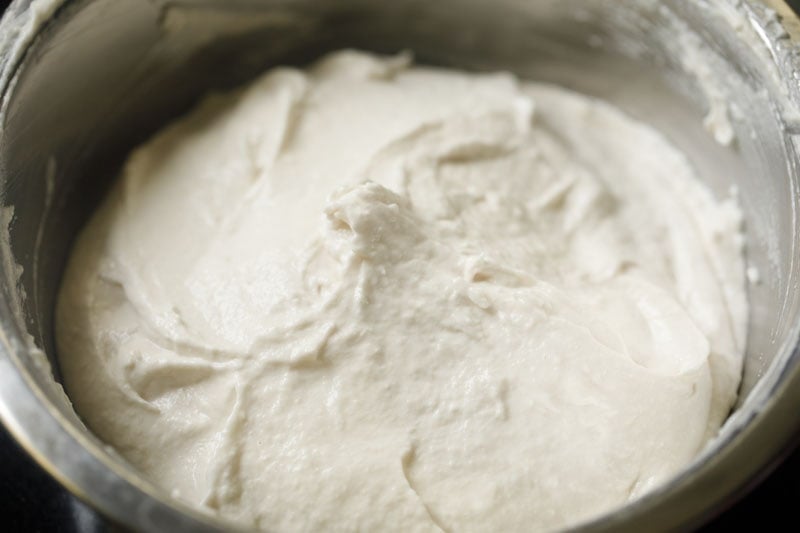
6. Remove the batter into a big bowl or vessel. Then briskly whip with a spatula, spoon or a wired whisk for 2 to 3 minutes. This aerates the batter and gives it a light, fluffy texture.
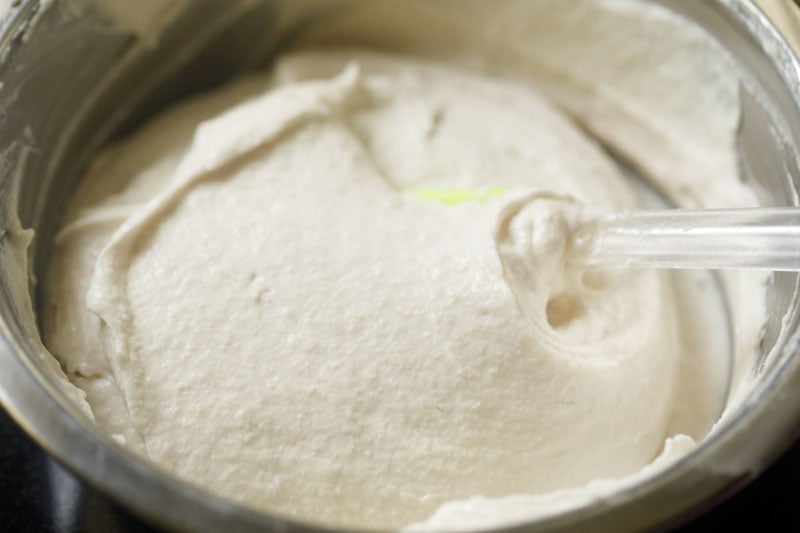
7. In the below photo you see the vada batter that has been aerated by continuously whisking it for few minutes.
Check Batter Consistency
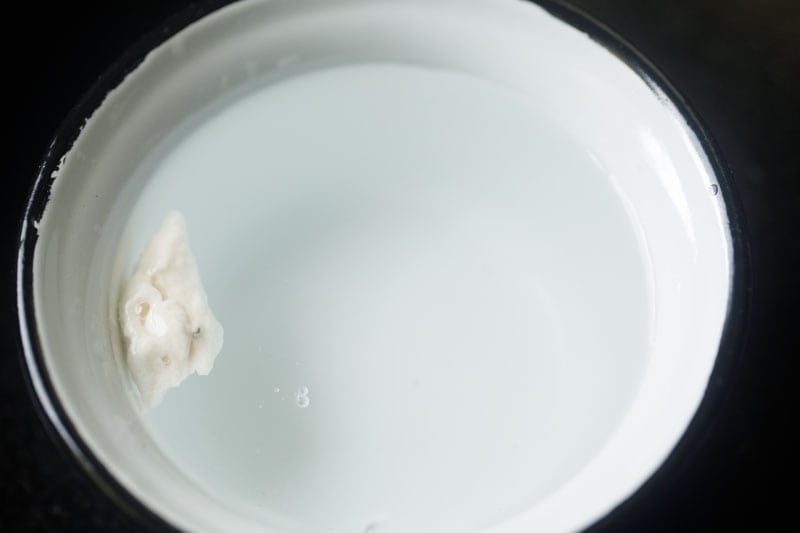
8. A quick way to check the perfect and right consistency of the batter is to add a small spoon of it in a bowl of water. The batter should float and remain intact. If it floats and does not get dissolved, then you have achieved the right consistency.
If it sinks, this means that your batter is not fluffy enough (with not enough air bubbles trapped in it) or is too thin.
If the batter is too thin, then add some semolina (fine rava or suji) or urad dal flour or rice flour to it to help thicken it up. Rava or suji also helps in giving a crispy texture to the vada.
Add Spices, Herbs to Vada Batter
9. Measure and keep all the ingredients ready for making the batter. To the batter, add the following spices and herbs:
- 1 tablespoon chopped curry leaves
- 1 teaspoon finely chopped green chillies
- 1 teaspoon finely chopped ginger
- 1 pinch asafoetida
- ½ teaspoon cumin seeds
- ½ teaspoon lightly crushed black pepper – can use whole peppercorns as well. The addition of black pepper gives a good taste but is optional.
- ½ teaspoon salt or as required
You can also add ⅓ cup finely chopped onions or shallots; 2 tablespoons of chopped coriander leaves and ¼ cup chopped fresh coconut pieces.
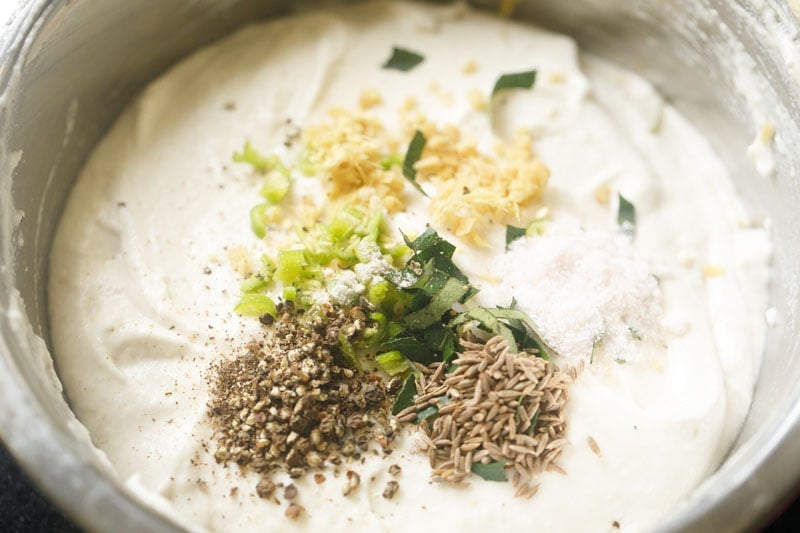
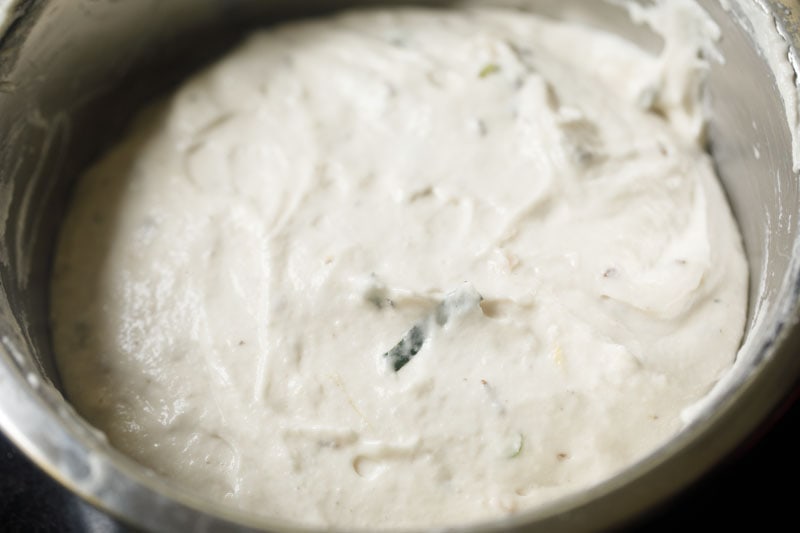
10. Mix the batter well with the herbs, spices and salt. You do not have to ferment the batter. You can use it right away. Check the taste of the batter and, if needed, add some salt.
Shape Batter
11. Take a bowl of water. Apply some water from the bowl on both your palms. Take some batter in your right palm from the bowl. Give it a round shape by moving it in a circular position in the right hand.
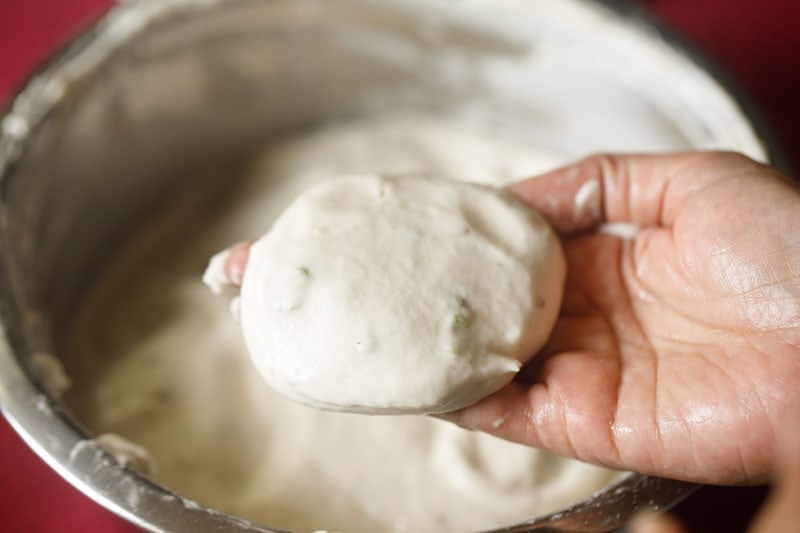
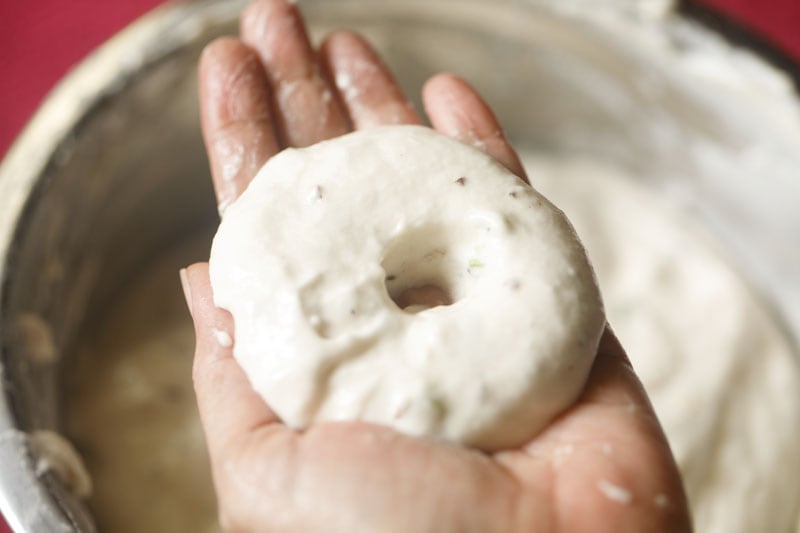
12. With your thumb make a hole in the center. You can also use banana leaves or zip lock bags to give the medu vada its doughnut shape.
Tip: If the batter sticks and you are not able to shape it then add 1 to 2 tablespoons of rice flour to the batter and mix well. This happens if the batter has become slightly thin which means that there is more water in it.
Fry Medhu Vadai
13. In a kadai, heat oil over medium heat. Once the oil becomes hot, slide the medu vada gently into the hot oil. Be careful here! The oil can sputter and pop over quite a distance, so I recommend wearing an apron and long sleeves to protect your skin and clothes.
Tip: If you do not care about the appearance of the doughnut shape of the medu vada, then just drop spoonfuls of the batter directly in the oil.
Do not overcrowd the pan. Work in batches, considering the size of your pan as your guide.
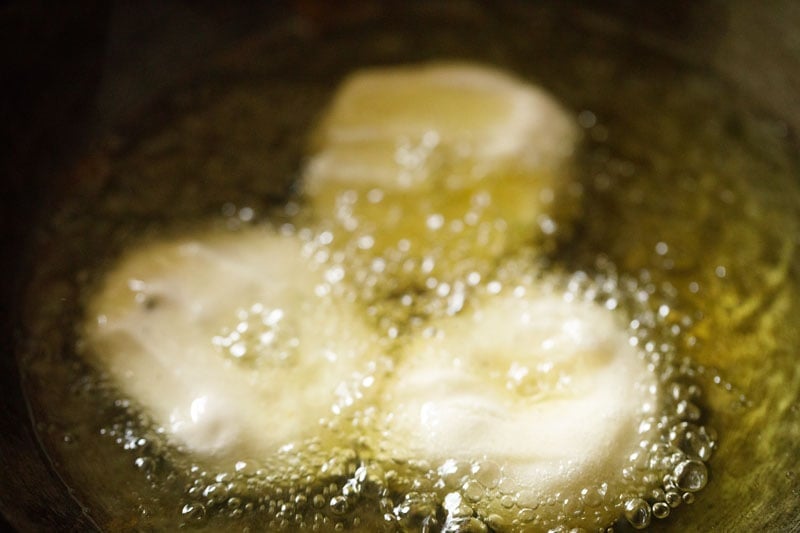
14. Once the vada or garelu are slightly golden and the batter has firmed up and looks crispy, then gently turn over with a slotted spoon and continue to fry.
The oil should not exceed 190 degrees celsius (375F), or fall below 175 degrees celsius (350F).
Remember: oil that is too hot will quickly brown the vada from the outside, but they will remain uncooked from inside. Oil that isn’t hot enough will make the vada absorb too much oil and become greasy.
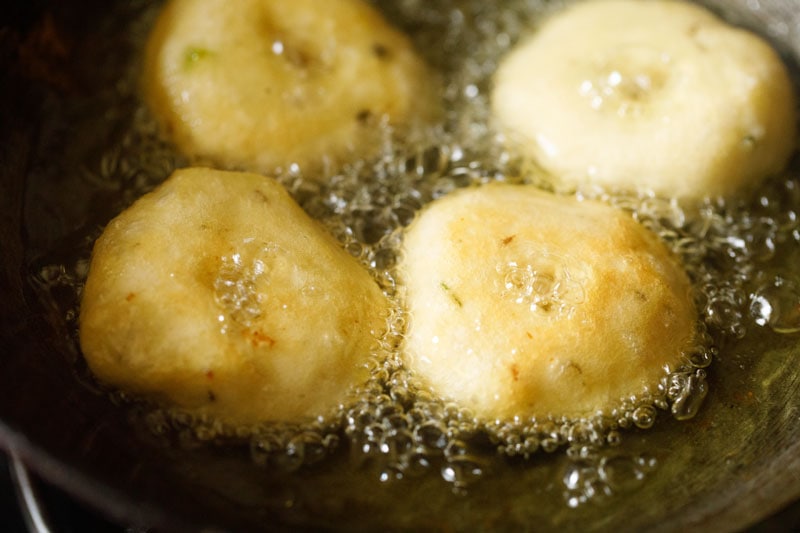
15. Continue to fry the vada, turning over as needed.
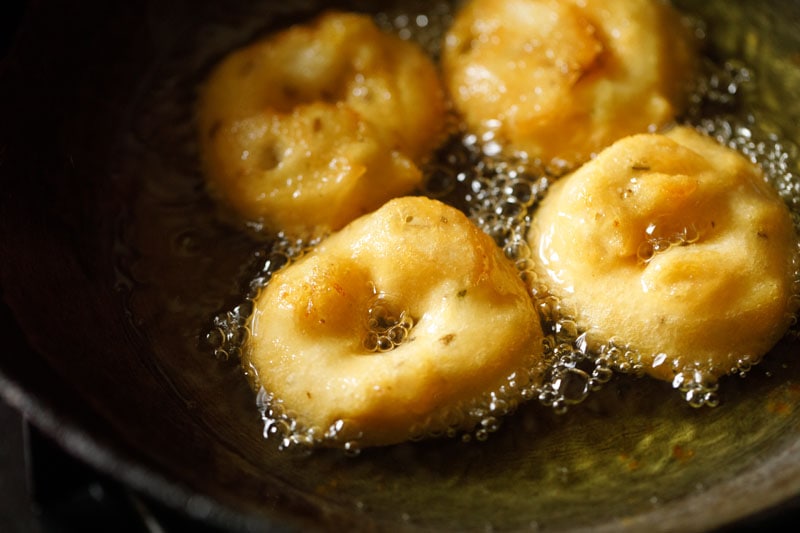
16. Fry the medhu vadai till crisp and golden.
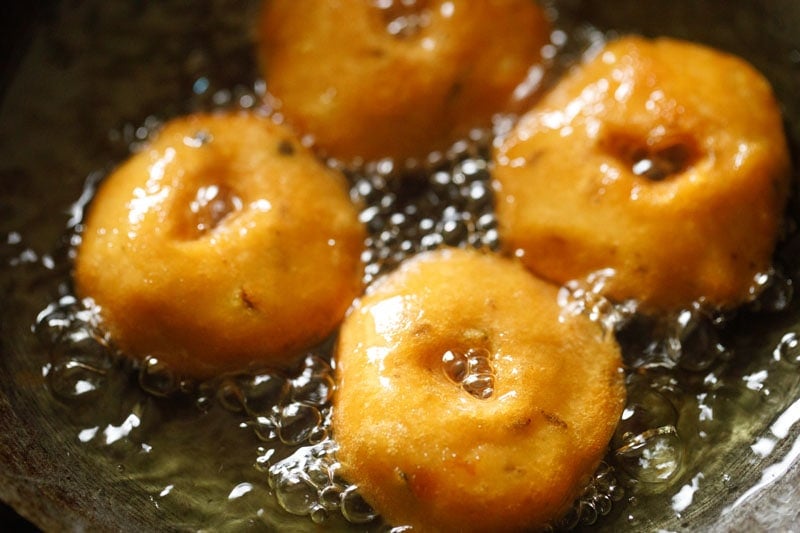
17. Once the medhu vadai is crisp and golden, then remove with a slotted spoon to drain the extra oil. Fry the rest of vadai in the same manner.
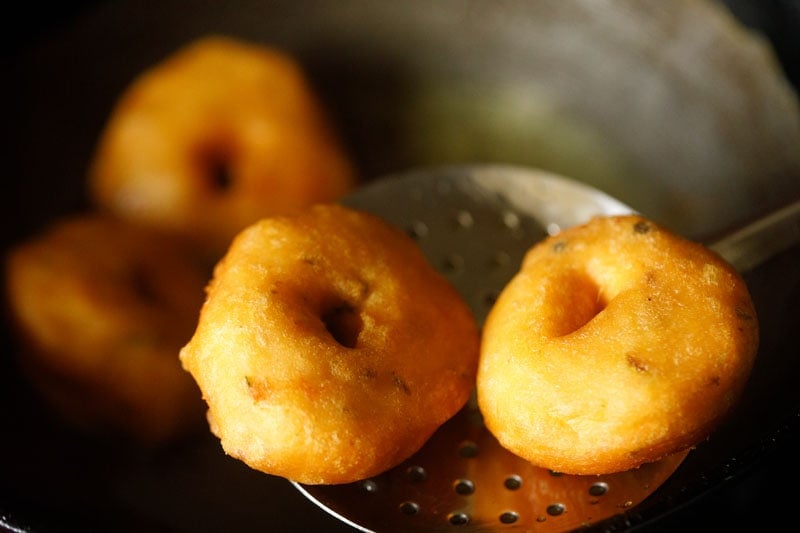
18. Drain them on kitchen tissues to remove extra oil. This way shape the vada batter and fry them in hot oil.
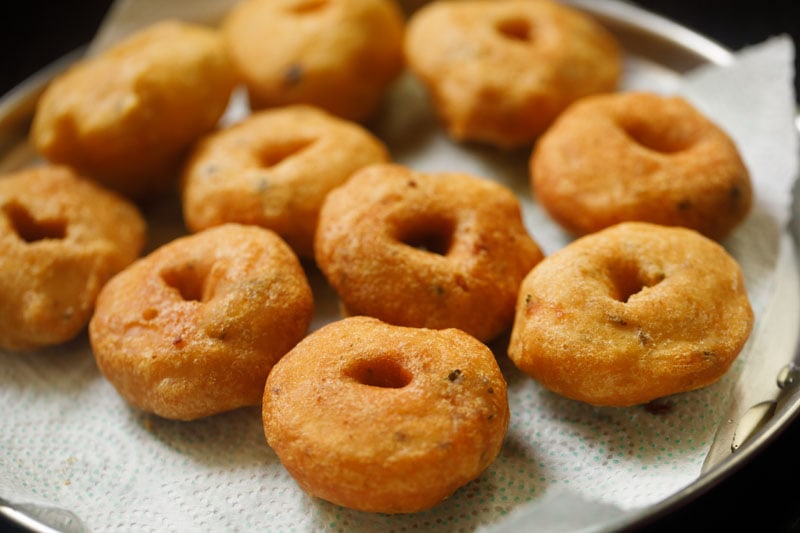
19. Serve Medu Vada or Garelu or Uzhunnu Vada hot or warm with sambar and coconut chutney. Enjoy!
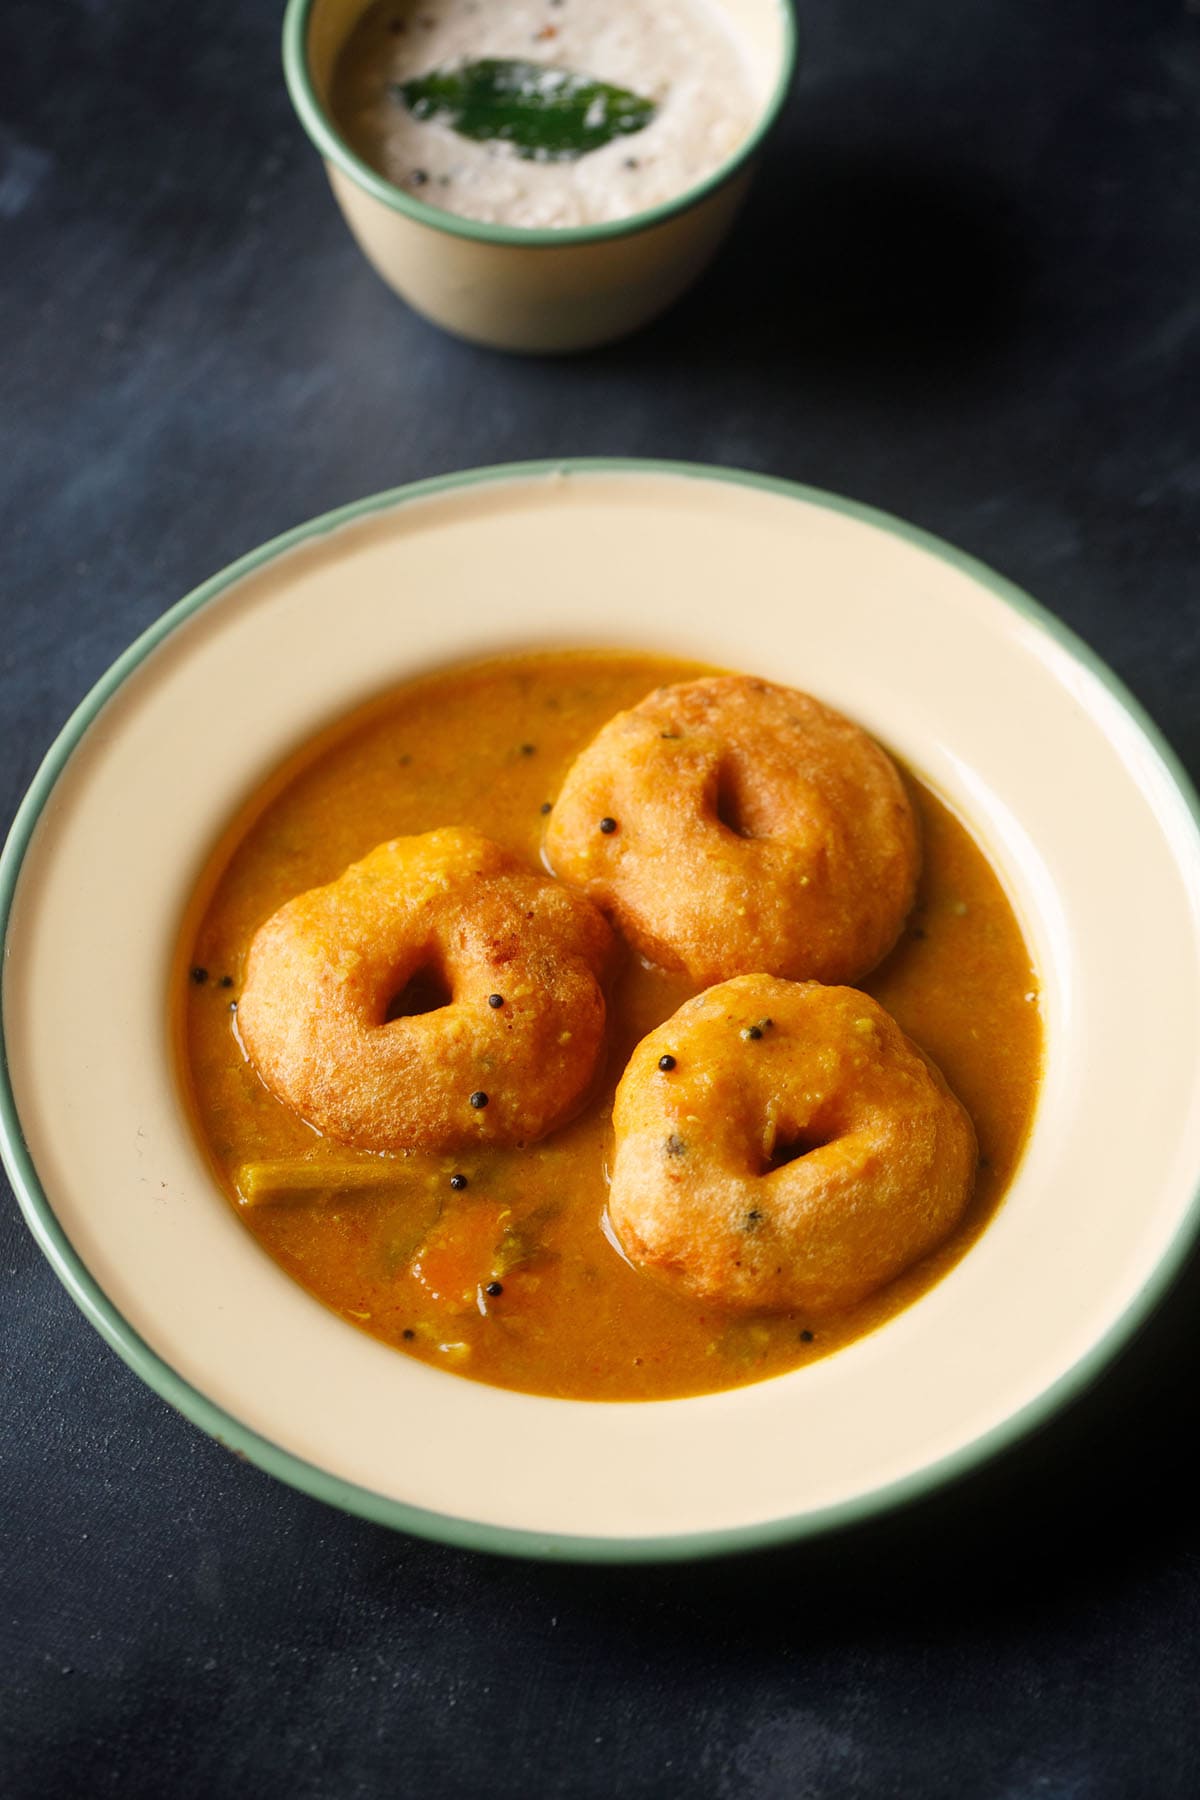
Sambar Vada
To make sambar vada, you can make any of the sambar varieties I have listed below. Depending on the veggie stock in the kitchen, I make sambar with just one veggie or a mix of various of them.
Vada and sambar are a match made in heaven, so even if you make your sambar without any veggie, it will still be a joy to eat.
- Sambar – Classic South Indian Sambar made with mix vegetables, lentils and sambar powder
- Hotel Style Sambar – If you love hotel style flavors in your sambar, you will love this variation where the sambar masala is made with freshly roasted spices and lentils. You can even pair this sambar with idli.
- Onion Sambar – This sambar features small onions or pearl onions together with lentils, tamarind and spices.
- Drumstick Sambar – A variation made with drumsticks which are fresh moringa pods and tastes too good with medu vada.
- Arachuvitta Sambar – Is made with coconut ground with freshly roasted spices and has a fantastic taste and flavor.
FAQs
Uh-oh, sounds like one of two things happened. If the batter is thin, then the vada will absorb too much oil during frying.
But even if the batter is perfect, you need to heat the oil properly – if it is warm or not hot enough, the vada will also turn out greasy.
Ooops, sounds like you didn’t blend/grind the batter enough. When the urad dal is almost the consistency of whipped cream, you have reached the right consistency.
Be sure to use a powerful (750+ watt or more) grinder or blender or a table-top wet grinder for the best results.
Also, please be sure to soak the urad dal for at least 4 to 5 hours or even overnight. If the dal aren’t well soaked, they will not grind to a soft, fluffy batter.
Ensure that you use fresh urad dal in its shelf period. Aged or old urad lentils will take a lot of time to grind or blend and can also make the vada dense or hard.
Sounds like your batter was too thin. Try adding a bit of rice flour or semolina to the batter to thicken it up; it should be the consistency of a thick cake batter or like whipped cream.
As with most donuts or fried goods, these savory fritters are best served hot from the frying pan (after draining oil, of course).
That said, any leftovers will keep for up to a day. To reheat, warm them in an oven until hot to the touch.
You can also make the batter up to 1 day ahead of time. Keep it in the fridge until you are ready to fry. Let the batter come to room temperature before frying.
Absolutely; it can either be halved or doubled depending on how many vada you want to make!
I use either sunflower or ground nut oil for deep frying, but any neutral oil with a high smoke point will work. Safflower, vegetable, or peanut oil are all acceptable substitutes.
More Popular South Indian Snacks!
Breakfast Recipes
Breakfast Recipes
Breakfast Recipes
Breakfast Recipes
Please be sure to rate the recipe in the recipe card or leave a comment below if you have made it. For more vegetarian inspirations, Sign Up for my emails or follow me on Instagram, Youtube, Facebook, Pinterest or Twitter.
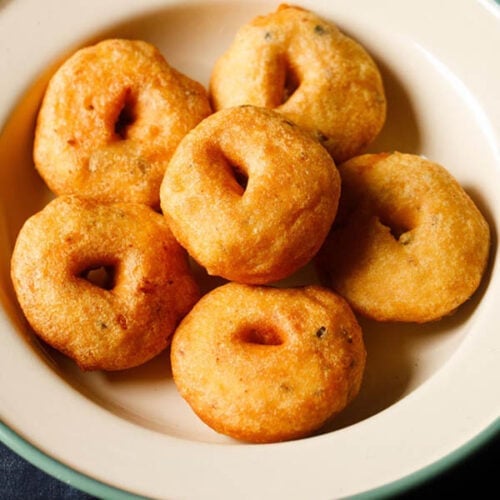
Medu Vada Recipe | Sambar Vada
Ingredients
- 1 cup urad dal (husked and split or whole black gram) – 200 grams
- 2.5 to 3 cups water – for soaking
- 3 to 4 tablespoons water – for grinding or blending lentils
- ½ teaspoon cumin seeds
- ½ teaspoon black peppercorns whole or crushed
- 1 tablespoon chopped curry leaves or 7 to 8 curry leaves
- ⅓ cup finely chopped onions – optional
- 1 teaspoon chopped green chilies or 1 to 2 green chilies
- 1 teaspoon finely chopped ginger
- 1 pinch asafoetida (hing) – optional
- ¼ cup chopped coconut pieces – optional
- 2 tablespoons chopped coriander leaves – optional
- ½ teaspoon salt or as required
- oil for deep frying, as required
Instructions
Making Vada Batter
- Rinse urad dal a couple of times in fresh water. Then soak the lentils for 4 hours or overnight.
- Grind or blend the soaked lentils to a smooth batter with water.
- If the batter becomes watery, then the instant relief would be to add some semolina or urad dal flour or rice flour to it.
- Add all the spices, herbs and salt. Mix well.
- Take a bowl of water. Apply some water from the bowl on both your palms. Take some batter in your right hand from the bowl. Give it a round shape by moving it around.
- With your thumb make a hole in the center. You can also use banana leaves or zip lock bags to give the medu vada its doughnut shape.
Frying Medu Vada
- In a kadai (wok) or pan heat oil for deep frying. Keep the heat to medium.
- Once the oil becomes hot, slid the vada gently and carefully into the hot oil.
- Shape the batter this way and gently slid them in the oil. Don't overcrowd the kadai or pan with the vada.
- Once the vada is slightly golden then gently turn over with a slotted spoon and continue to fry.
- Fry them till crisp and golden. The oil should be not very hot, but medium hot. You want the vadas to be cooked from inside. Very hot oil will quickly brown the vadas from outside but they will remain uncooked from inside. Less hot oil will make the medu vada to absorb too much oil. Even if the batter is thin then also the medu vadas will absorb too much oil.
- Fry all the medu vada this way till they become evenly browned and crisp.
- Drain them on kitchen tissue to remove excess oil.
- Serve the medhu vadai, hot or warm with sambar and coconut chutney. It can also be served with other dips like mint chutney, coriander chutney, tomato sauce or onion chutney, tomato chutney etc.
- One of the best combination is sambar vada where these medu vadai are dunked in piping hot sambar and served with a side of coconut chutney. This vada sambar meal is finished with steaming hot filter coffee.
Nutrition Info (Approximate Values)
This medu vada recipe from the blog archives was first published in October 2011. It has been republished and updated on Jun 2022.



Hi dasana,your recipes are very helpful for me,I tried your medu vada recipe,the taste n shape of vada were perfect only it was too hard to break the vada.can u help me to make soft vada’s…
Thank you
afreen for making medu vadas, always use urad dal which is fresh. the more aged the urad dal is the more hard the vadas will be. also soak in enough water and when grinding, grind to a smooth fluffy batter. the batter has to be ground really well. it should look fluffy somewhat similar to whipped cream texture. in a mixer-grinder, this cannot be achieved as the grinder will get heated up. so try to grind in intervals and grind till you get a nice smooth consistency in the batter. if required, then you can add a few tablespoons of water while grinding. hope these suggestions helps.
Hi dassana! I tried this recipe of ur twice it turned out good .. as my hub ND me are from.bangalore he want me to cook south Indian food coz at present we live in Qatar … so ur website helped me a lot .. can we add ginger garlic paste while grinding as I don’t have ginger??
thanks fazila. you can ginger-garlic paste. but when garlic is added the taste will change slightly. if you are fine with the taste, then you can add ginger-garlic paste.
Thank you once again
Welcome Fazila
HI
I MADE DOUGH FOR MEDU VADA BUT I COULDNT MAKE IT IN SHAPE
the batter should be thick in consistency. if its medium to thin consistency, then its difficult to shape medu vadas.
Thanks for the medu vada recipe with step by step procedure.It came out excellent.I have tried many of your recipes,all of them turn out to be yummy n delicious.Your step by step explanation and note help a lot.
Welcome Soumya. Glad to know this. Thanks for sharing your positive feedback on recipes.
All recepies r best
thanks durriyah.
Hello Amit! It’s always a pleasure to try your recipes. I have downloaded the veg recipe app as well..anything new that I would like to make I read many recipes but finally follow yours . It’s easy, delicious, and step by step pic makes it more easy. Thanks a lot..you are helping when mom’s not around ..all the best and success to you always..god bless
welcome sonal. glad to know that you like the recipes and their presentation. thanks for sharing your motivating feedback.
Hi Dassana,
Most of the times (read 98%), I look up to your recipes and website, latest tried being pineapple kesari, I tripled the quantity, the final product aroma wise, consistency and texture wise, in terms of appearance and taste, was just perfect. I just don’t scratch my head for measurements (exceptions are there), work it out accordingly 🙂
Fantastic space and job, kudos!
One small thing that I have noticed in quite a few posts. You use ‘Udipi’. Actually, it is Udupi, we pronounce ‘du’ as in ‘do’ and not ‘di’ as in ‘dim ‘.
thanks a lot chetna. glad to know that tripling the pineapple kesari recipe worked very well. in mumbai, the term ‘udipi’ is used and even written on hotel signboards. thats why i use the word ‘udipi’. i know it is udupi, but i am so used to seeing udipi and thats why its gets reflected on the posts too. will make a change in the recipe names.
I made vadas as per ur recipe n it turn out very yummy..it was my first attempt to make medu vadas and I m extremely happy with the result. I am following u from almost a yr. I m simply love with ur teaching style ur best.
thanks a lot avanti. glad to know. happy cooking and i hope you like the recipes which you will try in the future.
I made medu vada as per your recipe….it tasted awesome…just one thing it was really oily…on what temperature should I cook it so that it does not have a lot of oil.
thanks neha. if the the batter is liqiudy, meaning more water is there in it, then the vadas will absorb more oil. also if the vadas are fried on a low flame or on low heat or the oil is not hot enough, they will absorb oil.
It tried it… It was amazing… Still the taste remaining in my mouth n in my mind.. thanks for the recipe..!!
thank you hima for this feedback.
superb…you made my life easy as was difficult to make new items for kids tiffin. …keep it up and give us more recipies
sure we will keep posting new recipes 🙂 shweta and thanks for your positive feedback.
Respected Ma’am, I prepared medu vadas again. This time I made the batter little soft and fluffy by adding little water and baking soda. I grinded it very very well. This time the vadas came out to be very soft and delicious. I realized last time my vadas were hard as I had not grinded them well, even the batter was not fluffy, I had not added even a single drop of water last time. But this time I was very careful and followed all your instructions and the results were very good. Only one problem is the grinding of batter takes toll of our patience. No matter at end all is well. Thank you once again..
thanks for sharing vijay. glad to know 🙂
for the grinding, i would suggest you to invest in a good grinder with higher watts. the grinding is faster. you can also use a table top stone grinder. though lifting it and cleaning can be a task. i am using preethi blue leaf 750 watts mixer grinder and it grinds the urad dal faster, then the other mixer grinder i have used in the past.
Thanks dassana for the recipe!!tomorrow goin to try my favorite vada for the breakfast..
surely try sowrirajan and let us know how the medu vada was? thanks.
My girfriend is from south…so to impress her I made vadas according to your recipe…n guess she now love me than before…thanks a lot.
pleased to know this surya thankyou for trying the medu vada recipe and you are welcome.
Thanks u very very much Sir. Next time I will try with ur suggestions and give u the feedback.. Thanks once again…
surely vijay thank you so much and you are welcome.