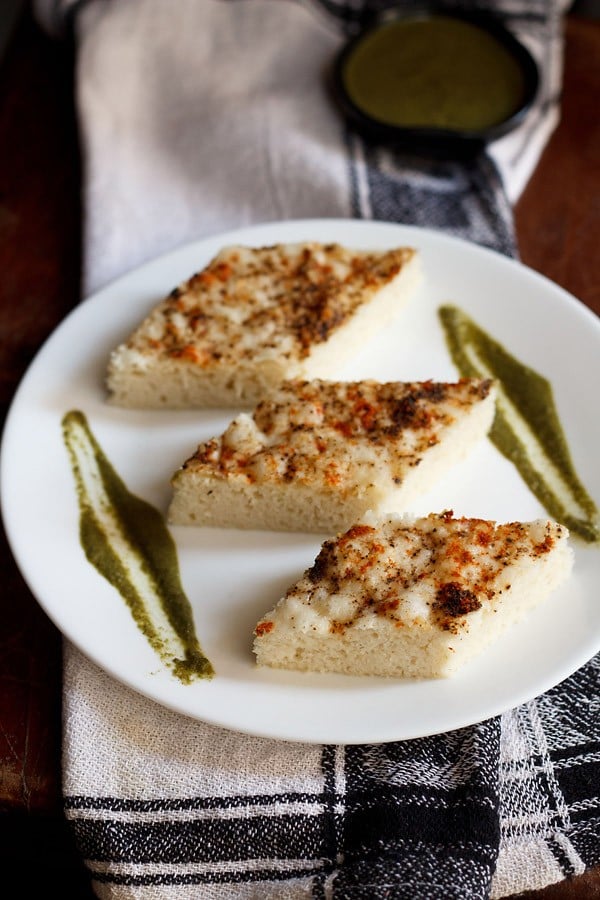
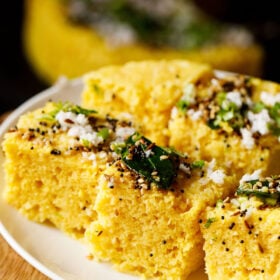
White Dhokla is a fermented and steamed sour cake made from rice, black gram and sour yogurt. Hence, locally known as Khatta Dhokla. It is a tasty, nutritious, gluten-free snack from Gujarati cuisine – which has a vibrant and rich culinary heritage. In this post, I share the recipe to make a light and spongy White Dhokla.
About White Dhokla
It is quite difficult to not mention about the quintessential snack dhokla, whenever we are speaking about this side of the Indian subcontinent. But not just a popular Gujarati snack, dhokla is one of the snacks that even I love to make as well as eat.
The same goes for my family too. The number one reason for this is that besides being scrumptious, this cushiony soft savory snack is very healthy as its steamed, and not fried.
The White Dhokla is one of the popular variations in a traditional dhokla recipe. The dish owes to the white-colored rice or idli rava, husked off-white urad dal (black gram) and sour curd for its name.
The white color of all these ingredients imparts a similar color to the final dish as well. This batter is mildly spiced with ginger and green chilies.
Essentially, the Khatta Dhokla is not even tempered. So, basically there are some spice powders that are sprinkled on top of the dhokla before steaming. Once done, it is cut into desired shapes and served warm or at room temperature.
These really taste amazing with a side of chutneys like sweet tamarind chutney, coriander chutney, mint chutney or even coconut chutney.
Two of the most common dhokla varieties are this White Dhokla and the Khaman, which is the classic steamed and tempered dhokla made of gram flour or besan. Because of which, it is also yellow in color.
In addition to these, I also make Rava Dhokla and Moong Dal Dhokla at home. All of these are hearty and super delicious snack options.
This recipe of White Dhokla is a fermented version, thus takes a good 6 to 7 hours in its preparation. Post which, the steaming part just takes about 15 to 20 minutes and the dhokla is ready to be served.
These are light, porous, wholesome and an easy to prepare steamed, savory rice and lentil cakes made from raw rice and husked, split black gram a.k.a urad dal. Great as a gluten free snack.
While living in Mumbai, I would often buy these from the Gujarati snacks or sweet shops. Generally, readymade Khatta Dhokla flour is used to make this particular dhokla.
You can even get your rice and urad dal ground in a nearby mill. If you plan to make this dhokla flour, use 250 grams of urad dal for 1 kilogram of rice.
‘Khatta’ means ‘sour.’ Since this dhokla has a slight sour taste in it, it is also called Khatta Dhokla. This sourness in the snack comes from the addition of the sour curd or yogurt.
For a pronounced sourness, you can even add some lemon juice. However, if the curd is very sour, then no need for any lemon juice. There is a hint of green chili and ginger in this White Dhokla batter. So, it is lightly spiced.
You could compare white dhokla with idli, which is also our favorite South Indian breakfast. However, this dhokla is sour, spongier and spiced unlike the humble idli.
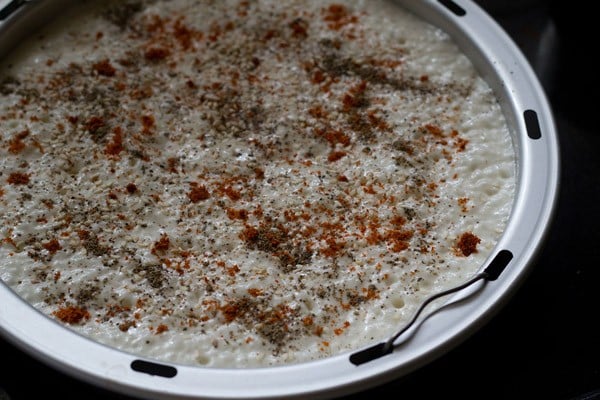
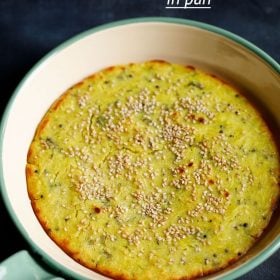
Before keeping this dhokla for steaming, I also sprinkle some black pepper powder, red chili powder and toasted white sesame seeds on the batter. This brings in a nice crunchy texture too in this dhokla.
For this Khatta Dhokla recipe, I have used basmati rice. You can use any regular rice or even idli rava. Serve it with a chutney of your choice. It tastes fab with this Papaya Sambharo or Cilantro Mint Chutney as well.
How to make White Dhokla
Make Batter
1. First soak 1 cup regular rice (or idli rava ) and ¼ cup urad dal (spilt and husked black gram) for 3 to 4 hours in enough water. Then, drain all the water.
Add the soaked rice and urad dal in a grinder or a high-speed blender jar. Add ½ inch chopped ginger and ½ to 1 teaspoon chopped green chillies with 2 to 3 tablespoons water or as needed.
Grind or blend the ingredients. If required, you can add more water. The batter should be thick like Idli Batter. You should be able to feel the fine grainy texture of rice in the batter.
When grinding, the urad dal will grind till smooth and pasty, but the rice grains take more time. A slightly grainy texture of the rice in the batter is preferable.
Tip: You can also grind both the rice and the urad dal separately, if you prefer.
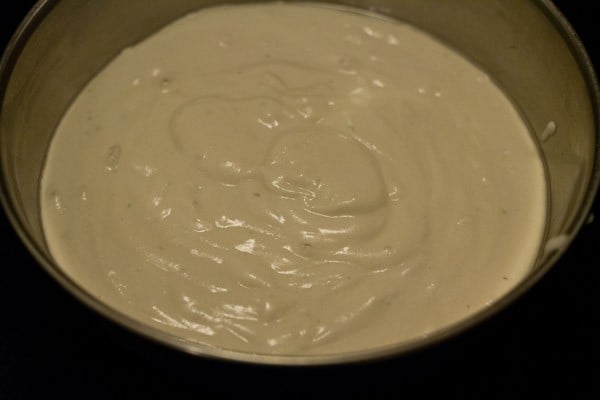
2. Take the batter in a bowl. Add ½ cup sour Curd (yogurt) and salt as required. Make sure that the curd or yogurt is thick and sour to taste.
If the curd has a thin or runny consistency, the batter will end up become thin or very thin, which may ruin the texture.
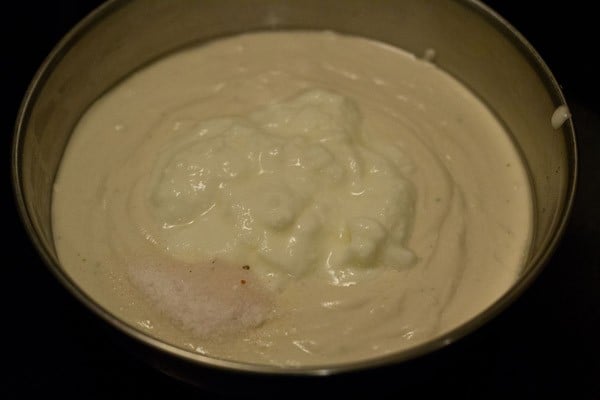
3. Mix thoroughly and keep the batter to ferment overnight or for 6 to 7 hours. The time taken for the batter to ferment will vary with the temperature in your city.
In hot summer months, the batter ferments quickly, so keep to ferment for lesser hours. In cooler seasons, it will take more time for the batter to ferment.
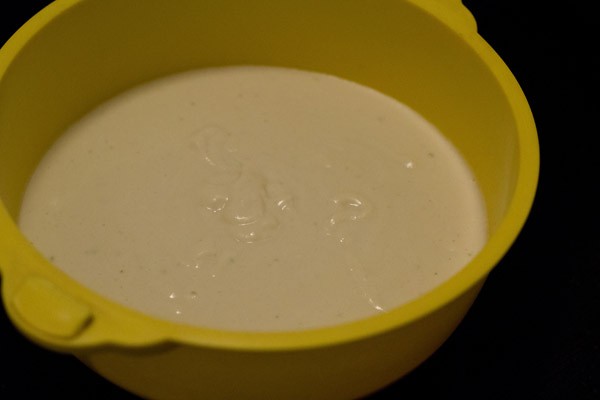
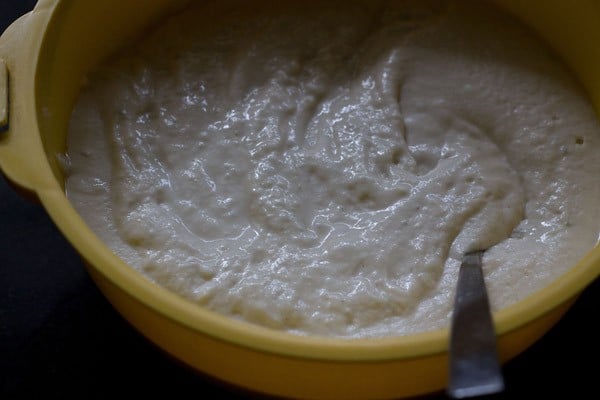
4. Below is the picture of the fermented dhokla batter. You should see tiny air pockets in the batter with a faint sour aroma.
If you feel there is no proper fermentation in the batter, keep it for some more hours.
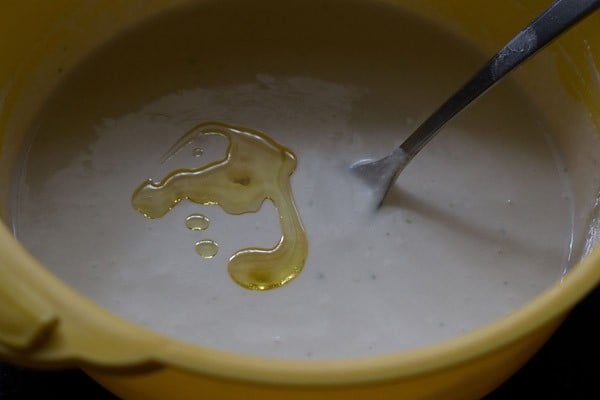
5. Add 1 teaspoon oil to the batter and stir. Addition of oil helps in the softness of the dhokla.
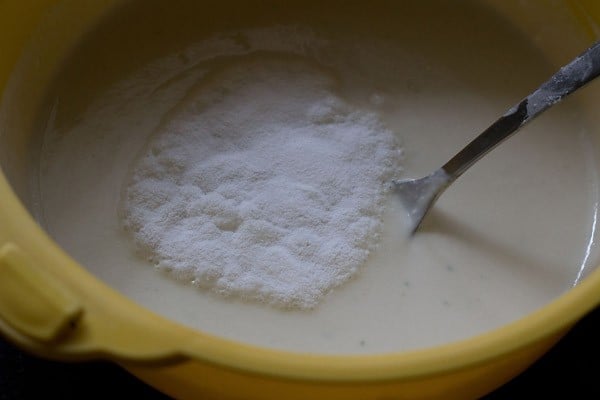
6. Add 1 teaspoon fruit salt (Eno) to the batter. You can also add ½ teaspoon baking soda instead of fruit salt.
Be quick enough to stir and mix the fruit salt evenly in the batter.
Steam Dhokla
7. Pour the batter in a greased steamer pan and sprinkle some black pepper powder, red chili powder and roasted sesame seeds on top.
The amount of black pepper powder, red chili powder and roasted sesame seeds is as per your taste.
8. Before steaming, you will have to keep 2 to 2.5 cups water with a trivet in a large pan and let the water come to a boil.
When you keep the steaming pan with the batter, the water should already be hot and boiling. Take care when placing the batter pan on the trivet as the water and steam will be very hot.
You can also use a pan like I have used that has side handles or use tongs to place the pan on the trivet.
Steam for 15 to 20 minutes or till a toothpick inserted in the dhokla comes out clean. Once done, let it cool completely and then remove the dhokla gently on a serving plate.
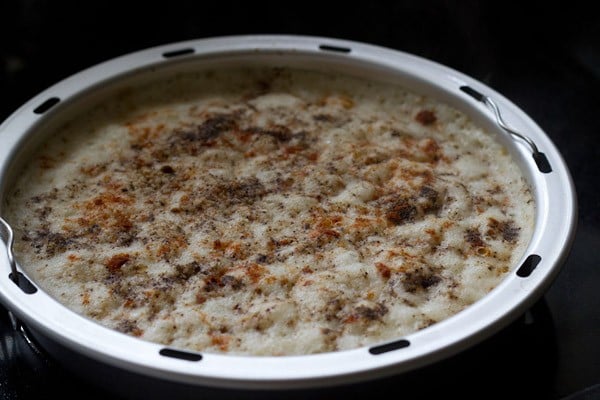
9. Its not necessary to temper White Dhokla. You can slice it into desired shape and serve straightaway as a tea-time or evening snack.
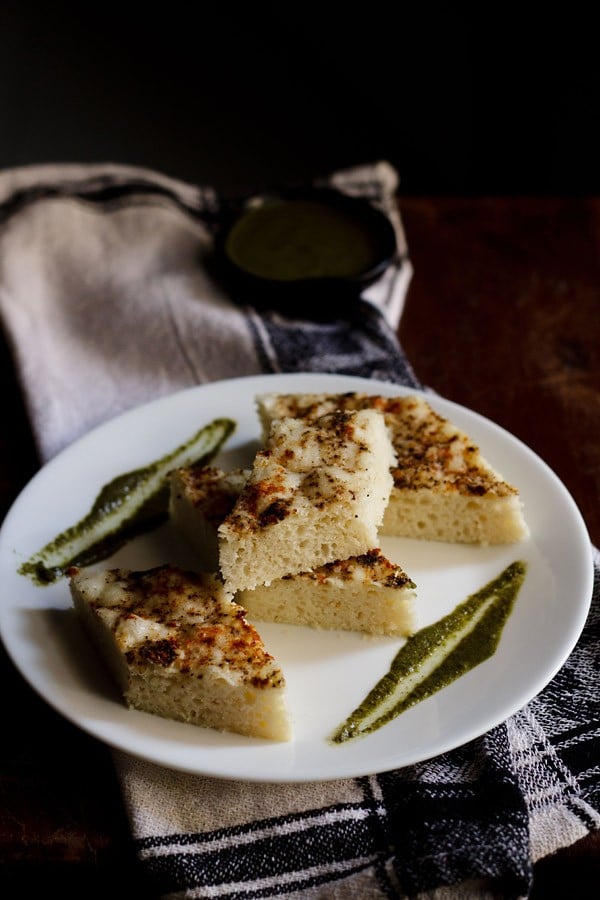
You can serve it either warm or at room temperature with Coriander Chutney, Mint Chutney, Coconut Chutney or with a sweet chutney like Tamarind Chutney.
Expert Tips
- You have to grind the batter to a thick consistency, in which you are able to feel the fine grainy texture of the rice. You can also grind both the rice and urad dal separately, if you want.
- While grinding rice and urad dal, do not add a lot of water. This will cause the batter to have a thin consistency which make the dhokla flat after steaming and ruin the spongy texture.
- A well fermented Khatta Dhokla batter will have tiny air pockets in it and a faint sour aroma. If you feel the batter is not well fermented, then keep it for some more hours.
- Adding the oil to the batter will make the dhokla softer.
- In place of fruit salt or Eno, you can also add ½ teaspoon baking soda in the batter.
- If the curd or yogurt is less sour, you can about ½ to 1 teaspoon lemon juice.
- The quantity of red chili powder, black pepper powder and sesame seeds can be as per your taste.
- You need not temper this dhokla and serve it straightaway as a tea-time or evening snack too.
- Making for more people? Scale the recipe to double or triple the measurements.
More Gujarati Snacks Recipes To Try!
Gujarati Food Recipes
Gujarati Food Recipes
Gujarati Food Recipes
Street Food Recipes
Please be sure to rate the recipe in the recipe card or leave a comment below if you have made it. For more vegetarian inspirations, Sign Up for my emails or follow me on Instagram, Youtube, Facebook, Pinterest or Twitter.
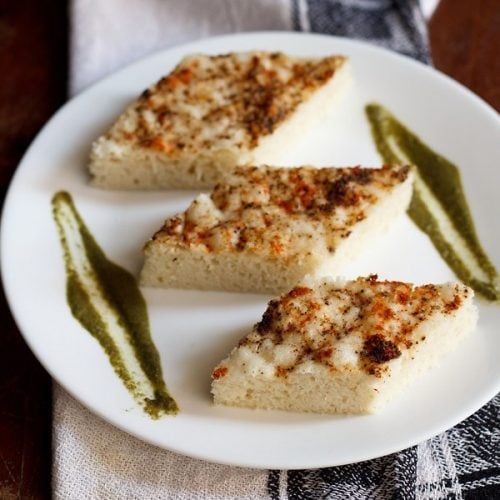
White Dhokla | Khatta Dhokla
Ingredients
- 1 cup regular rice or idli rava, I have used basmati rice
- ¼ cup urad dal (spilt and husked black gram)
- ½ cup Curd – thick and sour, (khatta dahi or sour yogurt)
- ½ inch ginger – peeled and chopped
- 1 green chilli or ½ to 1 teaspoon, chopped
- 2 to 3 tablespoons water or as needed, for grinding
- 1 teaspoon oil – to be added later to the batter
- 1 teaspoon Eno or fruit salt or ½ teaspoon baking soda
- ½ to 1 teaspoon oil – for greasing the pan
- salt as required
- black pepper powder as required
- red chilli powder as required
- roasted sesame seeds as required
Instructions
Making batter
- Rinse the rice and urad dal a couple of times in water.
- Soak them together or separately in enough water for 3 to 4 hours.
- Drain them well and then in a wet grinder, add the drained rice and urad dal.
- Add chopped ginger and green chili also.
- Grind the rice and urad dal adding 2 to 3 tablespoons of water at intervals.
- The batter should be thick like the idli batter.
- When you feel the batter, a little grainy texture of the ground rice is preferable.
- Pour the batter in a deep bowl or pan. Add the sour yogurt and salt.
- Stir well and keep the batter in a warm place to ferment overnight or for 6 to 7 hours.
- Before preparing the dhoklas, grease the pan in which you will be making the dhokla with oil.
- Add water in your steamer or pan or pressure cooker and let the water come to a boil.
- First add oil in the batter and stir well.
- Then add the fruit salt or baking soda to the batter.
- Be quick enough to stir well, so that the fruit salt or baking soda is distributed uniformly in the batter.
Making white dhokla
- Pour on a greased pan. Sprinkle with black pepper powder, red chili powder and roasted sesame seeds.
- Place the pan with the batter in the steamer or pot or pressure cooker.
- Cover and steam for 20-25 minutes or more till a toothpick inserted in the white dhokla comes out clean.
- If using a pressure cooker, remove the vent weight (whistle) and cover the lid tightly and steam for the same amount of time.
- When done, remove and let them become warm.
- Slice and serve the white dhokla with coriander chutney or mint chutney or coconut chutney. It is a good tea time snack.
- The leftover can be refrigerated in an covered container. While serving you can steam in the Instant pot for one minute or warm them in an microwave sprinkling a few drops of water.
Notes
- Grind the rice and urad dal to a thick batter. Do not add a lot of water as this will cause the batter to become thin – which won’t give a spongy texture when steamed.
- About ½ to 1 teaspoon of lemon juice can also be added if the yogurt is less sour.
- The recipe can be doubled or tripled.
Nutrition Info (Approximate Values)
This White Dhokla recipe from the archives first published on September 2013 has been republished and updated on November 2022.


Hello..Big big fan of your website
Please keep up the good work..The recipes are absolutely fantastic and almost all have turned out to be really well!!
Also the way you’ve mentioned the procedure, ingredients and the best part is measurement adjustment which can be done. Never seen such an organized website for cooking. 10 on 10!! For me cooking started with you..
Thanks a lot Dimple for the super feedback on the recipes and the website. So glad to read. Thanks again.