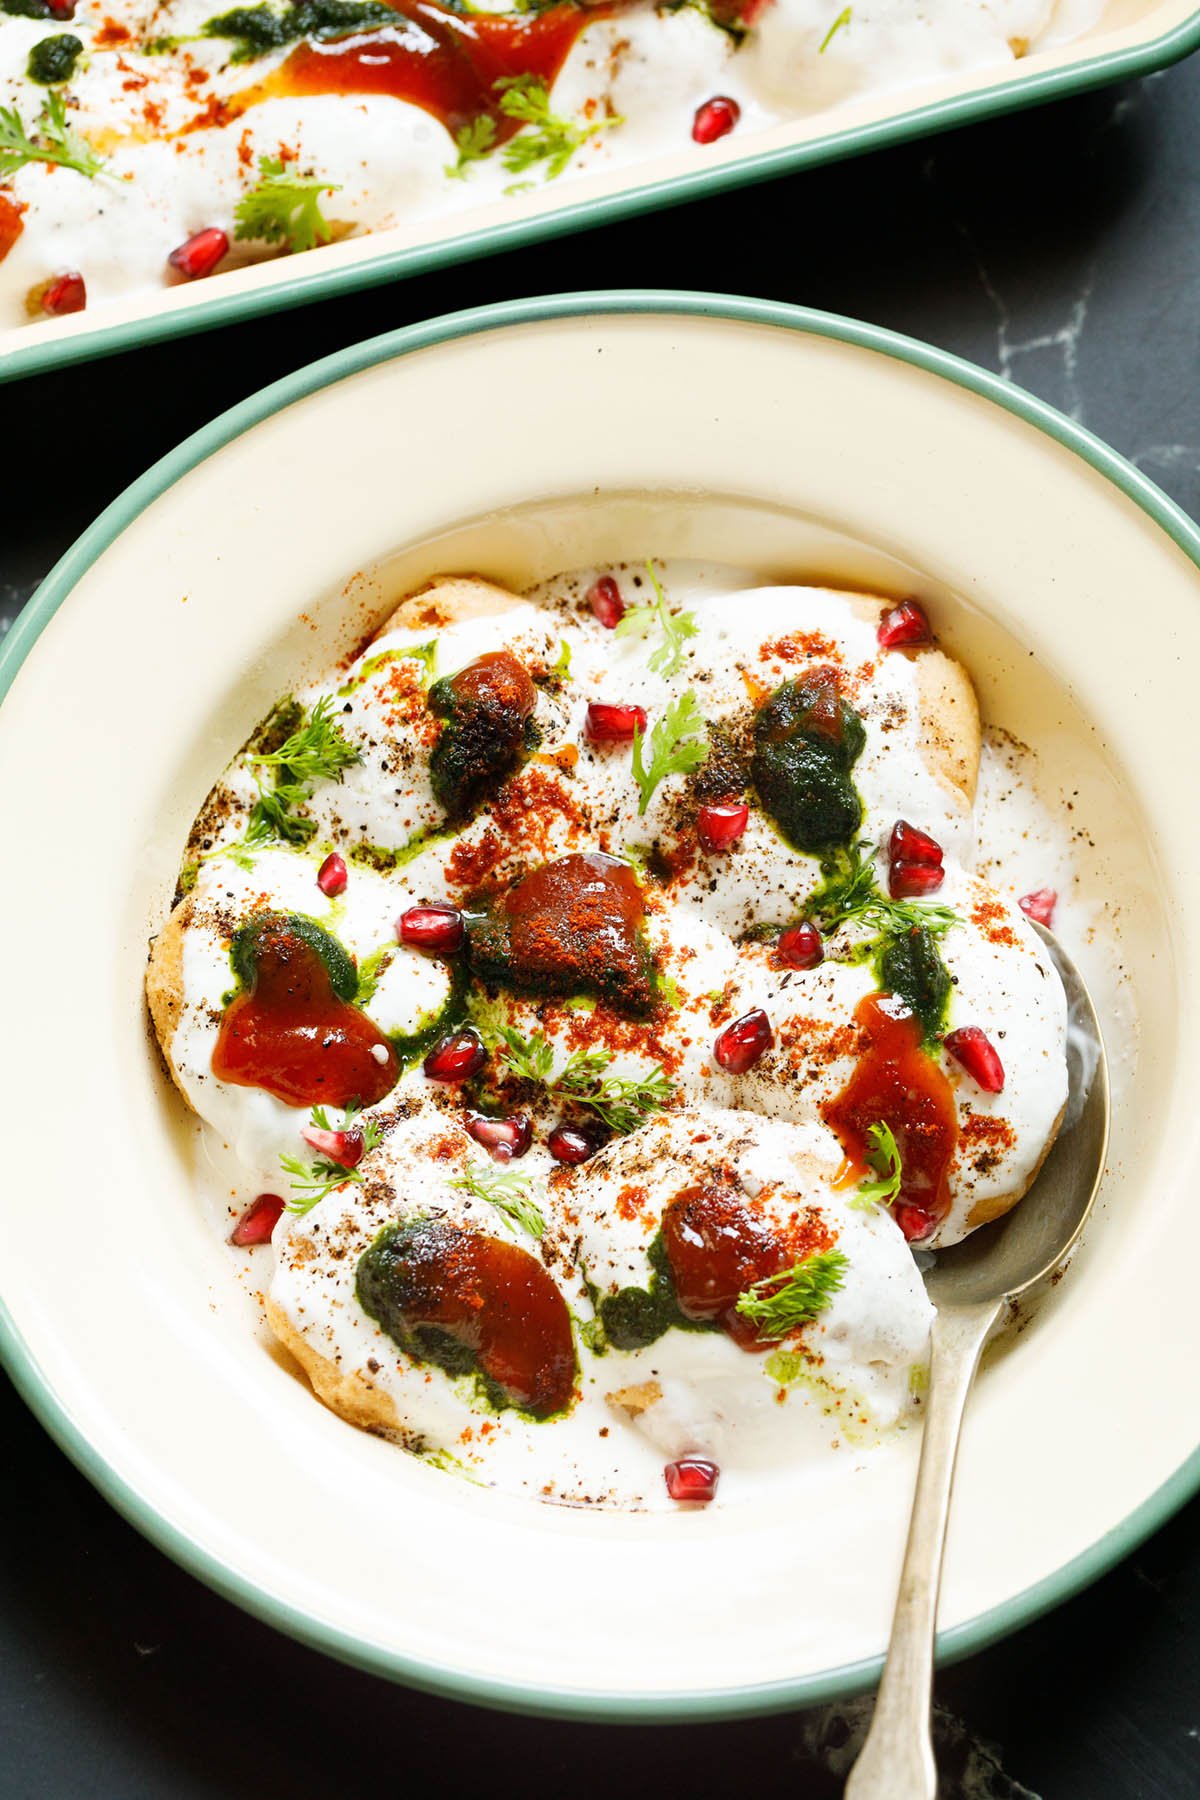
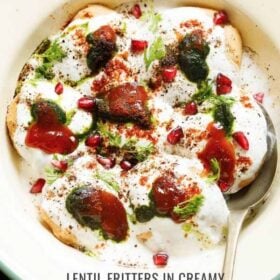
Fluffy, tender, soft, tangy and sweet Dahi Vada are a combination of all your favorite flavors and textures in one tasty snack. They consist of homemade fried lentil dumpling fritters, dunked in creamy whipped yogurt and topped with both spicy and sweet chutneys. Try my heirloom and classic Dahi Vada recipe with step-by-step photos for a fun appetizer or shareable party treat.
About Dahi Vada
Dahi Vada are a popular street food from North India. “Dahi” means yogurt and “Vada” means deep fried fritters or dumplings, and the recipe is about as straightforward as it sounds.
Fluffy, melt-in-your-mouth dumplings are coated in a simple creamy yogurt, and topped with classic Indian chutneys.
Dahi vada are often made for special occasions and festivals, but can also be enjoyed anytime for a party snack or appetizer.
A perfect dahi vada recipe starts with tender and puffy homemade fried lentil fritters that are soaked in water, drained, and then covered in tangy whipped yogurt.
These fluffy fritters are traditionally made with the ivory colored skinned urad dal, also known as black gram or urad bean or matpe bean.
Generous helpings of both spicy green coriander chutney and sweet tamarind chutney are beautifully drizzled over the top before serving.
The result is an impressive and delicious snack that includes just the right balance of sour, sweet, savory, and spicy flavors in every bite.
While dahi vada do require some time to make, you’ll quickly see with one taste how very worth every bit of effort they are. And, much of the prep work – like making both of the chutneys and yogurt – can be done well in advance.
Follow my step-by-step instructions with photos below to learn how to make the best traditional, authentic dahi vada recipe from scratch, with tips to ensure they turn out terrific every time.
You can also check the salty and savory South Indian variation of dahi vada called as Thayir Vada which has a complete different taste and flavor profile.
How to make Dahi Vada
Soak & Grind Lentils
1. Soak 1 cup heaped urad dal (200 grams husked and split black lentils) overnight or for at least 4 to 5 hours.
Later drain all the water using a colander or strainer. If you prefer, you can rinse the soaked urad dal prior to grinding the lentils.
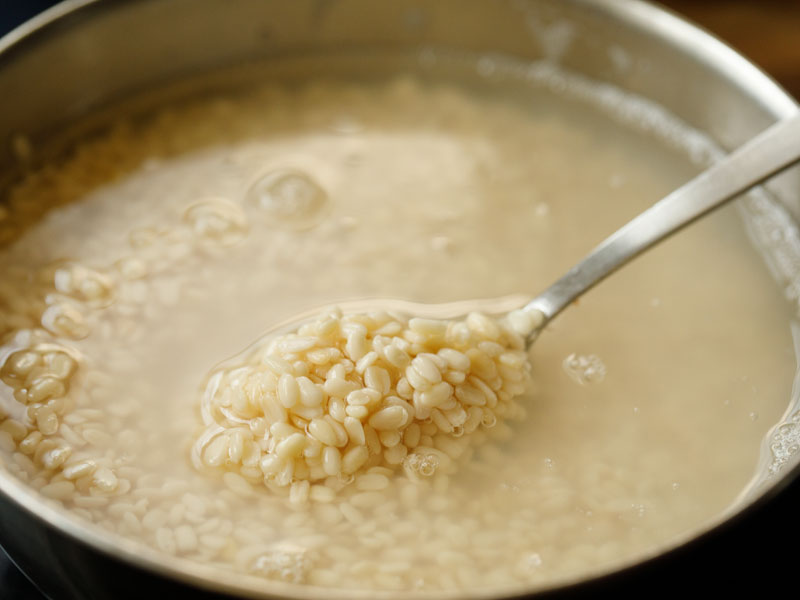
2. Then add the drained and soaked lentils in your trusted blender or mixer-grinder.
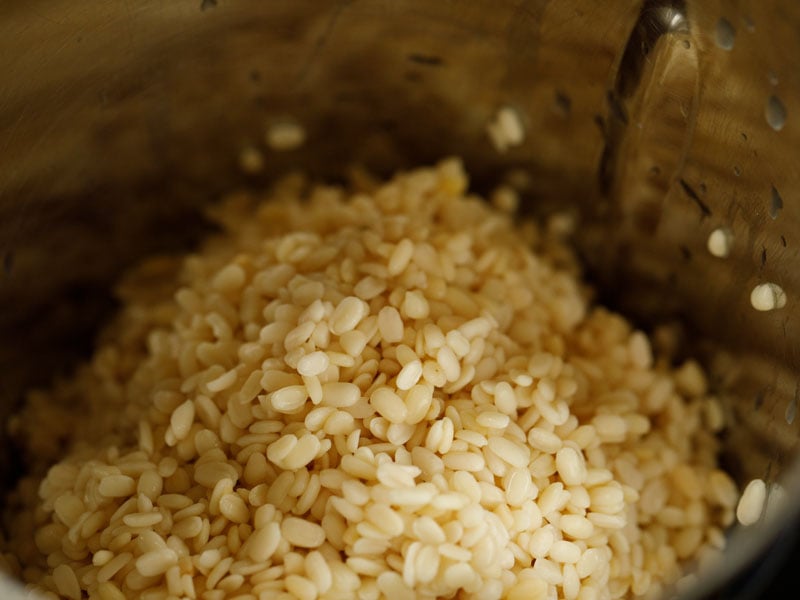
3. Add in the following spices and herbs:
- ½ teaspoon chopped green chilies or serrano/thai chillies
- 1 teaspoon chopped ginger
- 1 teaspoon cumin seeds
- 1 pinch of asafoetida (hing)
- salt as needed
Note: For a gluten-free version, use a gluten-free asafoetida or skip it.
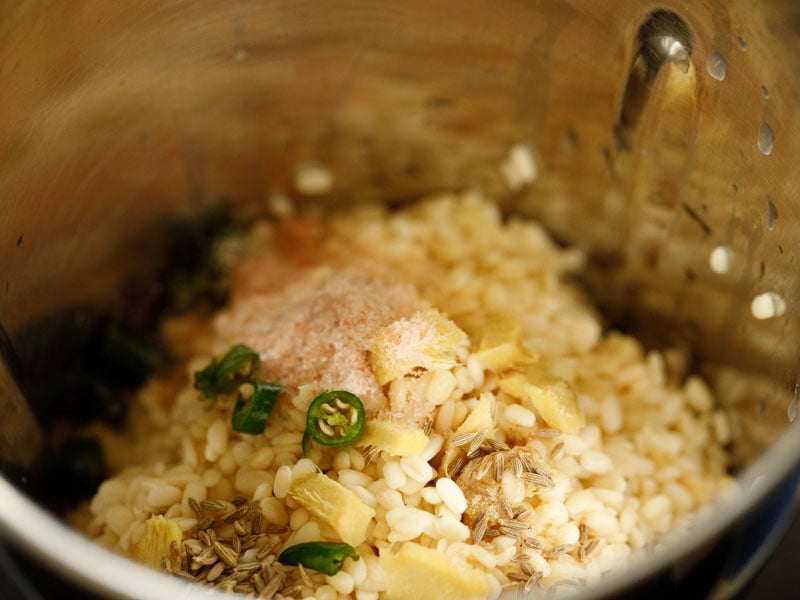
4. Blend or grind adding ¼ cup to ½ cup water in parts to a smooth fluffy batter.
Depending on the quality, age of lentils and soaking time the water amount can vary from ½ to ¾ cup. Keep in mind that the batter has a thick to medium-thick flowing consistency.
Grind in two batches or one batch depending on the capacity and size of your blender or mixer-grinder.
Tip 1: Adding a lot of water will make the batter thin which will result in a flat vada that absorbs more oil. A thin or runny batter will always absorb more oil while frying.
Tip 2: If the batter becomes thin or watery, add some rice flour or sooji (rava, semolina) to the batter and mix thoroughly to thicken it. Do not add too much of sooji as it can make the vada have a dense and hard texture.
Tip 3: To check if the batter has the right consistency, place a few drops of batter in a bowl of water. The batter having the right consistency will float on top of the water surface. If the batter has become thin, it will sink or dissolve in the water.
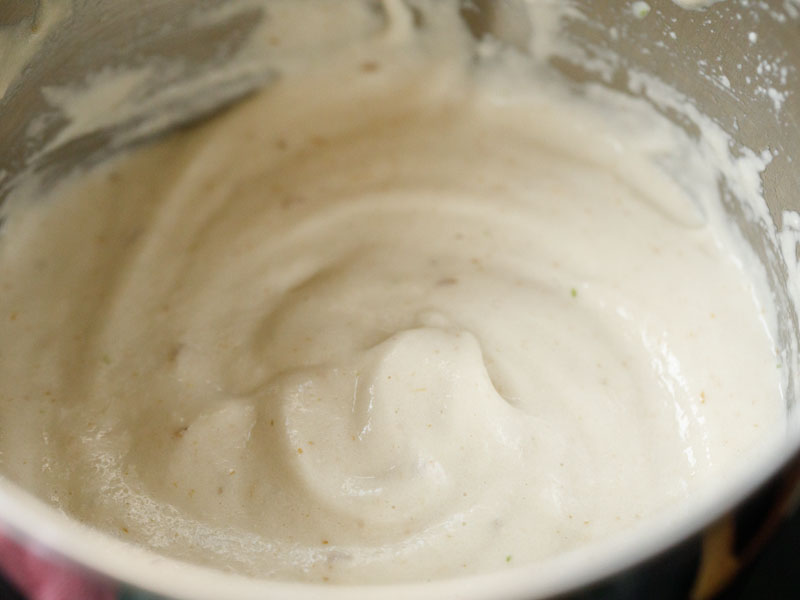
Aerate The Batter
5. Take the ground batter in a bowl with a help of a silicon spatula. Then briskly and vigorously whip the batter for two to three minutes with a spoon, whisk or spatula.
Whipping the batter aerates it and makes it more fluffy and light. As a result, you get softer and porous vada. A photo below showing the consistency of the batter.
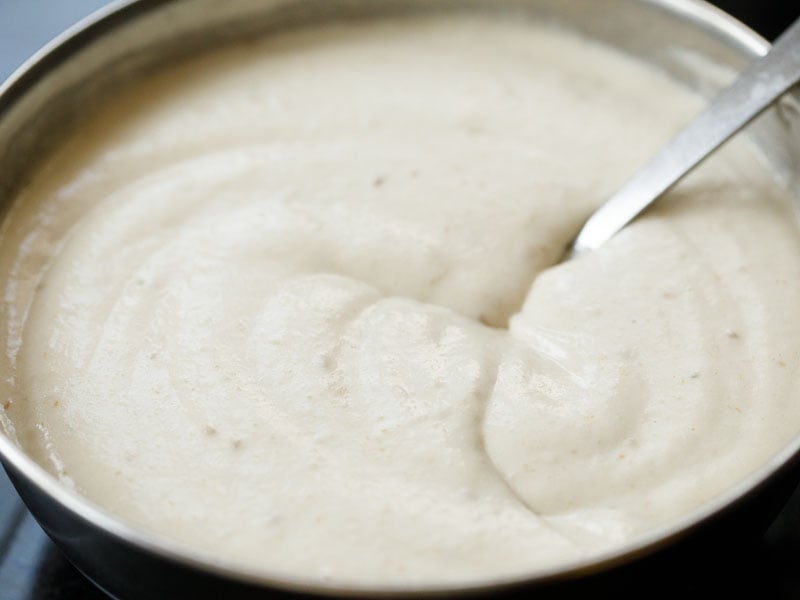
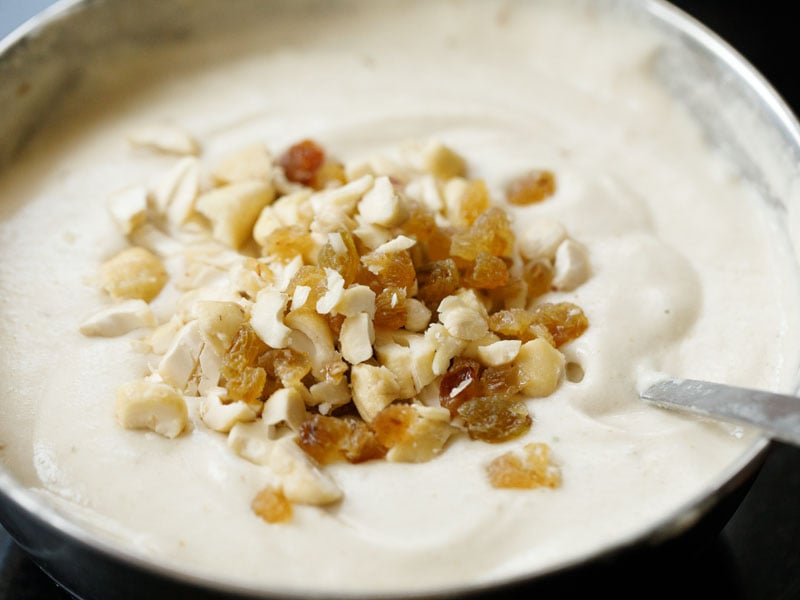
6. Stir in 1 tablespoon raisins (chopped) and 12 to 15 cashews (chopped roughly). These are optional ingredients and you can skip them if you want.
Check Oil Temperature
7. Heat oil as needed for deep frying in a kadai (Indian wok) or pan. Heat oil on medium heat. The oil should reach a temperature of 180 to 190 degrees Celsius.
To check without a thermometer, add some droplets of the batter with a spoon. It should sizzle and come up on the surface of oil swiftly and gradually.
If the batter droplets stay at the bottom of the pan, the oil is cold. If it comes up very quickly and becomes too browned or burnt, the oil is very hot.
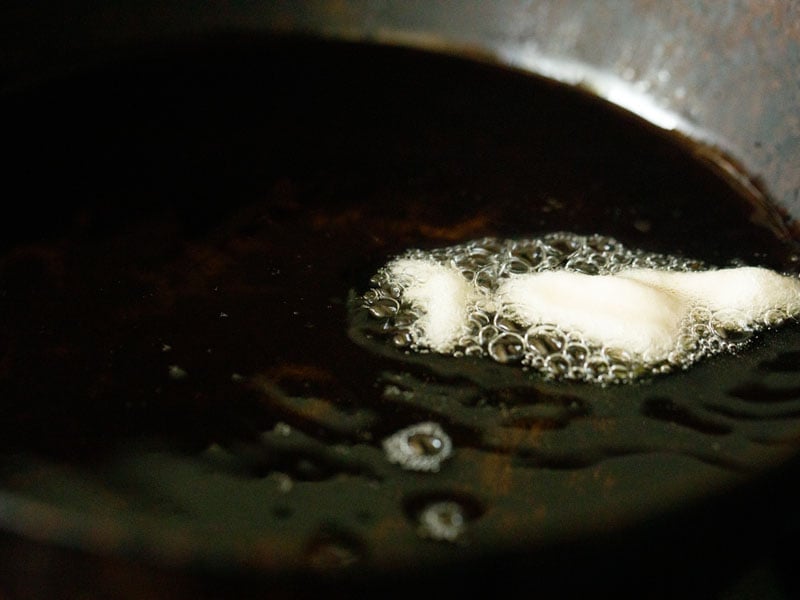
Fry Vada
8. Once the oil has reached the correct heat or temperature, now you can either drop the batter carefully with your fingers (without touching the hot oil) or with a spoon in medium hot oil.
Fry the vada in batches until crisp and golden. I prefer to use a spoon.
You can moisten the spoon sparingly with a bit of water, so that the batter slides easily from it. But don’t add more water on the spoon as the water droplets may fall in the hot oil and can burst and create serious burns. So take care.
Make the vada having more or less the same size. If you end up making different sizes, than the smaller sized vada will fry quickly and the larger sized vada will take more time. So do take a note of it and remove the smaller vada when they look golden and crisp all over.
Do not overcrowd the pan or kadai. Overcrowding the pan will lower the oil temperature and as a result the vadas will soak more oil. The vada also expand a bit while frying.
In the photo below, it looks as if the pan is overcrowded with the vada, but actually it is not – blame it on the photography!
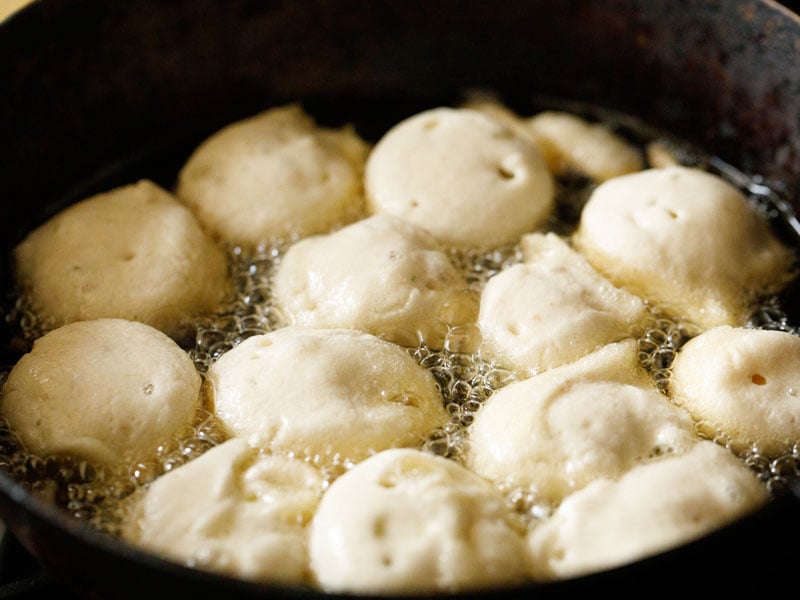
9. Let the bottom side become light golden and crisp. Then only turn these or they will break in the oil.
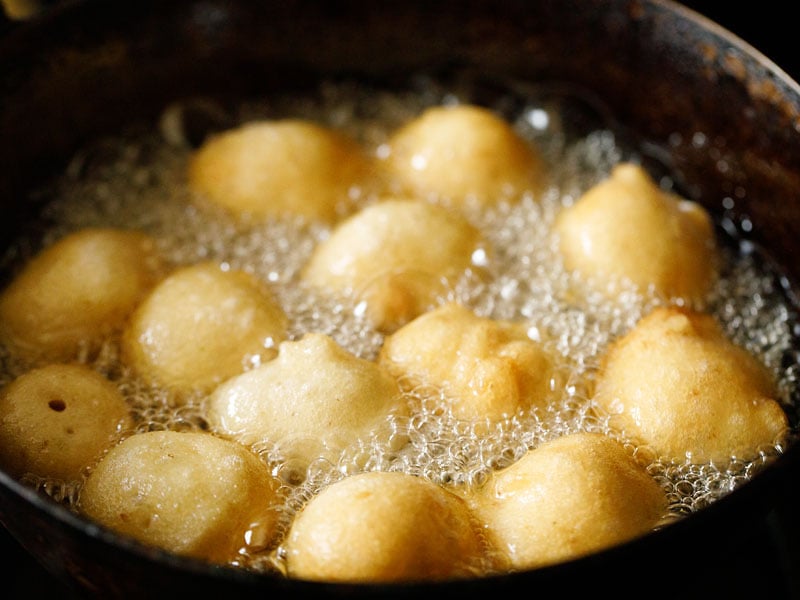
10. Flip again and for a couple of times more while frying. This ensures even cooking and you should see a uniform golden color all over.
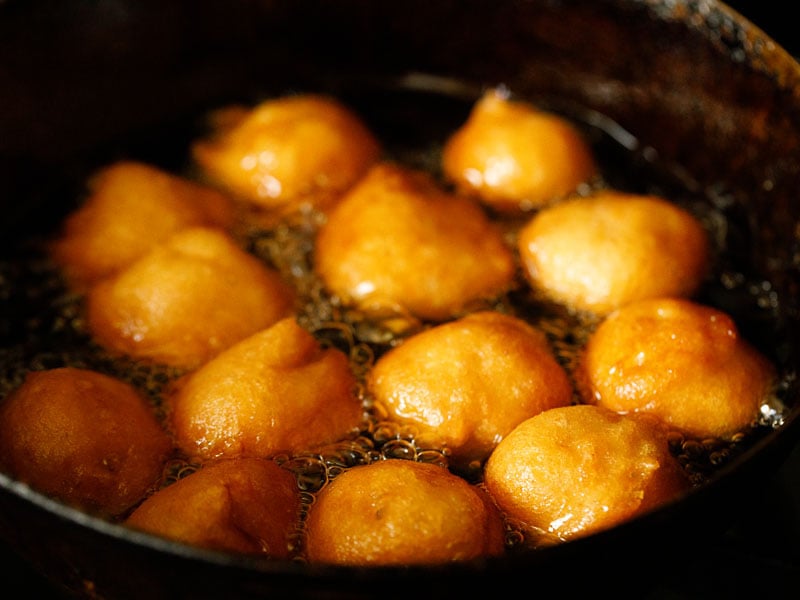
11. Place the vada on paper towels. This way fry the remaining vada in batches using up the entire batter.
If you want use half portion of the batter, then refrigerate the batter for a couple of days or freeze it for a month.

Soak Vada In Water
12. Wait for 2 to 3 minutes and while they are still hot, add the vada in water (at room temperature) and let them soak for 12 to 15 minutes. The vada will release some of the oil and absorb water increasing a bit in size with a color change.
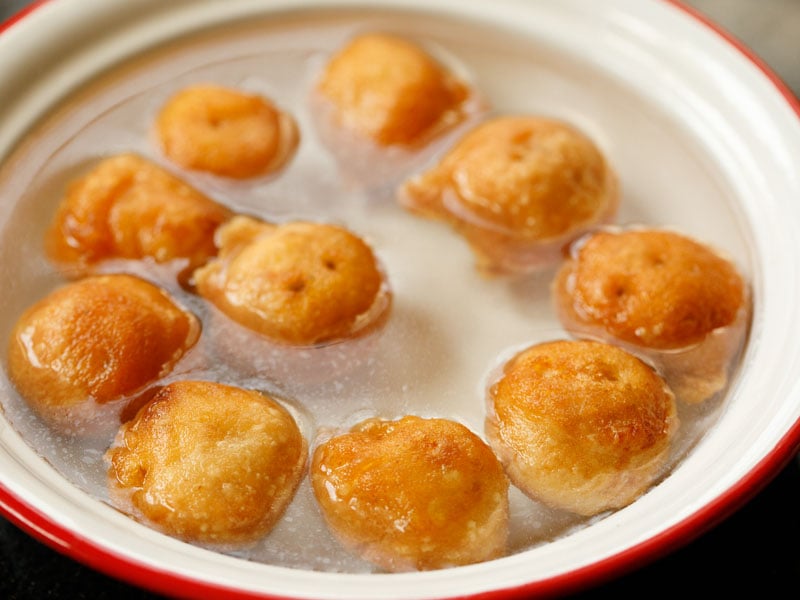
13. Press each soaked vada between your palms to remove water. Gently press or else you might end up breaking them
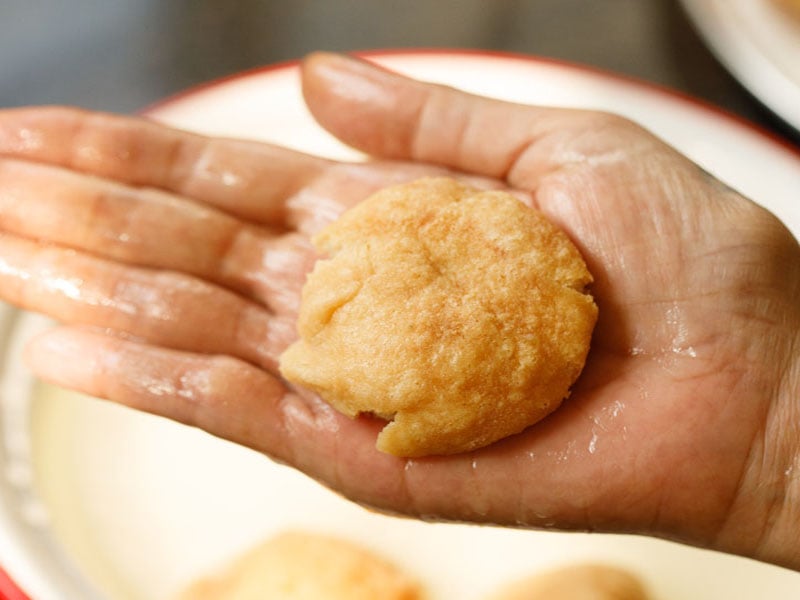
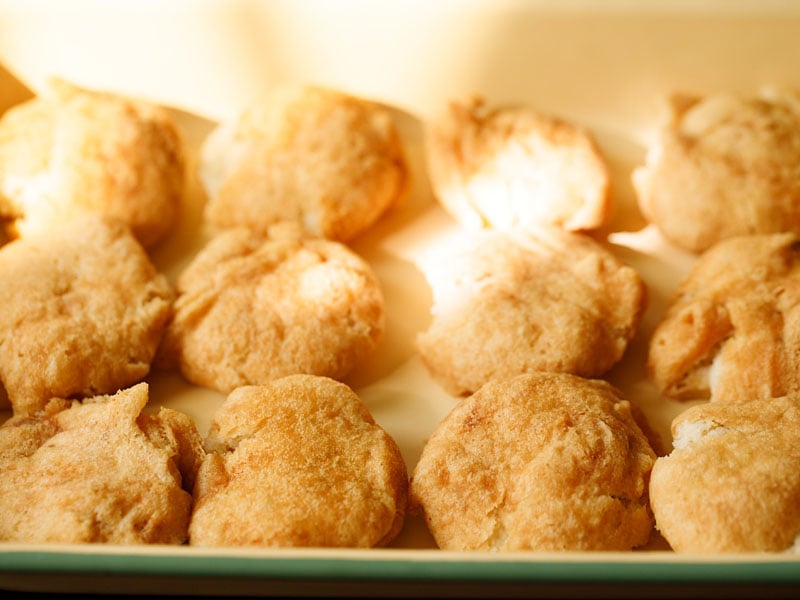
14. Press all the soaked vada this way and keep them aside in a plate or you can arrange them in the bowl or tray that you will be serving dahi vada.
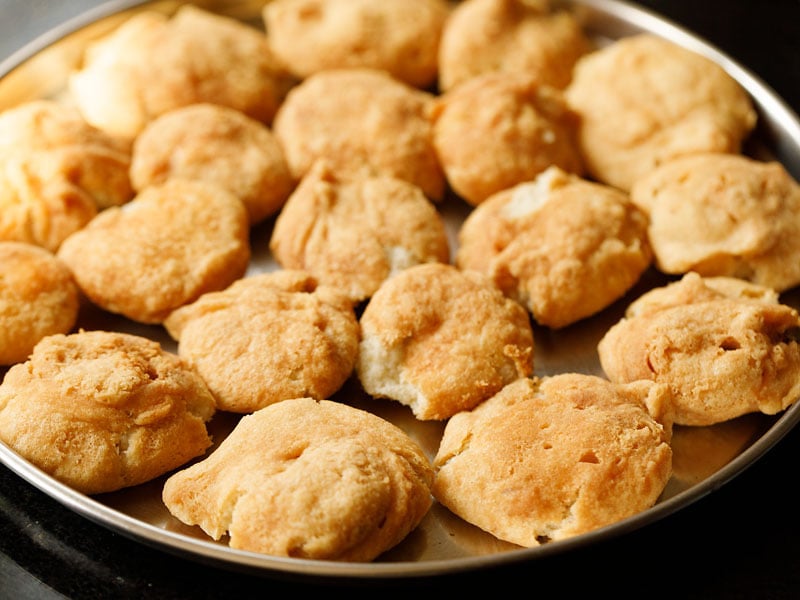
Assemble & Make Dahi Vada
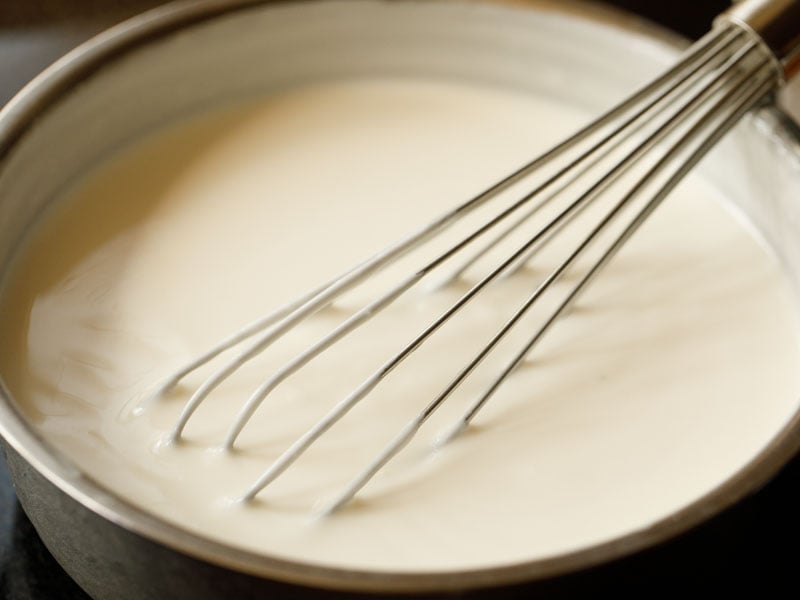
15. Beat 2.5 cups chilled curd (yogurt) until smooth. Check the taste of the curd before you assemble.
The curd should not taste sour, bitter or acidic. It should be fresh with a pleasant sweet-sour taste. I suggest to use Homemade Curd.
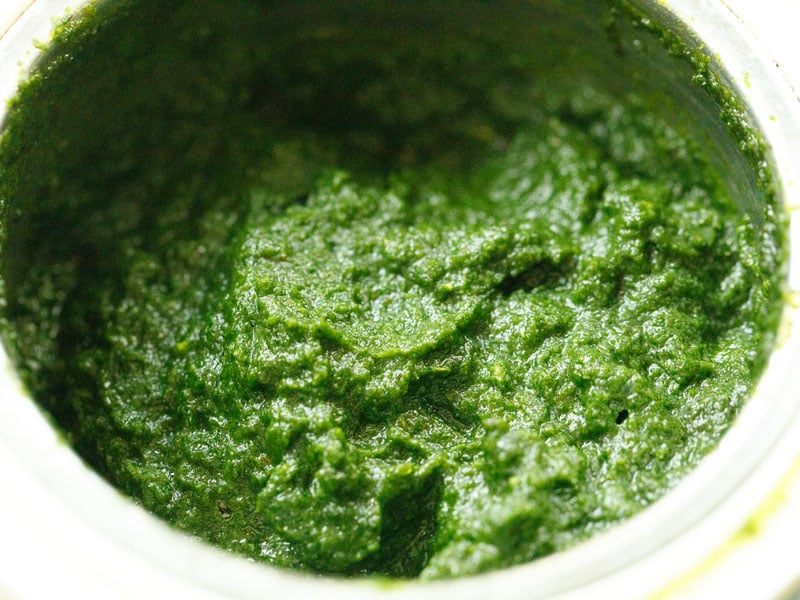
16. Keep your chutneys ready. Here is the photo of the spicy coriander (cilantro) chutney and this is how it is made.
Take the following listed ingredients in a small blender or mixer and blend until smooth.
- 2 cups coriander leaves (cilantro)
- ½ to 1 teaspoon dry mango powder (amchur powder)
- ½ teaspoon chopped garlic
- 1 teaspoon chopped green chillies
- ½ teaspoon cumin seeds or cumin powder
- salt as required
- 2 to 3 tablespoons of water or as needed
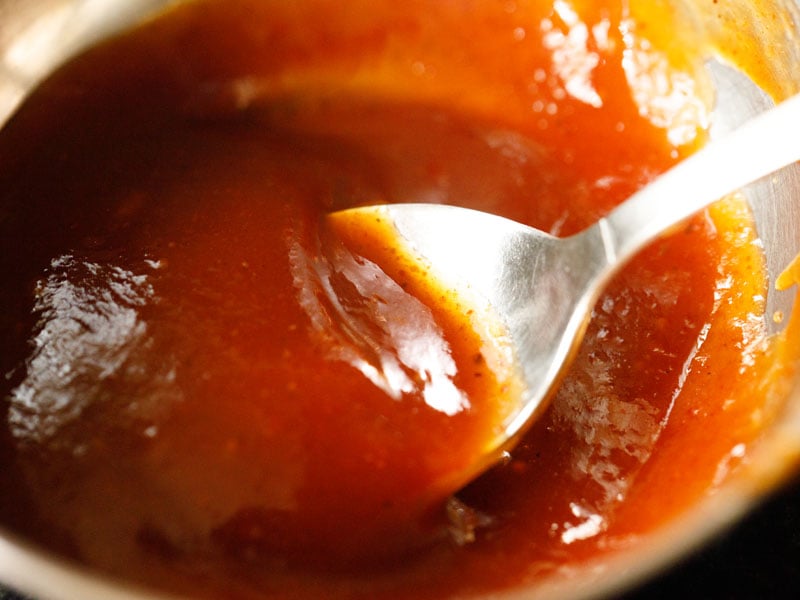
17. Below is the photo of sweet and tart tamarind chutney and you can get its recipe here – Tamarind Chutney.
You can prep the chutneys a day earlier before making dahi vada. Refrigerate both the chutneys.
18. In a large serving bowl or a tray arrange the vada which you had set aside after squeezing the water.
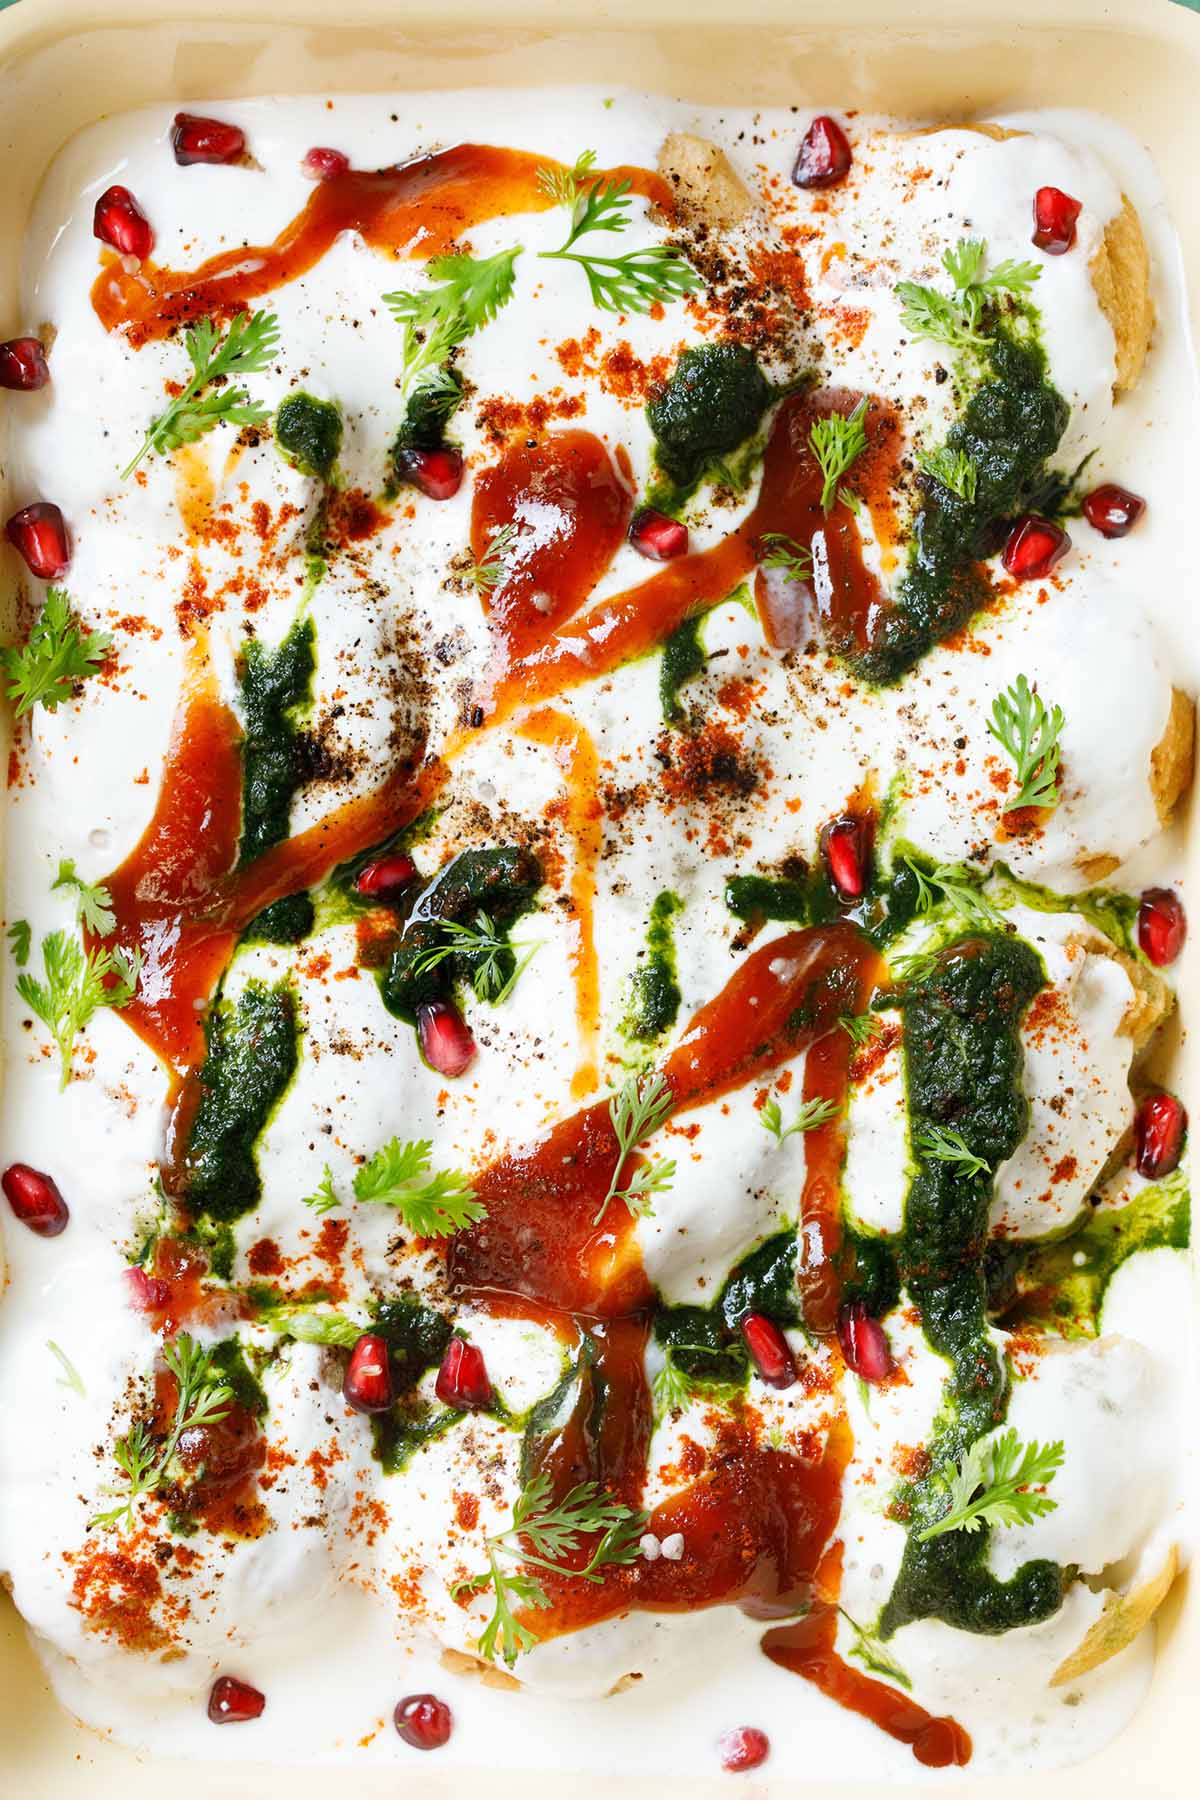
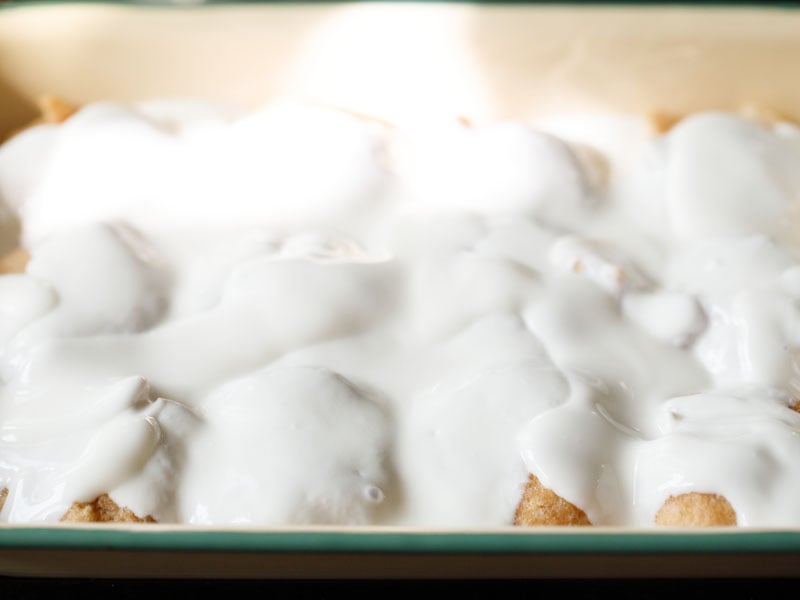
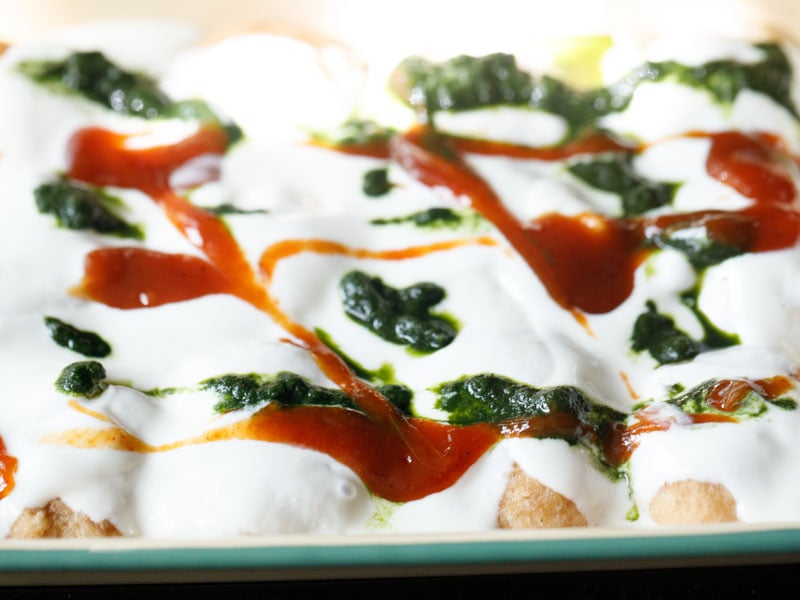
19. Pour the beaten curd evenly all over the vada covering them completely.
20. Pour the green coriander chutney and sweet tamarind chutney as you like.
Serving Suggestions
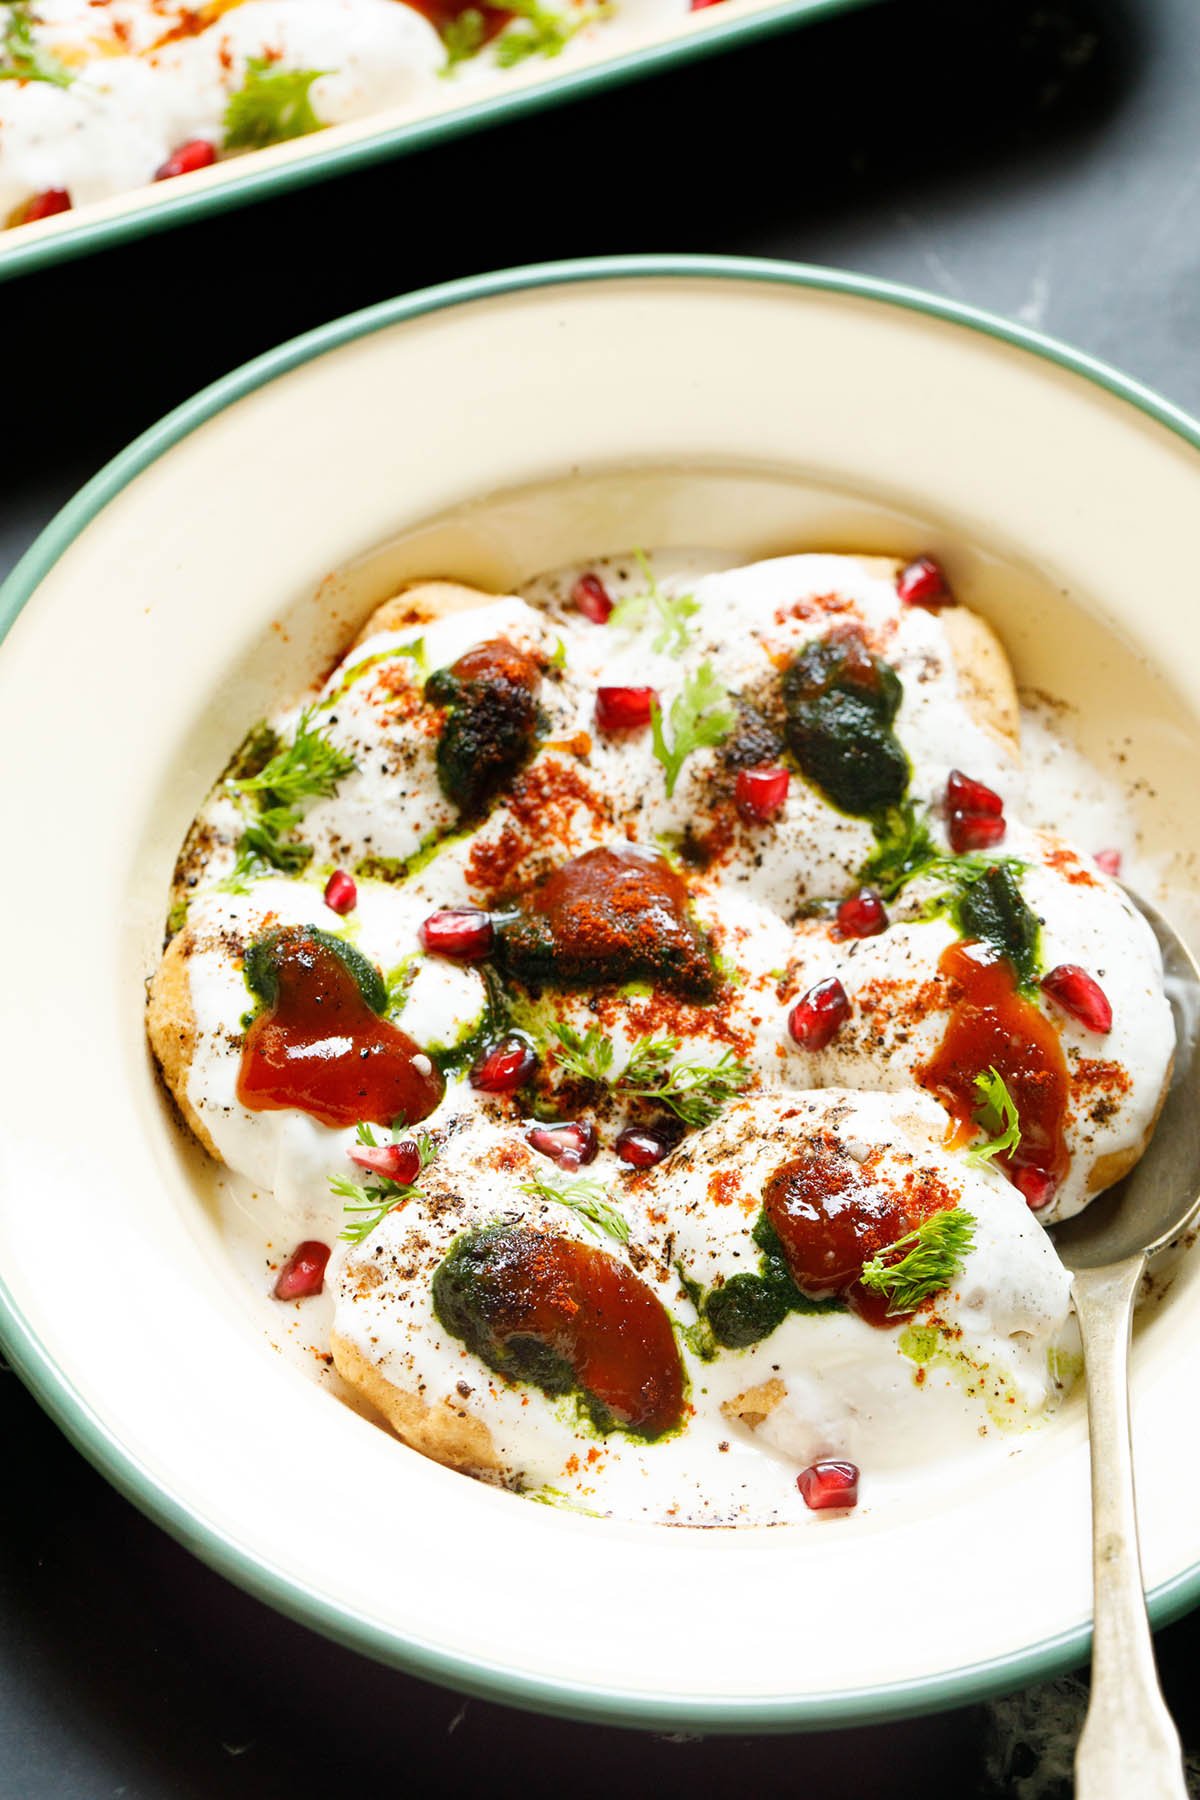
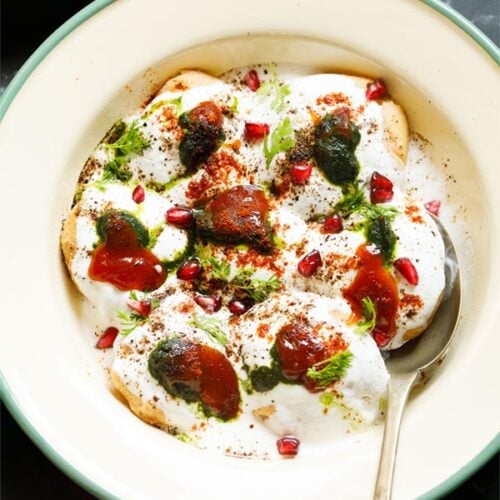
21. Sprinkle dahi vada with a few pinches of red chili powder or cayenne, roasted cumin powder, ¼ cup pomegranate arils (optional), chaat masala and/or black salt.
Garnish with 2 tablespoon coriander leaves and serve straightway. Or you can refrigerate for a couple of hours before serving.
How to store homemade Dahi Vada
Wrap the dish in plastic cling wrap or transfer to a container with a lid, and keep leftover dahi vada in the refrigerator overnight or for a day only. Any longer and the taste of the yogurt changes.
My recipe makes for 60 vada. The lentil dumplings can be made in advance and frozen before assembling the complete dish. Make the fritters per the recipe instructions, soak in water, and thoroughly squeeze out the water.
Then place in an airtight container and keep in the freezer for up to 1 to 2 months. Defrost overnight in the fridge, and then continue making the complete dahi vada recipe.
Expert Tips
Ingredient Notes
- Lentils: It is best to make dahi vada recipe with skinned urad dal. You can add about ¼ cup of moong lentils. Soak them with the urad lentils and then grind adding water as required to a smooth consistency.
- Yogurt: Always make dahi vada with fresh yogurt and not sour curd. I always use Homemade Curd, but store bought is just fine.
- Chutney: Both the Coriander Chutney and Tamarind Chutney can be made at home up to a week in advance, or bought ready made. Any leftover green chutney can be refrigerated for a couple of days. The tamarind chutney can be refrigerated in an airtight container for up to a month, and is great to serve with other Indian snacks.
Recipe Notes
- Soaking lentils: To get a good soft urad dal vada, remember to soak the lentils for 4 to 5 hours or overnight. Grind the batter really well.
- Aerating batter: Whisk the lentil batter briskly for 2 to 3 minutes. This incorporates air into the batter making the vada fluffy and soft.
- Topping Variation: You can make the dahi vada with only the sweet tamarind chutney and yogurt, and leave off the spicy green coriander chutney, if you like.
- No garlic version: To make a no-garlic version of dahi vada recipe, simply skip adding the garlic in the green coriander chutney.
- Vegan options: Use cashew yogurt, almond yogurt or coconut yogurt.
- Scaling: For a small batch, simply halve the recipe. For parties or get-togethers, double the dahi vada recipe.
Frying Notes
Fry the vada at just the right temperature in the oil. The oil should reach a temperature of 180 to 190 degrees Celsius, or 350 to 375 degrees Fahrenheit. To check without a thermometer, add some droplets of the batter with a spoon in the hot oil.
The batter should sizzle and come up on the surface of oil swiftly and steadily. If the batter droplets stay at the bottom of the pan, the oil is cold. If it comes up too quickly and becomes dark browned or burnt, the oil is too hot.
Do not overcrowd the pan while frying. Overcrowding will lower the oil temperature, and as a result the vadas will soak more oil.
FAQs
1. Is Dahi Vada and Dahi Bhalla same?
No, they are not the same. Though on the face of it they may look same, but there are differences and hence they are not the same dish.
Dahi Vada is made with the vada or fritters coated with curd and assorted chutneys only. While Dahi Bhalla which has a taste of a chaat snack, has in addition to the curd & chutneys, extra ingredients like Papdi (fried flour discs), boiled potato cubes and cooked white chickpeas (chana) added to it.
These ingredients makes a great difference to the flavor and taste of a dahi bhalla which are not added in dahi vada.
2. How do I fix watery vada batter?
Simply add some rice flour or sooji (rava, semolina) to the batter. Mix very well. A combination of both sooji and rice flour also works well. Take care not to add too much of sooji as it can make the vada have a dense texture.
3. Can we store dahi vada batter in the fridge?
Yes, you can store the batter for a couple of days. Do not store for more than 2 to 3 days as the batter becomes sour. For a longer storage, keep the batter in a freezer for a month.
4. Why does urad dal vada burst?
If your batter is runny or thin, it will burst in the oil when frying. Too much of water in the batter causes the vada to burst. A thin batter will also make the vada oily.
Can I freeze vada?
Yes you can freeze the vada after you have drained all the water from them. Place them in a covered container in the freezer. When you want to make dahi vada, remove and thaw them or keep in your refrigerator overnight. Later assemble with the beaten curd and the chutneys.
More Tasty Indian Snacks To Try!
Indian Street Food Recipes
Indian Street Food Recipes
Indian Street Food Recipes
Snacks Recipes
Please be sure to rate the recipe in the recipe card or leave a comment below if you have made it. For more vegetarian inspirations, Sign Up for my emails or follow me on Instagram, Youtube, Facebook, Pinterest or Twitter.
Dahi Vada Recipe (Authentic)
Ingredients
For vada batter
- 1 cup urad dal (heaped) – 200 grams
- ½ teaspoon chopped green chili or serrano or thai chili or 1 green chilli
- 1 teaspoon chopped ginger or 1 inch ginger
- 1 teaspoon cumin seeds
- 1 pinch asafoetida (hing)
- ¼ to ½ cup water or add as needed
- 1 tablespoon raisins – chopped
- 12 to 15 cashews – chopped
- salt as required – or ⅔ teaspoon food grade edible rock salt (sendha namak)
Other ingredients
- 2.5 cups Curd (yogurt) – chilled
- ½ to 1 teaspoon chaat masala or as required
- ¼ to ½ teaspoon red chili powder or cayenne, add as needed
- 1 teaspoon roasted cumin powder
- black salt – add as required, optional
- ¼ cup pomegranate arils – optional
- 2 tablespoons chopped coriander leaves (cilantro)
For tamarind chutney
- ½ cup tamarind – tightly packed (seedless)
- 1.75 cups water
- ½ teaspoon ginger powder (saunth)
- 1 pinch asafoetida (hing)
- ½ teaspoon cumin seeds
- ¼ teaspoon red chili powder or cayenne
- 7 to 8 tablespoons jaggery or sugar, add as required – adjust as per your taste
- rock salt (edible and food grade) or black salt or regular salt as required
- 1 teaspoon oil
For coriander chutney
- 2 cups coriander leaves (cilantro)
- ½ to 1 teaspoon dry mango powder or 1 to 1.5 teaspoons dried pomegranate seeds
- ½ teaspoon chopped garlic or 1 to 2 small to medium garlic cloves
- 1 teaspoon chopped green chillies or serrano pepper
- ½ teaspoon cumin seeds or cumin powder
- salt as needed
- 2 to 3 tablespoons water or as required
Instructions
Making sweet chutney
- Soak tamarind in water overnight or for 4 to 5 hours in a small bowl or pan.
- With your hands, squeeze the pulp from the tamarind in the same bowl or pan. Strain the pulp and set aside.
- Heat oil in a small pan. Lower the heat and add cumin seeds and let them crackle.
- Add ginger powder, red chili powder, asafoetida.
- Stir and add the strained tamarind pulp. Cook for 2 to 3 mins.
- Add the jaggery and salt and simmer for 4 to 5 mins more on low to medium-low heat. The mixture would thicken. Let the tamarind chutney mixture cool.
- When cooled, store the tamarind chutney in an air-tight dry jar or container.
Making green coriander chutney
- Blend or grind all the ingredients mentioned under the green chutney list with water.
- Remove and set aside in a small bowl.
Making batter
- First pick and then rinse the lentils for 3 to 4 times in water.
- Soak the lentils in enough water overnight or for 4 to 5 hours.
- Drain all the water and add the lentils in a blender or mixer-grinder.
- Add chopped green chilies, chopped ginger, cumin seeds, asafoetida and salt.
- Add water in parts and grind to a smooth thick or medium-thick flowing batter.
- Take the ground batter in a bowl. Stir the batter briskly for a couple of minutes. This aerates the batter making it more light and fluffy.
- Add the chopped raisins and cashews. Combine well and set aside.
Deep frying vada
- Heat a kadai or pan with oil for deep frying.
- When the oil becomes medium hot, add spoonfuls of the batter in the oil.
- Don’t be in a hurry to turn them.
- When you see the vada becoming pale golden from the base and sides, you can turn them.
- Fry the vada until they become golden and crisp. Place on paper towels.
Making dahi vada
- In another bowl take water. Wait for 2 to 3 minutes and while the vada are still hot, place the vada in the water. Soak for 12 to 15 minutes.
- The vada will release some of the oil and absorb water increasing a bit in size with a color change.
- Take each vada and flatten and press between your palms to remove the water.
- Place these vada in a serving bowl or tray.
- Whisk curd (yogurt) until smooth. Pour the curd over the vada evenly all over covering them.
- Top with the green chutney and tamarind chutney as needed.
- Sprinkle a few pinches of red chili powder or cayenne, roasted cumin powder, chaat masala and black salt.
- Garnish with pomegranate arils and coriander leaves.
Serving suggestions
- Serve dahi vada straightway. Or you can refrigerate for a couple of hours before serving.
Storage
- Wrap the dish in plastic cling wrap or transfer to a container with a lid, and keep leftover dahi vada in the refrigerator overnight or for a day only. Any longer and the taste of the yogurt changes.
- The lentil dumplings can be made in advance and frozen before assembling the complete dish. Make the fritters per the recipe instructions, soak in water, and thoroughly squeeze out the water.
- Then place in an airtight container and keep in the freezer for up to 1 to 2 months. Defrost overnight in the fridge, and then continue making the complete dahi vada recipe.
Notes
Ingredient Notes
- Lentils: It is best to make the recipe with skinned urad dal. You can add about ¼ cup of moong lentils. Soak them with the urad lentils and then blend or grind adding water as required to a smooth consistency.
- Curd: Remember to use fresh yogurt. I always use homemade curd, but store bought is just fine. Do not use yogurt which has become sour.
- Chutney: Both the coriander chutney and tamarind chutney can be made at home up to a week in advance, or bought ready made. The leftover green chutney stays good for a couple of days in the refrigerator. The tamarind chutney can be refrigerated in an airtight container for up to a month, and is great to serve with other Indian snacks.
Recipe Notes & Variations
- Soaking: To get a good soft urad dal vada, remember to soak the lentils for 4 to 5 hours or overnight. Grind the batter really well adding water as needed.
- Aerating batter: Whisk the lentil batter briskly for 2 to 3 minutes. This incorporates air into the batter and make the vada fluffy and soft.
- Variations: You can make the dahi vada with just the sweet tamarind chutney and yogurt, and leave off the spicy green coriander chutney, if you like.
- No garlic version: To make a no-garlic version dahi vada, just skip adding the garlic in the green coriander chutney.
- Vegan options: Use cashew yogurt, almond yogurt or coconut yogurt.
- Scaling: For a small batch, simply halve the recipe. For parties or get-togethers, double the recipe.
Frying Notes
Fry the vada at just the right temperature in the oil. The oil should reach a temperature of 180 to 190 degrees Celsius, or 350 to 375 degrees Fahrenheit. To check without a thermometer, add some droplets of the batter with a spoon in the hot oil. The batter should sizzle and come up on the surface of oil swiftly and steadily. If the batter droplets stay at the bottom of the pan, the oil is cold. If it comes up too quickly and becomes dark browned or burnt, the oil is too hot. Do not overcrowd the pan while frying. Overcrowding will lower the oil temperature, and as a result the vada will soak more oil. Note the approximate nutrition info is for 1 dahi vada.Nutrition Info (Approximate Values)
This Dahi Vada recipe from the archives was first published on November 2013. It has been updated on December 2024.




I have been following your blog for more than a year now and always refer to your recipes when i need to cook veg items. Your measurements and procedures are so perfect! They have never failed me. I just made dahi vadas. Thank you so much! Please keep writing.
thank you shashwati. so glad to read your feedback. thanks also for the review and rating on dahi vada. sure, i will keep adding recipes.
Dear Dassana,
I used your recipe yesterday for a potluck party at a friend’s place. The vadas turned out perfect and delicious and the whole ensemble was a very big hit!!! The only change I made was added a bit of yellow moong dal to the urad dal. It made the vadas even lighter! Everyone raved about the dahi vada, young and old alike! Your step by step pics are mighty helpful and the recipes are great!! Thank you so much and keep up your good work!!!
hi manjari, glad to read your review. loved it that everyone liked this dahi vada recipe at the potluck party. definitely, yellow moong dal can be added. welcome and thank you.
Hi can I use whole urad daal instead of split one ?
yes you can. but after soaking rub the whole urad dal in your palms so that the peels come out.
Your recipes are just awesome… please keep posting and keep rocking with ur posts .. please post kanji vada recipe… thank you.
thank you ankita. will try adding kanji vada recipe. have taken a note of the recipe request.
Perfect and so easy. The explanation is awesome.
I love dahi vada and this one just hit the spot. Though it seems lik many steps its very quick and simple. Thank you. I regularly try your recipes. And jalebi turned out perfectly too
thank you dinah. glad to know. yes it does look like many steps but easy to make. happy cooking.
Simply outstanding is what one of my guests told me when I served dahi vada, prepared using your recipe on Holi! Though I cook a lot as cooking is one of my hobbies, this was the first time I was making dahi vada at home. Thank you very much! I will keep coming back to you for more!
thank you jhilik. that’s nice to know and i am glad that the dahi vada recipe worked so well. most welcome and happy holi to you.
Tried today..amazing recipe..loved it..
Recipe explained in detail
thanks jacinta. glad to know and happy cooking.
Nice recipe
So I made these for my birthday last week when my parents were coming over. My dad loves dahi vada. I whisked the batter a little more than a few minutes. I was on the phone and kept on mixing it (you know b’day excitement). When I fried the vadas, it felt like I was frying cotton balls. They were so light and fluffy! Everyone loved them and they were super soft. Thank you so much for your lovely recipes and great tips 🙂
thats great jinal and thank you ???? when vada batter is ground well and nicely aerated, then while frying, the vadas become light and fluffy. thanks again.
Hi
Your recipies are awsome. Now a days if I think to prepare any veg dish for my family then i find the solution from. Your tips, step by step clarification makes it easy to follow. I am a bengali but you made me punjabi and south indian also. Till nowadays , we used to visit resturants to eat north and south indian dishes. But now I can prepare those at home.
Thanks a lot.
Pragnyaparamita Mukherjee
thank you much pragnyaparamita. this is a really positive comment from you. glad to know that i could help you in cooking north indian & south indian recipes at home. thanks again and happy cooking ????
hi actually i added soda in batter and the soda is more in quantity so what should i do now?
just add some sooji (rava) in it. the soda smell will reduce.
Very easy recipe. Can I save vada after frying it for 3 days in fridge and do rest of the prep on the day I will be serving them?
Heena, yes you can do this way.
I tried this recipe n its awesome I also use nylon sev n pomegranates for serving n its delicious
Thanks Muskan for sharing your positive feedback.
Hi do we need to add baking soda or eno to make it soft???? Please reply asap
Thank you
anshu, no need. if the batter is properly ground and you beat the batter well, then no need to add baking soda or eno.
Thanks. I tried today,was good in taste as per me…Let see what my family members gives feedback:)
thanks tina. hope your family members like the dahi vada.